Mbiview
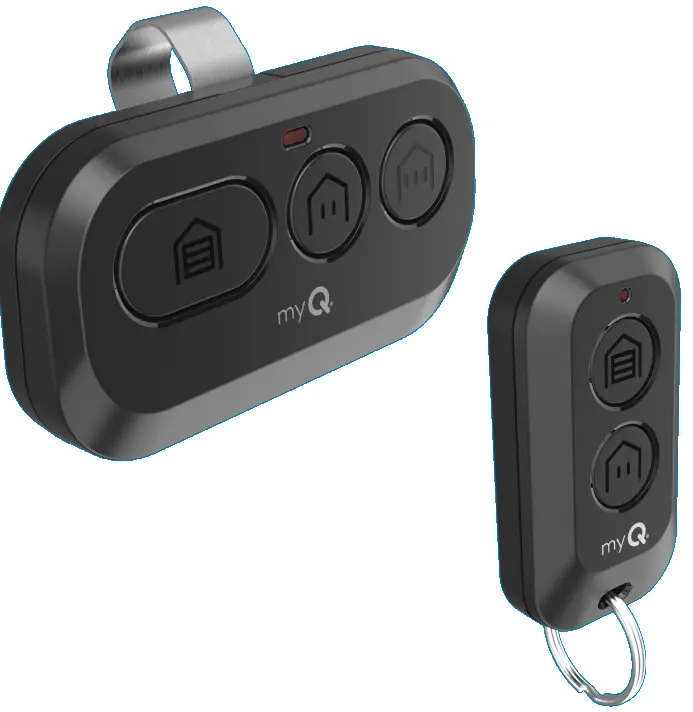
Your remote control is compatible with all Chamberlain®, LiftMaster®, and Craftsman® garage door openers manufactured after 1997 with the exception of Craftsman Series 100. Your remote control can be programmed to operate up to three (CH363 & CH363C) or two (CH382 & CH382C) compatible devices, such as garage door openers and gate operators. Each button on the remote control works independently of the other and must be programmed separately. The images throughout this manual are for reference only and your product may look different
PARALAJMËRIM
Për të parandaluar LËNDIM të mundshëm RËNDË ose VDEKJE nga një portë në lëvizje ose derë garazhi:
- Mbajini GJITHMONË telekomandat larg fëmijëve. ASNJËHERË mos i lejoni fëmijët të përdorin ose të luajnë me transmetuesit e telekomandës.
- Aktivizoni portën ose derën VETËM kur shihet qartë, është rregulluar siç duhet dhe nuk ka pengesa për lëvizjen e derës.
- Mbani gjithnjë në mendje derën e portës ose garazhit derisa të mbyllet plotësisht. Asnjëherë mos lejoni që dikush të kalojë rrugën e portës ose derës që lëviz.
PARALAJMËRIM: Ky produkt mund t'ju ekspozojë ndaj kimikateve, duke përfshirë plumbin, të cilat janë të njohura për shtetin e Kalifornisë se shkaktojnë kancer ose defekte të lindjes ose dëmtime të tjera riprodhuese. Për më shumë informacion shkoni te www.P65Warnings.ca.gov.
Program Your Remote to Your Wi-Fi Garage Door Opener Using the myQ App
HIGHLY RECOMMENDED: Connect your Wi-Fi Garage Door Opener to the myQ app and program your Remote to the Garage Door Opener to unlock exciting features such as remote naming, notifications and access history.
Connected to the mGarage Door Opener AlryQ Appeady
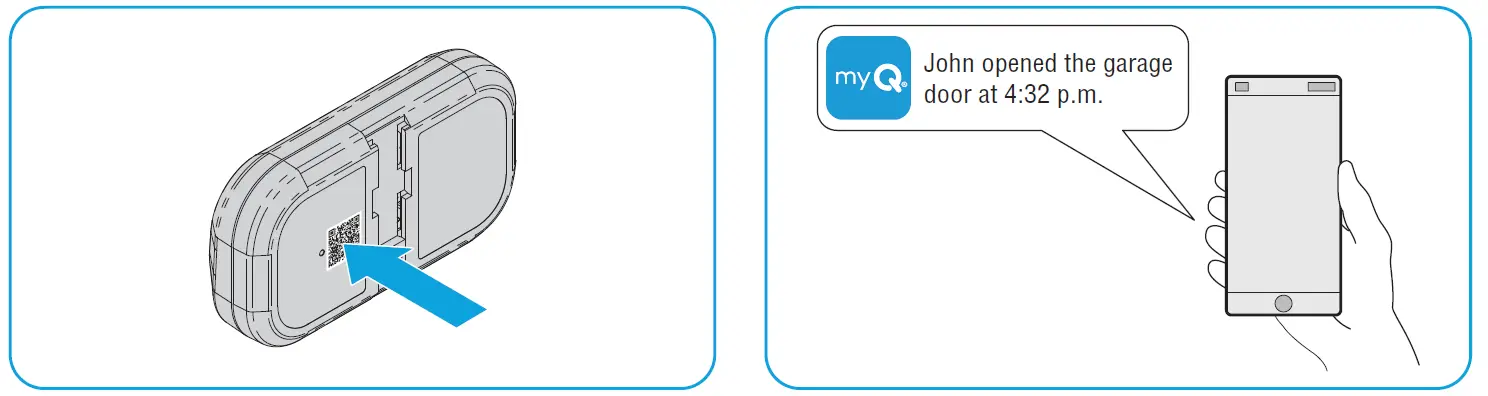
Scan the QR code on the reverse side of your remote and follow the programming instructions in the myQ app.

If Your Garage Door Opener is Not Connected to the myQ App
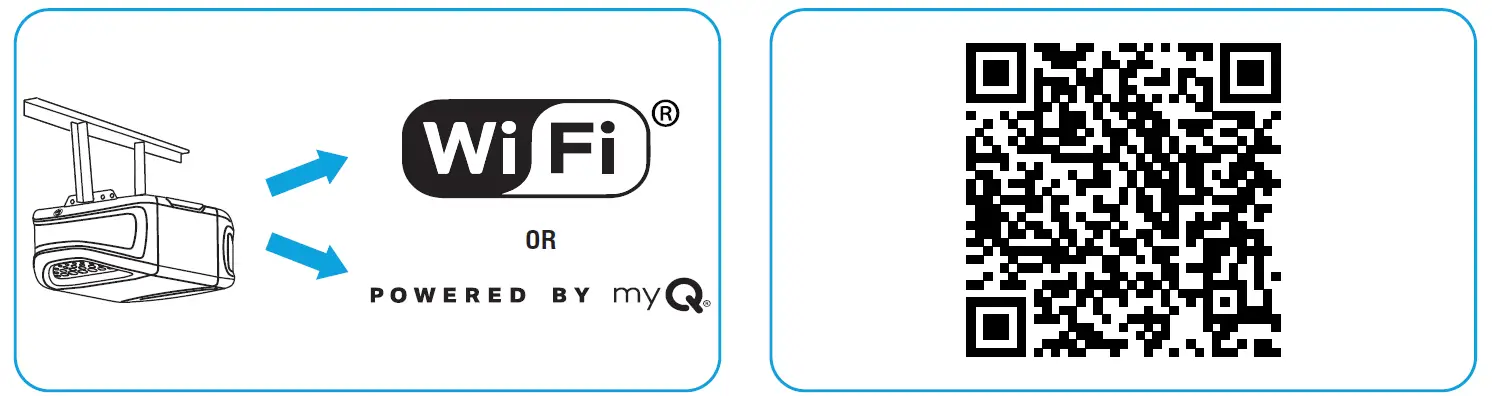
- Look for a “Wi-Fi®” or a “Powered by myQ” logo to determine if your garage door opener is myQ compatible.
- Scan the QR Code below to download the myQ app. Follow the instructions in the myQ app to connect your garage door opener.
 Once your garage door opener is connected, scan the QR code on the reverse side of your remote, and follow the programming instructions in the myQ app.
- Pasi telekomanda juaj të jetë programuar në aplikacionin myQ, mund ta emërtoni telekomandën tuaj, view Qasuni në historikun dhe merrni njoftime kur telekomanda aktivizon hapësen e derës së garazhit.
Para se të Filloni
Be sure the garage door is clear of ALL obstructions. Make sure the garage door opener has a working light because it is a programming indicator.

REKOMANDIM: Lexoni të gjitha hapat e programimit përpara se të filloni.
Metoda A: Program to a Security+ 3.0 Protocol Garage oor Opener (White Learn Button) Using the Learn Button on Door Control Panel
REKOMANDIME: Have your door control panel product manual available, as models vary in how to set the garage door opener into programming mode.
Follow the instructions below for your door control panel model to set your garage door opener into programming mode. Follow the instructions below for your door control panel model to set your garage door opener into programming mode.

Brenda 30 sekondave, shtypni dhe mbani butonin në telekomandë që dëshironi të përdorni.
Release the button when the garage door opener lights flash and/or two clicks are heard.

TEST FOR SUCCESS: Press the remote button you programmed. The garage door opener will activate. If the garage door does not activate, repeat the programming steps.
Metoda B: Programoni në një Hapëse Dere Garazhi me Protokollin Security+ 3.0 (Butoni i Bardhë i Mësimit) Duke Përdorur Butonin e Mësimit të Hapëses
- Locate the LEARN button on your garage door opener (a ladder may be required).
Press and immediately release the LEARN button.
- Brenda 30 sekondave, shtypni dhe mbani butonin në telekomandë që dëshironi të përdorni.
Release the button when the garage door opener lights flash and/or two clicks are heard.
TEST PËR SUKSES: Press the remote button you programmed. The garage door opener will activate. If the garage door does not activate, repeat the programming steps.
Metoda C: Program to All Compatible Garage Door Openers (White, Yellow, Purple, Red, & Orange Learn Buttons)
- Start with your garage door closed. Press and hold the two smaller buttons on the remote simultaneously until the red LED stays solid (typically 6 seconds), then release the buttons.

Opsioni 1: Follow the instructions below for your door control panel model to set your garage door opener into programming mode.
REKOMANDIME: Have your door control panel product manual available, as models vary in how to set the garage door opener into programming mode.
Paneli i kontrollit të derës
Ngrini panelin e aktivizimit të derës. Shtypni dy herë butonin LEARN (pas shtypjes së dytë, LED në panelin e kontrollit të derës do të pulsojë në mënyrë të përsëritur).

Butoni i Kontrollit të Derës
Press and hold the light button, then press and release the door activation button. The button LED will begin to flash.

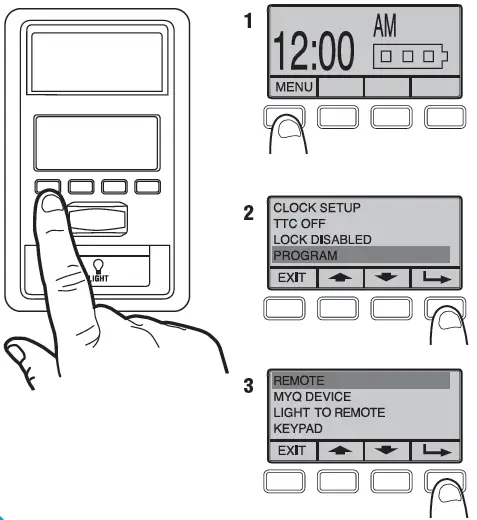
Paneli i Kontrollit të Derës Inteligjente
- Zgjidhni MENU.
- Shkoni poshtë dhe zgjidhni PROGRAM.
- Lëvizni poshtë dhe zgjidhni REMOTE.
Mos ndiqni udhëzimet në ekran.
KALONI DREJTPËRDREJT TE HAPI 04.
Opsioni 2: Locate the LEARN button on your garage door opener (a ladder may be required).
Press and immediately release the LEARN button.

- Press and release the button that you would like to program twice (second press must be within 20 seconds of the first press). The red LED will flash intermittently as the remote sends the preprogrammed codes to the garage door opener.
- Wait for the garage door opener to move the door. This can take up to 25 seconds.
During this time, your garage door opener light might flash.
When the garage door opener moves, within 3 seconds, press and release any button on the remote to confirm the code and exit programming.

TEST PËR SUKSES: Press the remote button you programmed in step 4. The garage door opener will activate. If the garage door does not activate, repeat the programming steps.
The LED on your remote control will stop flashing when the battery is low and needs to be replaced. Replace the battery with only 3V CR2032 coin cell battery. Dispose of the old battery properly.
Për të zëvendësuar baterinë, ndiqni udhëzimet siç tregohen më poshtë.
- On the back side of the remote, using a Phillips #1 screwdriver, unscrew the captive screw until it rotates freely.
- Me butonin e telekomandës lart, hapni me forcë strehën e sipërme të telekomandës nga streha e poshtme (nëse streha nuk ndahet, kontrolloni që vida fikse të rrotullohet lirshëm).
 With a cotton swab, push the old battery out of its holder in the direction of the nearest edge.
- Insert the replacement battery positive side up.

- Align the remote top and bottom housing so they clip together. Tighten the captive screw until the top and bottom housing no longer shift (do not overtighten the screw to avoid cracking the plastic housing).

The LED on your remote control will stop flashing when the battery is low and needs to be replaced.
Replace the battery with only 3V CR2032 coin cell battery. Dispose of the old battery properly.
Për të zëvendësuar baterinë, ndiqni udhëzimet siç tregohen më poshtë.
- With the remote button side down, separate the top and bottom housings of the remote by placing a flat screwdriver blade into the gap in the corner of the remote and gently twisting.
- Pry the top housing from the bottom housing.
 Following the “REMOVE” arrows direction printed on the logic board, with a cotton swab, push the old battery out of its holder
- Following the “INSERT” arrow direction printed on the logic board, insert the replacement battery positive side up.

- Align the remote top and bottom housing and press so they clip back together.

PARALAJMËRIM
- RREZIK PËR GËLLTIM: Ky produkt përmban një bateri butoni ose monedhë.
- Vdekja ose lëndimi i rëndë mund të ndodhë nëse gëlltitet.
- Një bateri e gëlltitur me buton ose monedhë mund të shkaktojë djegie të brendshme kimike në vetëm 2 orë.
- MBANI bateritë e reja dhe të përdorura PARA ARRISHTJES SË FËMIJËVE.
- Kërkoni kujdes të menjëhershëm mjekësor nëse një bateri dyshohet të gëlltitet ose të futet brenda ndonjë pjese të trupit.
PARALAJMËRIM
- Hiqni dhe ricikloni menjëherë ose hidhni bateritë e përdorura sipas rregullave lokale dhe mbajini larg fëmijëve. MOS i hidhni bateritë në mbeturina shtëpiake ose mos i digjni.
- Edhe bateritë e përdorura mund të shkaktojnë lëndime të rënda ose vdekje.
- Telefononi një qendër lokale të kontrollit të helmit për informacione për trajtimin.
- Lloji i baterisë: CR2032
- Bateria Voltage: 3 V
- Bateritë jo të rikarikueshme nuk duhet të rikarikohen.
- Mos e detyroni shkarkimin, rikarikimin, çmontimin, ngrohjen më lart (vlerësimi i temperaturës së specifikuar nga prodhuesi) dhe mos i digjni. Kjo mund të rezultojë në lëndim për shkak të ajrosjes, rrjedhjes ose shpërthimit që rezulton në djegie kimike.
- Sigurohuni që bateritë të jenë instaluar saktë sipas polaritetit (+ dhe -).
- Mos përzieni bateritë e vjetra dhe të reja, të markave ose llojeve të ndryshme të baterive, si bateritë alkaline, karbon-zink ose bateritë e rikarikueshme.
- Hiqni dhe ricikloni ose hidhni menjëherë bateritë nga pajisjet që nuk janë përdorur për një periudhë të gjatë kohore sipas rregullave lokale.
- Sigurojeni gjithmonë plotësisht ndarjen e baterisë. Nëse ndarja e baterisë nuk mbyllet mirë, ndaloni përdorimin e produktit, hiqni bateritë dhe mbajini larg fëmijëve.
Pjesë këmbimi
| Përshkrimi | Numri i pjesës |
| Klip vizori | 041-0494-000 |
Burime Shtesë
Një vit garanci e kufizuar
The Chamberlain Group LLC (“Seller”) warrants to the first consumer purchaser of this product that it is free from defect in materials and/or works man ship for a period of 1 year from the date of purchase.
Për më shumë informacion, vizitoni www.myq.com/warranty
Na kontaktoni
Për informacion ose ndihmë shtesë, ju lutemi vizitoni: mbështetje.kamberlaingrup.com
NJOFTIM: Kjo pajisje përputhet me pjesën 15 të rregullave të FCC dhe RSS-të e përjashtuara nga licenca për Inovacionin, Shkencën dhe Zhvillimin Ekonomik të Kanadasë. Funksionimi i nënshtrohet dy kushteve të mëposhtme:
- Kjo pajisje mund të mos shkaktojë ndërhyrje të dëmshme dhe
- Kjo pajisje duhet të pranojë çdo ndërhyrje të marrë, duke përfshirë ndërhyrjen që mund të shkaktojë funksionim të padëshiruar.
Çdo ndryshim ose modifikim që nuk miratohet shprehimisht nga pala përgjegjëse për pajtueshmërinë mund të anulojë autoritetin e përdoruesit për të operuar pajisjet.
©2025 The Chamberlain Group LLC
myQ and the myQ logo are trademarks, service marks, and/or registered trademarks of The Chamberlain Group LLC. All other trademarks, service marks and product names used herein are the property of their respective owners. The Chamberlain Group LLC. 300 Windsor Drive, Oak Brook, IL, 60523, United States
Pyetjet e shpeshta
- Q: How do I know if my garage door opener is connected to the myQ app?
A: You can scan the QR code on the reverse side of your remote and follow the instructions in the myQ app to check the connection status. - Q: What should I do if my remote control button does not program successfully?
A: Ensure that you are following the programming steps correctly and that there are no interferences during the process. Try reprogramming after troubleshooting any issues.
Dokumentet / Burimet
 |
myQ L993M 2-Button Keychain and 3-Button Remote Control [pdf] Manuali i Udhëzimeve L993M, CH363, CH363C, Q363LA, L932M, CH382, CH382C, L993M 2-Button Keychain and 3-Button Remote Control, L993M, 2-Button Keychain and 3-Button Remote Control, Keychain and 3-Button Remote Control, Button Remote Control, Remote Control |