Nadview
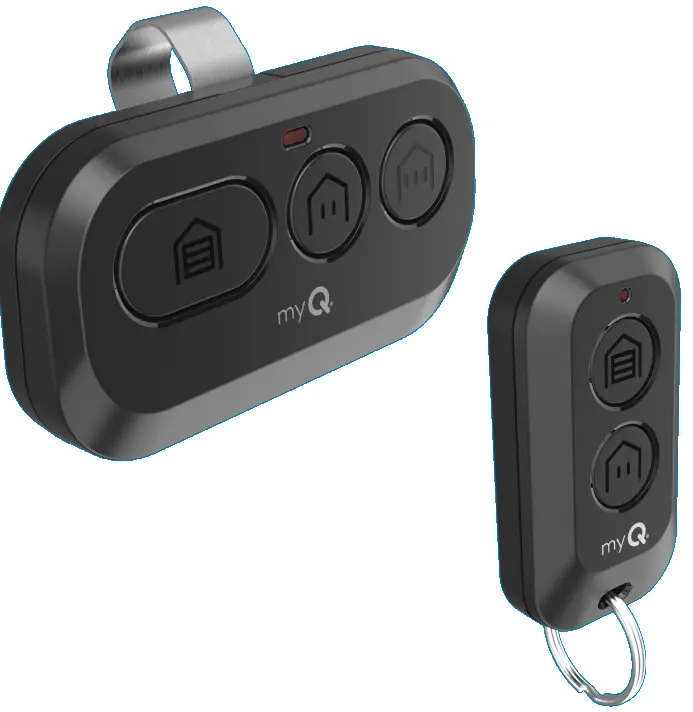
Your remote control is compatible with all Chamberlain®, LiftMaster®, and Craftsman® garage door openers manufactured after 1997 with the exception of Craftsman Series 100. Your remote control can be programmed to operate up to three (CH363 & CH363C) or two (CH382 & CH382C) compatible devices, such as garage door openers and gate operators. Each button on the remote control works independently of the other and must be programmed separately. The images throughout this manual are for reference only and your product may look different
OSTRZEŻENIE
Aby zapobiec możliwym POWAŻNYM OBRAŻENIOM lub ŚMIERCI spowodowanym przez ruchomą bramę lub drzwi garażowe:
- ZAWSZE trzymaj piloty poza zasięgiem dzieci. NIGDY nie pozwalaj dzieciom obsługiwać ani bawić się nadajnikami pilota.
- Bramę lub drzwi należy uruchamiać TYLKO wtedy, gdy są wyraźnie widoczne, prawidłowo wyregulowane i nic nie blokuje ich ruchu.
- ZAWSZE miej bramę lub drzwi garażowe w zasięgu wzroku, aż do całkowitego zamknięcia. NIGDY nie pozwalaj nikomu przechodzić przez ruchomą bramę lub drzwi.
OSTRZEŻENIE: Ten produkt może narazić Cię na działanie substancji chemicznych, w tym ołowiu, które są znane Stanowi Kalifornia jako powodujące raka, wady wrodzone lub inne szkody reprodukcyjne. Aby uzyskać więcej informacji, przejdź do www.P65Warnings.ca.gov.
Program Your Remote to Your Wi-Fi Garage Door Opener Using the myQ App
HIGHLY RECOMMENDED: Connect your Wi-Fi Garage Door Opener to the myQ app and program your Remote to the Garage Door Opener to unlock exciting features such as remote naming, notifications and access history.
Connected to the mGarage Door Opener AlryQ Appeady
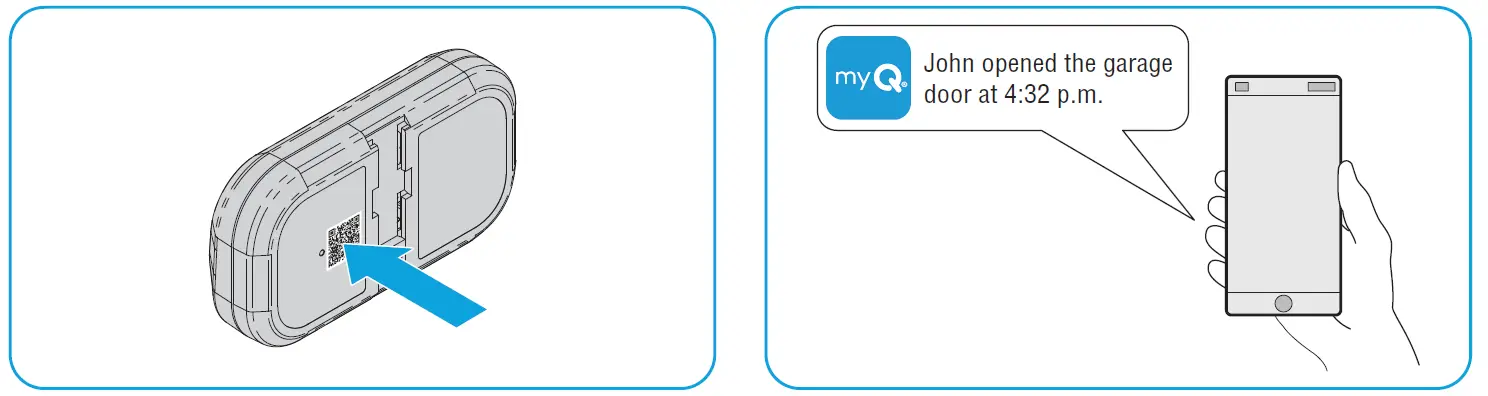
Scan the QR code on the reverse side of your remote and follow the programming instructions in the myQ app.

If Your Garage Door Opener is Not Connected to the myQ App
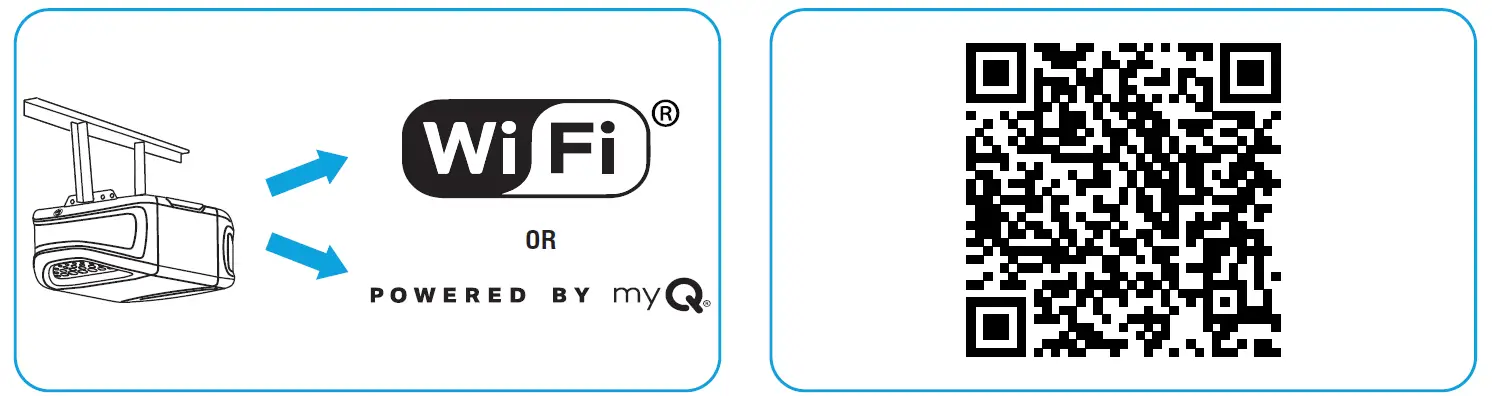
- Look for a “Wi-Fi®” or a “Powered by myQ” logo to determine if your garage door opener is myQ compatible.
- Scan the QR Code below to download the myQ app. Follow the instructions in the myQ app to connect your garage door opener.
 Once your garage door opener is connected, scan the QR code on the reverse side of your remote, and follow the programming instructions in the myQ app.
- Po zaprogramowaniu pilota w aplikacji myQ możesz nadać mu nazwę, view historię dostępu i otrzymuj powiadomienia, gdy pilot aktywuje otwieracz bramy garażowej.
Zanim zaczniesz
Be sure the garage door is clear of ALL obstructions. Make sure the garage door opener has a working light because it is a programming indicator.

ZALECENIE: Przed rozpoczęciem programowania przeczytaj dokładnie wszystkie kroki.
Metoda A: Program to a Security+ 3.0 Protocol Garage oor Opener (White Learn Button) Using the Learn Button on Door Control Panel
ZALECENIE: Have your door control panel product manual available, as models vary in how to set the garage door opener into programming mode.
Follow the instructions below for your door control panel model to set your garage door opener into programming mode. Follow the instructions below for your door control panel model to set your garage door opener into programming mode.

W ciągu 30 sekund naciśnij i przytrzymaj przycisk na pilocie, którego chcesz użyć.
Release the button when the garage door opener lights flash and/or two clicks are heard.

TEST POWODZENIA: Naciśnij zaprogramowany przycisk pilota. Otwieracz bramy garażowej zostanie uruchomiony. Jeśli brama garażowa się nie uruchomi, powtórz kroki programowania.
Metoda B: Programowanie do otwieracza drzwi garażowych z protokołem Security+ 3.0 (biały przycisk „Learn”) za pomocą przycisku „Learn” otwieracza
- Locate the LEARN button on your garage door opener (a ladder may be required).
Press and immediately release the LEARN button.
- W ciągu 30 sekund naciśnij i przytrzymaj przycisk na pilocie, którego chcesz użyć.
Release the button when the garage door opener lights flash and/or two clicks are heard.
TEST SUKCESU: Press the remote button you programmed. The garage door opener will activate. If the garage door does not activate, repeat the programming steps.
Metoda C: Program to All Compatible Garage Door Openers (White, Yellow, Purple, Red, & Orange Learn Buttons)
- Start with your garage door closed. Press and hold the two smaller buttons on the remote simultaneously until the red LED stays solid (typically 6 seconds), then release the buttons.

Opcja 1: Follow the instructions below for your door control panel model to set your garage door opener into programming mode.
ZALECENIE: Have your door control panel product manual available, as models vary in how to set the garage door opener into programming mode.
Panel sterowania drzwiami
Podnieś panel aktywacji drzwi. Naciśnij przycisk LEARN dwa razy (po drugim naciśnięciu dioda LED na panelu sterowania drzwiami będzie migać wielokrotnie).

Przycisk sterowania drzwiami
Press and hold the light button, then press and release the door activation button. The button LED will begin to flash.

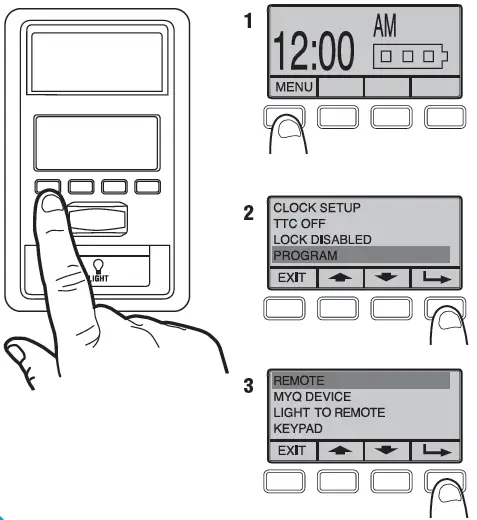
Inteligentny panel sterowania drzwiami
- Wybierz menu.
- Przewiń w dół i wybierz PROGRAM.
- Przewiń w dół i wybierz ZDALNY.
Nie postępuj zgodnie z instrukcjami wyświetlanymi na ekranie.
PRZEJDŹ OD RAZU DO KROKU 04.
Opcja 2: Locate the LEARN button on your garage door opener (a ladder may be required).
Press and immediately release the LEARN button.

- Press and release the button that you would like to program twice (second press must be within 20 seconds of the first press). The red LED will flash intermittently as the remote sends the preprogrammed codes to the garage door opener.
- Wait for the garage door opener to move the door. This can take up to 25 seconds.
During this time, your garage door opener light might flash.
When the garage door opener moves, within 3 seconds, press and release any button on the remote to confirm the code and exit programming.

TEST SUKCESU: Press the remote button you programmed in step 4. The garage door opener will activate. If the garage door does not activate, repeat the programming steps.
The LED on your remote control will stop flashing when the battery is low and needs to be replaced. Replace the battery with only 3V CR2032 coin cell battery. Dispose of the old battery properly.
Aby wymienić baterię, postępuj zgodnie z instrukcjami podanymi poniżej.
- On the back side of the remote, using a Phillips #1 screwdriver, unscrew the captive screw until it rotates freely.
- Trzymając przycisk pilota skierowany do góry, podważ górną obudowę pilota i oddziel ją od dolnej (jeśli obudowa nie oddzieli się, sprawdź, czy śruba mocująca obraca się swobodnie).
 With a cotton swab, push the old battery out of its holder in the direction of the nearest edge.
- Insert the replacement battery positive side up.

- Align the remote top and bottom housing so they clip together. Tighten the captive screw until the top and bottom housing no longer shift (do not overtighten the screw to avoid cracking the plastic housing).

The LED on your remote control will stop flashing when the battery is low and needs to be replaced.
Wymień baterię na baterię pastylkową 3 V CR2032. Zutylizuj starą baterię zgodnie z przepisami.
Aby wymienić baterię, postępuj zgodnie z instrukcjami podanymi poniżej.
- With the remote button side down, separate the top and bottom housings of the remote by placing a flat screwdriver blade into the gap in the corner of the remote and gently twisting.
- Pry the top housing from the bottom housing.
 Following the “REMOVE” arrows direction printed on the logic board, with a cotton swab, push the old battery out of its holder
- Following the “INSERT” arrow direction printed on the logic board, insert the replacement battery positive side up.

- Align the remote top and bottom housing and press so they clip back together.

OSTRZEŻENIE
- NIEBEZPIECZEŃSTWO POŁKNIĘCIA: Ten produkt zawiera baterię guzikową lub pastylkową.
- W przypadku połknięcia może dojść do ŚMIERCI lub poważnych obrażeń.
- Połknięcie baterii pastylkowej lub pastylkowej może spowodować wewnętrzne oparzenia chemiczne w ciągu zaledwie 2 godzin.
- TRZYMAJ nowe i zużyte baterie poza zasięgiem dzieci.
- W przypadku podejrzenia połknięcia lub włożenia baterii do jakiejkolwiek części ciała należy natychmiast zwrócić się o pomoc lekarską.
OSTRZEŻENIE
- Wyjmij i natychmiast poddaj recyklingowi lub utylizacji zużytych baterii zgodnie z lokalnymi przepisami i trzymaj z dala od dzieci. NIE wyrzucaj baterii do śmieci domowych ani nie poddawaj ich spalaniu.
- Nawet zużyte baterie mogą spowodować poważne obrażenia lub śmierć.
- Aby uzyskać informacje na temat leczenia, skontaktuj się z lokalnym ośrodkiem kontroli zatruć.
- Typ baterii: CR2032
- Pojemność bateriitage: 3 V
- Nie wolno ładować baterii, których nie można ponownie naładować.
- Nie należy na siłę rozładowywać, ładować, demontować, podgrzewać powyżej (temperatura określona przez producenta) ani nie spalać. Może to spowodować obrażenia w wyniku odpowietrzenia, wycieku lub eksplozji skutkującej oparzeniami chemicznymi.
- Sprawdź, czy baterie są zainstalowane prawidłowo, zgodnie z polaryzacją (+ i -).
- Nie należy mieszać starych i nowych baterii, ani baterii różnych marek i typów, np. baterii alkalicznych, cynkowo-węglowych lub akumulatorów.
- Wyjmij i natychmiast poddaj recyklingowi lub wyrzuć baterie ze sprzętu nieużywanego przez dłuższy okres czasu, zgodnie z lokalnymi przepisami.
- Zawsze całkowicie zabezpiecz komorę baterii. Jeśli komora baterii nie zamyka się prawidłowo, zaprzestań używania produktu, wyjmij baterie i trzymaj je z dala od dzieci.
Części zamienne
| Opis | Numer części |
| Klips do wizjera | 041-0494-000 |
Dodatkowe zasoby
Roczna ograniczona gwarancja
The Chamberlain Group LLC (“Seller”) warrants to the first consumer purchaser of this product that it is free from defect in materials and/or works man ship for a period of 1 year from the date of purchase.
Więcej informacji znajdziesz na stronie www.myq.com/warranty
Skontaktuj się z nami
Aby uzyskać dodatkowe informacje lub pomoc, odwiedź: support.chamberlaingroup.com.
OGŁOSZENIE: To urządzenie jest zgodne z częścią 15 przepisów FCC oraz kanadyjskimi kanałami RSS zwolnionymi z licencji dotyczących innowacji, nauki i rozwoju gospodarczego. Działanie podlega następującym dwóm warunkom:
- To urządzenie nie może powodować szkodliwych zakłóceń i
- Urządzenie musi akceptować wszelkie odbierane zakłócenia, w tym zakłócenia mogące powodować niepożądane działanie.
Wszelkie zmiany lub modyfikacje, które nie zostały wyraźnie zatwierdzone przez stronę odpowiedzialną za zgodność, mogą unieważnić prawo użytkownika do obsługi sprzętu.
©2025 Chamberlain Group LLC
myQ and the myQ logo are trademarks, service marks, and/or registered trademarks of The Chamberlain Group LLC. All other trademarks, service marks and product names used herein are the property of their respective owners. The Chamberlain Group LLC. 300 Windsor Drive, Oak Brook, IL, 60523, United States
Często zadawane pytania
- Q: How do I know if my garage door opener is connected to the myQ app?
A: You can scan the QR code on the reverse side of your remote and follow the instructions in the myQ app to check the connection status. - Q: What should I do if my remote control button does not program successfully?
A: Ensure that you are following the programming steps correctly and that there are no interferences during the process. Try reprogramming after troubleshooting any issues.
Dokumenty / Zasoby
 |
myQ L993M 2-Button Keychain and 3-Button Remote Control [plik PDF] Instrukcja obsługi L993M, CH363, CH363C, Q363LA, L932M, CH382, CH382C, L993M 2-Button Keychain and 3-Button Remote Control, L993M, 2-Button Keychain and 3-Button Remote Control, Keychain and 3-Button Remote Control, Button Remote Control, Remote Control |