Quaview
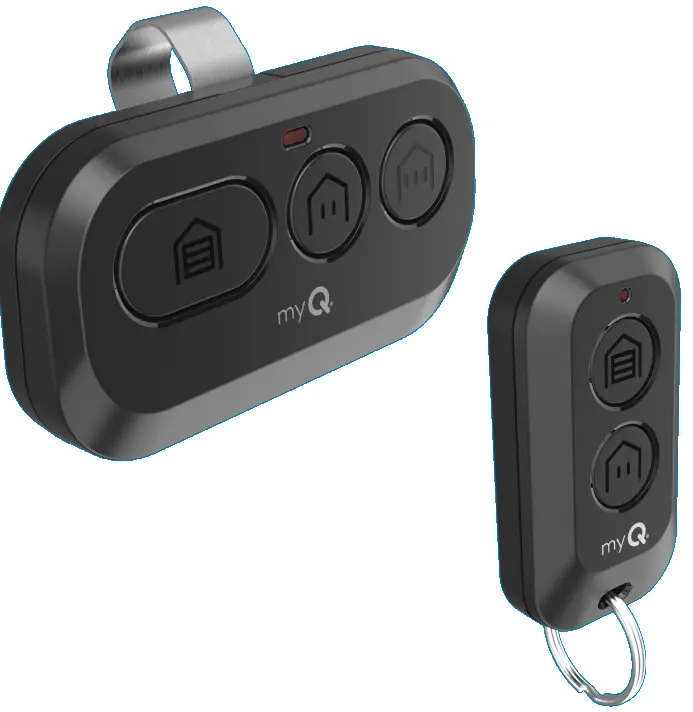
Your remote control is compatible with all Chamberlain®, LiftMaster®, and Craftsman® garage door openers manufactured after 1997 with the exception of Craftsman Series 100. Your remote control can be programmed to operate up to three (CH363 & CH363C) or two (CH382 & CH382C) compatible devices, such as garage door openers and gate operators. Each button on the remote control works independently of the other and must be programmed separately. The images throughout this manual are for reference only and your product may look different
CẢNH BÁO
Để ngăn ngừa thương tích NGHIÊM TRỌNG hoặc TỬ VONG có thể xảy ra do cổng hoặc cửa nhà để xe di chuyển:
- ALWAYS keep remote controls out of reach of children. NEVER permit children to operate, or play with the remote control transmitters.
- Chỉ kích hoạt cổng hoặc cửa khi có thể nhìn thấy rõ ràng, được điều chỉnh đúng cách và không có vật cản nào cản trở việc di chuyển của cửa.
- LUÔN LUÔN giữ cổng hoặc cửa nhà để xe trong tầm nhìn cho đến khi đóng hoàn toàn. KHÔNG BAO GIỜ cho phép bất kỳ ai băng qua lối đi của cổng hoặc cửa đang di chuyển.
CẢNH BÁO: Sản phẩm này có thể khiến bạn tiếp xúc với các hóa chất bao gồm chì, được Tiểu bang California biết đến là có thể gây ung thư hoặc dị tật bẩm sinh hoặc các tác hại sinh sản khác. Để biết thêm thông tin, hãy truy cập www.P65Warnings.ca.gov.
Program Your Remote to Your Wi-Fi Garage Door Opener Using the myQ App
HIGHLY RECOMMENDED: Connect your Wi-Fi Garage Door Opener to the myQ app and program your Remote to the Garage Door Opener to unlock exciting features such as remote naming, notifications and access history.
Connected to the mGarage Door Opener AlryQ Appeady
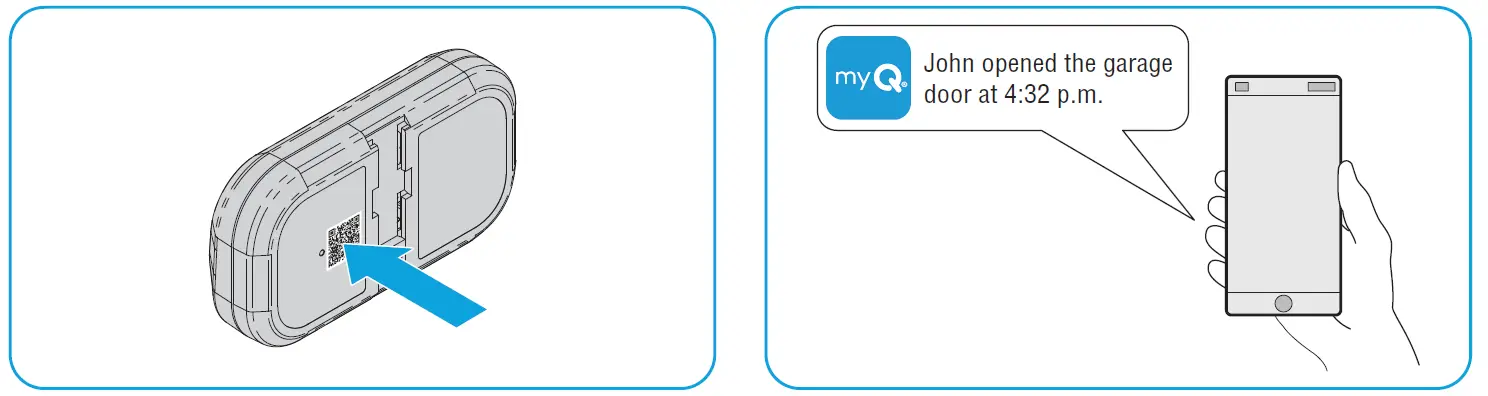
Scan the QR code on the reverse side of your remote and follow the programming instructions in the myQ app.

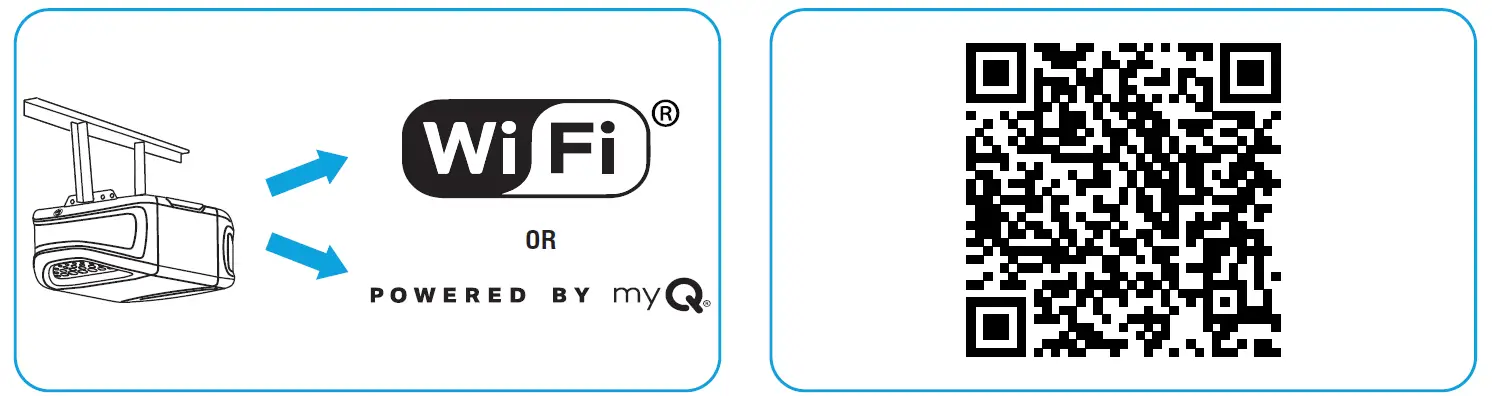
If Your Garage Door Opener is Not Connected to the myQ App
- Look for a “Wi-Fi®” or a “Powered by myQ” logo to determine if your garage door opener is myQ compatible.
- Scan the QR Code below to download the myQ app. Follow the instructions in the myQ app to connect your garage door opener.
 Once your garage door opener is connected, scan the QR code on the reverse side of your remote, and follow the programming instructions in the myQ app.
- Once your remote is programmed in the myQ app, you can name your remote, view access history, and receive notifications when your remote activates the garage door opener.
Trước khi bạn bắt đầu
Be sure the garage door is clear of ALL obstructions. Make sure the garage door opener has a working light because it is a programming indicator.

KHUYẾN NGHỊ: Đọc kỹ tất cả các bước lập trình trước khi bắt đầu.
Phương pháp A: Program to a Security+ 3.0 Protocol Garage oor Opener (White Learn Button) Using the Learn Button on Door Control Panel
SỰ GIỚI THIỆU: Have your door control panel product manual available, as models vary in how to set the garage door opener into programming mode.
Follow the instructions below for your door control panel model to set your garage door opener into programming mode. Follow the instructions below for your door control panel model to set your garage door opener into programming mode.

Trong vòng 30 giây, hãy nhấn và giữ nút trên điều khiển từ xa mà bạn muốn sử dụng.
Release the button when the garage door opener lights flash and/or two clicks are heard.

TEST FOR SUCCESS: Press the remote button you programmed. The garage door opener will activate. If the garage door does not activate, repeat the programming steps.
Phương pháp B: Lập trình cho Bộ mở cửa nhà để xe giao thức Security+ 3.0 (Nút học màu trắng) bằng cách sử dụng nút học của bộ mở cửa
- Locate the LEARN button on your garage door opener (a ladder may be required).
Press and immediately release the LEARN button.
- Trong vòng 30 giây, hãy nhấn và giữ nút trên điều khiển từ xa mà bạn muốn sử dụng.
Release the button when the garage door opener lights flash and/or two clicks are heard.
TEST FOR SUCCESS: Press the remote button you programmed. The garage door opener will activate. If the garage door does not activate, repeat the programming steps.
Phương pháp C: Program to All Compatible Garage Door Openers (White, Yellow, Purple, Red, & Orange Learn Buttons)
- Start with your garage door closed. Press and hold the two smaller buttons on the remote simultaneously until the red LED stays solid (typically 6 seconds), then release the buttons.

Lựa chọn 1: Follow the instructions below for your door control panel model to set your garage door opener into programming mode.
SỰ GIỚI THIỆU: Have your door control panel product manual available, as models vary in how to set the garage door opener into programming mode.
Bảng điều khiển cửa
Nâng bảng điều khiển kích hoạt cửa. Nhấn nút LEARN hai lần (sau lần nhấn thứ hai, đèn LED trên bảng điều khiển cửa sẽ nhấp nháy liên tục).

Nút nhấn điều khiển cửa
Press and hold the light button, then press and release the door activation button. The button LED will begin to flash.

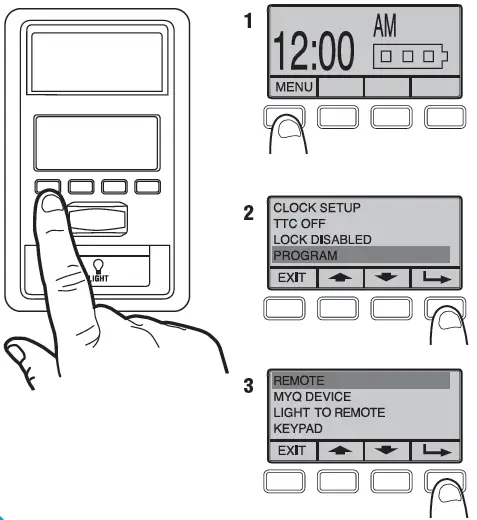
Bảng điều khiển cửa thông minh
- Chọn MENU.
- Scroll down and select PROGRAM.
- Scroll down and select REMOTE.
Do not follow on screen instructions.
MOVE DIRECTLY TO STEP 04.
Lựa chọn 2: Locate the LEARN button on your garage door opener (a ladder may be required).
Press and immediately release the LEARN button.

- Press and release the button that you would like to program twice (second press must be within 20 seconds of the first press). The red LED will flash intermittently as the remote sends the preprogrammed codes to the garage door opener.
- Wait for the garage door opener to move the door. This can take up to 25 seconds.
During this time, your garage door opener light might flash.
When the garage door opener moves, within 3 seconds, press and release any button on the remote to confirm the code and exit programming.

TEST FOR SUCCESS: Press the remote button you programmed in step 4. The garage door opener will activate. If the garage door does not activate, repeat the programming steps.
The LED on your remote control will stop flashing when the battery is low and needs to be replaced. Replace the battery with only 3V CR2032 coin cell battery. Dispose of the old battery properly.
Để thay pin, hãy làm theo hướng dẫn như bên dưới.
- On the back side of the remote, using a Phillips #1 screwdriver, unscrew the captive screw until it rotates freely.
- With the remote button side up, pry open the remote top housing from the bottom housing (if the housing will not separate, check that the captive screw is rotating freely).
 With a cotton swab, push the old battery out of its holder in the direction of the nearest edge.
- Insert the replacement battery positive side up.

- Align the remote top and bottom housing so they clip together. Tighten the captive screw until the top and bottom housing no longer shift (do not overtighten the screw to avoid cracking the plastic housing).

The LED on your remote control will stop flashing when the battery is low and needs to be replaced.
Replace the battery with only 3V CR2032 coin cell battery. Dispose of the old battery properly.
Để thay pin, hãy làm theo hướng dẫn như bên dưới.
- With the remote button side down, separate the top and bottom housings of the remote by placing a flat screwdriver blade into the gap in the corner of the remote and gently twisting.
- Pry the top housing from the bottom housing.
 Following the “REMOVE” arrows direction printed on the logic board, with a cotton swab, push the old battery out of its holder
- Following the “INSERT” arrow direction printed on the logic board, insert the replacement battery positive side up.

- Align the remote top and bottom housing and press so they clip back together.

CẢNH BÁO
- NGUY HẠI KHI Nuốt phải: Sản phẩm này chứa pin cúc áo hoặc pin đồng xu.
- TỬ VONG hoặc thương tích nghiêm trọng có thể xảy ra nếu nuốt phải.
- Pin cúc áo hoặc pin đồng xu bị nuốt phải có thể gây bỏng hóa chất bên trong chỉ trong vòng 2 giờ.
- GIỮ pin mới và đã qua sử dụng NGOÀI TẦM TAY CỦA TRẺ EM.
- Tìm kiếm sự chăm sóc y tế ngay lập tức nếu nghi ngờ pin bị nuốt hoặc bị nhét vào bên trong bất kỳ bộ phận nào của cơ thể.
CẢNH BÁO
- Tháo và tái chế ngay hoặc vứt bỏ pin đã qua sử dụng theo quy định của địa phương và tránh xa tầm tay trẻ em. KHÔNG vứt pin vào thùng rác gia đình hoặc đốt.
- Ngay cả pin đã qua sử dụng cũng có thể gây thương tích nghiêm trọng hoặc tử vong.
- Gọi đến trung tâm kiểm soát chất độc tại địa phương để biết thông tin về cách điều trị.
- Loại pin: CR2032
- Pin Voltage: 3 V
- Pin không sạc lại được không được sạc lại.
- Không ép xả, nạp lại, tháo rời, làm nóng trên (mức nhiệt độ do nhà sản xuất chỉ định) hoặc đốt. Làm như vậy có thể dẫn đến thương tích do lỗ thông hơi, rò rỉ hoặc nổ dẫn đến bỏng hóa chất.
- Đảm bảo pin được lắp đúng theo cực (+ và -).
- Không sử dụng lẫn lộn pin cũ và pin mới, pin của các nhãn hiệu hoặc loại pin khác nhau, chẳng hạn như pin kiềm, pin cacbon-kẽm hoặc pin sạc lại.
- Tháo và tái chế hoặc thải bỏ ngay pin khỏi thiết bị không được sử dụng trong thời gian dài theo quy định của địa phương.
- Luôn cố định chắc chắn ngăn chứa pin. Nếu ngăn chứa pin không đóng chặt, hãy ngừng sử dụng sản phẩm, tháo pin và để xa tầm tay trẻ em.
Linh kiện thay thế
| Sự miêu tả | Mã số sản phẩm |
| Kẹp tấm che | 041-0494-000 |
Tài nguyên bổ sung
Bảo hành có giới hạn một năm
The Chamberlain Group LLC (“Seller”) warrants to the first consumer purchaser of this product that it is free from defect in materials and/or works man ship for a period of 1 year from the date of purchase.
Để biết thêm thông tin, hãy truy cập www.myq.com/bảo hành
Liên hệ với chúng tôi
Để biết thêm thông tin hoặc hỗ trợ, vui lòng truy cập: hỗ trợ.chamberlaingroup.com
ĐỂ Ý: Thiết bị này tuân thủ phần 15 của quy tắc FCC và RSS được miễn giấy phép về Đổi mới, Khoa học và Kinh tế Canada. Hoạt động tuân theo hai điều kiện sau:
- Thiết bị này có thể không gây nhiễu có hại và
- Thiết bị này phải chấp nhận mọi nhiễu sóng nhận được, bao gồm cả nhiễu sóng có thể gây ra hoạt động không mong muốn.
Bất kỳ thay đổi hoặc sửa đổi nào không được chấp thuận rõ ràng bởi bên chịu trách nhiệm tuân thủ có thể làm mất quyền vận hành thiết bị của người dùng.
©2025 Tập đoàn Chamberlain LLC
myQ and the myQ logo are trademarks, service marks, and/or registered trademarks of The Chamberlain Group LLC. All other trademarks, service marks and product names used herein are the property of their respective owners. The Chamberlain Group LLC. 300 Windsor Drive, Oak Brook, IL, 60523, United States
Câu hỏi thường gặp
- Q: How do I know if my garage door opener is connected to the myQ app?
A: You can scan the QR code on the reverse side of your remote and follow the instructions in the myQ app to check the connection status. - Q: What should I do if my remote control button does not program successfully?
A: Ensure that you are following the programming steps correctly and that there are no interferences during the process. Try reprogramming after troubleshooting any issues.
Tài liệu / Tài nguyên
 |
myQ L993M 2-Button Keychain and 3-Button Remote Control [tập tin pdf] Hướng dẫn sử dụng L993M, CH363, CH363C, Q363LA, L932M, CH382, CH382C, L993M 2-Button Keychain and 3-Button Remote Control, L993M, 2-Button Keychain and 3-Button Remote Control, Keychain and 3-Button Remote Control, Button Remote Control, Remote Control |