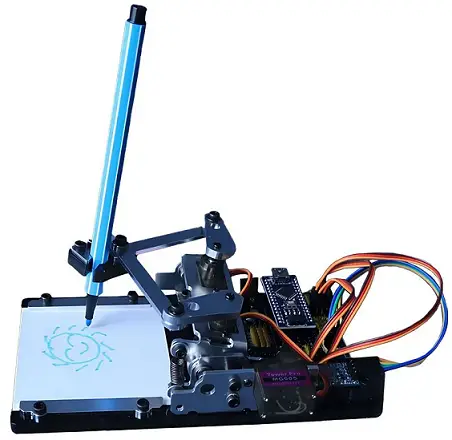
Elektor Arduino Controlled Drawing Robot
Product Specifications
- Arduino-controlled Drawing Robot
- Components:
- Arduino Nano – 5
- Nano Shield – 1
- Bluetooth Module – 1
- Servos – 3
- Cables – 4
- Screws:
- M2X8 – 6
- M2.5×6 – 2
- M3x6 – 2
- M3x8 – 15
- M3x10 – 3
- M3x12 – 6
- M3x16 – 2
- Nuts:
- M2 – 6
- M3 – 29
- Gaskets:
- M3 – 2
- Spacers:
- Black Nylon M3x2 – 5
- M3x9 – 2
- Additional Components:
- Springs 5×0.4×6 – 1
- Bearings M3x8 – 2
Product Usage Instructions
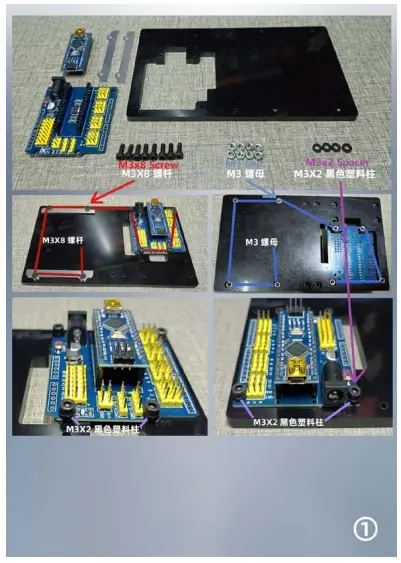
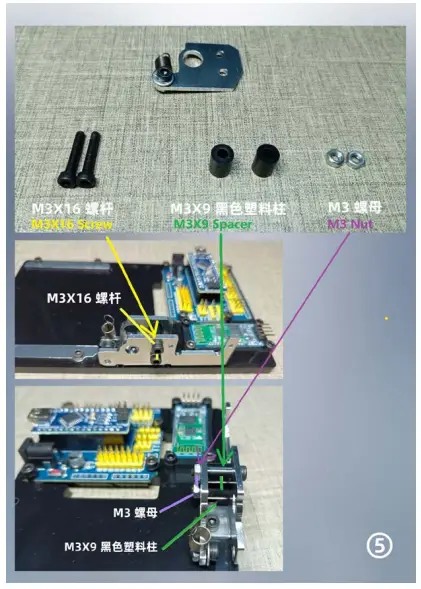
Step 1: Install Nano Expansion Shield
First, install the Nano expansion shield with 8x M3X8 screws and 4x M3X2 spacers in the shown location.
Step 2: Install Bluetooth Module
Then install the Bluetooth module with 4x M3X12 screws with nuts.
Components
Screws
- M2X8 —6
- M2.5×6 —2
- M3x6 —2
- M3x8—15
- M3x10—3
- M3x12—6
- M3x16—2
Nuts
- M2 —6
- M3 —29
Gaskets
- M3 —2
Spacers black Nylon
- M3x2 —5
- M3x9 —2
Springs
- 5×0.4×6 —1
Bearings
- M3x8 —2
- Arduino Nano —5
- Nano Shield —1
- Bluetooth Module —1
- Servos —3
- Cables —4
INSTALLATION INSTRUCTION
STEP 1
- First, install the Nano expansion shield with 8x M3X8 screws and 4x M3X2 spacers in the shown location
STEP 2
- Then install the Bluetooth module with 4x M3X12 screws with nuts

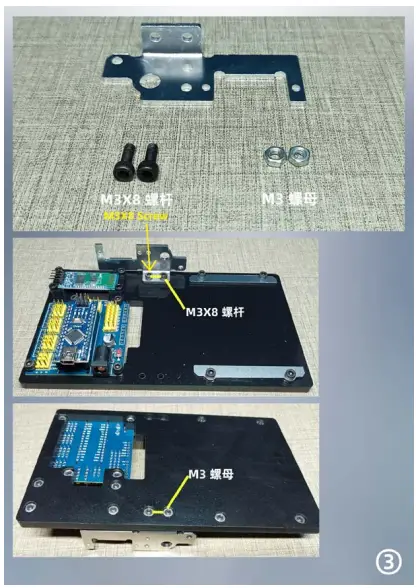
STEP 3
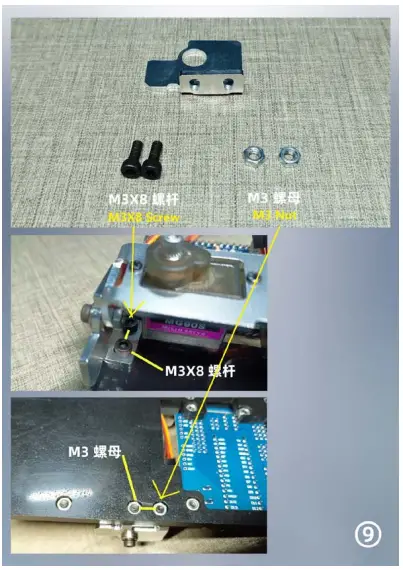
- Then install the bracket with 2x M3X8 screws with nuts
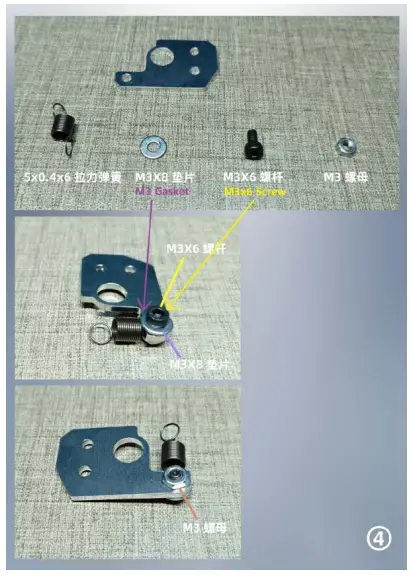
STEP 4
- Assembly this arm with the return spring
STEP 5
- Put them all together to the bracket
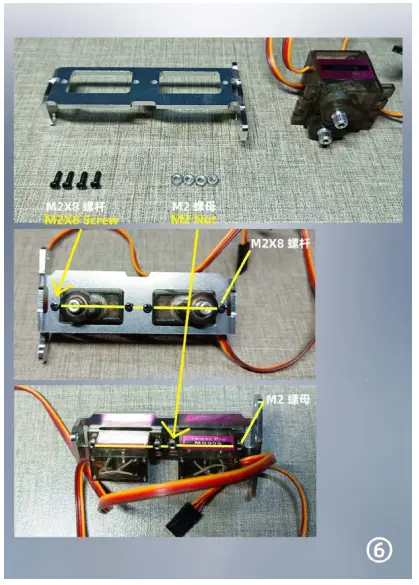
STEP 6
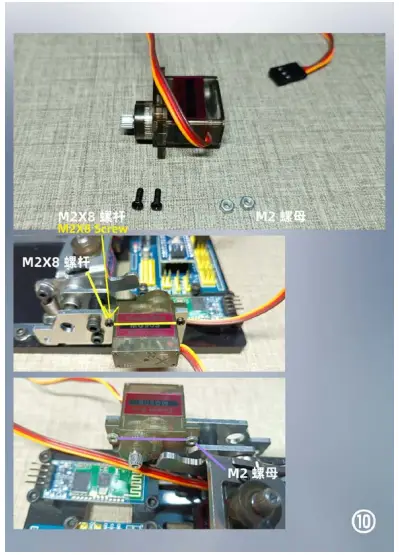
- Nowassembly2servoswithM2X8 screwsand nuts
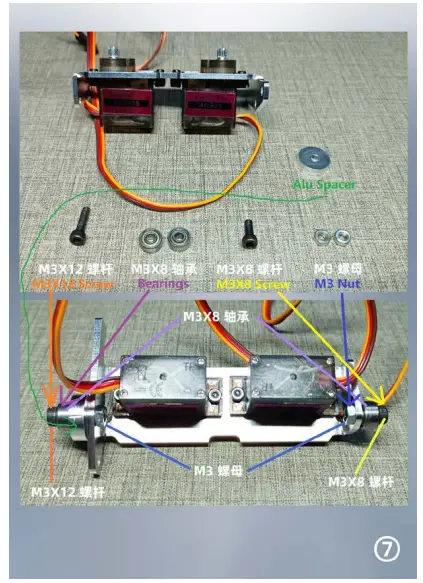
STEP 7
- Add bearings to the construction
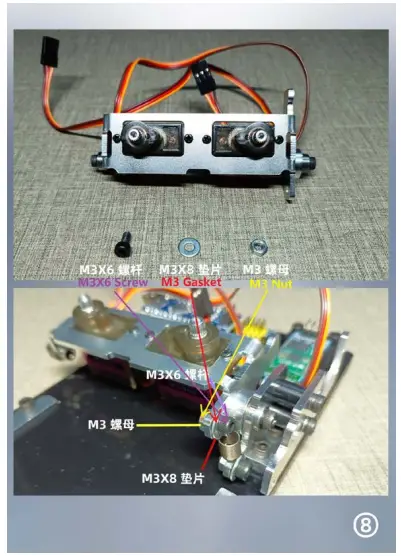
STEP 8
- Connect the frame with servos to the return spring
STEP 9
- Install abother base bracket, and connect it to the servo frame
STEP 10
- Install the last servo
STEP 11
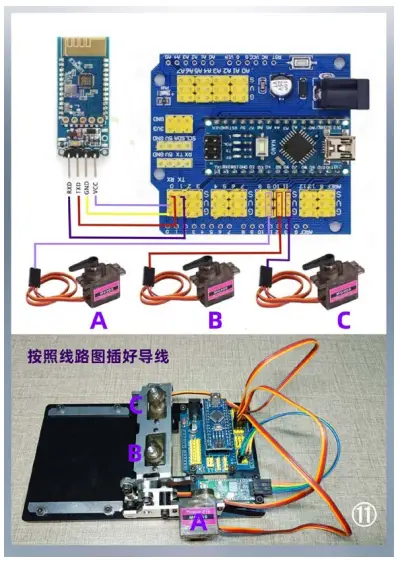
- Connect 3 servos to the Nano expansion shield as picture shown
STEP 12
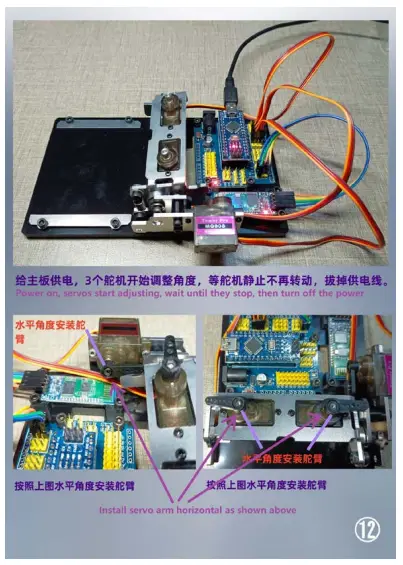
- Power on, and wait until servos stop turning, then turn off the power
- Install servo arms horizontal as pictures shown
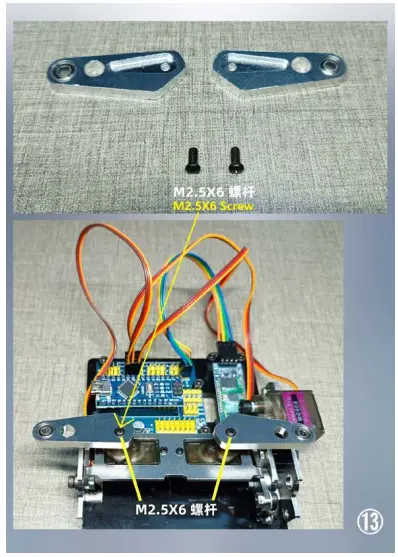
STEP 13
- Install 2 robot arms with M2.5X6 screws
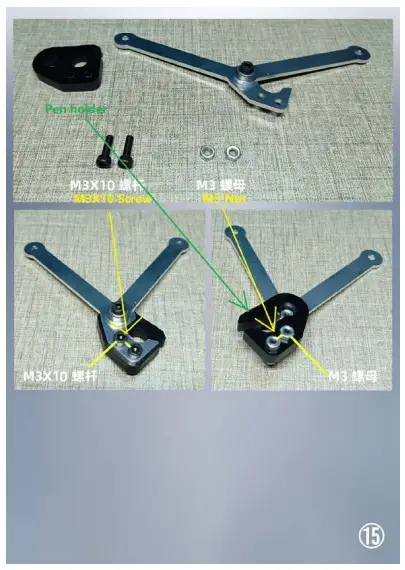
STEP 14
- And M3 screws

STEP 15
- Install the pen holder
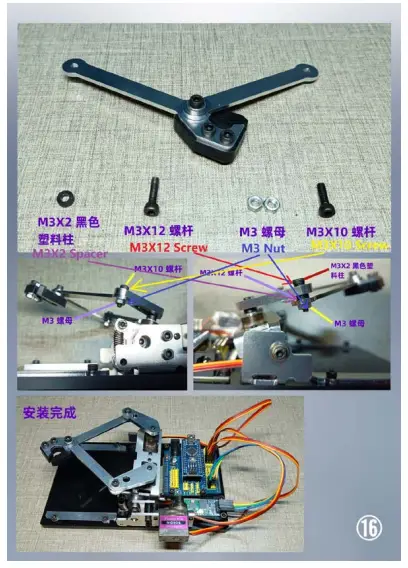
STEP 16
- Put it all together, and finish the assembly
Frequently Asked Questions
Q: How do I power on the drawing robot?
A: Power on the robot and wait until servos stop turning, then turn off the power.
Q: How do I connect the servos to the Nano expansion shield?
A: Connect 3 servos to the Nano expansion shield as shown in the picture provided in the manual.
Documents / Resources
 |
Elektor Arduino Controlled Drawing Robot [pdf] Installation Guide Arduino Controlled Drawing Robot, Controlled Drawing Robot, Drawing Robot, Robot |