![]() Quick start guide
Quick start guide
Player V2
Creating, running and customising light scenarios with
Light Stream Player
Player V2 Creating Running and Customising Light Scenarios
Equipment
| • Light Stream Player V2 | • Light Stream Converter | • Software Light Stream |
 |
 |
 |
Connection
Wiring diagram


Access to Light Stream Player
Access to Light Stream Player is carried out using a web-browser at a given IP address from a computer, phone or tablet with Internet access.
In order to connect, the Network card and Light Stream Player must be on the same subnet.
If necessary, change the IP address of the network card.
Example: Windows 10
- Go to Network Connections (Control Panel/Network and Internet/Network Connections)
Select an active network connection right-click (right mouse button) and select Properties.

- Next IP version 4 (TCP/IPv4) -> Properties.

- Since Light Stream Player has default
IP address: 192.168.0.205
For exampleIP address: 192.168.0.112
This address must be uniqueand must not be repeated with other devices on the network.
Subnet mask: 255.255.255.255.0

Next, go to your web browser and enter the following parameters.
Default access credentials:

You are now in the interface of Light Stream Player.
Then it is necessary to change the network parameters of Light Stream Player to complete the configuration.
Changing Light Stream Player network parameters
Network settings using the display and control buttons of the Player V2 menu.
In the Network section, you can view the current parameters:
IP address, mask, gateway and MAC address on Ethernet ports 1 and 2.

To change network settings from any item on the Ethernet 1 or 2 screen, press ![]() .
.
Static IP configuration.
 On the IP Address screen, place the cursor on the desired value and change the value using the
 ![]() and
and ![]() .
.
To move to the next NETMASK screen, place the cursor on the rightmost digit and again press the button ![]() .
.
On the NETMASK screen you can change the netmask using the buttons ![]() and
and ![]() .
.
Next, press the button ![]() to go to the Set Gateway screen.
to go to the Set Gateway screen.
If you need to set the IP gateway, select Yes and specify its IP address.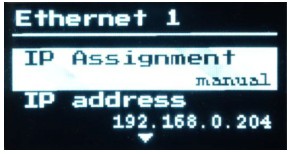 You will then return to the Ethernet 1 or 2 screen.
It will take another 2-3 seconds to update the network settings.
Retrieve network settings via DHCP.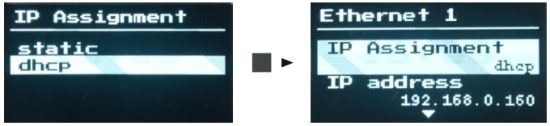
On the IP Assignment screen, select dhcp and press ![]() .
.
It will take another 2-3 seconds to update the network settings.
Changing Light Stream Converter network parameters
The network card and Light Stream Converter must be on the same subnet.
If necessary, change the IP address of the network card.
The default IP address and other data are indicated on the information label on the device.
Go to the Light Stream software then:
Fixtures->Search->Ethernet Device->Search
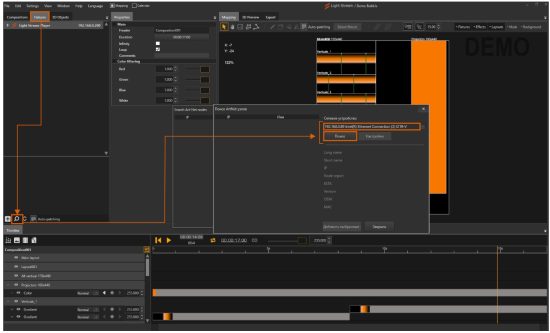
Highlight the found converter->Settings.
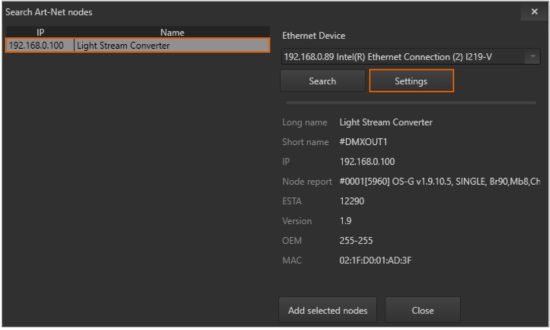 Change the IP address to the desired IP address.
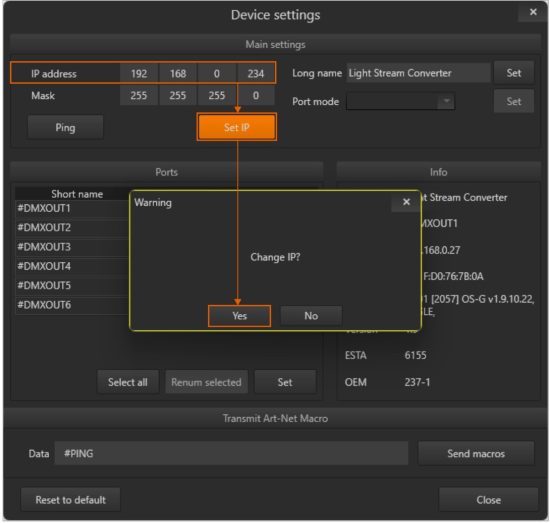 Changing network settings Light Stream Converter is complete.
Setting the date and time
To configure network settings Go to Settings->Date and time
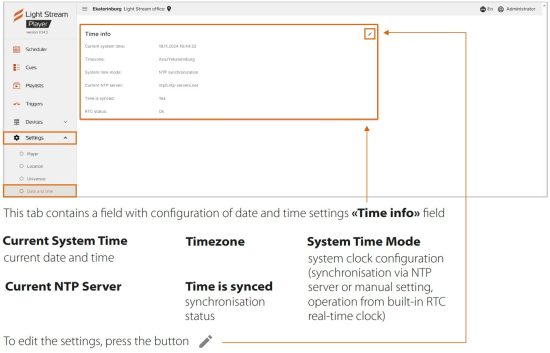

Caution: These settings may affect the operation of the Scheduler operating mode.
Adding Art-Net devices and universes
Further work will require adding devices and universes
Go to Settings->Universes and Devices


Add devices and universes in two ways:
Method 1: Manually using the Add buttons.
Click Add ArtNet device
In the Add Devices window, fill in:
- Name – name of the device;
- Network Mode -unicast (preferred);
- IP address – network address of the device;
- Port – by default 6454;
- Description – description, e.g. scene number.
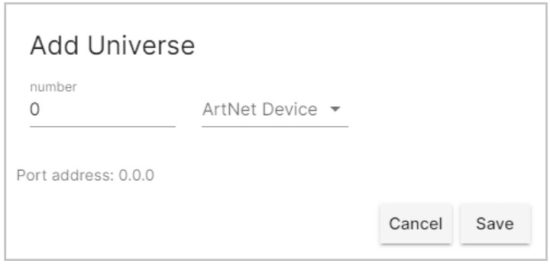
To add universes clickAdd Universe and in the opened window fill in:
- Number – number of the universe (numbering is end-to-end according to ArtNet v.4 protocol), additionally the number of the universe according to ArtNet v.3 protocol (Net.Subnet.Universe) is shown;
- ArtNet Device – select the previously added device.
Method 2: Automatically by importing from Light Stream software.
Go to Light Stream, then: Fixtures->select Light Stream Player-> enter Username and Password->click Send button.

After that, refresh the page web-browser page of Light Stream Player.
ArtNet devices and universes added.
Creating and loading animations
You will need ready-made animations to download, and you can learn how to create them on our YouTube channel (https://www.youtube.com/@lightstreampro/featured) and, in particular, in the video (Quick Start in the Light Stream programme) at the link: https://www.youtube.com/watch?v=7yMR__kkpFY&ab_channel=LightStream
Export finished animations from the Light Stream programme
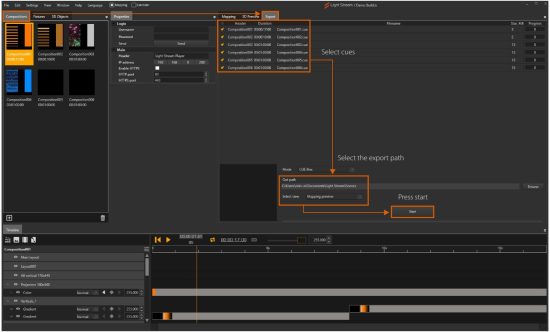
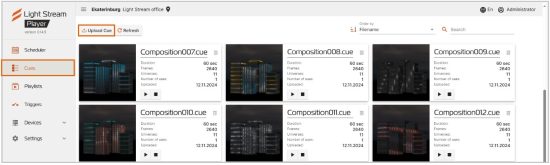
Then go to the web-interface of Light Stream Player and download ready animations
Cues tab-> Upload Cue button
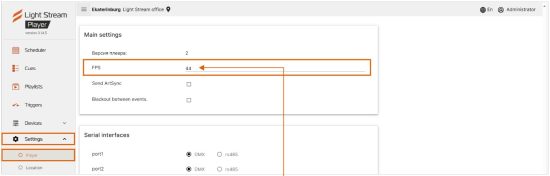
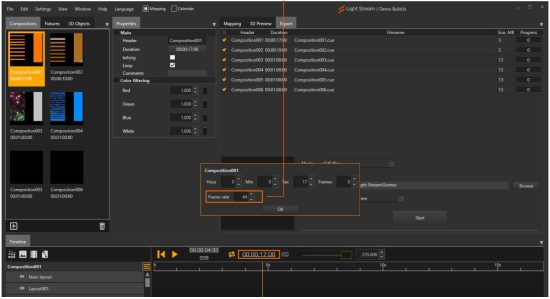
 Synchronise the frame rate of animations in the settings Light Stream and Light Stream Player software.
Go to Settings->Player tab, and in the FPS line.set the value equal to the Frame rate parameter (the window pops up when you press the left key during animation in Light Stream software).
The animations have been uploaded
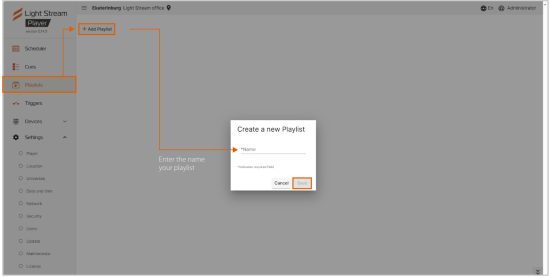
Creating a Playlist
Go to the “Playlists” tab and click “Add Playlist”.
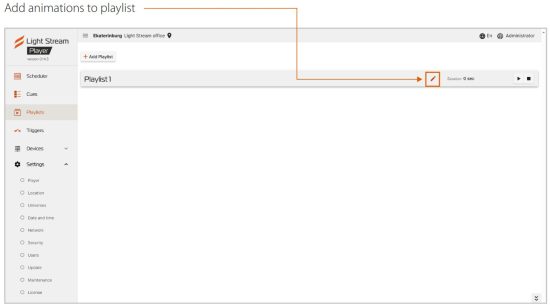
Click Add cue.
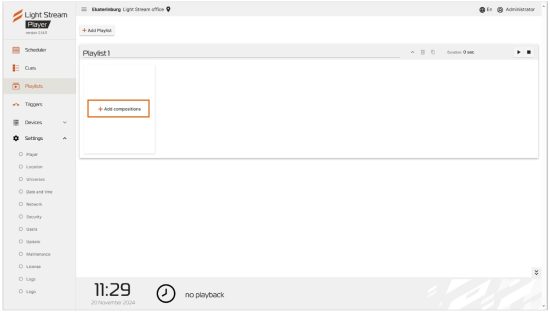
Select the desired animations and click Add.

Playlist creation is complete
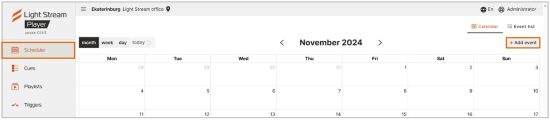
Creating events and scenario
To create an Event, go to the tab Scheduler->Event list->Add event

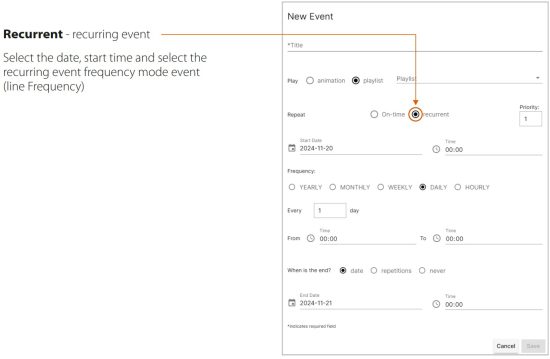
Read more about Recurrent mode.
There are several modes for selecting Frequency:
Hourly mode.
The time interval is set on a minute-by-minute basis: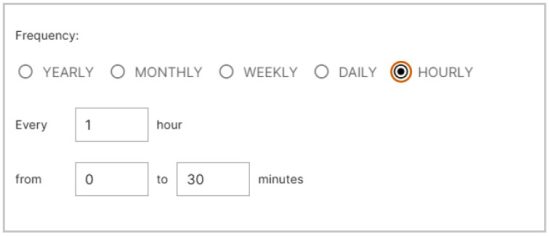 Daily mode.
You can set the operating time and frequency in days:  Weekly mode.
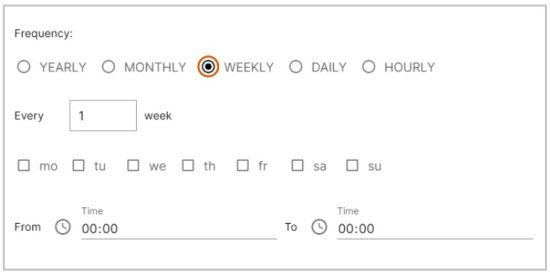
You can set the days of the week and time, on which the created event will be triggered:
 Monthly mode – selection of event operation on a certain day of the month:
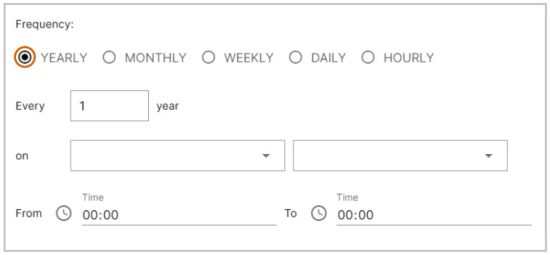
 Yearly mode – selection of a specific day of the year for the event operation:
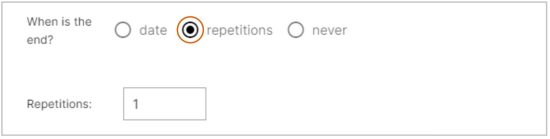
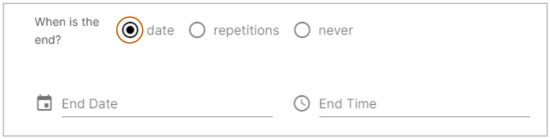
 For each of the Frequency modes, you can set the “When is the end?” option, meaning when the event should end.
Never
 Selecting the number of repetitions.
 А specific end date.
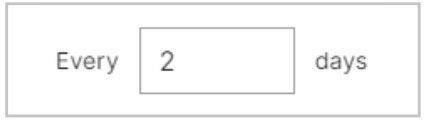
 The Every days option means the repetition interval in days. If you set it to 2, then accordingly the event will be repeated every second day.
 When the event configuration is complete, the Save button should be pressed.
Creating a backup
To save a backup copy settings or to transfer settings from one Player to another use the Backup function.
In the web-interface of Light Stream Player go to the tab Settings->Maintenance.

Congratulations!
The basic settings are done!
![]() www.lightstream.pro
www.lightstream.pro
Quick start guide
Updated: November 2024
Documents / Resources
 |
Light Stream Player V2 Creating Running and Customising Light Scenarios [pdf] User Guide Player V2 Creating Running and Customising Light Scenarios, Player V2, Creating Running and Customising Light Scenarios, Customising Light Scenarios, Light Scenarios |