WUNDA 4期热源连接和控制设置
介绍
第一阶段:
- Heat source connection & control setup – Professional installation guide Before proceeding to phase 4, ensure that phase 3 has been fully completed.
第四阶段专业版 – 热源连接和控制设置
- 确保由合格的专业人员执行以下步骤。请确保前几个阶段的所有必要步骤均已完成。
安装
步骤 1
- 连接前检查清单
- 在将分集水器连接到热源之前,请对地暖系统、管道和分集水器进行压力测试。排除所有造成压力损失的源头。

步骤 2
- 将歧管连接到热源
- Each manifold(s) must have independent feed(s) from the heat source.
- It is recommended for an s-plan/s-plan + to be configured so each system sharing the heat source has its own 2 port motorised valve. Allowing separation of the systems and each to have its own call to the heat source.
To connect to isolation valves on either side of the mixing valve, use a 1” male iron to 15mm, 22mm, or 28mm compression fitting.
- 2–4 port manifolds: 15mm feeds
- 4–8 port: 22mm feeds
- 8–12 port: 28mm feeds
在引入热水之前,请确保歧管混合阀完全关闭。

步骤 3
- 排出系统中的空气
- 当歧管连接到热源,且供水已注满后,确保地暖回路保持隔离。检查流量计和回流阀是否已关闭(顺时针旋转至最远)。

这将确保从进料到歧管的任何空气都可以通过手动排气口排出,而不会让任何空气进入 UFH 回路。

步骤 4
- 向系统中添加抑制剂
- 像任何中央供暖系统一样,向系统中注入合适的抑制剂。在任何合适的加水点加入抑制剂。计算水量:
- 16mm pipe: Total loop length × 0.113 = litres
- 12mm pipe: Total loop length × 0.061 = litres
- Use loop lengths from the pipe layout drawing.

For the HubSwitch guide please see:
https://www.wundagroup.com/wp-content/uploads/2025/03/HubSwitch-manual_v2.pdf
步骤 5
Wiring and control
- 以下说明适用于 Wunda 智能控制器。如果您使用的是 Wunda 的标准控制器,请遵循相关的说明书。如果您使用的是第三方控制器,请务必遵循其指南。
Single-zone manifolds using Wunda smart controls
- For single-zone manifolds (all loops run together), electronic actuators and a connection box are not needed.
- Open all manual return valves by hand (anticlockwise).

Use a HubSwitch channel (230V) to trigger:
- Brown wire of manifold zone valve Live wire of the manifold pump
- 为泵的零线和地线进行适当的连接。其余的区域阀电缆将返回到热源旁边的S型接线盒,灰色和橙色用于触发热源。
- HubSwitch 需要使用 DIP 开关和跳线连接配置为合适的通道模式。请根据 HubSwitch 的触发功能,按照其说明进行相应的配置。
使用 Wunda 智能控制器对多区域歧管进行布线和控制
- 多区域歧管接线盒的接线。当不同区域需要供暖时,电子执行器用于允许回路彼此独立流动。这些执行器连接到接线盒,并在应用程序中进行配置。如果安装多个多区域歧管,则每个歧管都需要一个接线盒,每个集线器最多可连接 4 个接线盒。
- 安装注意事项:请勿将连接盒安装在歧管下方,以免造成水损坏。

取下所有手动回流阀盖,并将电动执行器安装到位。请保留手动阀盖,以备将来需要重新充气或清除回路中的空气时使用。
接线说明:
- 将执行器的火线和零线分别连接到接线盒上相应的执行器L和N端子。按顺序依次为1-12(取决于歧管尺寸)。
- 在配置房间时,稍后将在应用程序中配置区域,以确定每个房间需要加热时触发哪个执行器。
- 将歧管泵的火线、零线和地线连接至连接盒中的标记端子。

- The brown of the zone valve for the floor heating manifold should go into the normally open (NO) terminal on the connection box with a link made between the AC out 230V L to COM.
- Optional: Use a 230V HubSwitch channel to trigger the manifold zone valve.
- If triggering the heat source directly (not part of an s-plan) the relay can be used, either volt free with no link or 230V with a link made to COM.
- The HubSwitch can also be used, refer to its instruction to configure for one channel 230V or volt free mode.
步骤 6
通过应用程序进行系统配对和配置
- Testing before pairing:
- 接线盒:
- To test outputs on the connection box, hold the test button for 5 seconds to enter test mode (Test LED will flash blue)
- Tap the test button to cycle outputs to the right, through each actuator an LED will illuminate to show which output is being tested.
- Tap the test button to cycle to the left to test the relay and manifold pump.
- When you have confirmed the wiring is correct exit test mode by holding the test button.

HubSwitch:
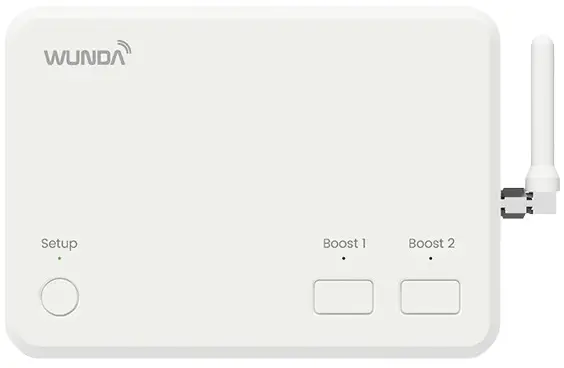
- To test outputs on the HubSwitch hold boost 1 & 2 buttons together for 5 seconds,
- Tapping boost 1 will allow you to cycle through each channel the LED flashes to show which channel is being tested (depending on how the Hub is configured).
- Tapping boost 2 will toggle that channel on/off showing a green LED when on, or a red LED when off.
- Hold both boost 1 & 2 to come out of test mode.

应用程序设置过程:
- 请确保您的路由器正在广播 2.4GHz WiFi。您可能需要在路由器或宽带提供商处采取一些步骤来确保这一点。这对于任何智能控制都是必要的。
- Download WundaHome app, create an account, and select:
- Add System > Add HubSwitch
- 按照应用程序中的说明设置 HubSwitch,将其连接到互联网并与您的帐户配对(可以在调试后使用转移代码进行转移)。
- 按照应用程序中的说明将连接盒与系统配对,如果多个连接盒根据其控制的歧管命名,则为每个连接盒提供适当的名称。
- 在应用程序中创建并命名房间。
- 按照应用程序上的说明,将恒温器与每个房间配对。
- 进入房间设置>高级参数>连接盒配置:
- 突出显示该房间的执行器。如果使用连接盒继电器触发区域阀门/热源,则突出显示“继电器”。
- 如果不使用连接盒继电器来触发区域阀/热源,请在“HubSwitch 通道配置”中选择适当的通道。
- 重复此操作为每个房间配置适当的输出。
步骤 7
- 初始系统启动和流量设置
- Manually set the flow rates for each loop. Set the mixing valve to minimum to start, open it up to achieve a higher flow temperature, indicated on the top temperature gauge.
- 打开流量计(如果是单区域歧管,则打开手动回流阀盖)。
- 通过选择高于当前房间温度的温度,呼叫应用程序上所有地暖房间供暖。
- 2-5 分钟内,执行器应触发,歧管泵和热源触发器应触发。
- 需要在流量计上调整流速。
- 按照管道布局图上的表格设置流量。这些可能需要略微调整,如果流量设置正确,则进水温度计和回水温度计之间的温差应为 7°C。(5-10°C 是可接受的)。

- 回路中的流速越快,差异就越小,流速越慢,差异就越大。
- 如果难以达到正确的流量,请检查泵是否处于适合地暖的正确模式。回路中可能仍有空气,请重复填充过程,以确保回路中没有空气造成阻力,从而降低流量。
- 这些说明仅适用于 Wunda 系统 - 将其与任何其他系统一起使用可能会导致严重的性能问题、系统故障或保修失效。
保修单
- 这些说明仅适用于 Wunda 系统 - 将其与任何其他系统一起使用可能会导致严重的性能问题、系统故障或保修失效。
- www.wundagroup.com 01291 634 149
常见问题
问:我可以将这些说明用于 Wunda 以外的系统吗?
A: No, these instructions are strictly for use with Wunda systems only. Using them with any other system may result in serious performance issues, system failure, or invalidation of your warranty.
文件/资源
 |
WUNDA 4期热源连接和控制设置 [pdf] 安装指南 阶段 4 热源连接和控制设置、热源连接和控制设置、连接和控制设置 |

