CASIO
Module No. 5423
EQW-T620 User's Guide
Important Information
Care Instructions:
- Avoid exposing the watch to extreme temperatures.
- Wear the watch carefully and avoid dropping it.
- Do not overtighten the strap; a finger should fit between your wrist and the strap.
- Clean the watch and strap with a dry, soft cloth, or a soft cloth dampened with a mild neutral detergent solution. Never use volatile agents like gasoline, solvents, or spray cleaners.
- Store the watch in a dry place when not in use.
- Avoid contact with gasoline, cleaning solvents, spray aerosols, adhesives, paint, etc., as these can damage gaskets, the case, and the watch's finish.
- Be cautious when cleaning straps with silk-screened designs to avoid damaging the graphics.
Water Resistance:
- Never press buttons underwater.
- Never move the hands underwater.
- Never unscrew the crown underwater.
- If the watch is exposed to salt water, rinse it thoroughly and dry it.
- Avoid wearing a watch with a leather strap while swimming and avoid prolonged contact of leather straps with water.
Plastic Straps:
- A white powdery substance may appear on plastic straps; this is harmless and can be removed by wiping with a cloth.
- Sweat or moisture on a plastic strap, or storage in high humidity, can damage or crack the strap. Wipe straps clean of dirt and moisture promptly with a soft cloth to ensure longevity.
Fluorescent Cases and Straps:
- Prolonged exposure to direct sunlight can cause fluorescent colors to fade gradually.
- Prolonged contact with moisture can also cause fluorescent colors to fade. Wipe off any moisture as soon as possible.
- Prolonged contact with other damp surfaces can cause discoloration. Ensure fluorescent surfaces are dry and avoid contact with other surfaces.
- Friction on fluorescent surfaces can transfer the color to other surfaces.
Condensation:
- Slight condensation may form on the inside of the glass due to significant temperature changes. This is a normal physical phenomenon and not a defect.
Disclaimer:
- CASIO COMPUTER CO., LTD. is not responsible for any damage incurred during the use of this watch, nor does it accept claims from third parties.
Congratulations on your purchase of a CASIO watch!
Note: This watch does not have a time zone differing from UTC by -3.5 hours for Newfoundland (Canada).
Water Resistance Ratings:
| Rating | Case Marking | Splashes, Rain, Washing | Swimming, Snorkeling | Diving with Scuba Gear |
|---|---|---|---|---|
| I | No Mark | No | No | No |
| II | WATER RESISTANT | Yes | No | No |
| III | 50M WATER RESISTANT | Yes | Yes | No |
| IV | 100M WATER RESISTANT | Yes | Yes | Yes |
| V | 200M WATER RESISTISTANT | Yes | Yes | Yes |
| V | 300M WATER RESISTANT | Yes | Yes | Yes |
Notes on Water Resistance:
- 1: Watch is not water resistant. Avoid all contact with water.
- 2: WR (Water Resistant) according to ISO 2281. Brief contact with water is acceptable.
- 3: 5 Bar (50 meters) water resistance withstands the specified water pressure, suitable for showering and brief swimming.
- 4: 10 Bar (100 meters) water resistance is suitable for regular swimming and snorkeling.
- 5: 20 Bar (200 meters) water resistance is suitable for scuba diving (excluding depths requiring helium-oxygen mixtures).
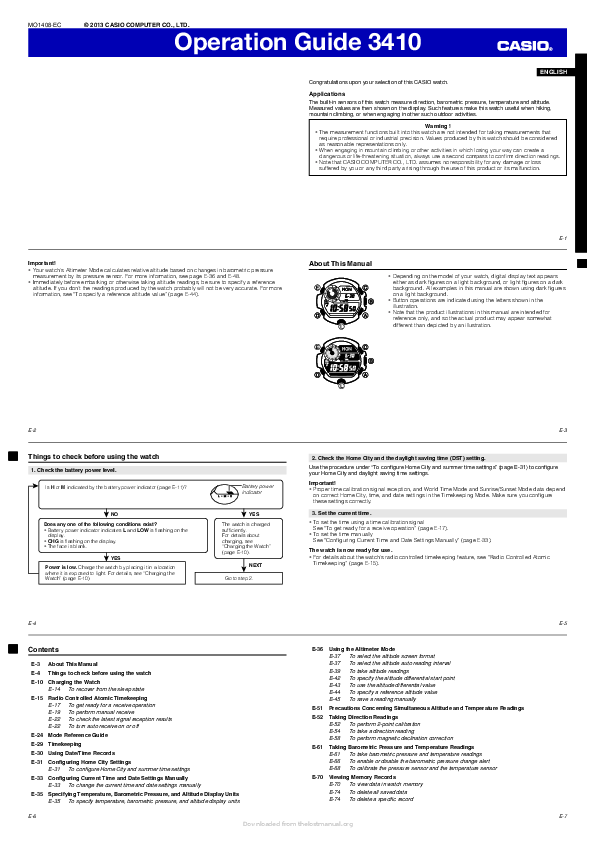
About This User's Guide
Operations are performed using four buttons labeled A, B, C, and D in this manual.
Hands and Indicators:
- [1] Hour Hand
- [2] Second Hand
- [3] Minute Hand
- [4] 24-Hour Hand: Indicates the current hour in 24-hour format.
- [5] Left Dial Hands: Indicate the world time in 24-hour format according to the selected mode.
- [6] Right Dial Hand: Indicates the current day of the week or the selected mode.
- [7] Date
Before You Begin
Follow these steps before using the watch:
- Check Battery Level: Press and hold [Button C] for about 2 seconds to enter the Current Time mode. Observe the movement of the [Second Hand] [2].
- If the [Second Hand] [2] moves smoothly at 1-second intervals: The battery is sufficiently charged. Proceed to the next step.
- If the [Second Hand] [2] moves at 2-second intervals or stops: The battery charge is low. Place the watch in a light source for charging. Refer to the "Charging the Watch" section.
- Check Home City Code and DST Settings: Refer to the "Setting Home City Code" section for details. Ensure correct settings for accurate World Time display.
- Set Current Time:
- Set current time by receiving a radio calibration signal. Refer to "Receiving Radio Calibration Signal".
- Set current time manually. Refer to "Setting Current Time and Date Manually".
After completing the above steps, the watch is ready for use.
Battery Charge Level
You can check the battery charge level by observing the movement of the [Second Hand] [2]:
| Second Hand Movement | Charge Level | Functions |
|---|---|---|
| Smoothly at 1-second intervals | 1 | All watch functions operate. |
| At 2-second intervals | 2 | Radio calibration does not operate. Charge the battery as soon as possible by placing the watch in a well-lit area. |
| Stopped; [Date Indicator] [7] shows "1"; [Hour Hand] [1], [Minute Hand] [3], and [24-Hour Hand] [4] are at the 12 o'clock position. | 3 | All functions are off. The watch continues internal timekeeping for approximately one week. If charged within this period, the hands will automatically move to display the current time. If not charged within a week, all settings will be lost, and the watch will return to factory default settings after charging. |
Charging the Watch
The watch is powered by a light-sensitive panel and a rechargeable battery charged by solar cells. When the watch is not exposed to light, the battery charge level will decrease. Try to expose the watch to a light source as often as possible.
- When not in use, leave the watch in a location accessible to light.
- Charging is faster when the watch is placed in the brightest possible light.
- Remember that charging efficiency decreases when any part of the solar panel is covered by clothing.
- Try to keep the watch exposed to light for as long as possible without covering it. Charging time increases significantly if the watch face is partially covered.
Battery Charging Time:
| Light Intensity | Daily Charging Time* | Recharge Time** | |
|---|---|---|---|
| Level 3 to Level 2 | Level 2 to Level 1 | ||
| Direct Sunlight (50,000 lx) | 8 min. | 2 hours | 24 hours |
| Sunlight Through Window (10,000 lx) | 30 min. | 6 hours | 89 hours |
| Daylight Through Window (Cloudy, 5,000 lx) | 48 min. | 9 hours | 144 hours |
| Fluorescent Lighting (500 lx) | 8 hours | 97 hours | - |
* Time for daily charging to ensure normal operation.
** Time required to fully recharge the battery.
The times above are approximate and depend on lighting conditions.
Caution: The watch surface may become hot if left in bright light for charging. Handle with care to avoid burns. The watch surface can also get very hot:
- On a car dashboard parked in the sun.
- Near an incandescent lamp.
- Under direct sunlight.
Power Saving Mode
The watch automatically enters power saving mode (if enabled) when left stationary for extended periods. There are two levels of power saving:
- Power Saving (Second Hand): The [Second Hand] [2] stops at the 12 o'clock position after 60-70 minutes of inactivity.
- Full Power Saving: All functions, including the time display, are turned off after 6-7 days of inactivity. Internal timekeeping continues.
The watch does not enter power saving mode between 6:00 AM and 9:59 PM. If the watch is already in power saving mode at 6:00 AM, it will remain in that mode.
The watch will not enter power saving mode if it is in Stopwatch mode.
Exiting Power Saving Mode: Place the watch in a well-lit area or press any button.
Radio Controlled Timekeeping
This watch receives radio calibration signals to adjust the current time. If automatic reception fails, you can set the time manually.
This section provides information for city codes that support radio signal reception. Refer to the table for supported city codes.
City Codes and Reception Stations:
| Home City Code | City | UTC Offset | Reception Station |
|---|---|---|---|
| LON, PAR, ATH | London, Paris, Athens | 0, +1, +2 | Germany (Mainflingen), England (Anthorn) |
| HKG | Hong Kong | +8 | China (Shangqiu) |
| TYO | Tokyo | +9 | Japan (Fukushima, Fukuoka/Saga) |
| NYC, CHI, DEN, LAX, ANC, HNL | New York, Chicago, Denver, Los Angeles, Anchorage, Honolulu | -5, -6, -7, -8, -9, -10 | USA (Fort Collins, Colorado) |
Notes on Reception:
- Some areas for HNL (Honolulu) and ANC (Anchorage) are far from signal stations, potentially causing poor reception.
- For HNL (Honolulu) or HKG (Hong Kong) city codes, only current time and date are adjusted by radio calibration. DST must be set manually.
- Reception is generally better at night than during the day.
- Reception takes 2 to 14 minutes. Avoid operating or moving the watch during this period.
- Reception may be difficult or absent in areas like: high-rise buildings, vehicles, near household appliances/office equipment, mobile phones, mountains, construction sites, airports, or high-voltage power lines.
Reception Range: (Diagrams described textually)
- Signals from England and Germany: Anthorn (500 km), Mainflingen (1500 km).
- Signal from USA: Fort Collins (1000 km / 600 miles).
- Signal from China: Shangqiu (1500 km).
- Signals from Japan: Fukushima or Fukuoka/Saga (500 km).
- Reception may not be possible beyond these distances, or due to seasonal/daily factors, or radio interference.
Receiving the Signal:
- Ensure the watch is in Current Time mode.
- Position the watch towards a window as shown in the diagram (12 o'clock position towards the window). Ensure no metal objects are nearby.
- Receive the signal automatically or manually.
Automatic Signal Reception: The watch attempts reception up to 6 times daily (5 times in China) between 00:00 and 5:00 AM. If successful, no further attempts are made that day. This occurs only in Current Time mode. If settings are being changed, automatic reception is skipped.
Manual Signal Reception: Press and hold [Button A] for about 2 seconds. The [Second Hand] [2] will indicate the result of the last reception (Y/N) and then the R (READY) indicator.
- R (READY): Watch is ready to receive a signal.
- W (WORK): Watch is receiving a signal.
- Y (YES): Signal received successfully.
- N (NO): Signal not received.
After reception, the [Second Hand] [2] will indicate Y or N for 5 seconds. The watch will auto-adjust time if the signal was received. If you manually changed time/date after the last successful reception, the [Second Hand] [2] may indicate 'N'.
Radio Calibration Precautions:
- Strong electrostatic discharge can cause incorrect time settings.
- Minor deviations (±1 second) may occur even after successful reception.
- The auto calendar is valid from 2000 to 2099. It will stop working on January 1, 2100.
- If you are in a region where signal reception is impossible, the watch operates with its specified accuracy.
- Radio calibration will not occur if the battery charge level is 2 or lower, or if the watch is in power saving mode.
Modes
The watch has three main modes. Select the mode based on your intended action.
Returning to Current Time Mode: Press and hold [Button C] for about 2 seconds from any other mode.
Selecting a Mode: Use [Button C] to cycle through modes in the sequence shown. The [Right Dial Hand] [6] indicates the selected mode.
Current Time Mode: View current time and date. The [Right Dial Hand] [6] points to the day of the week indicator (SU, M, T, W, T, F, S).
Stopwatch Mode: Measure elapsed time and split times.
- [2] Second Hand: Indicates elapsed seconds.
- [5] Left Dial Hands: Indicate elapsed hours and minutes.
- [6] Right Dial Hand: Indicates 1/20-second elapsed time.
Measuring Elapsed Time: Press [Button B] to start, press [Button B] again to stop. Press [Button D] to reset.
Measuring Split Times: Press [Button B] to start, press [Button D] for split time, press [Button B] to stop, press [Button D] to reset.
Note: Maximum measurement is 23 hours, 59 minutes, 59.95 seconds. The [Button D] has no function when hands are moving to reset or display split times. The stopwatch continues even if the mode is changed or until the maximum time is reached. The [Right Dial Hand] [6] shows 1/20-second for the first 30 seconds, then stops at the 12 o'clock position (0). The internal 1/20-second count continues.
World Time Mode: Displays current time for one of 29 city codes (time zones). The city code set in World Time mode is called the World Time City Code.
Viewing World Time for a City Code:
- In World Time mode, use [Button C] to move the [Right Dial Hand] [6] to the STD or DST indicator. The [Second Hand] [2] will indicate the currently set World Time City Code.
- Use [Button D] to move the [Second Hand] [2] to the desired World Time City Code. The [Left Dial Hands] [5] will display the current time for that city. The [Hour Hand] [1] and [Minute Hand] [3] will show the current time of your Home City.
If the time for a selected World Time City appears incorrect, check the Home City time settings.
Setting DST for a World Time City:
- In World Time mode, use [Button D] to select the city for which you want to change the DST setting. The [Left Dial Hands] [5] will move to display the current time for that city. Wait for the hands to stop moving.
- Press and hold [Button A] for about 2 seconds. The [Right Dial Hand] [6] will move to indicate STD (Standard Time) or DST (Daylight Saving Time). DST cannot be changed for the UTC city code.
Quickly Swapping Home City and World Time City: This function is useful when traveling and frequently changing time zones.
- Example: Home City is Tokyo (TYO), World Time City is New York (NYC). After the swap, New York (NYC) becomes the Home City, and Tokyo (TYO) becomes the World Time City.
- 1. In World Time mode, use [Button D] to select the city that will become the new Home City (e.g., NYC). Wait for the [Left Dial Hands] [5] to stop moving.
- 2. Press and hold [Button B] for about 3 seconds. The selected city (NYC) becomes the Home City, and the previous Home City (TYO) becomes the World Time City. The watch remains in World Time mode. The [Second Hand] [2] will indicate the new World Time City Code (TYO). The [Left Dial Hands] [5] will display the current time for the new World Time City.
Note: If the new Home City supports radio signal reception, it will be automatically enabled.
Setting the Watch
You can manually set the current time and date if radio calibration is not possible.
Setting Home City Code:
- In Current Time mode, press and hold [Button A] for about 5 seconds. The [Second Hand] [2] will indicate the last reception result (Y/N), then R (READY), then the current Home City Code.
- Use [Button D] to cycle through city codes. Hold [Button D] to advance rapidly. Wait for the hands to stop moving.
- Press [Button B] to set Standard Time (STD) or Daylight Saving Time (DST) for the selected city. The [Right Dial Hand] [6] indicates the current STD/DST setting. DST cannot be changed for the UTC city code.
- Press [Button A] to return to Current Time mode.
Setting DST: Follow the steps in "Setting Home City Code" and use [Button B] to toggle between STD and DST.
Setting Current Time Manually:
- In Current Time mode, press and hold [Button A] for about 5 seconds. The [Second Hand] [2] will indicate the last reception result (Y/N), then R (READY), then the current Home City Code. The [Right Dial Hand] [6] will indicate the current STD/DST setting.
- Press [Button C]. The [Second Hand] [2] and [Right Dial Hand] [6] will move to the 12 o'clock position. The watch enters time setting mode.
- Use [Button D] (+) and [Button B] (-) to set the hours and minutes. Hold the buttons to advance rapidly. The [24-Hour Hand] [4] moves synchronously with the [Hour Hand] [1]. Pay attention to the AM/PM indication on the [24-Hour Hand] [4].
- Press [Button C] to move to the date setting.
- Use [Button D] to set the month.
- Press [Button C] to move to the year setting.
- Use [Button D] and [Button B] to set the year (tens and units).
- Press [Button C] to move to the day setting.
- Use [Button D] (+) and [Button B] (-) to set the day.
- Press [Button A] to return to Current Time mode. The [Second Hand] [2] will resume from the 12 o'clock position. The [Right Dial Hand] [6] will indicate the day of the week, which is automatically calculated after setting the date.
Setting Current Date Manually:
- In Current Time mode, press and hold [Button A] for about 5 seconds. The [Second Hand] [2] will indicate the last reception result (Y/N), then R (READY), then the current Home City Code.
- Press [Button C] twice. The [Second Hand] [2] will move to the year setting (tens digit). The watch enters year setting mode.
- Use [Button D] and [Button B] to set the year.
- Press [Button C] to move to month setting.
- Use [Button D] to set the month.
- Press [Button C] to move to day setting.
- Use [Button D] (+) and [Button B] (-) to set the day.
- Press [Button A] to return to Current Time mode.
Note: If no operation is performed for 2-3 minutes, the watch will automatically exit setting mode.
Analog Time Adjustment
Strong magnetic fields or shocks can cause incorrect time and/or date display, even after radio calibration. Perform manual adjustment if this occurs. Do not adjust if the time and date are correct.
Automatic Analog Time Adjustment:
- This function automatically adjusts the home position of the watch hands.
- It occurs automatically every hour, between 55 minutes of the previous hour and 5 minutes of the next hour.
- It can also be triggered manually.
- The adjustment takes approximately 3.5 minutes. If the time displayed by the hands differs from the current time by an hour or more, perform manual adjustment.
Manually Starting Automatic Analog Time Adjustment:
- In Current Time mode, press and hold [Button D] for about 6 seconds until the [Second Hand] [2] completes one full rotation.
- The [Second Hand] [2] will pause briefly before completing the rotation. Do not release [Button D] until the rotation is complete.
- Pressing [Button D] again will stop the adjustment and return the watch to Current Time mode.
- If [Button D] is released during the pause, the hands may move to manual adjustment positions. Press [Button A] to return to Current Time mode and retry.
Manual Analog Time Adjustment:
- Press and hold [Button C] for about 2 seconds until the [Second Hand] [2] stops and then moves. The watch enters adjustment mode.
- Press and hold [Button D] for about 3 seconds. The [Second Hand] [2] will start moving. Release [Button D] when the [Second Hand] [2] stops.
- Adjust the [Second Hand] [2] to the 12 o'clock position using [Button D].
- Press [Button C] to move to the next setting: [Hour Hand] [1] and [Minute Hand] [3].
- Adjust the [Hour Hand] [1] and [Minute Hand] [3] to the 12 o'clock position using [Button D] (+) and [Button B] (-). The [24-Hour Hand] [4] moves synchronously with the [Hour Hand] [1].
- Press [Button C] to move to the [Left Dial Hands] [5] adjustment. Move them to the 24-hour position using [Button D] (+) and [Button B] (-).
- Press [Button C] to move to the [Right Dial Hand] [6] adjustment. Move it to the 0 position using [Button D] (+) and [Button B] (-).
- Press [Button C] to move to the [Date Indicator] [7] adjustment. Set it to "1" using [Button D] (+) or [Button B] (-).
- Press [Button A] to return to Current Time mode. The [Date Indicator] [7] will show the current date, and the hands will display the current time. Wait for the hands to stop moving before performing any other actions.
Troubleshooting
Hand Position and Movement:
- Cannot determine current mode: Refer to "Selecting Modes". Press and hold [Button C] for 2 seconds to return to Current Time mode.
- [Second Hand] [2] indicates "N" for last reception result: Possible causes include moving the watch or performing settings during reception, or poor reception conditions. Ensure the watch is in a suitable location for reception and do not move it during reception. Check the "Approximate Reception Range".
- [Second Hand] [2] moves at 2-second intervals; all hands at 12 o'clock; buttons do not work: Battery charge is low. Place the watch in a light source to charge the battery until the [Second Hand] [2] moves smoothly at 1-second intervals.
- Watch hands move rapidly when no operations are performed: This may be due to the watch exiting power saving mode or time correction after successful radio reception. This is not a malfunction.
- Incorrect hour display: Check the Home City Code setting. Change it if necessary.
- Current time is off by 1 hour: If radio calibration signal was not received on the day DST should have changed, manual DST setting may be required. Refer to "Setting DST".
- Time/date incorrect after radio calibration: Check and adjust Home City Code and DST settings if necessary.
- Watch shows incorrect time and/or date: The watch may have been exposed to strong magnetic fields or shocks. Perform the analog time adjustment procedure.
Radio Signal Reception:
- Automatic radio calibration reception is impossible, or manual reception fails: Possible causes include: the watch is in Stopwatch mode (return to Current Time mode), the Home City Code does not support reception (check and change code), or the battery charge is low (charge the battery).
Charging:
- Watch does not resume operation after being placed in a light source: This can happen when the battery charge level drops to Level 3. Continue exposing the watch to light until the [Second Hand] [2] resumes smooth 1-second movement.
- [Second Hand] [2] initially moved at 1-second intervals, then started moving at 2-second intervals: The battery is not yet fully charged. Continue charging the battery by exposing the watch to light.
World Time:
- [Left Dial Hands] [5] in World Time mode are off by 1 hour: Incorrect Standard Time (STD) / Daylight Saving Time (DST) setting for the selected World Time City Code, or incorrect Home City time setting. Check and adjust the STD/DST setting for the World Time City Code and the Home City time.
- Incorrect display on [Left Dial Hands] [5] in World Time mode: Incorrect time setting for the Home City Code. Adjust the Home City Code time.
Radio calibration successful, but date/time set incorrectly:
- Possible causes: Incorrect Home City Code setting; watch exposed to magnetic field or shock.
- Solutions: Check and correct the Home City Code; perform analog time adjustment.
Technical Specifications
- Accuracy: ±15 seconds per month (without radio calibration).
- Current Time: Hour, minute (moves every 10 sec), second, 24-hour display, date, day of week.
- Calendar System: Fully automatic calendar programmed from 2000 to 2099.
- Other: Home City Code setting (29 codes + UTC); DST.
- Radio Calibration Reception: Automatic reception 6 times daily (5 times in China); manual reception.
- Reception Stations: Mainflingen, Germany (DCF77, 77.5 kHz); Anthorn, England (MSF, 60.0 kHz); Fort Collins, Colorado, USA (WWVB, 60.0 kHz); Fukushima, Japan (JJY, 40.0 kHz); Fukuoka/Saga, Japan (JJY, 60.0 kHz); Shangqiu, Henan, China (BPC, 68.5 kHz).
- Stopwatch: Measurement limits: 23:59'59.95''. Measurement unit: 1/20 second. Measurement modes: elapsed time, split time.
- World Time: 29 city codes (29 time zones) and UTC.
- Other: DST, quick Home/World Time city swap, power saving mode, low battery alert, automatic analog time adjustment.
- Power: Light-sensitive panel and one rechargeable battery.
- Approximate Battery Life: 5 months (without charging from solar battery, with 1 radio reception per day (approx. 4 minutes)).
City Code Table
Data as of December 2013. World time rules and DST adjustments vary by country.
| City Code | City | UTC Offset | City Code | City | UTC Offset |
|---|---|---|---|---|---|
| PPG/PAGO PAGO | Pago Pago | -11 | LAX/LOS ANGELES | Los Angeles | -8 |
| HNL/HONOLULU | Honolulu | -10 | DEN/DENVER | Denver | -7 |
| ANC/ANCHORAGE | Anchorage | -9 | CHI/CHICAGO | Chicago | -6 |
| NYC/NEW YORK | New York | -5 | SCL/SANTIAGO | Santiago | -4 |
| RIO/RIO DE JANEIRO | Rio de Janeiro | -3 | THR/TEHRAN | Tehran | +3.5 |
| FEN/F.DE NORONHA | Fernando de Noronha | -2 | DXB/DUBAI | Dubai | +4 |
| RAI/PRAIA | Praia | -1 | KBL/KABUL | Kabul | +4.5 |
| UTC | UTC | 0 | KHI/KARACHI | Karachi | +5 |
| LON/LONDON | London | 0 | DEL/DELHI | Delhi | +5.5 |
| PAR/PARIS | Paris | +1 | DAC/DHAKA | Dhaka | +6 |
| ATH/ATHENS | Athens | +2 | RGN/YANGON | Yangon | +6.5 |
| JED/JEDDAH | Jeddah | +3 | BKK/BANGKOK | Bangkok | +7 |
| TYO/TOKYO | Tokyo | +9 | HKG/HONG KONG | Hong Kong | +8 |
| ADL/ADELAIDE | Adelaide | +9.5 | SYD/SYDNEY | Sydney | +10 |
| NOU/NOUMEA | Noumea | +11 | WLG/WELLINGTON | Wellington | +12 |
Note on Russia: As of June 2011, Russia abolished DST. Federal Law enacted July 21, 2014, established 11 time zones effective October 26, 2014, with most shifted back by one hour. Consider this information when setting your watch.
Product Information
Product Name: Wristwatch (Electronic / Electro-mechanical Quartz, Men's/Women's)
Brand: CASIO
Manufacturer: CASIO COMPUTER Co., Ltd.
Manufacturer Address: 1-6-2, Hon-machi 1-chome, Shibuya-ku, Tokyo 151-8543, Japan
Importer: LLC "Casio", 127015, Russia, Moscow, Butyrskaya St., Bldg. 77
Warranty Period: 1 year
Authorized Service Center Address for Claims: As specified in the warranty card.