1. Introduction
The Phanteks Glacier G40 ASUS GPU Block is a high-performance water-cooling solution specifically designed for ASUS ROG Strix and TUF Gaming RTX 4090 graphics cards. This water block provides superior thermal performance by directly cooling the GPU die, memory, and power delivery components, enabling stable operation and enhanced overclocking potential. This manual provides essential information for the proper installation, operation, and maintenance of your GPU water block.
Compatibility:
- ASUS ROG Strix GeForce RTX 4090 24GB
- ASUS ROG Strix GeForce RTX 4090 OC Edition 24GB
- ASUS TUF-RTX4090-O24G-GAMING
- ASUS TUF-RTX4090-24G-GAMING
2. Package Contents
Verify that all components are present before beginning installation. If any items are missing or damaged, please contact Phanteks support.
- Phanteks Glacier G40 ASUS GPU Block
- Integrated Backplate
- Thermal Pads (pre-cut for specific components)
- Thermal Paste
- Mounting Screws and Hardware
- D-RGB Cable
- GPU Support Bracket
- User Manual (this document)

Figure 2.1: Contents of the Phanteks Glacier G40 ASUS GPU Block package, including the water block, backplate, thermal materials, mounting hardware, and D-RGB cable.
3. Safety Precautions
Please read and understand these safety precautions before proceeding with installation. Improper installation can lead to component damage or personal injury.
- Static Electricity: Always ground yourself before handling electronic components to prevent electrostatic discharge (ESD) damage. Use an anti-static wrist strap if available.
- Power Disconnection: Ensure your computer system is completely powered off and unplugged from the wall outlet before starting any installation or maintenance.
- Coolant Handling: Use only approved PC liquid cooling coolants. Avoid contact with skin and eyes. In case of contact, rinse thoroughly with water.
- Tools: Use appropriate tools and avoid excessive force during installation.
- Leak Testing: A thorough leak test is mandatory before powering on your system after installing the water block.
4. Installation Guide
This section details the step-by-step process for installing the Phanteks Glacier G40 ASUS GPU Block onto your compatible graphics card.
4.1. Preparation
- Gather necessary tools: Phillips head screwdriver, anti-static mat/wrist strap, isopropyl alcohol (90% or higher), lint-free cloth.
- Ensure your liquid cooling loop is drained if you are replacing an existing water block.
- Place your graphics card on a clean, anti-static surface.
4.2. Removing the Stock Cooler
- Carefully remove all screws securing the stock cooler to the GPU PCB. Pay attention to different screw lengths and locations.
- Gently detach the stock cooler from the PCB. Disconnect any fan headers or RGB cables connected to the PCB.
- Remove the stock backplate if present.
4.3. Cleaning the GPU PCB
- Using isopropyl alcohol and a lint-free cloth, carefully clean all old thermal paste from the GPU die and thermal pads from the VRM and memory chips. Ensure the PCB is completely clean and dry.
4.4. Applying Thermal Pads
- Refer to the included thermal pad placement guide (usually a diagram in the physical manual or online).
- Carefully peel off the protective film from both sides of the thermal pads.
- Apply the thermal pads to the designated memory chips and VRM components on the GPU PCB. Ensure full coverage and proper alignment.
4.5. Applying Thermal Paste
- Apply a small amount of the provided thermal paste to the center of the GPU die. A pea-sized or cross pattern is generally sufficient. Do not spread it manually.
4.6. Mounting the Water Block
- Carefully align the Glacier G40 water block with the GPU PCB, ensuring all mounting holes align and the GPU die makes contact with the copper cold plate.
- Gently lower the water block onto the PCB.
- Secure the water block using the provided mounting screws. Follow the recommended tightening pattern (e.g., diagonal) to ensure even pressure. Do not overtighten.
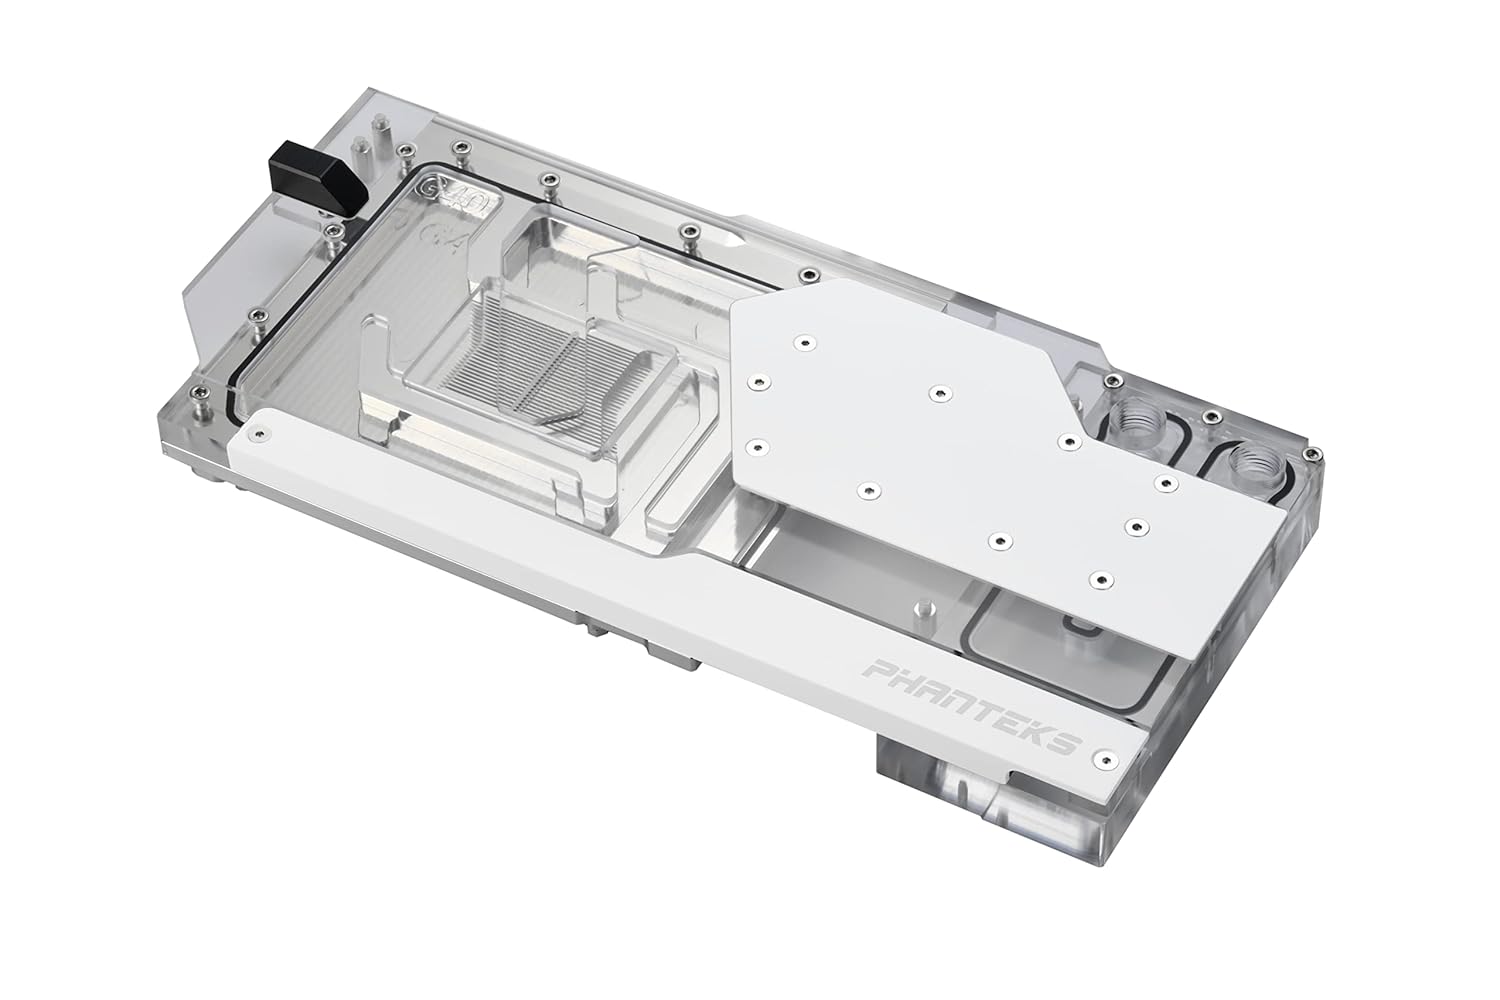
Figure 4.1: Top view of the Phanteks Glacier G40 ASUS GPU Block, showing the clear acrylic jetplate over the GPU die area and the overall design.
4.7. Installing the Backplate
- Align the integrated backplate with the rear of the GPU PCB and the water block.
- Secure the backplate using the designated screws. The backplate provides additional cooling and structural support.

Figure 4.2: Underside view of the Phanteks Glacier G40 ASUS GPU Block, illustrating the integrated backplate and its mounting points.
4.8. Connecting D-RGB Lighting
- Connect the included D-RGB cable from the water block to a compatible 3-pin 5V D-RGB header on your motherboard or a Phanteks D-RGB controller.
- Ensure correct polarity (+5V, Data, Ground) to prevent damage to the LEDs.

Figure 4.3: The Phanteks Glacier G40 ASUS GPU Block illuminated with Digital-RGB lighting, showcasing its aesthetic integration.
4.9. Installing Fittings and Leak Testing
- Install your chosen G1/4" fittings into the inlet and outlet ports of the water block. Ensure they are tightened securely but do not overtighten.
- Integrate the GPU water block into your custom liquid cooling loop.
- Perform a thorough leak test for at least 24 hours using a dedicated leak testing tool or by running the pump with only distilled water and no power to other components. Monitor for any signs of leaks before powering on your system.
5. Operating Instructions
Once the water block is successfully installed and leak-tested, you can power on your system.
- Initial Startup: After filling your loop and performing a leak test, power on your system. Monitor coolant levels and temperatures.
- Temperature Monitoring: Use monitoring software (e.g., HWMonitor, GPU-Z) to observe GPU core, memory, and VRM temperatures under load. Optimal temperatures will vary but should be significantly lower than with air cooling.
- D-RGB Control: If connected to a motherboard D-RGB header, use your motherboard's RGB software (e.g., ASUS Aura Sync) to customize lighting effects. If connected to a Phanteks controller, use its dedicated controls.
6. Maintenance
Regular maintenance ensures optimal performance and longevity of your liquid cooling system.
- Coolant Replacement: It is recommended to replace your coolant every 6-12 months, depending on the coolant type and system usage, to prevent buildup and maintain performance.
- System Cleaning: Periodically inspect your loop for any signs of particulate buildup or discoloration. If significant buildup occurs, the loop may need to be disassembled and cleaned.
- Water Block Cleaning: If necessary, the water block can be disassembled to clean the micro-fins. This should only be done by experienced users. Use a soft brush and distilled water. Avoid abrasive materials.
- O-Ring Inspection: During disassembly for cleaning, inspect all O-rings for signs of wear, cracking, or compression. Replace if necessary.
7. Troubleshooting
This section addresses common issues you might encounter.
- Leaks: If a leak is detected during leak testing, immediately power off the system (if running) and identify the source. Retighten fittings or replace O-rings as needed. Re-test thoroughly.
- High Temperatures:
- Ensure pump is running and coolant is flowing.
- Verify proper thermal paste application and water block mounting pressure.
- Check for air bubbles trapped in the water block. Tilt the system to dislodge them.
- Ensure radiators have adequate airflow and fans are operating correctly.
- D-RGB Not Working:
- Check D-RGB cable connection to the motherboard or controller.
- Ensure correct 3-pin 5V header is used (not 4-pin 12V RGB).
- Verify D-RGB software settings.
- No Display Output:
- Ensure the GPU is fully seated in the PCIe slot.
- Check all power connections to the GPU.
- Verify that the display cable is securely connected to the GPU and monitor.
8. Specifications
| Feature | Specification |
|---|---|
| Model Number | PH-GB4090AS_MW01_BP |
| Compatibility | ASUS ROG Strix / TUF Gaming RTX 4090 series |
| Water Block Materials | Copper Base (Nickel plated), Cast Acrylic Cover, Anodized Aluminum Covers, Brass Stop Fitting, Viton O-rings |
| Backplate Materials | Aluminum Covers, Mylar layer (0.25mm thickness) |
| RGB LED Type | Digital RGB LED strip hard board (+5V, Data, Empty, Ground) |
| LED Number | 15 pcs |
| Power Connector Type | 4-Pin (for D-RGB, typically connects to 3-pin 5V header) |
| Voltage | 5 Volts (for D-RGB) |
| Cooling Method | Water |
| Product Dimensions (LxWxH) | 11.02" x 5.17" x 1" (280 x 131.244 x 26 mm) |
| Water Block Weight | 2.86 lbs (1.3 kg) |
| Backplate Dimensions (LxWxH) | 9.78" x 5.17" x 0.04" (248.5 x 131.244 x 1 mm) |
| Backplate Weight | 0.18 lbs (82.1 g) |
| UPC | 886523002840 |
9. Warranty Information
Phanteks products are manufactured to the highest quality standards. For detailed warranty terms and conditions, please refer to the official Phanteks website or the warranty card included with your product. Keep your proof of purchase for warranty claims.
10. Support
For further assistance, technical support, or to inquire about replacement parts, please visit the official Phanteks website:
You can typically find FAQs, driver downloads, and contact information for customer service on their support pages.


