
1. Introduction
Thank you for choosing the AECOJOY 12' x 8' Hard Top Lean-to Gazebo. This manual provides essential information for the safe assembly, operation, maintenance, and troubleshooting of your new outdoor structure. Please read these instructions thoroughly before beginning assembly and retain them for future reference.
This gazebo is designed to provide a comfortable and protected outdoor living space, featuring a durable hard top roof, integrated curtains, and mosquito netting for comprehensive protection against sun, rain, and insects.
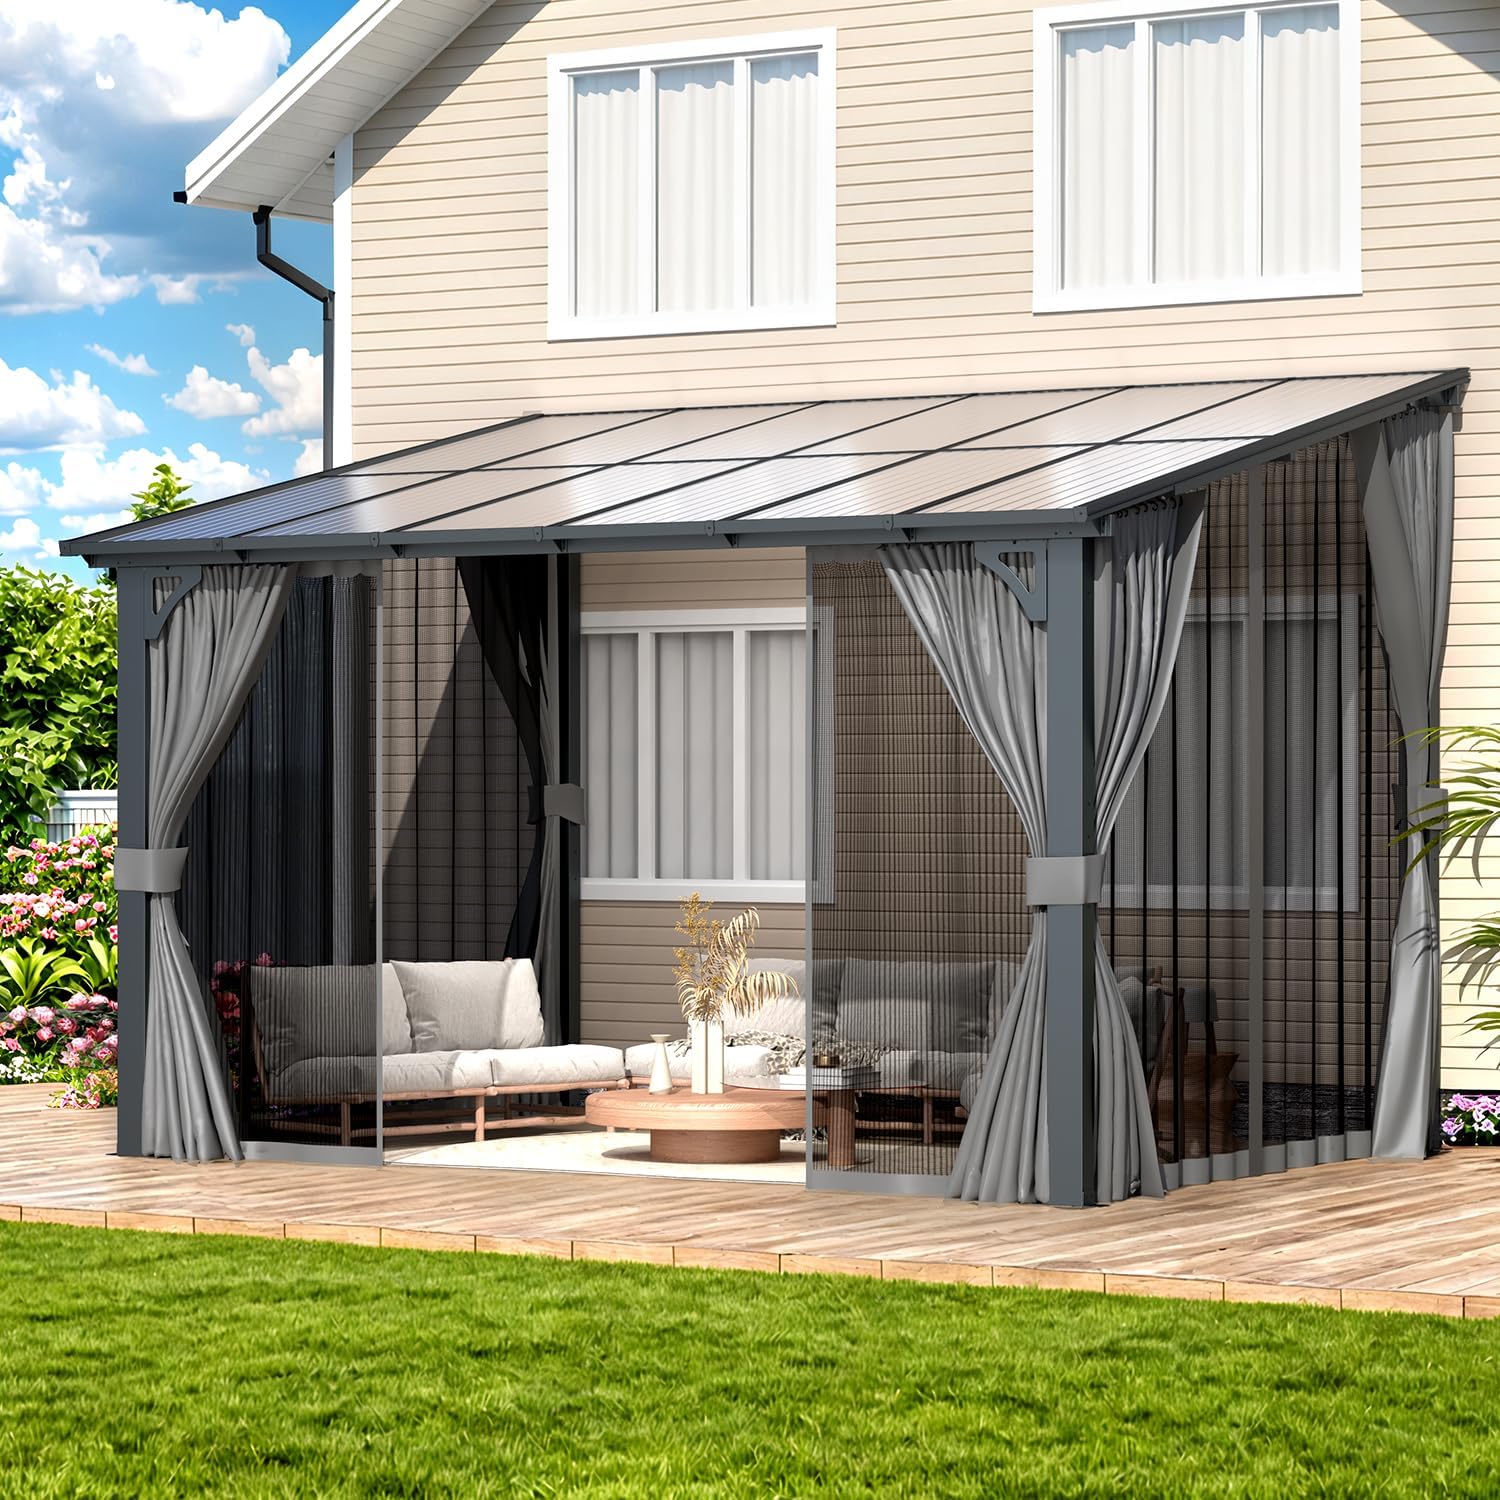
Figure 1.1: AECOJOY 12' x 8' Hard Top Lean-to Gazebo installed on a patio.
2. Safety Information
Your safety is paramount. Adhere to all safety warnings and instructions to prevent injury or damage to the product.
- Assembly Safety: Always assemble with at least two to three adults. Wear appropriate safety gear, including gloves and eye protection. Ensure the assembly area is clear of obstructions.
- Structural Stability: This gazebo is designed to be wall-mounted. It must be securely fixed to a stable wall and anchored to the ground as instructed. Failure to do so may result in structural instability, especially in windy conditions. The structure can confidently withstand winds of approximately 70 mph when properly secured.
- Snow Load Capacity: The hard top roof is engineered to handle snow loads up to 6 lbs/sq.ft, equivalent to about 7 inches of heavy snow. In areas with heavy snowfall, it is recommended to regularly clear snow from the roof to prevent excessive accumulation and potential damage.
- Weather Conditions: While designed for various weather conditions, extreme weather such as severe storms, hurricanes, or blizzards may exceed the gazebo's design limits. In such conditions, it is advisable to remove curtains and netting and take additional precautions to secure the structure.
- Fire Safety: Keep all heat sources, including barbecues, patio heaters, and open flames, away from the gazebo structure and fabric components.
- Children and Pets: Do not allow children or pets to play unsupervised around the gazebo during assembly or in adverse weather conditions.

Figure 2.1: Gazebo features for summer and winter conditions.
3. Components List
Before beginning assembly, unpack all components and verify against the parts list provided in your packaging. Ensure all parts are present and undamaged. If any parts are missing or damaged, contact customer support immediately.
Typical Components Include:
- Aluminum and Metal Frame Components (Legs, Beams, Connectors)
- Hard Top Sun Panels (Roof Panels)
- Curtains (Fabric Panels)
- Mosquito Netting (Mesh Panels)
- Hardware Kit (Bolts, Screws, Washers, Anchors, Wall Mounts)
- Curtain and Netting Rings/Hooks
- Assembly Tools (Basic wrenches, Allen keys - specialized tools may be required)
4. Setup and Installation
Follow these steps carefully for a successful and secure installation. Refer to the detailed diagrams in your included manual for visual guidance.
4.1 Tools Required (Not Included)
- Phillips Head Screwdriver
- Battery-powered Screw Driver / Hammer Drill (for concrete/deck anchoring)
- Tape Measure
- Magnetic Level
- Rubber Mallet (optional, for roof panel insertion)
- Safety Gloves and Eye Protection
4.2 Pre-Assembly Checklist
- Choose a level and stable location for your gazebo, preferably against a sturdy wall.
- Unpack all boxes and identify each component. Organize hardware by type.
- Ensure you have all necessary tools and at least two to three people for assembly.
4.3 Assembly Steps
- Assemble the Frame: Begin by connecting the main support beams and legs according to the numbered diagrams. Do not fully tighten bolts until the entire frame is assembled.
- Attach to Wall: Position the gazebo frame against the desired wall. Use the provided wall-mounting accessories to securely fasten the rear posts to the wall. Pre-drilling may be required depending on your wall material.
- Anchor to Ground: Secure the gazebo's base to the ground using the provided anchors. For concrete surfaces, you may need to purchase heavy-duty concrete screws (e.g., 4"-6" screws) and potentially brace the area underneath if installing on a deck. Ensure all four posts are firmly anchored.
- Install Roof Panels: Carefully slide the hard top sun panels into the designated roof channels. Ensure they are fully seated and snug. A rubber mallet with a wooden block may assist in gently tapping panels into place without damage.
- Install Curtains and Netting: Attach the curtains and mosquito netting to the designated tracks using the provided rings or hooks. The gazebo features 3-sided curtains and netting with smooth zippers for a complete seal.
- Final Tightening: Once the entire structure is assembled and aligned, go back and fully tighten all bolts and fasteners.

Figure 4.1: Detail of 3-sided curtains and mosquito netting with zippers.
5. Operating Instructions
Your AECOJOY gazebo is designed for ease of use and maximum comfort.
- Curtains: The fabric curtains can be drawn closed for privacy or shade, or tied back to the posts using the included straps. They provide protection against harmful UV rays and light rain.
- Mosquito Netting: The mesh netting can be zipped closed to create an enclosed space, protecting against insects while allowing airflow. When not in use, the netting can also be tied back.
- Roof Panels: The inclined design of the roof ensures efficient water runoff, providing a waterproof shelter.
6. Maintenance
Regular maintenance will extend the life and appearance of your gazebo.
- Cleaning Frame: Clean the metal and aluminum frame components with a mild soap and water solution. Rinse thoroughly with clean water and dry with a soft cloth. Avoid abrasive cleaners or harsh chemicals.
- Cleaning Roof Panels: The hard top sun panels can be cleaned with a soft cloth, mild soap, and water. Avoid scratching the surface.
- Cleaning Curtains and Netting: The fabric curtains and mosquito netting can be spot cleaned with mild soap and water. For deeper cleaning, follow care instructions on the fabric tags. Ensure they are completely dry before storing or closing for extended periods to prevent mildew.
- Seasonal Care: In winter, regularly remove heavy snow accumulation from the roof to prevent structural strain. During periods of high wind, it is advisable to tie back or remove the curtains and netting to reduce wind resistance. Periodically check all bolts and fasteners for tightness and re-tighten as needed.
7. Troubleshooting
Here are solutions to common issues you might encounter:
| Problem | Possible Cause | Solution |
|---|---|---|
| Water dripping from roof panels | Roof panels not fully seated or sealed; minor gaps at panel joints. | Ensure all roof panels are pushed completely into their channels. Apply a silicone sealant to any persistent small gaps at the panel joints if necessary. |
| Curtains or netting sticking/difficult to slide | Debris in tracks; misaligned rings/hooks; fabric snagging. | Clean the tracks thoroughly. Check that all rings/hooks are properly attached and not bent. Ensure fabric is not caught on any part of the frame. |
| Gazebo feels unstable or sways in wind | Not properly anchored to ground or wall; loose fasteners. | Verify that the gazebo is securely attached to the wall and all ground anchors are firmly in place. Re-tighten all bolts and fasteners on the frame. Consider additional heavy-duty anchoring if in a high-wind area. |
| Missing parts upon unboxing | Packaging error. | Immediately contact AECOJOY customer service with your product model number and a list of missing parts. |
8. Specifications
Key technical details for your AECOJOY Gazebo:

Figure 8.1: AECOJOY 12' x 8' Hardtop Gazebo Dimensions.
| Specification | Detail |
|---|---|
| Brand | AECOJOY |
| Model Number | 16407+16452 |
| Product Dimensions | 144"L x 96"W x 96"H (12'L x 8'W x 8'H) |
| Item Weight | 110 Pounds |
| Frame Material | Metal & Aluminum |
| Roof Material | Sun Panels (Hard Top) |
| Water Resistance Level | Waterproof |
| Shape | Rectangular |
| Assembly Required | Yes |
| Color | Dark |
| Snow Capacity | Up to 7 inches (6 lbs/sq.ft) |
| Wind Resistance | Approx. 70 mph (when properly secured) |
9. Warranty and Support
AECOJOY stands behind the quality of its products. We are committed to providing a worry-free experience for our customers.
- Customer Support: A professional technical team is available 24/7 to address any concerns related to installation, usage, maintenance, or missing parts.
- Maintenance and Replacements: We provide support for maintenance and replacements for the product itself. Please contact our customer service for assistance.
- Contact Information: Refer to the contact details provided in your product packaging or visit the official AECOJOY website for support.


