1. Introduction
The Thermaltake AX700 TG Super Tower chassis is engineered to support high-performance computing needs, including AI computing, content creation, and data storage. This chassis offers flexible hardware configurations, extensive cooling capabilities, and ample storage options. It is designed to accommodate various motherboard sizes and provides significant room for components and expansion.
2. Safety Information
- Always disconnect the power supply from the wall outlet before performing any installation or maintenance.
- Avoid exposing the chassis to water or excessive humidity.
- Handle tempered glass panels with care to prevent breakage.
- Ensure proper grounding to prevent electrical hazards.
- Keep small components and screws away from children.
3. Package Contents
Verify that all components listed below are present in your package:
- Thermaltake AX700 TG Super Tower Chassis
- Accessory Box (containing screws, cable ties, and other small parts)
- User Manual (this document)
- Additional fan/radiator brackets (if applicable)
4. Product Overview and Features

Figure 1: Front-left view of the Thermaltake AX700 TG Super Tower Chassis.
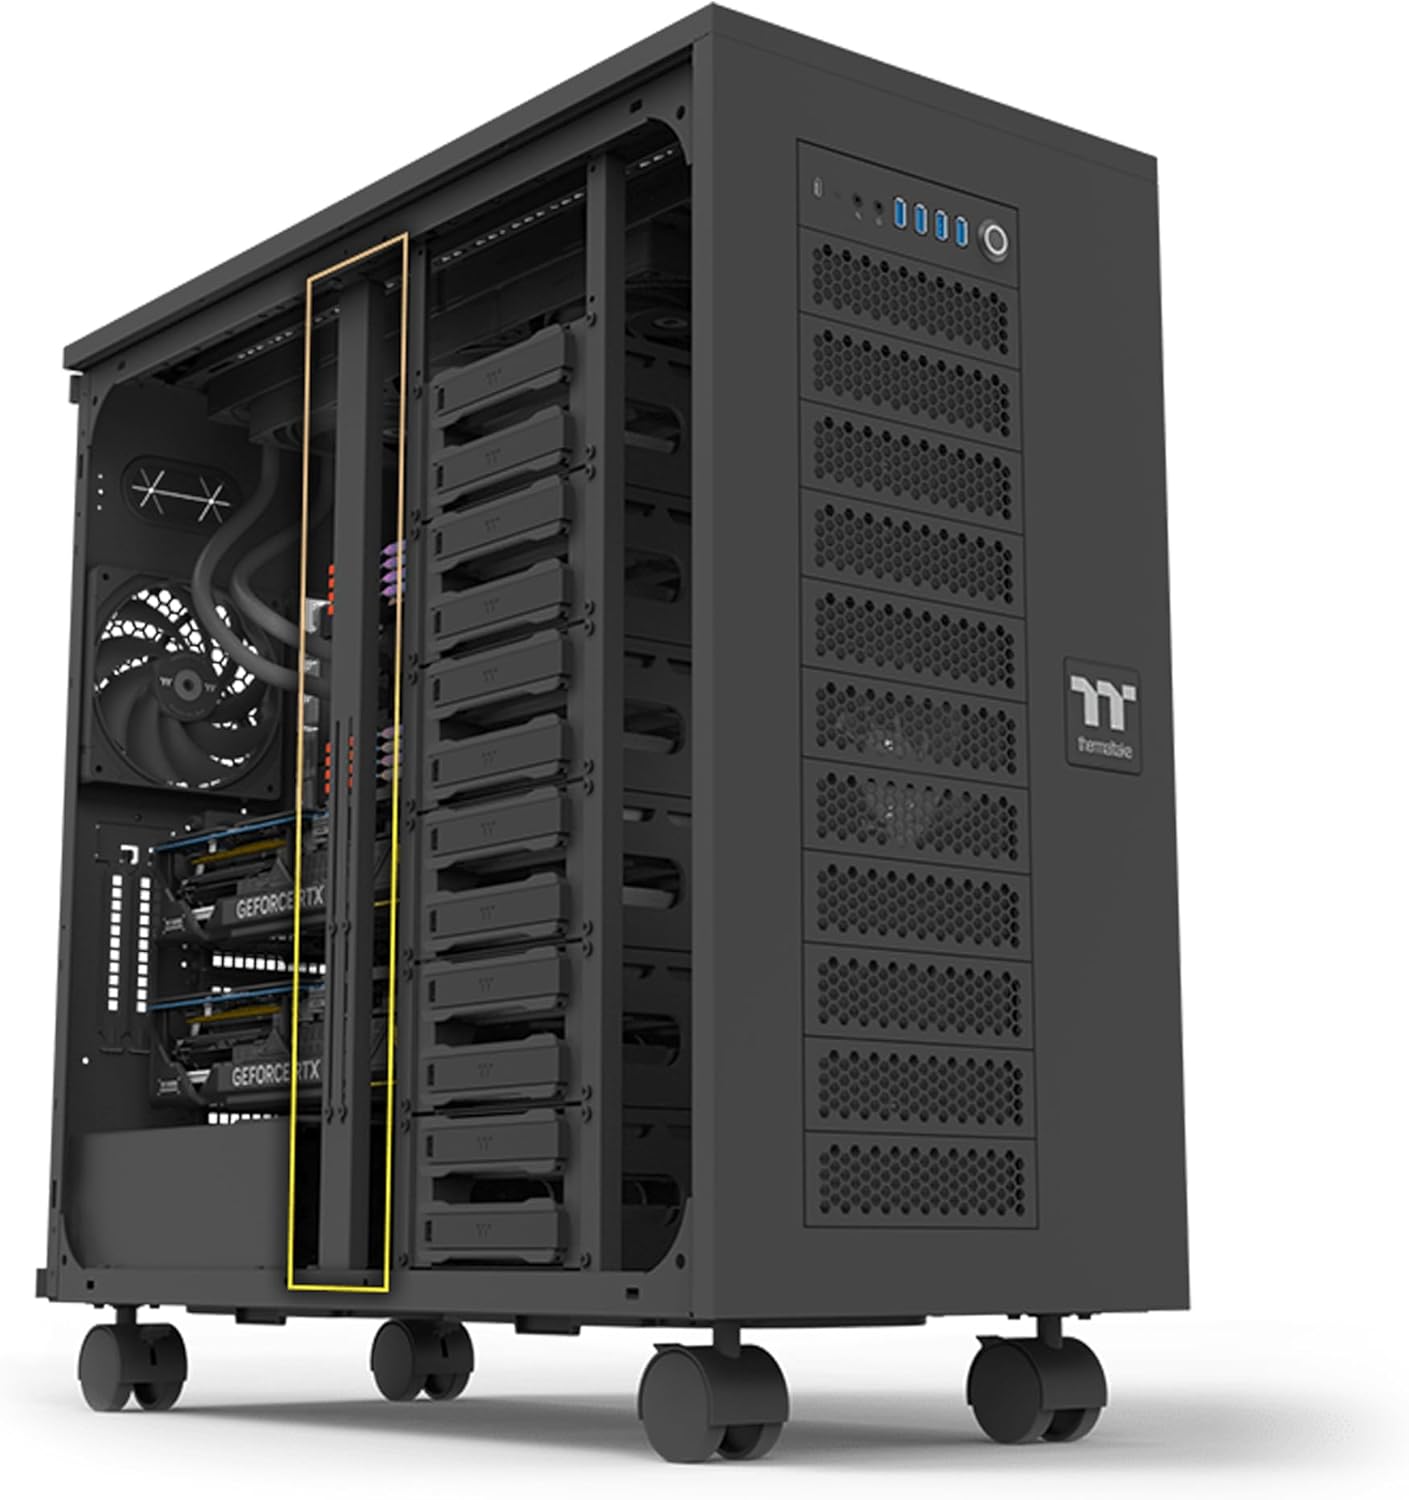
Figure 2: Interior view showcasing drive bays and component layout.

Figure 3: Front view highlighting the mesh panel design and I/O ports.

Figure 4: Interior view with drive cages removed, showing extensive space.

Figure 5: Top view of the chassis, showing ventilation and I/O panel.
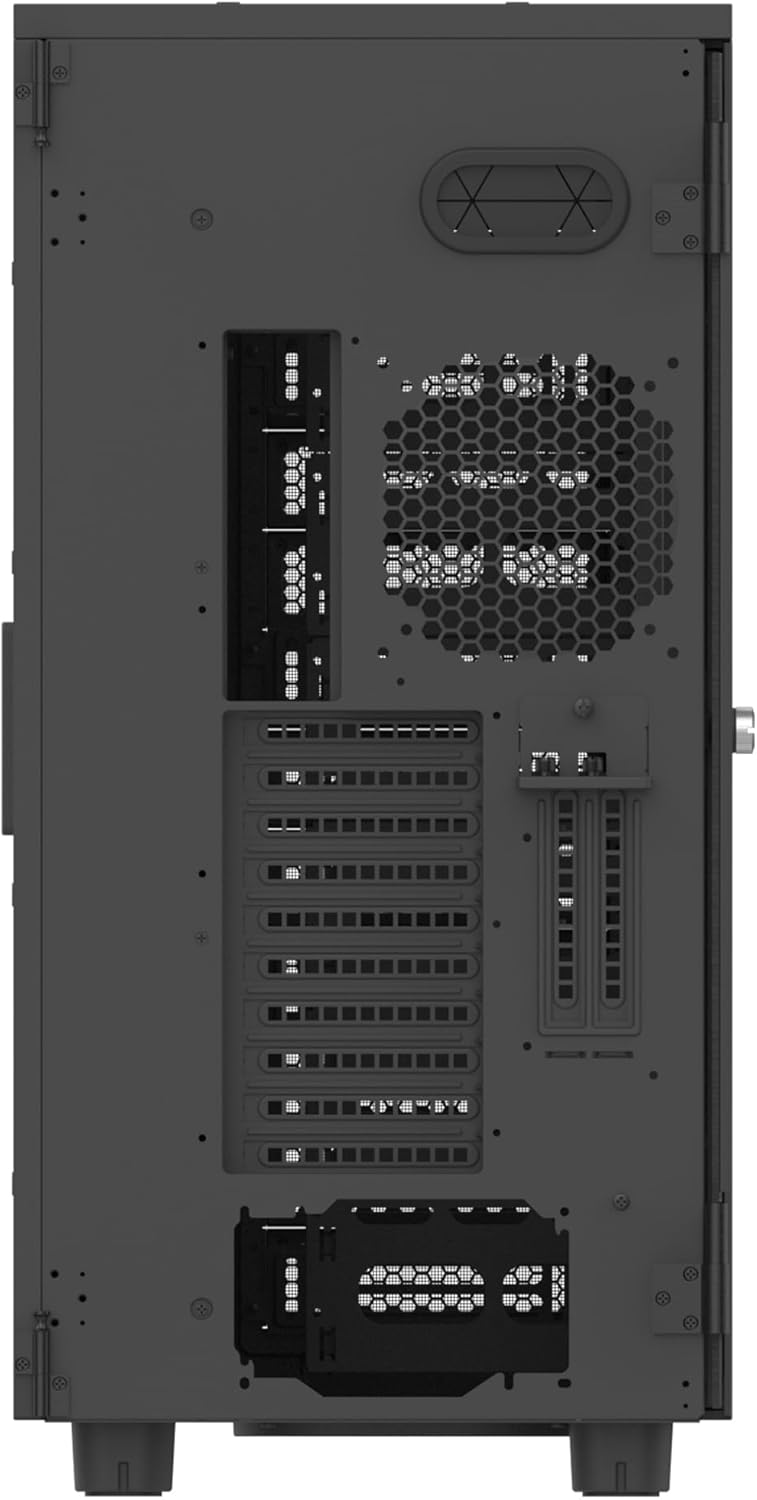
Figure 6: Rear view of the chassis, showing expansion slots and fan mount.
4.1. Key Features:
- Motherboard Compatibility: Supports SSI-CEB/SSI-EEB server boards, as well as XL-ATX/E-ATX/ATX/mATX/mITX consumer motherboards.
- Extensive Cooling Support: Accommodates up to 18x 140mm/120mm fans. Radiator support includes AIOs up to 420mm and DIY solutions up to 560mm. Air coolers up to 190mm.
- Multi-GPU Expandability: Features 8+2 PCIe expansion slots for multiple GPUs. Supports GPUs up to 360mm with HDD racks installed, or up to 630mm without HDD racks. Includes a GPU brace with 4 adjustable supports.
- Ample Storage: Up to 18 HDD trays for 3.5" or 2.5" drives. Twelve trays are located in the main chamber cages, with an additional 6 trays behind the motherboard tray.
- Stackable Expansion: Compatible with the optional AX100 Pedestal (sold separately) for increased storage, cooling, and power options, mountable on the bottom and/or top of the chassis.
- Side Panels: One tempered glass left side panel for component visibility and one perforated right side panel for enhanced airflow. Both feature a hinged design for easy access.
- Dust Protection: Features dust filters on the front, top, bottom, and motherboard sides to protect internal components.
- Front I/O Ports: Includes a power button with integrated power LED, HDD LED, 4x USB 3.0, 1x USB 3.2 Gen 2 Type-C, and HD Audio ports.
- Dismantlable Modular Design (DMD): Facilitates easy installation and maintenance by allowing various components to be removed.

Figure 7: Detailed view of the front I/O ports.

Figure 8: Exploded view illustrating the Dismantlable Modular Design.
5. Setup
5.1. Hard Drive Installation
The AX700 TG chassis offers extensive storage options with multiple HDD trays. Follow these steps to install your 3.5" or 2.5" drives:
- Locate the HDD cages within the main chamber or behind the motherboard tray.
- Slide your 3.5" or 2.5" drive into an available tray. Secure the drive to the tray using the provided screws from the accessory box.
- Slide the filled tray back into the HDD cage until it clicks into place.
- Connect SATA power and data cables to each installed drive. Ensure cables are routed neatly to maintain airflow.
Video 1: Hard Drive Cage Installation Guide. This video demonstrates the process of installing hard drives into a PC case, including securing drives in trays and connecting SATA cables. While the specific case may differ, the general installation principles apply.
5.2. Motherboard Installation
The AX700 TG supports a wide range of motherboard form factors. Ensure you have the correct standoffs installed for your motherboard size.
- Install the I/O shield that came with your motherboard into the rear I/O cutout of the chassis.
- Align your motherboard with the standoffs and gently place it into the chassis.
- Secure the motherboard using the appropriate screws from the accessory box.
5.3. Power Supply Unit (PSU) Installation
The chassis supports standard ATX PSUs. The PSU is typically mounted at the bottom rear of the case.
- Position the PSU into its designated bay at the bottom rear of the chassis.
- Secure the PSU to the chassis using the screws provided with your PSU or from the accessory box.
- Route the necessary power cables (24-pin ATX, CPU, PCIe, SATA) through the cable management cutouts to their respective components.
5.4. Graphics Card (GPU) Installation
The AX700 TG offers generous GPU clearance and includes a GPU brace for stability.
- Remove the necessary PCIe slot covers from the rear of the chassis.
- Align your GPU with the PCIe slot on the motherboard and firmly press it into place until it clicks.
- Secure the GPU to the chassis using the provided screws or tool-less mechanism.
- Connect any required PCIe power cables from the PSU to the GPU.
- Utilize the included adjustable GPU brace to provide additional support and prevent sag.
5.5. Cable Management
Effective cable management is crucial for optimal airflow and aesthetics. The AX700 TG provides various tie-down points and ample space behind the motherboard tray.
- Route cables through the rubber grommets and cutouts to the backside of the motherboard tray.
- Use the provided cable ties or Velcro straps to bundle and secure cables neatly.
- Ensure no cables obstruct fan blades or airflow paths.
6. Operating
6.1. Powering On/Off
Connect your PC to a power outlet and press the power button on the front I/O panel to turn on your system. To power off, use the operating system's shutdown function or press and hold the power button.
6.2. Front I/O Port Usage
The front I/O panel provides convenient access to various ports:
- USB Ports: Use the USB 3.0 and USB 3.2 Gen 2 Type-C ports for connecting peripherals and external storage devices.
- HD Audio: Connect your headphones or microphone to the dedicated audio jacks.
- HDD LED: Indicates hard drive activity.
7. Maintenance
7.1. Cleaning Dust Filters
Regular cleaning of the dust filters is essential to maintain optimal airflow and prevent dust buildup inside the chassis.
- Locate the dust filters on the front, top, and bottom of the chassis.
- Gently remove the filters. They are designed for easy removal.
- Clean the filters using compressed air, a soft brush, or by rinsing with water (ensure they are completely dry before reinstallation).
- Reinstall the clean filters back into their respective positions.
8. Troubleshooting
- System not powering on: Check all power connections, including the 24-pin ATX, CPU, and GPU power cables. Ensure the PSU switch is in the 'On' position.
- No display output: Verify that the monitor cable is connected to the graphics card (not the motherboard I/O unless using integrated graphics) and that the GPU is properly seated and powered.
- Overheating: Ensure all fans are spinning correctly and dust filters are clean. Check CPU and GPU temperatures using monitoring software.
- Unusual noises: Identify the source of the noise (e.g., fan, HDD). Check for loose components or cables.
9. Specifications
| Feature | Specification |
|---|---|
| Brand | Thermaltake |
| Series | AX700 TG Black |
| Model Number | CA-11B-00F1WN-00 |
| Case Type | Super Tower |
| Motherboard Compatibility | SSI-CEB, SSI-EEB, XL-ATX, E-ATX, ATX, Micro ATX, Mini ITX |
| Dimensions (L x W x H) | 645 x 324.6 x 685 mm (approx. 25.4 x 12.8 x 26.9 inches) |
| Item Weight | 57.4 pounds |
| Material | Stainless Steel, Tempered Glass, Plastic |
| CPU Cooler Clearance | Up to 190 mm |
| GPU Clearance | Up to 360 mm (with HDD rack), 630 mm (without HDD rack) |
| PSU Length Clearance | Up to 220 mm |
| Expansion Slots | 8 + 2 (Vertical) |
| Drive Bays | 18x 3.5" or 2.5" (12 in cages, 6 behind M/B tray) |
| I/O Ports | 1x USB Type-C, 4x USB 3.0, 1x HD Audio |
| Cooling Method | Fan |
10. Warranty and Support
For detailed warranty information and technical support, please refer to the official Thermaltake website or contact their customer service. Keep your proof of purchase for warranty claims.
Online Resources:
- Thermaltake Official Website: www.thermaltake.com
- Product Support Page: www.thermaltake.com/support


