1. Introduction
Thank you for choosing the Naifay Car Stereo Radio. This manual provides detailed instructions for the installation, operation, and maintenance of your new car stereo. This unit is designed to enhance your driving experience with features such as a 9-inch IPS touch screen, Wireless CarPlay, Android Auto, Bluetooth 5.1, GPS navigation, Wi-Fi connectivity, backup camera support, and steering wheel control compatibility.
Please read this manual thoroughly before installation and use to ensure proper function and to prevent damage.

Image 1.1: Front view of the Naifay 9-inch IPS Touch Screen Car Stereo unit.
2. Important Compatibility Notes
This Naifay car stereo is specifically designed for Nissan Altima models from 2013 to 2018. It includes all necessary cables for a direct replacement without cutting original vehicle wiring.
- Premium Sound Systems: This unit does not support vehicles equipped with premium sound systems such as J.B.L or B.O.S.E.
- Large Navigation Screens: If your vehicle has a factory-installed large navigation screen, this unit may not be compatible.
If you are unsure about compatibility, please consult a professional installer or contact Naifay customer support with your car's model, year, and a picture of your dashboard.

Image 2.1: Visual guide for Nissan Altima dashboard compatibility. Displays examples of compatible and incompatible factory radio setups.
3. Package Contents
Please verify that all items listed below are included in your package:
- Naifay Car Stereo Unit (9-inch)
- Backup Camera
- Can Bus Decoder
- Power Cable
- Mounting Bracket
- USB Cable (x2)
- Radio Adapter
- RCA Cable
- GPS Antenna
- Microphones
- User Manual (this document)

Image 3.1: Unit dimensions and a visual representation of all included accessories in the package.
4. Safety Information
Observe the following safety precautions during installation and operation:
- Professional Installation Recommended: Due to the complexity of car electrical systems, professional installation is highly recommended. Incorrect installation can damage the vehicle's electrical system or the stereo unit.
- Disconnect Battery: Always disconnect the vehicle's negative battery terminal before beginning any electrical work to prevent short circuits and damage.
- Wiring: Ensure all wiring connections are secure and properly insulated to prevent electrical shorts. Do not modify the wiring harness unless specifically instructed.
- Driving Safety: Do not operate the stereo's advanced features or watch videos while driving. Distracted driving can lead to accidents.
- Ventilation: Ensure the unit has adequate ventilation to prevent overheating.
5. Installation Guide
5.1 Pre-Installation Checks
- Verify vehicle compatibility (refer to Section 2).
- Ensure all package contents are present (refer to Section 3).
- Gather necessary tools (e.g., screwdrivers, wire strippers, electrical tape).
- Disconnect the vehicle's negative battery terminal.
5.2 Stereo Unit Installation
- Carefully remove the factory radio and trim panels from your Nissan Altima. Refer to your vehicle's service manual for specific instructions on panel removal.
- Connect the provided power cable and Can Bus decoder to the car stereo and the vehicle's wiring harness. Ensure all connections are firm.
- Connect the GPS antenna and route it to a location with a clear view of the sky (e.g., dashboard, A-pillar).
- Connect the external microphone for optimal call quality.
- Mount the new Naifay stereo unit into the dashboard opening using the provided mounting brackets.
5.3 Backup Camera Wiring
The backup camera provides a visual aid for reversing. Follow these steps for proper connection:
- Connect the camera's video output (yellow RCA connector) to the 'CVBS-IN-1' or 'Reverse Input' port on the car stereo.
- Connect the camera's power wire (red wire) to the vehicle's reversing lamp power supply. This ensures the camera activates when the vehicle is in reverse.
- Connect the camera's ground wire (black wire) to a suitable chassis ground point.
- Connect the 'Reverse Input' trigger wire (often pink or brown) from the stereo's wiring harness to the vehicle's reverse light signal wire. This tells the stereo to switch to the camera view.

Image 5.1: Detailed wiring diagram illustrating the connections for the backup camera to the Naifay car stereo.
5.4 Steering Wheel Control (SWC)
The unit supports the original car's steering wheel controls. Connect the two Key/SWC wires from the stereo's harness to the corresponding wires in your vehicle's wiring. Configuration may be required in the stereo's settings menu after installation.
5.5 Post-Installation
- Reconnect the vehicle's negative battery terminal.
- Turn on the vehicle and test the stereo's basic functions (power, audio, touch screen).
- Test the backup camera by shifting into reverse.
- Test steering wheel controls.
- If all functions are working, reassemble the trim panels.
6. Initial Setup
6.1 Power On/Off
The unit will power on automatically when the vehicle's ignition is turned on. To manually power off or restart, use the designated power button on the unit or within the software interface.
6.2 Wi-Fi Connection
To access online features, connect the stereo to a Wi-Fi network or your mobile hotspot:
- Go to 'Settings' on the main menu.
- Select 'Network & Internet' or 'Wi-Fi'.
- Turn on Wi-Fi and select your desired network from the list.
- Enter the password if prompted and connect.
6.3 Bluetooth Pairing
Pair your mobile phone via Bluetooth 5.1 for hands-free calls and audio streaming:
- On the stereo, go to 'Settings' and select 'Bluetooth'.
- Ensure Bluetooth is enabled and the unit is discoverable.
- On your mobile phone, search for available Bluetooth devices and select the Naifay stereo (e.g., 'Naifay Car Stereo').
- Confirm the pairing code on both devices if prompted.
6.4 GPS Navigation Setup
The unit comes with a GPS module and supports both online and offline navigation.
- Online Navigation: Requires a Wi-Fi connection. Use pre-installed apps like Google Maps or download others from the Play Store.
- Offline Maps: Download maps for your region in advance using a Wi-Fi connection. This allows navigation without an active internet connection.

Image 6.1: Display of GPS navigation features and the Wi-Fi connection interface.
7. Operating the Stereo
7.1 Touch Screen Interface
The 9-inch IPS touch screen provides a responsive and intuitive user experience. Navigate through menus, select applications, and control functions by tapping, swiping, and pinching (for zoom, where applicable).
7.2 Wireless CarPlay & Android Auto
Connect your smartphone wirelessly for seamless integration of Apple CarPlay or Android Auto:
- Ensure Bluetooth and Wi-Fi are enabled on both your phone and the car stereo.
- For CarPlay (iOS): Connect your iPhone via Bluetooth first, then confirm the CarPlay prompt.
- For Android Auto (Android): Connect your Android phone via Bluetooth first, then confirm the Android Auto prompt.
- Once connected, you can access phone calls, messages, navigation, and music apps directly from the stereo screen.
7.3 MirrorLink
MirrorLink allows you to project your phone's screen onto the car stereo display.
- iOS Devices: Supports wireless connection.
- Android Devices: Supports wireless or wired connection.
Access the MirrorLink application on the stereo and follow the on-screen instructions to connect your device.
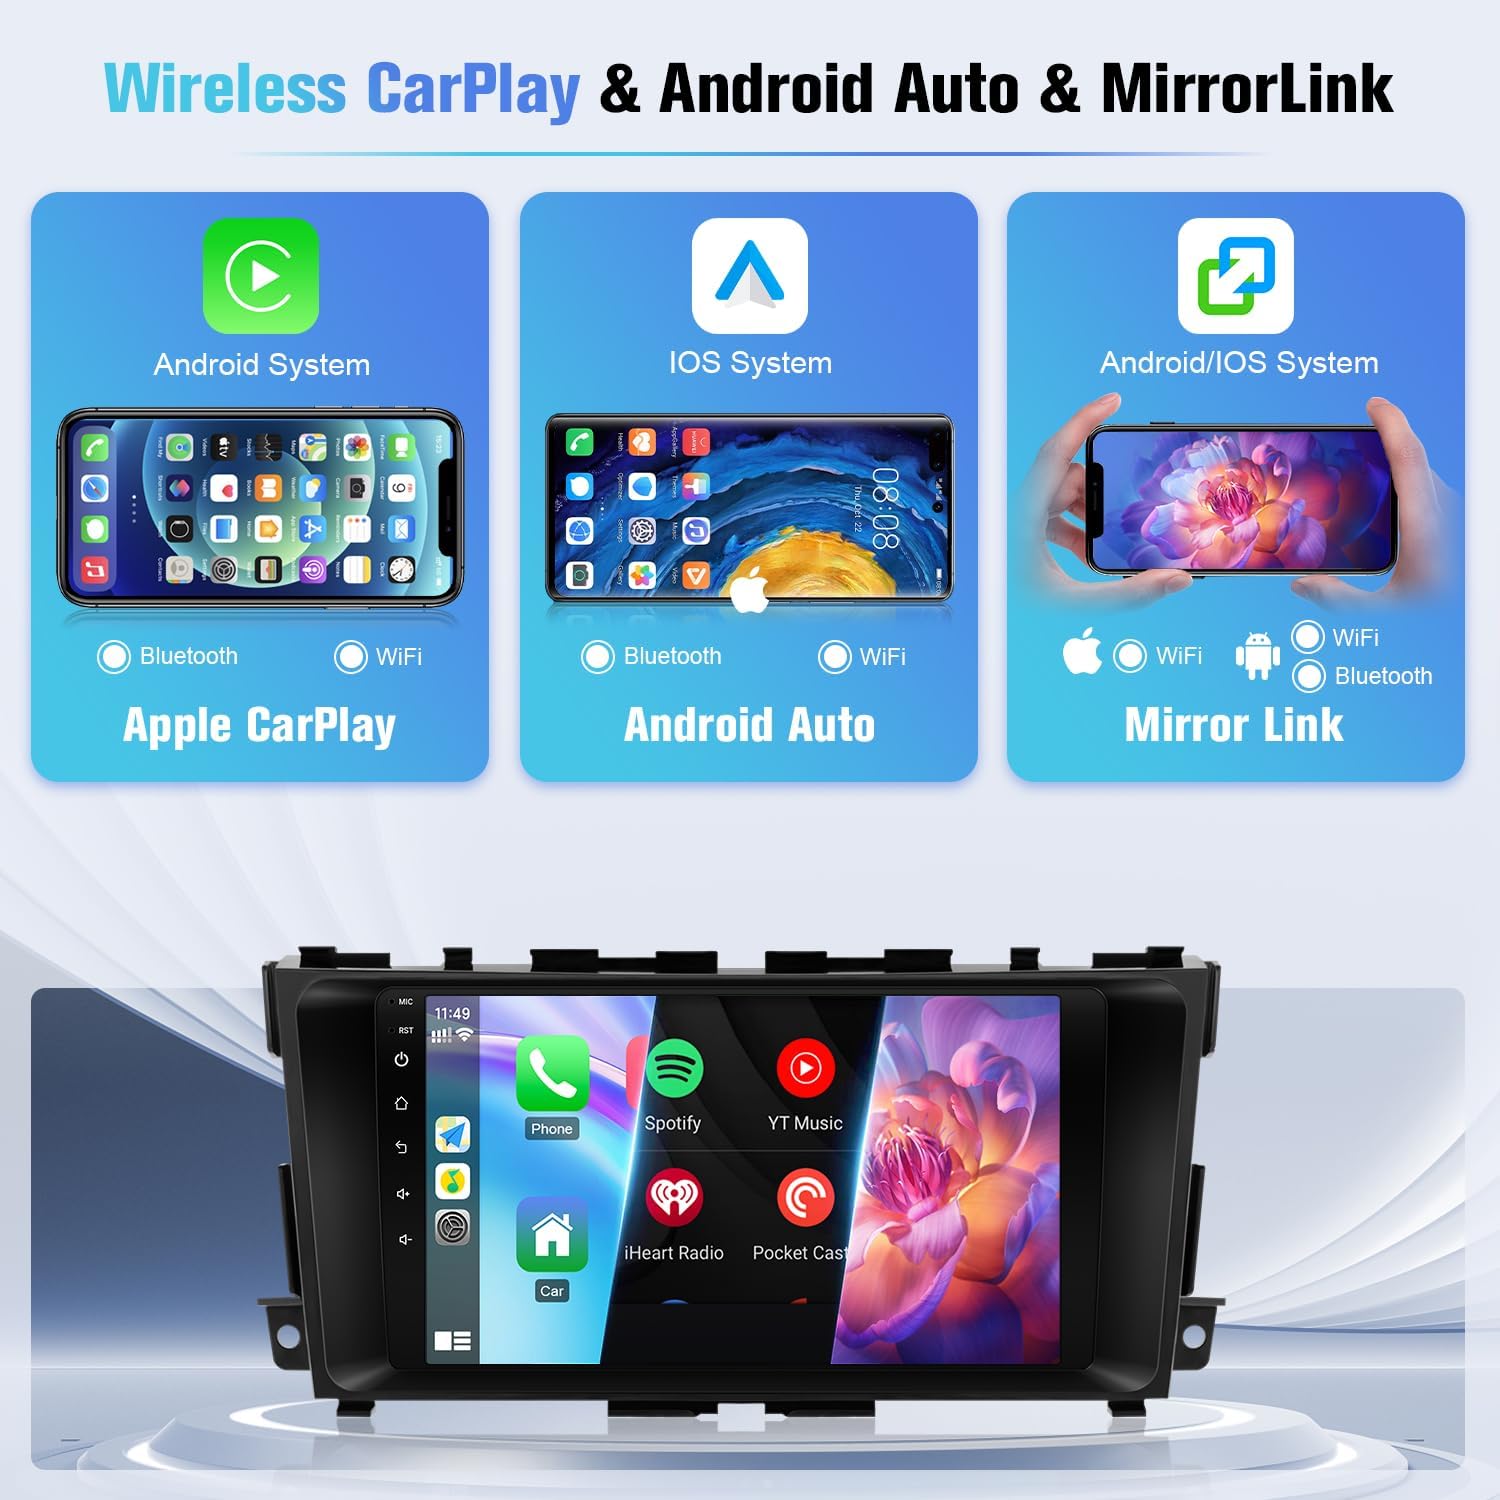
Image 7.1: Overview of wireless connectivity for Apple CarPlay, Android Auto, and MirrorLink features.
7.4 FM Radio
Access the FM Radio application from the main menu. You can manually search for stations or use the automatic scan function to find and save available stations. The unit supports unlimited preset stations.
7.5 Media Playback
Play audio and video files from various sources:
- USB: Connect USB drives to the provided USB ports.
- Bluetooth Audio: Stream music wirelessly from your paired smartphone.
- Online Streaming: Use Wi-Fi to access streaming apps downloaded from the Play Store.
7.6 Split Screen Function
The split-screen feature allows you to run two applications simultaneously on the display, such as navigation and music playback. To activate, long-press the recent apps button or drag an app to one side of the screen.
7.7 Voice Control
Utilize voice commands through Siri (for CarPlay) or Google Assistant (for Android Auto) to control navigation, make calls, send messages, and play music, enhancing driving safety.

Image 7.2: Visual summary of key operational features including Bluetooth, FM radio, backup camera display, steering wheel control interface, and split-screen view.
8. Maintenance
To ensure the longevity and optimal performance of your Naifay car stereo, follow these maintenance guidelines:
- Screen Cleaning: Use a soft, lint-free cloth specifically designed for electronic screens. Do not use abrasive cleaners or harsh chemicals. Gently wipe the screen to remove dust and fingerprints.
- Software Updates: Periodically check for available software updates through the system settings. Updates can improve performance and add new features.
- Avoid Extreme Temperatures: Prolonged exposure to extreme heat or cold can affect the unit's performance and lifespan.
- Cable Connections: Occasionally check that all cables are securely connected, especially after driving on rough terrain.
9. Troubleshooting
If you encounter issues with your Naifay car stereo, refer to the following common problems and solutions:
| Problem | Possible Cause | Solution |
|---|---|---|
| Unit does not power on. | Loose power connection, blown fuse, incorrect wiring. | Check power cable connections. Inspect vehicle fuses and the stereo's inline fuse. Verify wiring according to the installation guide. |
| Unit keeps turning off/resetting. | Unstable power supply, loose connections, software issue. | Ensure stable power connection. Check all wiring. Perform a factory reset (if accessible) or contact support for software troubleshooting. |
| No sound. | Volume too low, incorrect audio source, speaker wiring issues. | Increase volume. Select correct audio source. Check speaker wiring connections. |
| Backup camera not displaying. | Incorrect camera wiring, faulty camera, incorrect settings. | Verify camera power and video connections (refer to Image 5.1). Ensure the reverse trigger wire is correctly connected. Check camera settings in the stereo menu. |
| CarPlay/Android Auto not connecting. | Bluetooth/Wi-Fi off, phone compatibility, software glitch. | Ensure Bluetooth and Wi-Fi are active on both devices. Restart phone and stereo. Check phone's compatibility with CarPlay/Android Auto. |
| GPS signal weak or inaccurate. | GPS antenna obstruction, poor placement, software issue. | Ensure GPS antenna has a clear view of the sky. Check antenna connection. Update GPS software if available. |
If the problem persists after attempting these solutions, please contact Naifay customer support.
10. Specifications
| Feature | Detail |
|---|---|
| Display Size | 9 Inches |
| Operating System | Android 11 |
| Processor | 4-Core |
| RAM | 2GB |
| Internal Storage | 32GB |
| Connectivity | Wireless, Bluetooth 5.1, USB, Wi-Fi |
| Special Features | Wireless CarPlay, Wireless Android Auto, MirrorLink, GPS Navigation, FM Radio, AHD Backup Camera Support, Steering Wheel Control (SWC), Split Screen |
| Product Dimensions | 11.25 x 1.57 x 5.19 inches |
| Item Weight | 2.64 pounds |
11. Warranty and Support
Naifay is committed to providing excellent products and customer service.
- Warranty: The product includes a 12-month replacement warranty.
- Returns: A 60-day return policy is available.
- Technical Support: Lifetime technical support is provided. Expect a quick reply within 24 hours for inquiries.
For any questions, technical assistance, or warranty claims, please contact Naifay customer support through the platform where you purchased the product. You can typically find a 'Contact Seller' or 'Ask a question' option on the product page or within your order history.

Image 11.1: Guide on how to contact Naifay support for assistance.


