
1. Introduction
This manual provides essential information for the installation, adjustment, and maintenance of your maXpeedingrods Coilovers for the Ford Mustang S550 (2015-2023). Please read these instructions thoroughly before beginning any work to ensure proper function and safety.
2. Safety Information
Automotive suspension work requires specialized tools and knowledge. Improper installation or adjustment can lead to serious injury or vehicle damage. It is highly recommended that installation be performed by a qualified professional. Always wear appropriate personal protective equipment, including safety glasses and gloves. Ensure the vehicle is securely supported on jack stands before working underneath it.
3. Package Contents
Verify that all components are present and undamaged before proceeding with installation. The package should contain the following items:

Image: Overview of all components included in the maXpeedingrods Coilover kit, showing front coilovers, rear shock absorbers, rear spring kits, Allen wrench, C spanners, and sway bar end links.
- 2x Front Coil-overs
- 2x Rear Shock Absorbers
- 2x Rear Spring Kits
- 1x Allen Wrench
- 2x C Spanners
- 2x Sway Bar End Links
4. Setup and Installation
This section outlines the general steps for installing the maXpeedingrods Coilovers. Specific vehicle service manuals should be consulted for detailed removal and installation procedures of the original suspension components.
4.1 Pre-Installation Checks
- Ensure the vehicle is on a level surface and securely supported.
- Inspect all coilover components for any shipping damage.
- Familiarize yourself with the components, including the adjustable camber plates and dust boots.

Image: A detailed diagram of a coilover unit, highlighting features such as the camber plate top mount (6061-T6 Aluminum), 24 clicks of rebound damping force adjustment, upper spring seat with radial bearing, full-length dust boot, high rigidity 55CrSi steel cold-bent coil springs, 6061-T6 AL perch, anodized shock body with anti-corrosion coating, and powder-coated lower mount.

Image: Close-up of the adjustable camber plates, emphasizing their lightweight design and noise reduction properties.
4.2 General Installation Steps (Professional Installation Recommended)
- Safely lift the vehicle and remove the wheels.
- Remove the original suspension components (struts, springs, shocks).
- Install the new maXpeedingrods coilover units. Ensure all bolts are torqued to manufacturer specifications.
- For front coilovers, align the top hat bolts with the vehicle's strut tower.
- For rear shocks and springs, ensure proper seating of the springs and secure attachment of the shocks.
- Reinstall wheels and lower the vehicle.
- Perform an alignment after installation to ensure correct vehicle geometry.
5. Operating and Adjustment
Your maXpeedingrods Coilovers offer adjustable damping and ride height to fine-tune your vehicle's performance and stance.
5.1 Damping Adjustment (24 Levels)
The coilovers feature 24 levels of damping rebound force adjustment. This allows you to customize the ride comfort and handling characteristics.
- Full Soft: For a comfortable driving experience.
- 16 Clicks from Full Stiff: Recommended for spirited driving.
- Full Stiff: Suitable for occasional track use.
Adjust damping by turning the knob located at the top of the coilover (or bottom for some rear applications). Turn clockwise for stiffer damping, counter-clockwise for softer damping. Always adjust both sides of an axle equally.

Image: An illustration highlighting the 24-click damping adjustment mechanism on the coilover, indicating the radial bearing.
5.2 Ride Height Adjustment
The coilovers allow for independent ride height adjustment, typically within a 1-3 inch lowering range from stock. This adjustment is performed using the threaded body and locking rings.
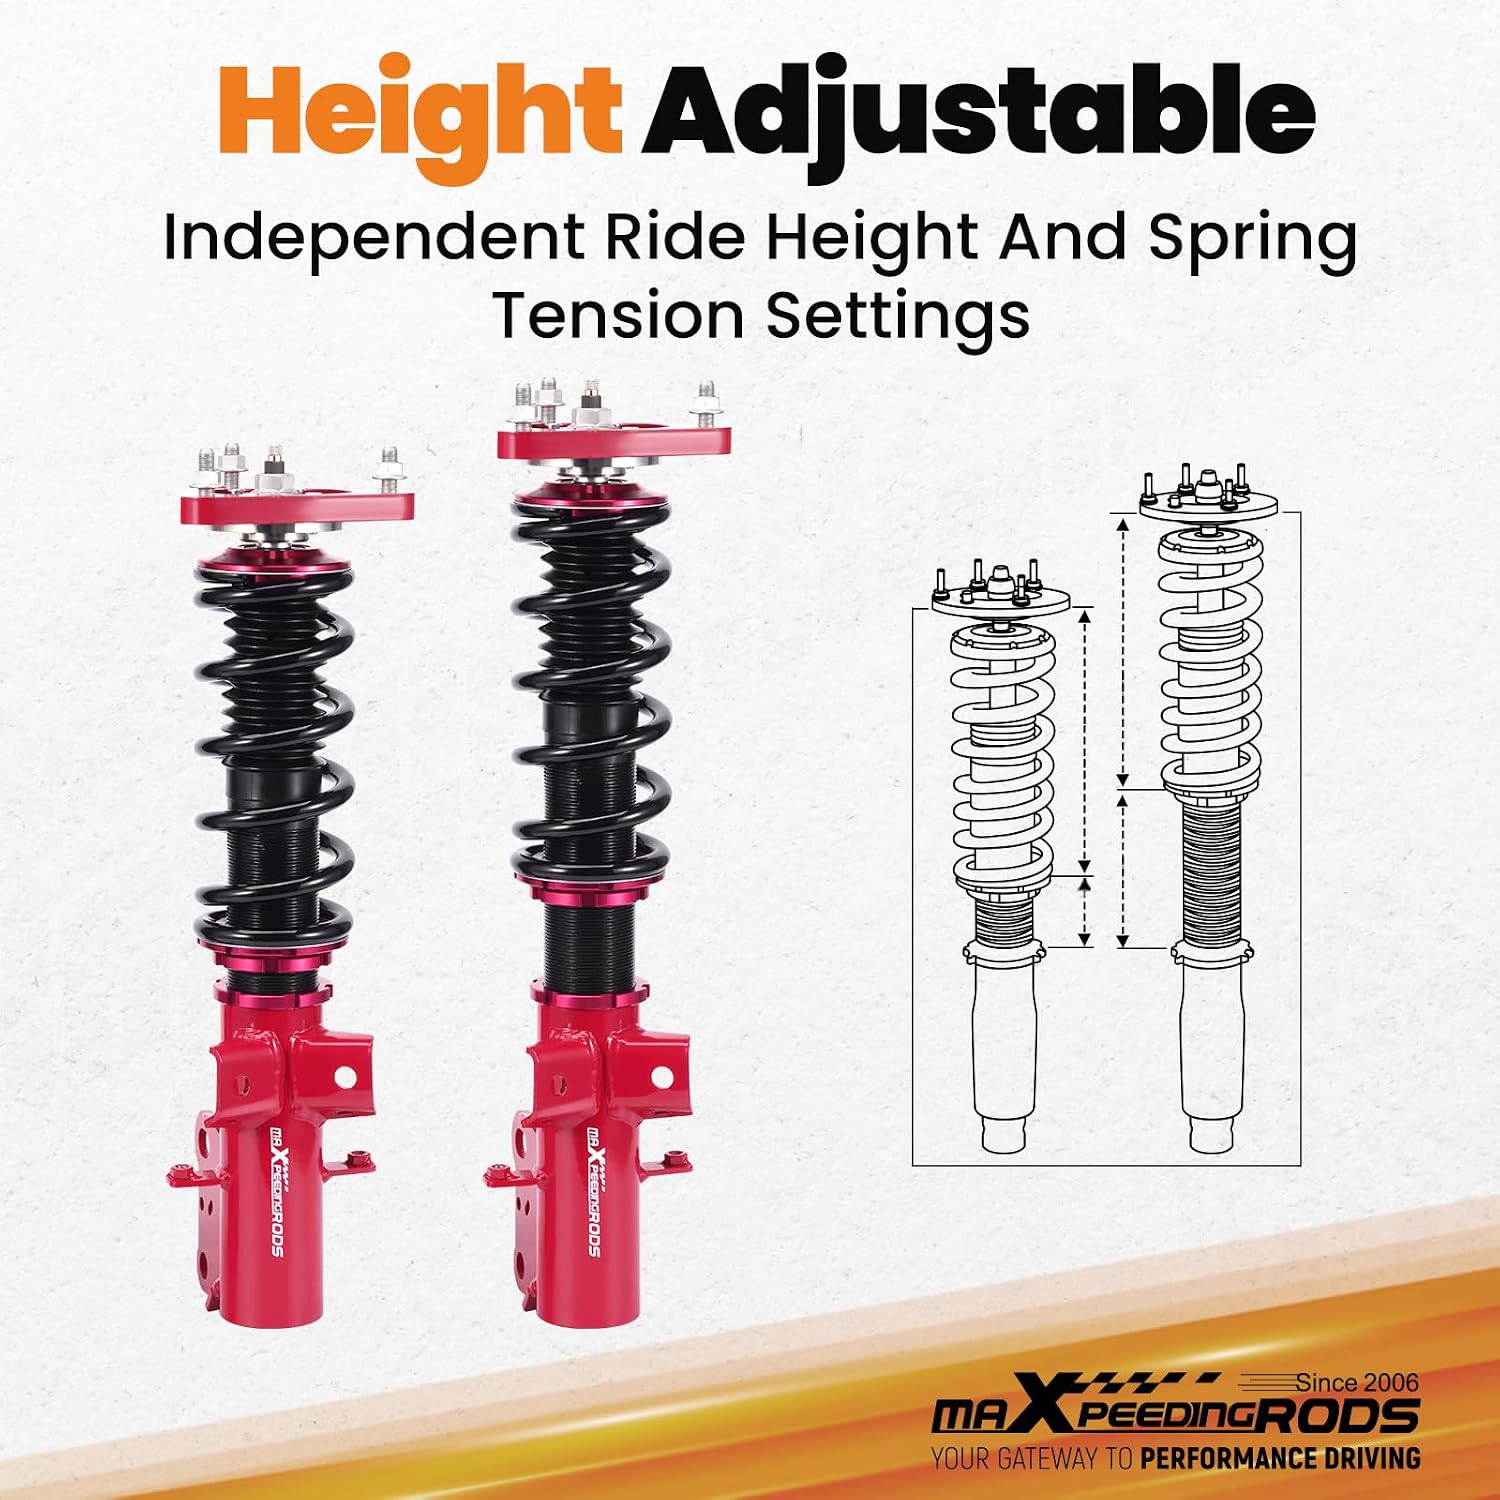
Image: A visual representation of the height adjustment mechanism, showing how the coilover body can be threaded up or down to change ride height, with an accompanying diagram illustrating the range of adjustment.

Image: Close-up of the CNC Billet Aluminum perches and locking rings used for securing the height adjustment.
Procedure for Height Adjustment:

Image: A diagram illustrating the steps for adjusting coilover height, showing the lower mount (A), lock ring for height adjustable (B), and lock ring for preload adjustment (C), with instructions to loosen A and B, adjust thread distance, and then tighten.
- Loosen the lower mount (A) and locking ring (B) using the provided C spanners.
- Increase or decrease the thread distance to change the ride height. Turning the lower mount up will lower the vehicle; turning it down will raise it.
- Once the desired height is achieved, tighten the lower mount (A) and locking ring (B) securely against each other to prevent movement.
Note: Always adjust both sides of an axle to the same height to maintain vehicle balance. After any height adjustment, a wheel alignment is recommended.
6. Maintenance
Regular inspection and maintenance will prolong the life and performance of your coilovers.
- Regular Inspection: Periodically check all mounting bolts for tightness. Inspect the shock bodies, springs, and dust boots for any signs of damage, leaks, or corrosion.
- Cleaning: Keep the coilovers clean from dirt, salt, and debris, especially the threaded sections, to ensure smooth height adjustment. The anodized shock body and powder-coated lower mount offer anti-corrosion protection, but regular cleaning is still beneficial.
- Dust Boots: The full-length dust boots protect the piston shafts. Ensure they are intact and free from tears.
7. Troubleshooting
If you experience issues with your coilovers, consider the following common troubleshooting steps:
- Unusual Noises (Clunking/Squeaking):
- Check all mounting bolts for proper torque.
- Inspect for any loose components or contact between the coilover and other vehicle parts.
- Ensure springs are properly seated.
- Uneven Ride Height:
- Verify that both coilovers on an axle are adjusted to the same height.
- Check for any bent or damaged components.
- Poor Handling/Ride Quality:
- Re-evaluate damping settings. Adjust to a softer or stiffer setting as desired.
- Ensure tire pressures are correct.
- Confirm that a proper wheel alignment has been performed after installation or height adjustments.
If problems persist, consult a qualified automotive technician or contact maXpeedingrods customer support.
8. Specifications
| Feature | Specification |
|---|---|
| Application | Ford Mustang (S550) 6th generation 2015-2023 |
| Damping Adjustment | 24 Levels Rebound Force Adjustable |
| Front Spring Rate | 7 kg/mm (392 lbs/in) |
| Rear Spring Rate | 14 kg/mm (784 lbs/in) |
| Ride Height Adjustment | 1-3 inches lowering (does not retain original ride height) |
| Top Mount Material | 6061-T6 Aluminum Alloy |
| Shock Body Coating | Anodized with Anti-Corrosion Coating |
| Lower Mount Coating | Powder-Coated |
| Front Rod Diameter | 22mm |
| Product Dimensions | 28.35 x 20.08 x 7.87 inches |
| Item Weight | 71.5 pounds |

Image: A diagram illustrating the dimensions of both front and rear coilover units, including spring rates and overall lengths. Front coil-over: 7 kg/mm (392 lbs/in), 220mm length. Rear coil-over: 14 kg/mm (784 lbs/in), 230mm length.

Image: A cutaway view of the coilover highlighting the 22mm front rod diameter and the high rigid piston rod, which is steel with high-frequency heat treatment for strength and durability.
9. Warranty Information
For detailed warranty terms and conditions, please refer to the official maXpeedingrods website or contact their customer service directly. Warranty coverage typically addresses manufacturing defects and material flaws under normal use.
10. Customer Support
If you require further assistance, have questions regarding installation, or need to report an issue, please contact maXpeedingrods customer support. You can typically find contact information on their official website or through your purchase platform.


