1. Introduction
This manual provides detailed instructions for the installation, operation, and maintenance of your Ledvion LED Track Lighting System. This modern and flexible lighting solution is designed to illuminate various spaces, offering customizable light intensity and color temperature.
The Ledvion LED Track Lighting System (Model LVT10002_2m6s) includes a 2-meter track and 6 GU10 track spotlights. It is suitable for homes, offices, and retail environments.

Image 1: Overview of the Ledvion LED Track Lighting System with six spotlights.
2. What's in the Box
Carefully unpack the box and ensure all components are present and undamaged. The package for SKU LVT10002_2m6s should contain the following items:
- 1x 2-meter LED track (typically supplied as two 1-meter segments)
- 6x GU10 Track Spotlights
- 6x Optional Anti-Glare Grids
- Mounting hardware (screws and wall plugs)
- 1x Power connector
- 1x End cap

Image 2: Visual representation of the components included in the box for SKU LVT10002_2m6s. This includes the track segments, six spotlights, anti-glare grids, mounting hardware, and connectors.
3. Setup and Installation
Installation of the Ledvion track lighting system is designed to be straightforward. However, if you are unsure about any steps, it is recommended to consult a qualified electrician.
3.1 Safety Precautions
- Always turn off the main power supply at the circuit breaker before beginning any electrical installation.
- Ensure the mounting surface is suitable to support the weight of the track and spotlights.
- Do not connect the system to a power source until all components are securely installed.
3.2 Installation Steps
- Mount the Track: Position the 2-meter track (or connected 1-meter segments) on the desired ceiling or wall location. Mark the drilling points for the mounting screws. Drill holes and insert appropriate wall plugs. Secure the track firmly using the provided screws.
- Connect Power: Connect the power feeder to the track and the main electrical supply. Ensure all wiring connections are secure and comply with local electrical codes.
- Install Spotlights: The spotlights feature an effortless plug-and-play locking system. Align the spotlight connector with the track groove, push it in, and then rotate the locking mechanism to secure it in place.
- Insert GU10 Bulbs: If not pre-installed, insert GU10 LED bulbs into each spotlight fixture. Ensure the bulbs are compatible with the GU10 fitting and any dimming requirements.
- Attach Anti-Glare Grids (Optional): If using, gently press the anti-glare grids into the front of the spotlight fixtures.

Image 3: Illustration of the plug-and-play installation process, demonstrating how to easily add, remove, or reposition spotlights on the track.

Image 4: Example of the Ledvion track lighting system installed in a kitchen, showcasing its aesthetic integration.
4. Operating Instructions
Once installed, the Ledvion track lighting system is ready for operation. The system is designed for use with GU10 LED lamps, which are energy-efficient and can be dimmed with an external dimmer (not included).
4.1 Power On/Off
Control the lighting system using your standard wall switch connected to the track's power supply.
4.2 Adjusting Spotlights
Each track spotlight can be tilted 350 degrees in all directions and rotated 90 degrees, allowing you to direct light precisely where needed. Gently adjust the spotlight head to achieve the desired illumination angle.
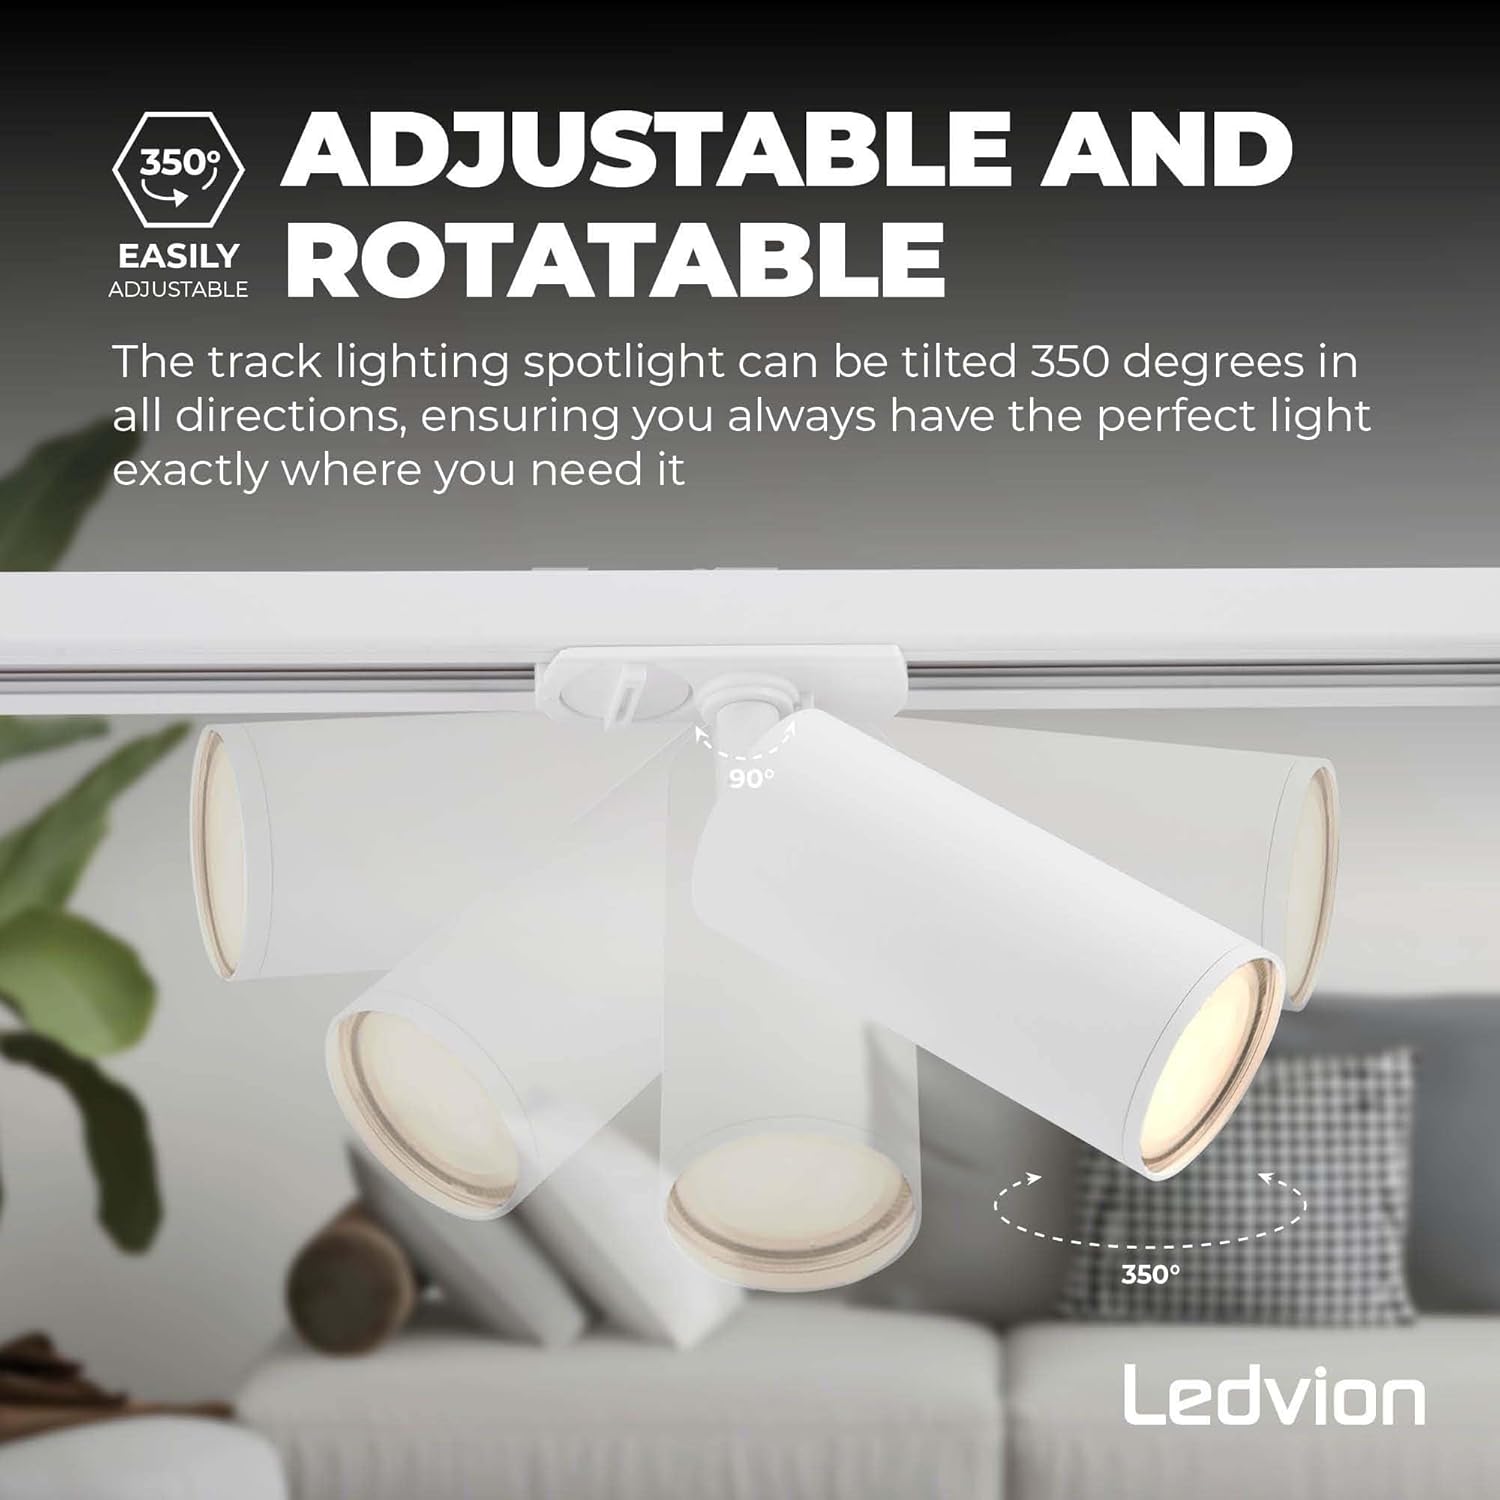
Image 5: Visual guide demonstrating the 350-degree adjustable tilt and 90-degree rotatable features of the track spotlights.
4.3 Dimming Functionality
If you have installed dimmable GU10 LED bulbs and connected the system to an external dimmer, you can adjust the light intensity to create the perfect ambiance for any occasion. Refer to your dimmer's instructions for specific operation.
5. Features and Accessories
5.1 Adjustable and Rotatable Spotlights
The individual spotlights offer exceptional flexibility, allowing for precise light direction. Each spotlight can be tilted up to 350 degrees and rotated 90 degrees, ensuring optimal illumination for any area.

Image 6: A detailed view of a single track spotlight, highlighting its cylindrical design and GU10 fitting.
5.2 Optional Anti-Glare Grid
To prevent glare and enhance visual comfort, optional anti-glare grids are included. These grids can be easily added to or removed from the front of the spotlights.

Image 7: Illustration of the optional anti-glare grid and how it can be attached to the spotlight to reduce glare.
5.3 Optional System Upgrades
The Ledvion track system is expandable with various optional accessories (sold separately) to customize your lighting layout:
- Powerfeeder with Coverplate (SKU: LVT10019): For alternative power connection points.
- Powerfeeder with I-Connector (SKU: LVT10021): For connecting multiple track segments in a straight line.
- X-Connector (SKU: LVT10017): For creating cross-shaped track layouts.
- T-Connector (SKU: LVT10015): For creating T-shaped track layouts.
- Pendant Spot Adjustable Cord (SKU: LVT10005): To add pendant lighting elements to the track.

Image 8: Visual guide to optional accessories for expanding the Ledvion track lighting system, including various connectors and a pendant spot.
6. Maintenance
To ensure the longevity and optimal performance of your Ledvion LED Track Lighting System, follow these simple maintenance guidelines:
- Cleaning: Disconnect power before cleaning. Use a soft, dry cloth to wipe the track and spotlights. Avoid abrasive cleaners or solvents, as these can damage the finish.
- Bulb Replacement: Ensure power is off before replacing GU10 bulbs. Allow bulbs to cool completely before handling. Gently twist and pull to remove the old bulb, then insert and twist the new GU10 bulb into place.
- Inspection: Periodically check all connections and mounting points for tightness. If any damage is observed, disconnect power and contact a qualified technician.
7. Troubleshooting
If you encounter issues with your Ledvion LED Track Lighting System, refer to the following troubleshooting steps:
| Problem | Possible Cause | Solution |
|---|---|---|
| Lights do not turn on. | No power supply; loose connection; faulty bulb. | Check circuit breaker. Ensure all connections are secure. Replace bulb. |
| Lights flicker. | Incompatible dimmer; loose bulb; faulty wiring. | Ensure dimmer is compatible with LED bulbs. Tighten bulbs. Consult electrician for wiring check. |
| Spotlight difficult to adjust/rotate. | Initial stiffness; mechanism not fully engaged. | Apply gentle, firm pressure to rotate or tilt. Ensure the spotlight is correctly locked into the track. Avoid excessive force. |
| One or more spotlights not working. | Faulty bulb; loose connection to track. | Replace the bulb. Re-seat the spotlight firmly into the track, ensuring the locking mechanism is engaged. |
If the problem persists after attempting these solutions, please contact Ledvion customer support or a qualified electrician.
8. Specifications
Detailed technical specifications for the Ledvion LED Track Lighting System (Model LVT10002_2m6s):
| Feature | Specification |
|---|---|
| Brand | Ledvion |
| Model Number | LVT10002_2m6s |
| Track Length | 2000 mm (2 meters) |
| Product Dimensions (Packaging) | 105 x 20 x 15 cm |
| Item Weight | 2.35 Kilograms |
| Number of Spotlights | 6 |
| Bulb Type | GU10 (LED recommended) |
| Voltage | 230 Volts |
| Plug Type | Electrical (Wired) |
| Dimmable | Yes, with compatible GU10 LED bulbs and external dimmer |
| Style | 1-phase Track Lighting |

Image 9: Diagram illustrating the dimensions of the track (2000 mm) and individual spotlights (150 mm height, 50 mm diameter).
9. Safety Information and Compliance
This product complies with all relevant EU Directive requirements.
9.1 General Safety
- Intended Use: Only use this device for its intended purpose. Do not use if damaged or defective.
- Damage: If this product is damaged, especially the power cable, it must be replaced by the manufacturer, its service agent, or similarly qualified persons to avoid a hazard.
- Power Disconnection: Before any replacement or repair, always turn off the main power supply. To disconnect voltage, pull the plug.
- Installation & Repair: Installation should only be performed in combination with the original driver. This product should only be opened by an authorized technician for repair purposes. Do not attempt to carry out repairs yourself.
9.2 Disposal of Your Product
This product is made of high-quality materials and parts that can be reused. Do not dispose of the product with normal household waste. For further information, please contact your local waste collection service for details on proper disposal and recycling. In your country, there are separate collection systems for electrical and electronic products. Proper disposal of old products will prevent adverse effects on the environment and human health.
9.3 Warranty and Disclaimer
Any changes and/or modifications to the product will void the warranty. Ledvion reserves the right to make changes to designs and specifications without notice. All product names, logos, and brands mentioned are trademarks or registered trademarks of their respective holders and are hereby recognized as such.

Image 10: Back of the product packaging, displaying safety instructions, disposal guidelines, and a QR code for additional documentation.
10. Support
For additional documentation or support, please visit the Ledvion website or scan the QR code below:
Ledvion Documentation and Support
(Link extracted from product packaging QR code)


