1. Introduction
This manual provides comprehensive instructions for the installation, setup, and operation of your Roinvou 6+128G Android 13 Head Unit. This unit is designed to upgrade the radio system in Ford F-150 vehicles manufactured between 2009 and 2012, offering advanced features such as Wireless CarPlay, Android Auto, GPS Navigation, 5GHz WiFi, Bluetooth 5.0, FM/RDS Radio, and a 32-band Equalizer.
Please read this manual thoroughly before installation and use to ensure proper functionality and to avoid damage to the unit or your vehicle.
2. Important Notes & Compatibility
- This head unit is specifically designed for Ford F-150 models from 2009, 2010, 2011, and 2012.
- The stereo package includes the in-dash head unit, wiring harness cables, CANBUS decoder, and a frame panel.
- It is compatible with the original amplifier system.
- Ensure your original car does not come with a large screen from the factory.
- Before purchasing and installation, verify that the power cable port on the detail page matches your original car's port.

Figure 2.1: Compatibility chart for Ford F-150 dashboards. Green checkmarks indicate compatible dashboards, while red X marks indicate incompatible ones. The image also shows a 'Before Installation' and 'After Installation' comparison.
3. What's in the Box
Your Roinvou Head Unit package includes the following components:
- Roinvou Car Stereo (9-inch HD Touchscreen)
- Power Cable
- CANBUS Decoder
- Radio Antenna
- Dual RCA Harness
- GPS Antenna
- AHD Backup Camera
- External Microphone
- Rear Camera Input Cable
- Dual USB Cable
- Installation Tool & Accessories

Figure 3.1: Visual representation of all items included in the package, such as the head unit, various cables, antennas, and tools.
4. Installation Guide
The installation process involves removing the factory radio and associated trim, then installing the new Roinvou head unit. It is recommended to watch the provided installation video for a visual guide. Ensure the vehicle's battery is disconnected before starting the installation.
4.1. Center Console Disassembly
- Remove Lower Panel Screws: Locate and remove the two 7mm bolts at the bottom of the center console panel, typically near the auxiliary input and power outlet.
- Remove Upper Panel Screws: Carefully pry open the upper trim panel surrounding the air vents and radio. Remove the two 7mm bolts located at the top of the factory radio unit.
- Disconnect Wiring: Gently pull the entire center console panel forward. Disconnect all electrical connectors from the back of the factory radio and climate controls. Take care not to damage the clips or wiring.
- Remove Factory Radio: Once all wiring is disconnected, remove the factory radio unit from the dashboard.
4.2. Preparing the New Head Unit
- Transfer Climate Control Module: On the back of the factory console panel, locate the climate control module. Remove the T20 bolts securing it and carefully detach it.
- Transfer Power Outlet: Remove the power outlet from the factory panel by carefully prying it out.
- Install Components on New Panel: Attach the climate control module and power outlet to the new Roinvou head unit's frame panel. Ensure they are securely fastened.
- Connect Wiring Harness: Connect the provided wiring harness to the new head unit and the vehicle's existing wiring. Ensure all connections are secure.
4.3. Reassembly
- Mount New Head Unit: Carefully slide the new head unit with its frame panel into the dashboard opening. Secure it with the appropriate screws.
- Reconnect Vehicle Wiring: Reconnect all electrical connectors to the new head unit and climate controls.
- Test Functionality: Before fully reassembling, reconnect the vehicle battery and test the head unit's basic functions (power, audio, touch screen, climate controls).
- Reinstall Trim Panels: Once confirmed working, reattach all trim panels, ensuring they snap securely into place.
Video 4.1: Detailed guide on disassembling the Ford F-150 center console and preparing for the new head unit installation. This video demonstrates the removal of the factory radio and climate control components.

Figure 4.2: Detailed diagram illustrating the various ports and their corresponding connections on the back of the head unit and the wiring harness.

Figure 4.3: Wiring diagram for the AHD reversing camera. It shows how to connect the camera to the head unit's video input and power it from the reverse lamp circuit.
5. Setup and Initial Configuration
Upon first power-up, the system may require initial setup. Follow the on-screen prompts to configure language, time zone, and network settings. Connect to a stable Wi-Fi network for optimal functionality and updates.
5.1. UI Customization
- Wallpapers: The system offers 19 background options. Touch the color circle in the lower left corner of the screen to switch between them.
- Desktop Themes: Long press the main interface to switch between 59 desktop themes.
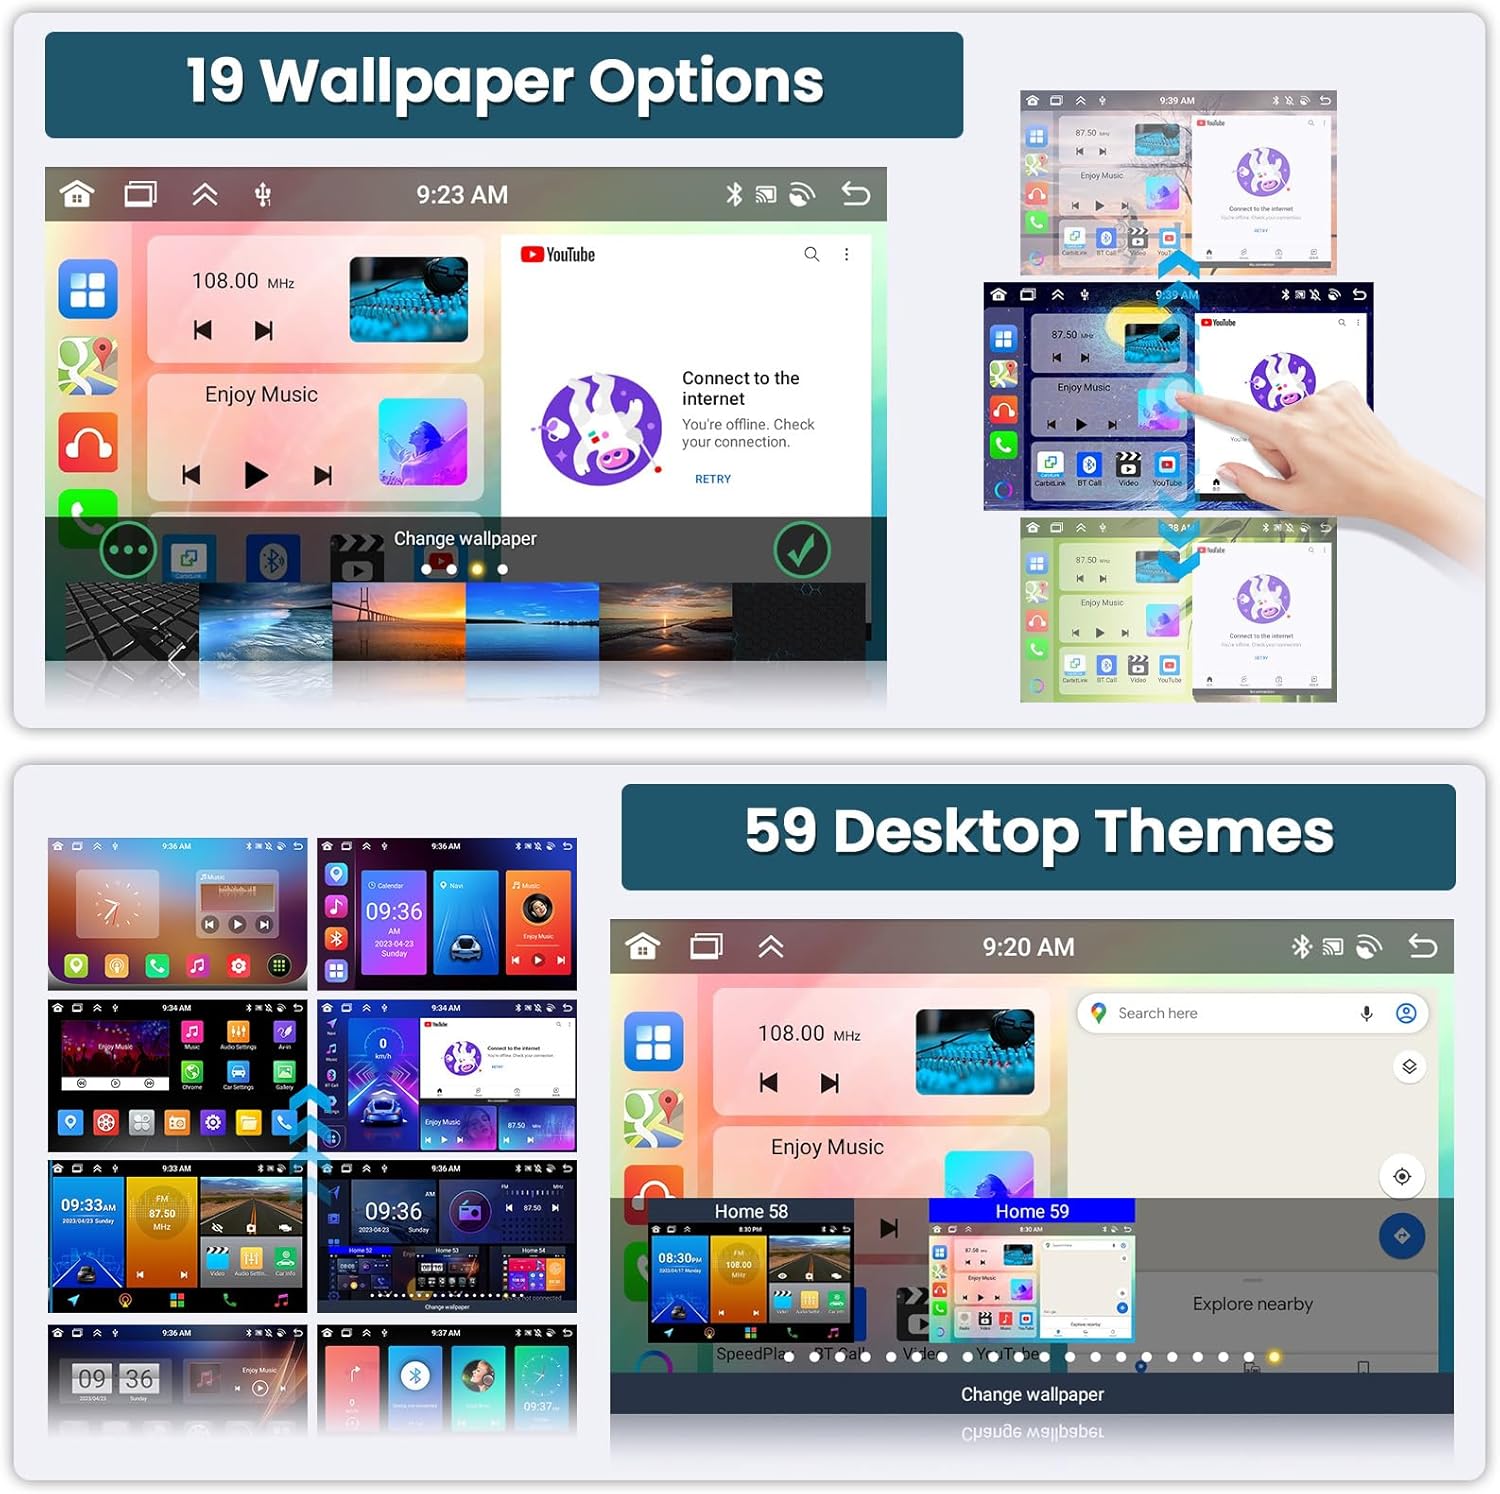
Figure 5.1: Examples of the 19 wallpaper options and 59 desktop themes available for customizing the head unit's interface.
6. Operating Instructions
6.1. Wireless CarPlay & Android Auto
The head unit supports both wireless and wired Apple CarPlay and Android Auto. This allows for voice-assisted control and access to phone features like music, navigation, calls, and messages directly on the head unit's screen.
- Connection: Connect your smartphone via WiFi hotspot or the phone's original USB cable.
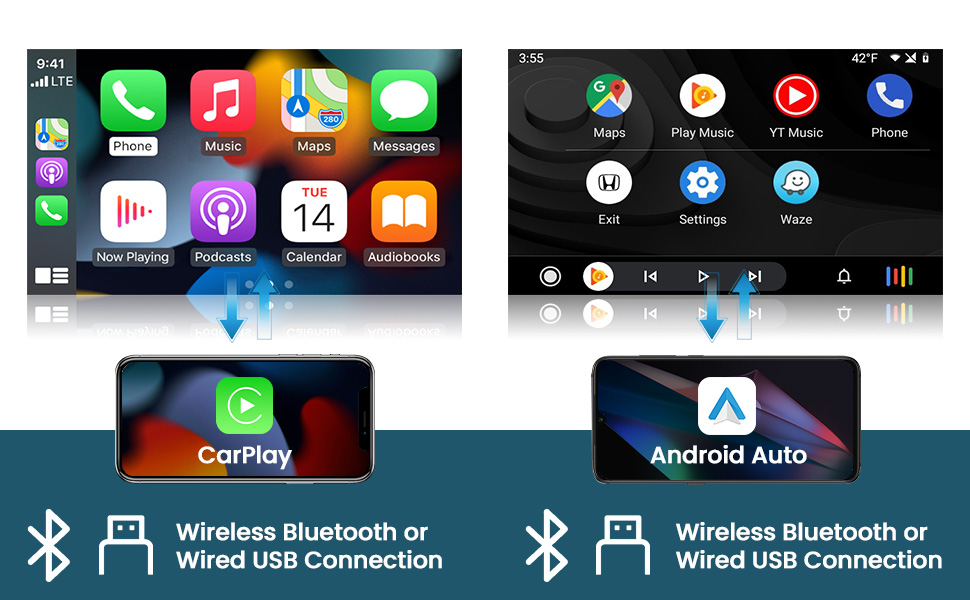
Figure 6.1: Visual guide for connecting smartphones to the head unit via Wireless Bluetooth or Wired USB for CarPlay and Android Auto functionality.
6.2. GPS Navigation & WiFi
The unit includes a built-in GPS module. Navigation software like Waze and free offline maps can be utilized. With a WiFi or hotspot connection, online maps function seamlessly, and you can download apps from the Play Store for online video streaming.

Figure 6.2: Display of GPS navigation features and the availability of various online applications when connected to WiFi.
6.3. Bluetooth & FM/RDS Radio
The head unit features built-in and external microphones for hands-free calling, music playback, and voice functions. The FM radio offers 18 preset stations with manual, semi-automatic, and fully automatic channel search. RDS provides channel broadcasting, weather forecasts, and real-time road conditions.
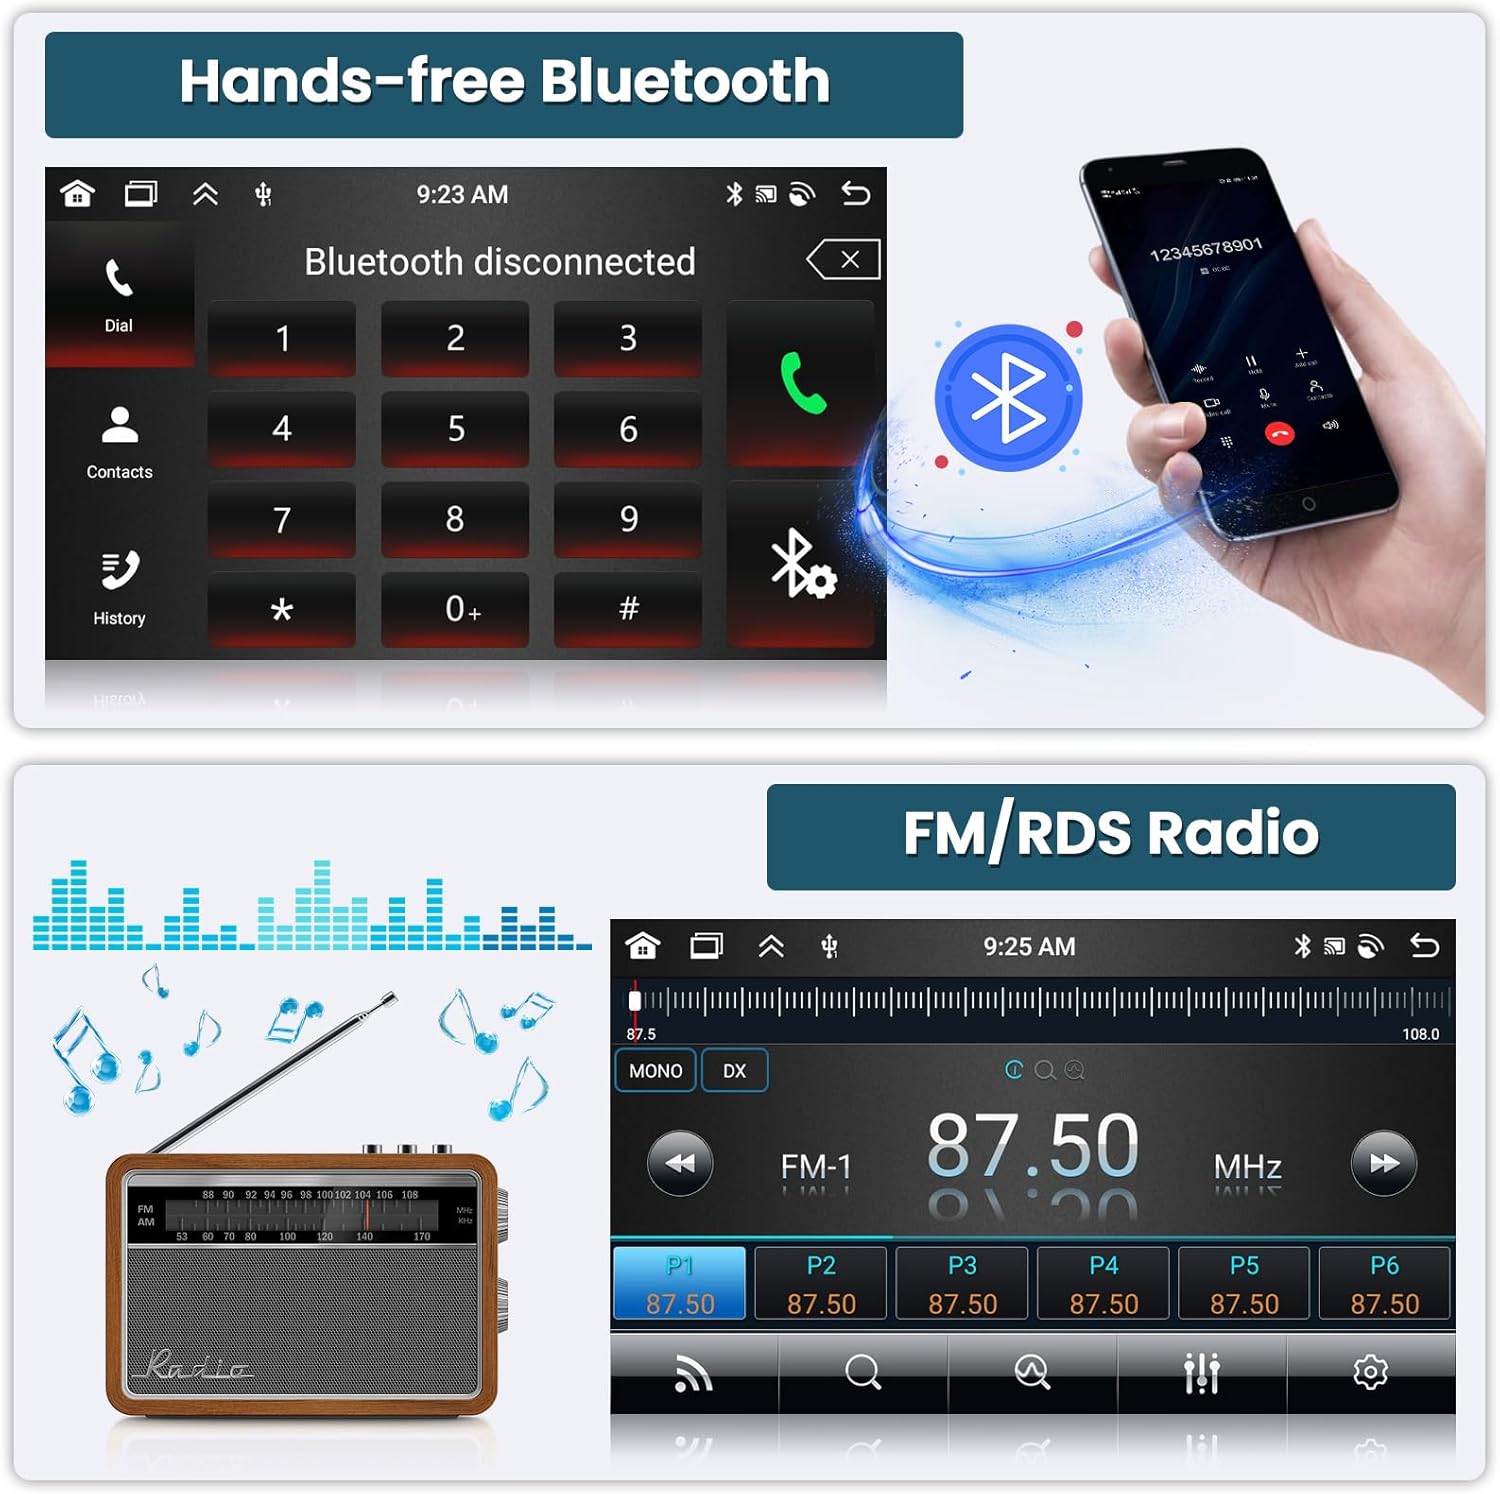
Figure 6.3: Interfaces for hands-free Bluetooth communication and FM/RDS radio functionality.
6.4. Steering Wheel Control (SWC)
The unit supports steering wheel controls, allowing you to manage audio and other functions without taking your hands off the wheel. Configuration may be required in the system settings.
6.5. Rear View Camera
The included AHD backup camera provides a clear reversing image with night vision, waterproof design, and a wide-angle view. The display automatically switches to the camera view when the vehicle is in reverse.
- Guidelines: To enable camera guidelines, navigate to 'Car Info app > about > custom settings' and turn on 'track line dynamic or static'.

Figure 6.4: The AHD reversing image displayed on the head unit, highlighting features like night vision, waterproofing, and wide-angle view.
6.6. Dual Screen Functionality
The head unit supports dual screen mode, allowing two applications to run simultaneously. This enables multitasking, such as using navigation while playing music.
Video 6.5: Demonstration of the head unit's UI functions, including CarPlay, Android Auto, navigation, and dual-screen capabilities.
6.7. 32-Band Equalizer (EQ)
Customize your audio experience with the 32-band EQ options, allowing precise adjustment of sound frequencies for optimal listening.
7. Troubleshooting
- No Power: Check all power connections and vehicle fuses. Ensure the CANBUS decoder is correctly installed if applicable.
- No Sound: Verify speaker connections and amplifier compatibility. Check audio settings in the head unit.
- Bluetooth/Android Auto/CarPlay Connectivity Issues: Try restarting your phone and the head unit. Ensure Bluetooth is enabled on both devices. For wired connections, use the phone's original USB cable.
- Screen Freezing/Unresponsive Touch: If the screen becomes unresponsive, try a soft reset (refer to the device's specific reset procedure, often a small reset button or holding the power button). If touch calibration is off, place five fingers on the screen and hold for a few seconds to access the calibration screen.
- Radio Not Turning Off with Key: This may indicate an incorrect wiring connection related to the accessory power. Consult the wiring diagram and ensure the CANBUS module is correctly configured for your vehicle.
- Poor GPS Signal: Ensure the GPS antenna is installed in a location with a clear view of the sky and is securely connected.
- Backup Camera Not Displaying: Verify the camera's power and video connections. Check camera settings in the head unit's 'Car Info' app.
8. Specifications
| Feature | Detail |
|---|---|
| Screen Size | 9 Inches |
| Resolution | 1280 x 720 |
| Operating System | Android 13 |
| Processor | 8 Cores |
| RAM | 6GB |
| Storage | 128GB |
| Connectivity | Bluetooth 5.0, USB, Wi-Fi (5GHz) |
| Special Features | Wireless/Wired Apple CarPlay, Wireless/Wired Android Auto, Mirror Link, Voice Control, GPS Navigation, FM/RDS Radio, HD Touchscreen, SWC, 32-band EQ, 19 Backgrounds, 59 UI Themes |
| Audio Output Mode | Stereo |
| Mounting Type | Dashboard Mount |
| Vehicle Service Type | Truck (Ford F-150 2009-2012) |
9. Warranty and Support
Your Roinvou head unit is covered by a 30-day refund/replacement policy. For technical support, troubleshooting assistance, or warranty claims, please contact Roinvou customer service via email at roinvouservices@163.com. Please provide your product model and purchase details for efficient service.


