1. Introduction
This manual provides detailed instructions for the safe and efficient operation of your Briloner Ceiling Fan with Light, Model 3801015. This device integrates a ceiling light with a multi-speed fan, offering both illumination and air circulation. It features adjustable color temperature (CCT), dimming capabilities, a remote control, and timer functions. This product is designed for indoor use only.

Figure 1: Briloner Ceiling Fan with Light, Model 3801015. This image shows the black and white ceiling fan with its integrated light and a remote control.
2. Safety Instructions
Please read all safety instructions carefully before installation and use. Retain this manual for future reference.
- Electrical Safety: Ensure the main power supply is disconnected before installation, maintenance, or cleaning to prevent electric shock. All wiring should be performed by a qualified electrician in accordance with local electrical codes.
- Indoor Use Only: This product is rated IP20 and is suitable for indoor environments only. Do not expose to water or high humidity.
- Mounting: The ceiling fan must be securely mounted to a structural ceiling joist or a suitable support system capable of holding the fan's weight (1.65 kg).
- Clearance: Maintain adequate clearance between the fan blades and any obstructions, including walls and furniture.
- Light Source: This product contains an F-rated light source, which can be disassembled for independent verification. Do not attempt to replace the integrated LED light source yourself. Contact qualified personnel for service.
- Children and Pets: Keep children and pets away from the fan during operation and installation.
3. Package Contents
Verify that all components are present and undamaged before proceeding with installation:
- Briloner Ceiling Fan with Light unit
- Remote Control (2 AAA batteries included)
- Mounting Hardware
- Assembly Instructions
4. Setup and Installation
Installation should be performed by a qualified professional. Always ensure the power supply is turned off at the circuit breaker before beginning any electrical work.
- Prepare the Installation Area: Turn off power at the main circuit breaker. Ensure the mounting location is structurally sound and can support the fan's weight.
- Mount the Bracket: Secure the mounting bracket to the ceiling using the provided mounting hardware. Ensure it is firmly attached.
- Wiring: Connect the electrical wires from the ceiling to the fan's wiring according to the provided assembly instructions. Pay close attention to live, neutral, and ground connections.
- Attach the Fan Unit: Carefully lift the fan unit and attach it to the mounting bracket. Secure it in place as per the assembly instructions.
- Final Checks: Once installed, ensure all connections are secure and the fan is stable. Restore power at the circuit breaker.

Figure 2: Dimensional diagram of the Briloner Ceiling Fan, showing a diameter of 485mm and a height of 145mm.
5. Operating Instructions
Your Briloner Ceiling Fan with Light is controlled via the included remote control.
5.1 Remote Control Functions
The remote control allows you to manage all functions of the ceiling fan and light.
- Power On/Off: Turns the unit on or off.
- Fan Speed Control: Adjusts the fan speed through 5 different levels.
- Light On/Off: Toggles the light function.
- Dimming: Adjusts the brightness of the light.
- Color Temperature (CCT) Adjustment: Changes the light color from warm white (3000K) to cool white (6500K).
- Night Light Function: Activates a soft 3000K light setting.
- Timer Function: Sets a timer for the light (30 minutes) or the fan (1 hour).
- Fan Direction: Changes the rotation direction of the fan blades (Summer/Winter mode).

Figure 3: Visual representation of the adjustable color temperature (3000K-6500K) and 5-stage fan speed control.
5.2 Fan Operation
The fan offers 5 speed settings for optimal air circulation.
- Speed Adjustment: Use the remote control to cycle through the 5 fan speeds.
- Direction of Rotation (Summer/Winter Mode):
- Standard Mode (Summer): Fan rotates counter-clockwise, pushing air downwards to create a cooling breeze.
- Reverse Mode (Winter): Fan rotates clockwise, drawing air upwards to redistribute warm air evenly throughout the room.

Figure 4: Illustration of the fan's adjustable rotation direction, showing downward airflow for cooling in summer and upward airflow for heat distribution in winter.
5.3 Light Operation
The integrated LED light provides versatile illumination options.
- Dimmable: Adjust the light intensity to suit your preference using the remote control.
- Color Temperature Control (CCT): Select from a range of color temperatures between 3000K (warm white) and 6500K (cool white) to create the desired ambiance.
- Night Light: Activate the dedicated night light function for a soft, low-intensity 3000K light, ideal for nighttime use.

Figure 5: Examples of the light's dimming capability, night light function, and adjustable color temperature from warm to cool.
5.4 Timer Function
The timer function allows for automated operation, promoting energy efficiency.
- Light Timer: Set the light to turn off automatically after 30 minutes.
- Fan Timer: Set the fan to turn off automatically after 1 hour.
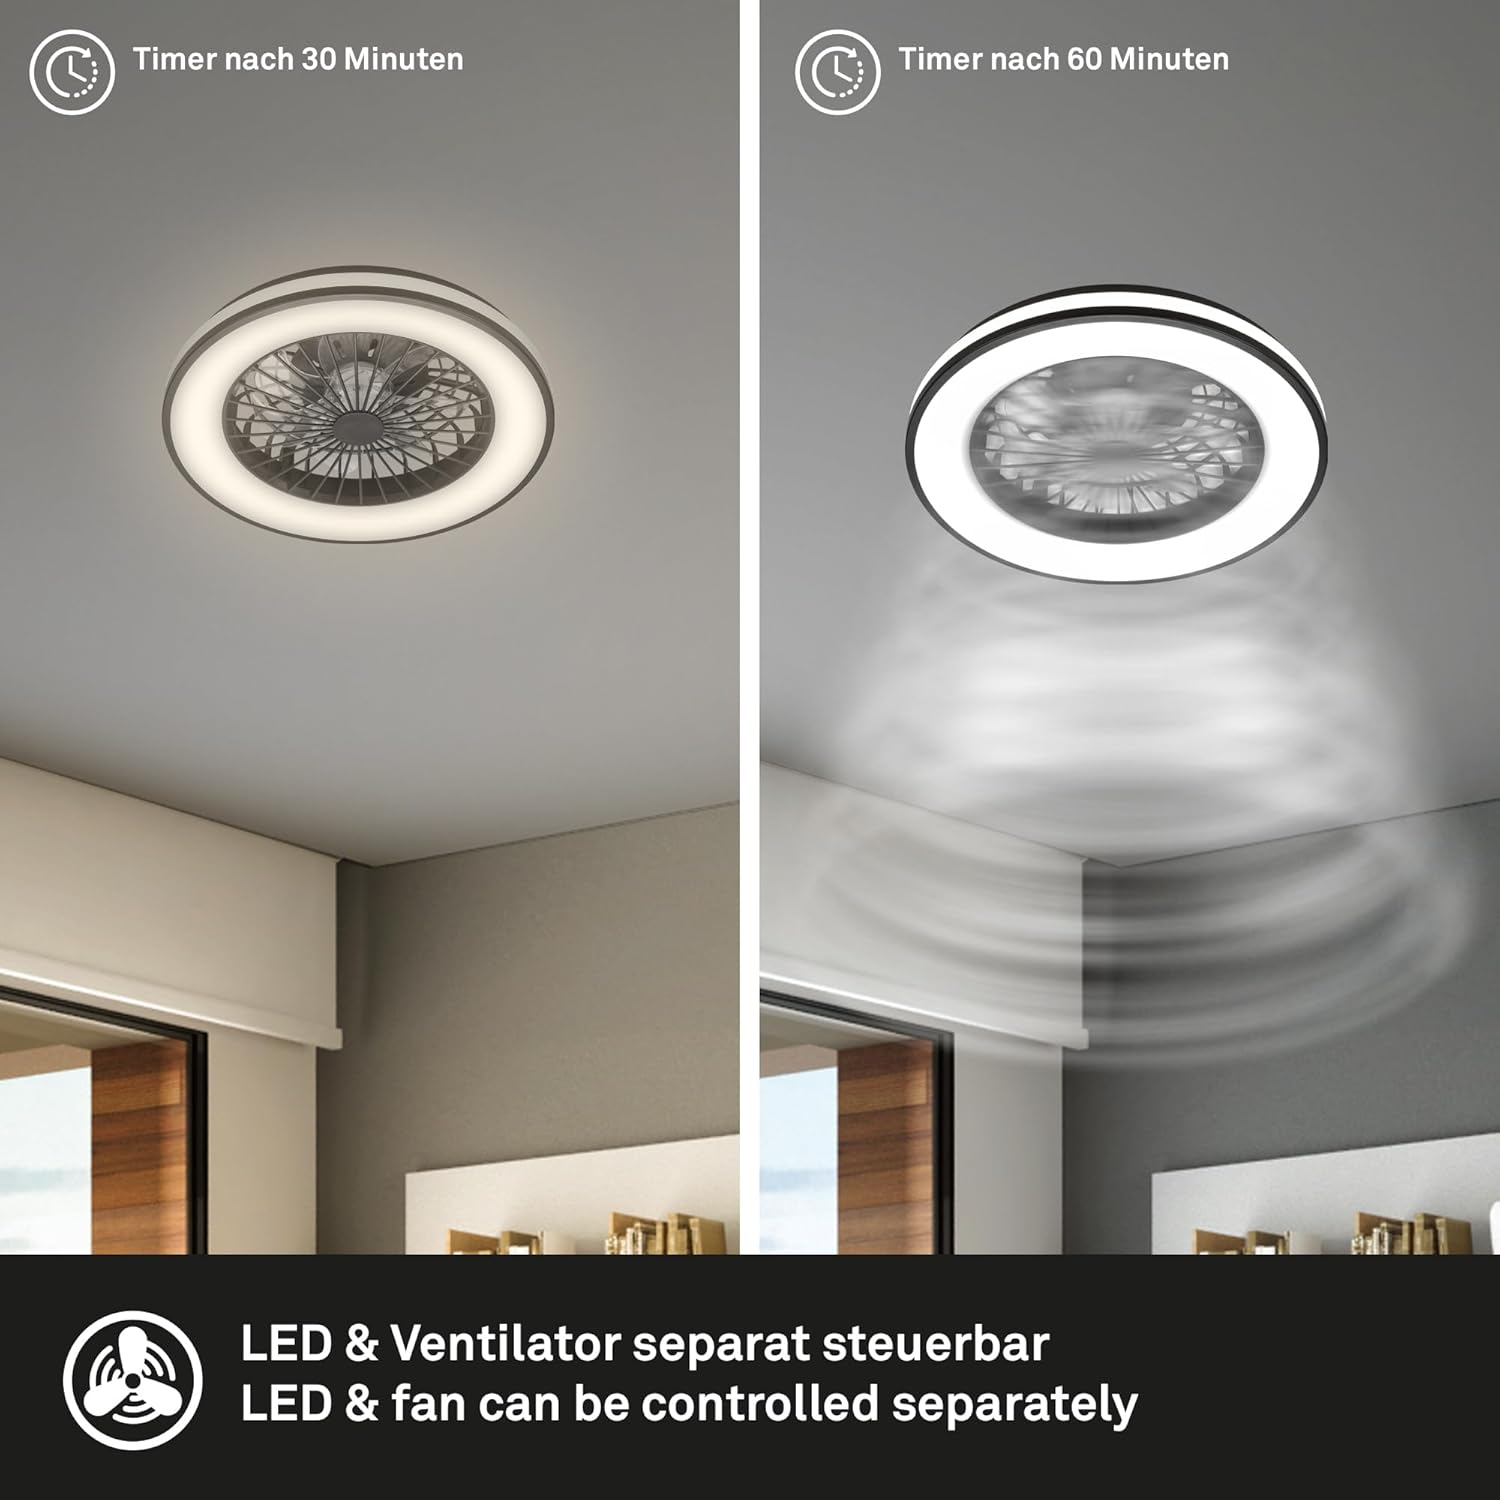
Figure 6: Illustration of the separate timer functions for the light (30 minutes) and the fan (60 minutes).
6. Maintenance
Regular maintenance ensures optimal performance and longevity of your ceiling fan.
- Cleaning: Before cleaning, ensure the power supply is disconnected. Use a soft, dry cloth to wipe down the fan and light fixture. Do not use abrasive cleaners, solvents, or wet cloths, as these can damage the finish or electrical components.
- Blade Cleaning: Gently wipe the fan blades to remove dust accumulation.
- Light Source: The LED light source is integrated and not user-replaceable. If the light source fails, contact a qualified technician for service.
7. Troubleshooting
If you encounter issues with your ceiling fan, refer to the following common problems and solutions:
| Problem | Possible Cause | Solution |
|---|---|---|
| Fan does not operate. | No power supply. Remote control batteries are dead. Incorrect wiring. | Check circuit breaker. Replace remote control batteries (2 AAA). Consult a qualified electrician to check wiring. |
| Light does not turn on. | No power supply. Remote control batteries are dead. Light function not activated. | Check circuit breaker. Replace remote control batteries. Press the light on/off button on the remote. |
| Remote control not responding. | Batteries are dead or incorrectly inserted. Obstruction between remote and receiver. | Replace batteries, ensure correct polarity. Ensure a clear line of sight to the fan. |
| Fan wobbles. | Loose mounting screws. Unbalanced blades. | Ensure all mounting screws are tightened. Refer to assembly instructions for blade balancing. |
8. Specifications
| Feature | Detail |
|---|---|
| Brand | Briloner |
| Model Number | 3801015 |
| Product Dimensions | 48.5 x 48.5 x 14.5 cm (Diameter x Height) |
| Item Weight | 1.65 Kilograms |
| Color | Black/White |
| Material | Plastic |
| Power Source | Wiring (AC) |
| Light Type | Integrated LED |
| Light Wattage | 49W (Total power for light and fan combined, as per product description) |
| Color Temperature (CCT) | 3000K - 6500K (Dimmable) |
| Fan Speeds | 5 levels |
| Control Method | Remote Control |
| Timer Functions | 30 minutes (light), 1 hour (fan) |
| Ingress Protection (IP) Rating | IP20 (Indoor use only) |
| Batteries for Remote | 2 x AAA (included) |
| Certification | Energy Star (Specification met) |
9. Warranty and Support
For warranty information and customer support, please refer to the documentation provided with your purchase or contact your retailer. You may also visit the official Briloner website for further assistance.


