
Wildgame Innovations WGI-WGICM0723
Wildgame Innovations Shadow Trail Camera User Manual
Model: WGI-WGICM0723
1. Introduction
This manual provides detailed instructions for the setup, operation, and maintenance of your Wildgame Innovations Shadow Trail Camera, model WGI-WGICM0723. Please read this manual thoroughly before using the camera to ensure proper function and longevity.
The Shadow Trail Camera is designed for outdoor use, featuring a compact, camouflaged design for discreet placement. It captures high-resolution images and 720p HD videos, equipped with Lightsout invisible infrared LED flash for night vision and Silent Shield technology for quiet operation.
2. What's in the Box
- Wildgame Innovations Shadow Trail Camera (Model WGI-WGICM0723)
- User Manual (this document)
- (Note: Batteries and SD card are typically sold separately unless specified on packaging.)
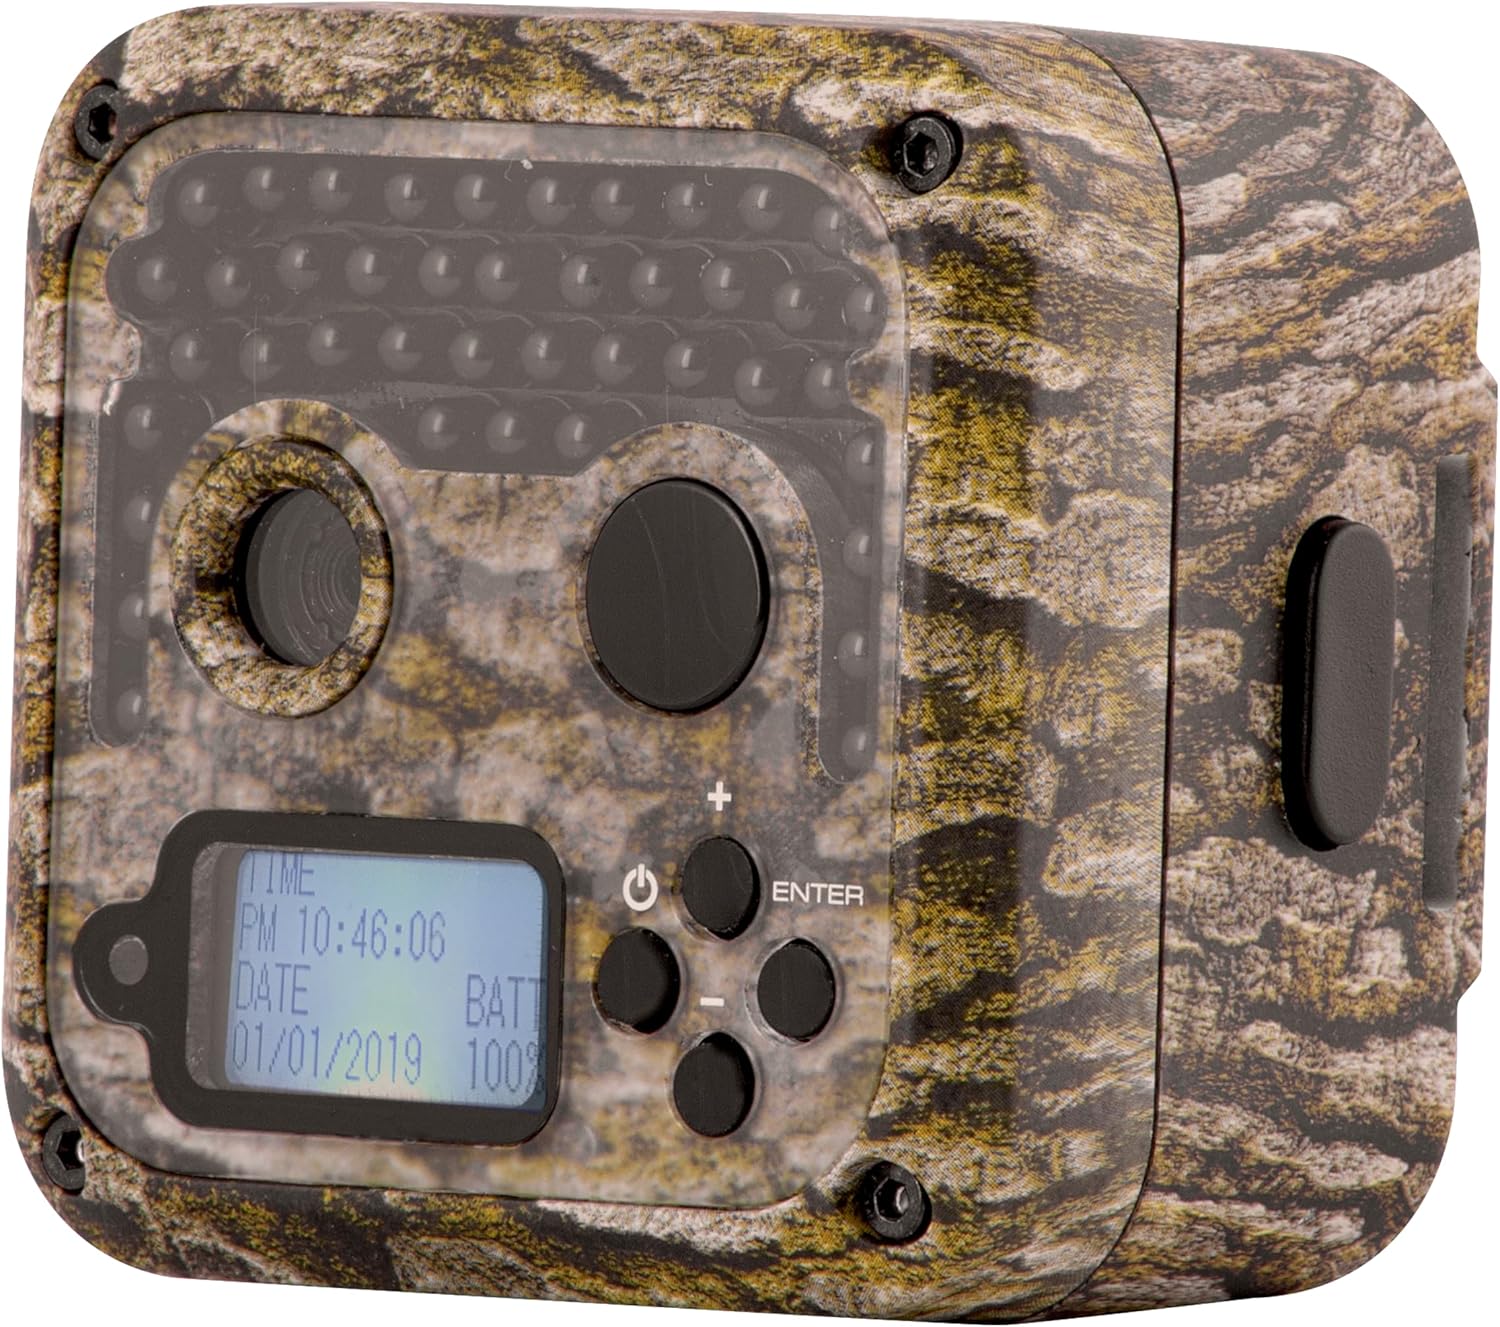
Figure 2.1: Front view of the Wildgame Innovations Shadow Trail Camera, showing the lens, infrared LEDs, and control panel with display.
3. Setup
3.1. Battery Installation
The Shadow Trail Camera requires 4 AA batteries for operation. For optimal performance and battery life, it is recommended to use high-quality alkaline or lithium batteries.
- Locate the battery compartment on the side or bottom of the camera.
- Open the latch or door to access the compartment.
- Insert 4 AA batteries, ensuring correct polarity (+/-) as indicated inside the compartment.
- Close the battery compartment door securely to maintain water resistance.

Figure 3.1: View of the Wildgame Innovations Shadow Trail Camera with the battery compartment open, showing the placement of AA batteries.
3.2. SD Card Installation
A Class 10 SD card (up to 32GB recommended) is required to store images and videos. Ensure the SD card is formatted before first use.
- Locate the SD card slot, typically near the battery compartment.
- Insert the SD card with the metal contacts facing down (or as indicated by the slot diagram) until it clicks into place.
- To remove, gently push the card in until it clicks, then release, and it will spring out.
3.3. Initial Power On and Basic Settings
After installing batteries and SD card:
- Turn the camera ON using the power button. The backlit display will illuminate.
- Use the navigation buttons (up, down, left, right, ENTER) to set the current date and time.
- Format the SD card: Navigate to the "Format SD" option in the menu and confirm. This will erase all data on the card.
- Adjust basic settings such as photo resolution (26MP), video resolution (720p), and trigger delay as desired.
4. Operating Instructions
4.1. Mounting the Camera
The Shadow camera is designed for discreet mounting on trees or fence posts.
- Choose a location that provides a clear view of the desired area, free from obstructions.
- Mount the camera approximately 3-6 feet (1-2 meters) off the ground.
- Use the included mounting strap or a compatible mounting accessory to secure the camera firmly.
- Angle the camera slightly downwards to capture subjects effectively and avoid direct sunlight into the lens.
4.2. Camera Modes
The camera typically operates in one of the following modes:
- Photo Mode: Captures still images when triggered by motion.
- Video Mode: Records video clips when triggered by motion.
- Photo + Video Mode: Captures a still image followed by a video clip when triggered.
Select your desired mode through the camera's menu settings.
4.3. Advanced Settings
Explore the camera's menu for advanced settings:
- Trigger Delay: Adjust the time between consecutive triggers.
- Sensitivity: Set the motion sensor sensitivity (High, Medium, Low).
- Time Lapse: Capture images at set intervals regardless of motion.
- Exposure Control: Fine-tune image brightness and clarity.
- Adaptive Illumination: Automatically adjusts flash intensity based on target distance.
5. Maintenance
5.1. Cleaning
- Wipe the camera body with a soft, damp cloth.
- Clean the lens and infrared LEDs gently with a microfiber cloth to avoid scratches.
- Ensure no dirt or debris accumulates around the seals of the battery and SD card compartments.
5.2. Battery Replacement
Replace batteries when the low battery indicator appears on the display or when performance degrades. Always replace all batteries at once with new ones of the same type.
5.3. SD Card Management
Regularly check the SD card for available space. Transfer captured media to a computer and format the SD card periodically to maintain optimal performance and prevent data corruption.
6. Troubleshooting
| Problem | Possible Cause | Solution |
|---|---|---|
| Camera not powering on | Dead or incorrectly installed batteries | Replace batteries; check polarity. |
| No images/videos captured | Full SD card, incorrect settings, low sensitivity, faulty SD card | Format/replace SD card; check camera mode and sensitivity settings. |
| Poor image/video quality | Dirty lens, low light, incorrect exposure settings | Clean lens; adjust exposure settings; ensure adequate lighting. |
| False triggers | High sensitivity, moving branches/foliage | Reduce sensitivity; clear obstructions from detection area. |
7. Specifications
| Feature | Detail |
|---|---|
| Model | WGI-WGICM0723 |
| Image Resolution | Up to 26 Megapixels |
| Video Resolution | 720p HD |
| Flash Type | Lightsout Invisible Infrared LED |
| Audio | Silent Shield Technology (quiet operation) |
| Power Source | 4 AA Batteries (not included) |
| Storage | SD Card (up to 32GB recommended, not included) |
| Connectivity | Wi-Fi (for smartphone compatibility, if applicable) |
| Mounting Type | Tree Mount |
| Dimensions (L x W x H) | 6 x 4 x 4 inches |
| Weight | 1.02 pounds |
| UPC | 616376001819 |
8. Warranty and Support
For warranty information and technical support, please refer to the official Wildgame Innovations website or contact their customer service directly. Keep your purchase receipt as proof of purchase for warranty claims.
Manufacturer: GSM Outdoors
Brand Website: www.wildgameinnovations.com
Related documentsWGI-WGICM0723


Ask a question about this manual
Ask about setup, troubleshooting, compatibility, parts, safety, or missing instructions. Manuals+ will review the question and use this page’s manual context to help answer it.