
1. Introduction
The Wildgame Innovations Kicker 16MP LIGHTSOUT trail camera is designed for capturing high-resolution images and videos of wildlife with minimal disturbance. Featuring invisible black LEDs, it provides discreet illumination for nighttime recording. This manual provides essential information for setting up, operating, maintaining, and troubleshooting your camera.
Key Features:
- Megapixels: 16MP for high-resolution photos.
- Illumination Range: 60 feet with 36 invisible black LEDs for discreet night vision.
- Video Resolution: 720p HD for clear video recordings.
- Trigger Speed: Less than 1 second to capture fast-moving subjects.
- Durability: Water-resistant design for outdoor use.
- Power: Operates on 8 AA batteries (not included).
- Storage: Requires an SD card (not included) for storing media.
2. Package Contents
Upon opening your Wildgame Innovations Kicker 16MP LIGHTSOUT package, please verify that all the following items are included:
- Wildgame Innovations Kicker 16MP LIGHTSOUT Trail Camera
- Adjustable Tree Strap with Alligator Clips
- Instruction Manual (this document)

Image: The Wildgame Innovations Kicker 16MP LIGHTSOUT trail camera, shown with 8 AA batteries and the included adjustable tree strap.
3. Setup
3.1 Battery Installation
The camera requires 8 AA alkaline batteries for operation. For optimal performance and battery life, especially in cold conditions, it is recommended to use high-quality alkaline batteries. Some users have reported issues with lithium batteries; therefore, alkaline batteries are advised.
- Open the camera housing by unlatching the side clips.
- Locate the battery compartment.
- Insert 8 AA batteries, ensuring correct polarity (+/-) as indicated inside the compartment.
- Close the battery compartment securely.
3.2 SD Card Installation
An SD card is required to store photos and videos. The camera supports standard SD cards. It is recommended to use an SD card with a Class 4 or higher speed rating for reliable performance.
- With the camera housing open, locate the SD card slot.
- Insert the SD card into the slot with the metal contacts facing down, until it clicks into place.
- To remove the SD card, gently push it in until it clicks, then release, and it will eject.

Image: The camera opened, revealing the battery compartment on the right and the SD card slot above it, along with the control buttons and display screen on the left.
3.3 Mounting the Camera
The adjustable tree strap allows for flexible mounting options.
- Select a sturdy tree or post at the desired height and location.
- Thread the adjustable strap through the mounting slots on the back of the camera.
- Securely fasten the strap around the tree/post using the alligator clips, ensuring the camera is stable and pointed towards the desired area.
- Adjust the camera angle as needed.
4. Operating Instructions
The Kicker 16MP LIGHTSOUT camera features a simple interface for ease of use. The 1.5-inch screen allows for basic configuration.
4.1 Powering On/Off
- To power on, slide the power switch to the "ON" position.
- To power off, slide the power switch to the "OFF" position.
4.2 Setting Date and Time
It is crucial to set the correct date and time for accurate record-keeping on your captured media.
- Access the camera's menu settings (refer to the on-screen prompts or included quick start guide for specific button navigation).
- Navigate to the "Date/Time" setting.
- Adjust the year, month, day, hour, and minute using the control buttons.
- Confirm your settings to save.
4.3 Photo and Video Modes
The camera can capture both still images and video clips.
- Photo Mode: Captures still images at 16MP resolution.
- Video Mode: Records video clips at 720p HD resolution.
Use the camera's internal display and control buttons to select your desired mode and adjust settings such as photo resolution, video length, and trigger delay.
4.4 Retrieving Media
To view your captured photos and videos:
- Remove the SD card from the camera.
- Insert the SD card into a compatible SD card reader connected to a computer or other viewing device.
- Access the files on the SD card to view, copy, or delete media.
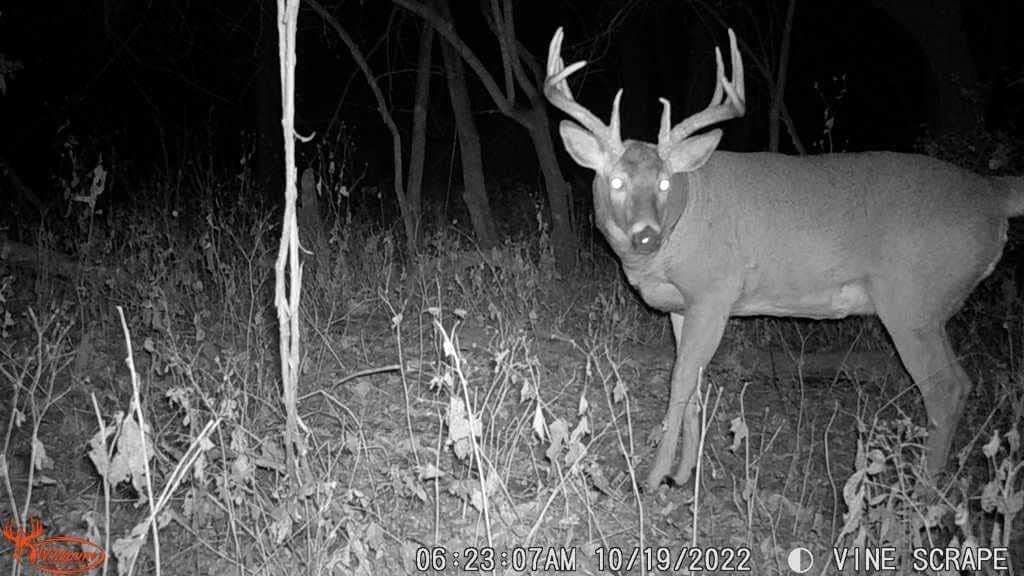
Image: A nighttime capture by the trail camera, showing a deer with visible eye glow, demonstrating the camera's low-light capabilities.

Image: A daytime capture by the trail camera, showing a deer in a field with a hunting blind in the background, illustrating clear image quality during daylight hours.

Image: Another nighttime capture by the trail camera, featuring a deer with prominent antlers, showcasing the camera's ability to capture detail in low light.
5. Maintenance
5.1 Battery Replacement
Replace batteries when the low battery indicator appears on the camera's display or when performance degrades. Always replace all 8 batteries simultaneously with new, high-quality alkaline batteries.
5.2 SD Card Management
Regularly check the SD card capacity. Format the SD card periodically (after backing up important files) to maintain optimal performance and prevent data corruption. Do not remove the SD card while the camera is powered on or actively recording.
5.3 Cleaning and Storage
- Wipe the camera's exterior with a soft, damp cloth. Avoid abrasive cleaners or solvents.
- Ensure the lens and infrared LEDs are clean and free of dirt or smudges for clear images.
- When storing the camera for extended periods, remove the batteries to prevent leakage and damage. Store in a cool, dry place.
6. Troubleshooting
This section addresses common issues you might encounter with your Kicker 16MP LIGHTSOUT camera.
| Problem | Possible Cause / Solution |
|---|---|
| Camera does not power on. |
|
| Poor image/video quality. |
|
| Camera not triggering / Missing events. |
|
| Visible flash at night (despite "LIGHTSOUT"). |
|
7. Specifications
| Feature | Detail |
|---|---|
| Model Number | WGI-WGICM0746 |
| Megapixels | 16MP |
| Illumination Range | 60 feet |
| Illumination Type | 36 invisible black LEDs |
| Trigger Speed | <1 second |
| Video Resolution | 720p HD |
| Power Source | 8 AA Batteries (Alkaline recommended) |
| Memory Type | SD Card (Not Included) |
| Screen Size | 1.5 Inches |
| Mounting Type | Tree Mount (Adjustable Strap Included) |
| Water Resistance Level | Water Resistant |
| Product Dimensions | 7.5 x 2.75 x 10.8 inches |
| Item Weight | 1.33 pounds |
| Color | Brown |
| Connectivity Technology | Wi-Fi (Note: This refers to the HuntSmart app connectivity, not direct camera Wi-Fi for file transfer) |
8. Warranty and Support
8.1 Warranty Information
The Wildgame Innovations Kicker 16MP LIGHTSOUT camera typically comes with a 1-year limited warranty from the date of purchase, covering manufacturing defects. Please retain your proof of purchase for warranty claims.
8.2 Customer Support
For technical assistance, warranty claims, or additional product information, please visit the official Wildgame Innovations website or contact their customer service department. Contact details are usually available on the manufacturer's website or product packaging.
Note: Some users have reported challenges with customer service response times. It is recommended to consult the official website for the most current support procedures.


