
RAINPOINT ITV205
RAINPOINT Dual Zone Sprinkler Timer User Manual
Model: ITV205
Brand: RAINPOINT
1. Introduction
The RAINPOINT Dual Zone Sprinkler Timer (Model ITV205) is designed to simplify your garden watering tasks. This advanced timer offers dual independent control, allowing you to manage two separate watering zones simultaneously with customized programs. Its durable and user-friendly design ensures reliable performance and water conservation for your lawn, garden, and potted plants.

Figure 1: RAINPOINT Dual Zone Sprinkler Timer
2. Key Features
- Leakage Free, Long Lasting & Accurate: UV-proof, corrosion-proof, and waterproof design with advanced circuit control for reliable and accurate scheduling.
- Dual Watering: Independently control two zones, allowing up to 6 watering times per day or as little as once a week for each valve.
- Multiple-Mode Manual Watering: Manually activate Zone 1, Zone 2, or both without interrupting programmed schedules.
- User Friendly Rain Delay: Postpone watering schedules for 24, 48, or 72 hours to conserve water during rainy periods.
- Functional & Long Lasting: Powered by 2 AAA 1.5V Alkaline batteries (not included) with a service life of up to 6 months.
3. Package Contents
Please ensure all items are present upon unboxing:
- RAINPOINT Dual Zone Sprinkler Timer (ITV205)
- User Manual
4. Setup
4.1 Battery Installation
- Locate the battery compartment on the back of the timer.
- Slide the battery cover open.
- Insert 2 new AAA 1.5V Alkaline batteries, ensuring correct polarity (+/-).
- Securely close the battery cover.
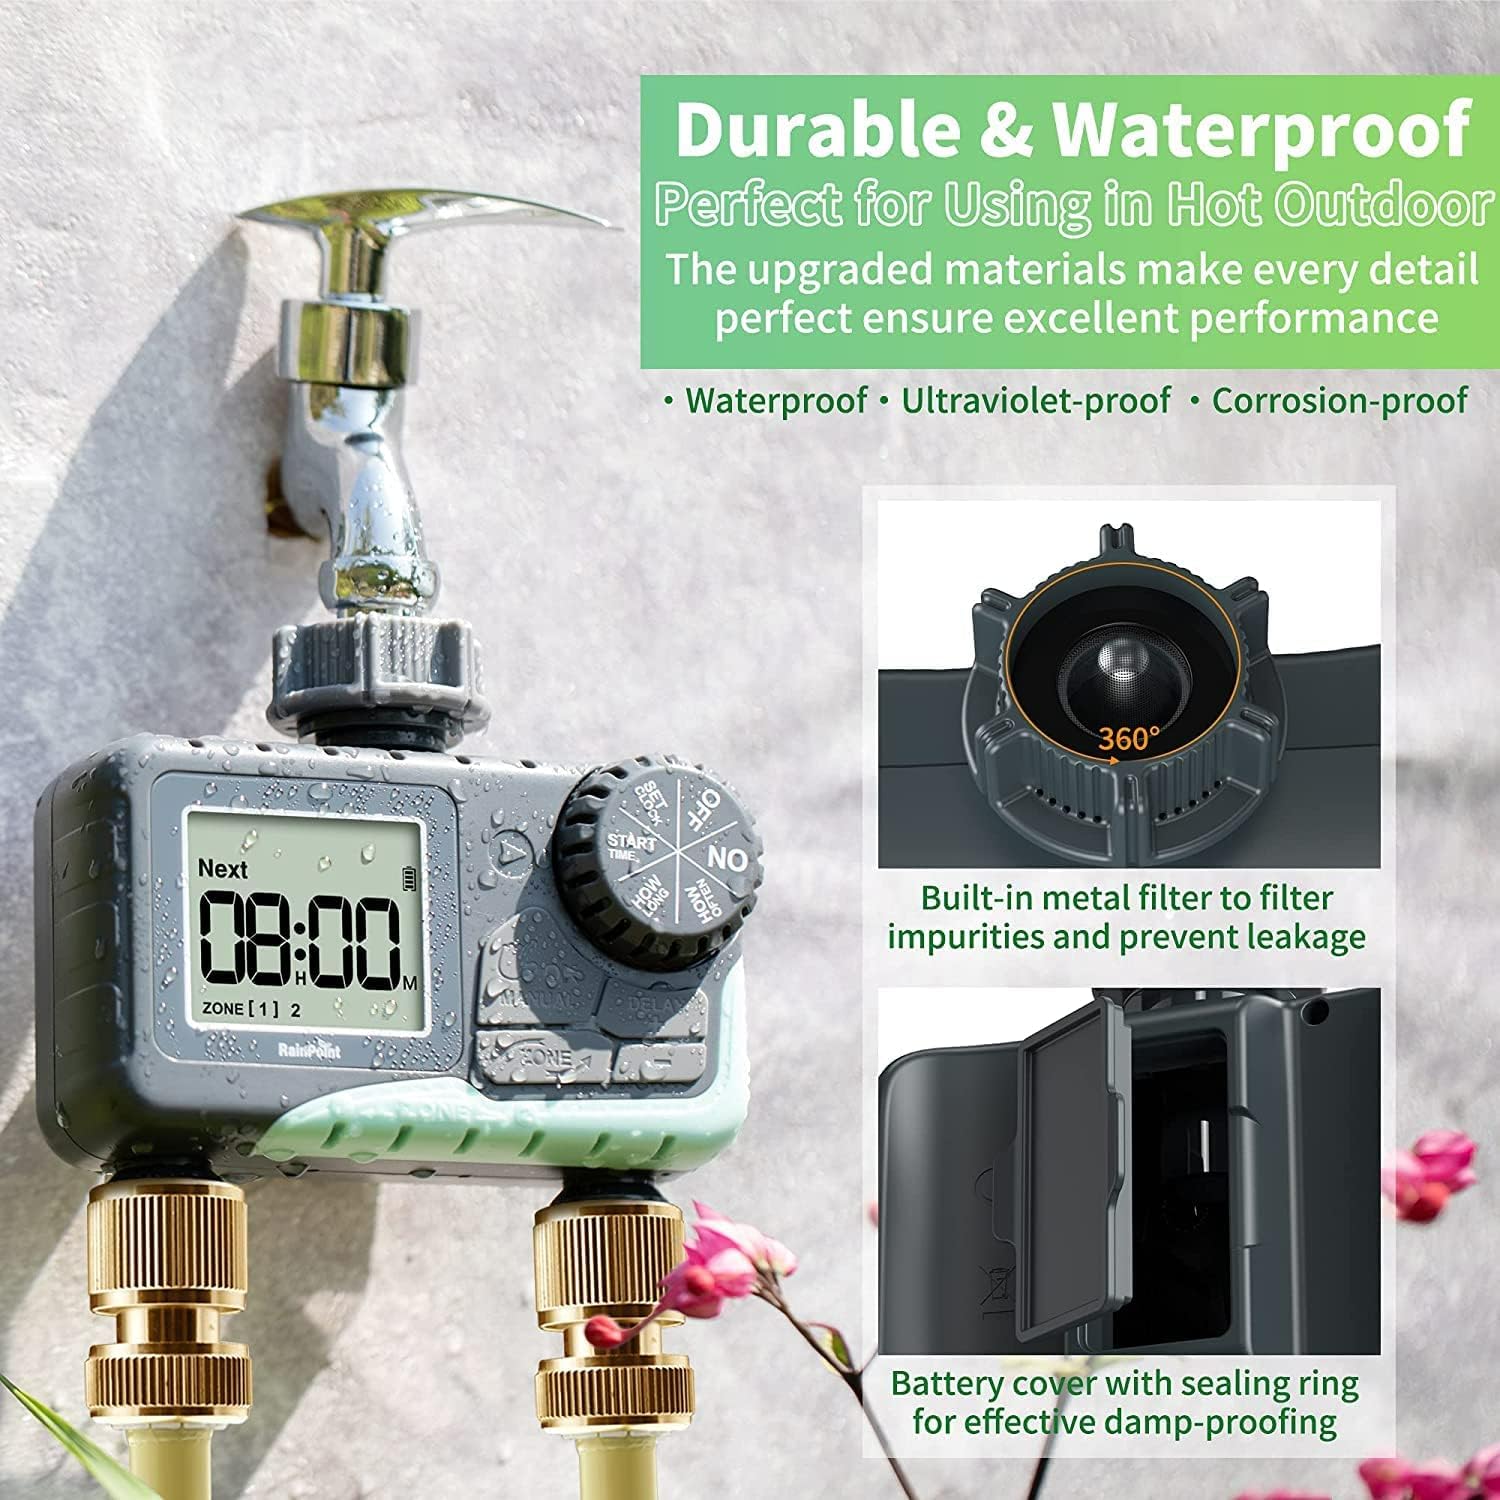
Figure 2: Durable and Waterproof Design with Battery Cover
4.2 Connecting to Faucet
- Ensure the faucet is turned off.
- Thread the timer onto your outdoor hose faucet. Hand-tighten only to prevent damage. The timer is designed to be UV-proof, corrosion-proof, and waterproof.
- The built-in metal filter helps prevent impurities from entering the timer. Ensure it is properly seated.
4.3 Connecting Hoses
- Connect your garden hoses to the two independent outlets at the bottom of the timer.
- Hand-tighten the hose connections.
4.4 Setting the Clock
- Turn the dial to the "SET CLOCK" position.
- Use the "+" and "-" buttons to adjust the current time (hours and minutes).
- Press the "OK/MANUAL" button to confirm each setting.
- Turn the dial back to the "ON" position to save the time.

Figure 3: Large LCD Screen for Easy Programming and Reading
5. Operating Instructions
5.1 Automatic Watering (Programming)
The timer allows for independent programming of two zones.
- Set Start Time: Turn the dial to "START TIME". Use "+" and "-" to set the desired start time for watering. Press "OK/MANUAL" to confirm.
- Set How Long: Turn the dial to "HOW LONG". Use "+" and "-" to set the watering duration (from 0 to 3 hours 59 minutes). Press "OK/MANUAL" to confirm.
- Set How Often: Turn the dial to "HOW OFTEN". Use "+" and "-" to set the watering frequency (e.g., every 1-12 hours or every 1-7 days). Press "OK/MANUAL" to confirm.
- Select Zone: To program the second zone, press the "ZONE" button to switch between Zone 1 and Zone 2 indicators on the screen. Repeat steps 1-3 for the selected zone.
- Turn the dial to "ON" to activate the programmed schedule.

Figure 4: Zone 1 & Zone 2 Simultaneously Programmed

Figure 5: Detailed Automatic Watering Settings
5.2 Manual Watering
Manual watering allows for immediate, temporary watering without affecting your programmed schedule.
- Ensure the dial is in the "ON" position.
- Press and hold the "OK/MANUAL" button for 3-5 seconds until the display changes to manual mode.
- Press the "ZONE" button repeatedly to select the desired zone(s) for manual watering: 1-click for Zone 1 only, 2-clicks for Zone 2 only, 3-clicks for both zones.
- Use the "+" and "-" buttons to adjust the manual watering duration (1 minute to 8 hours).
- Press "OK/MANUAL" again to start manual watering. The timer will count down the set duration.
- To stop manual watering early, turn the dial to "OFF" and then back to "ON". The screen will return to normal, and your original schedule will remain intact.

Figure 6: Manual Watering Without Interrupting Programming
5.3 Rain Delay Function
The rain delay feature temporarily pauses your watering schedule to prevent overwatering during rainy weather.
- Ensure the dial is in the "ON" position.
- Press the "DELAY" button. The display will show the delay options (24H, 48H, 72H).
- Use the "+" and "-" buttons to select the desired delay duration.
- Press "OK/MANUAL" to confirm the rain delay. The timer will pause for the selected duration and automatically resume the programmed schedule afterward.

Figure 7: User-friendly Rain Delay Watering
6. Maintenance
- Battery Replacement: Replace the 2 AAA 1.5V Alkaline batteries approximately every 6 months, or when the low battery indicator appears on the screen.
- Filter Cleaning: Periodically check and clean the built-in metal filter to prevent debris from clogging the timer and affecting water flow.
- Winter Storage: During freezing temperatures, disconnect the timer from the faucet and store it indoors in a dry, upright position to prevent damage from ice expansion.

Figure 8: Intelligent Self-Cleaning Valve Mechanism
7. Troubleshooting
| Problem | Possible Cause | Solution |
|---|---|---|
| No water flow | Low battery; Clogged filter; Faucet off; Incorrect programming | Replace batteries; Clean filter; Turn on faucet; Verify program settings |
| Display not working | Dead batteries; Water damage; Extreme temperature exposure | Replace batteries; Ensure battery cover is sealed; Avoid direct prolonged sunlight or freezing temperatures |
| Timer loses time/incorrect timing | Low battery; Internal clock issue | Replace batteries; Reset clock and reprogram. If issue persists, contact customer support. |
| Water leakage from connections | Loose connections; Damaged O-ring/washer | Ensure connections are hand-tight; Check and replace O-rings/washers if damaged. |
8. Specifications
- Model: ITV205
- Brand: RAINPOINT
- Color: Black
- Material: Plastic
- Product Dimensions: 2.9"D x 5.4"W x 5.4"H
- Item Weight: 0.55 Pounds (8.8 ounces)
- Number of Settings: 3 (Auto/Manual/Rain Delay)
- Power Source: 2 x AAA 1.5V Alkaline batteries (not included)
- UPC: 726754250224
9. Warranty and Support
RAINPOINT is committed to providing high-quality garden irrigation equipment. Many users have reported positive experiences with RAINPOINT's customer service, noting their professionalism, responsiveness, and willingness to offer solutions. Some customers have mentioned a 5-year warranty on their units, indicating strong product backing.
For any inquiries, troubleshooting assistance, or warranty claims, please refer to the contact information provided in your product packaging or visit the official RAINPOINT website. RAINPOINT aims to provide answers within 24 hours via email, live chat, or local business support.
Related documentsITV205


Ask a question about this manual
Ask about setup, troubleshooting, compatibility, parts, safety, or missing instructions. Manuals+ will review the question and use this page’s manual context to help answer it.