1. Introduction
This manual provides detailed instructions for the safe and proper installation, operation, and maintenance of your SYLVOX Full Motion Outdoor TV Wall Mount, Model S100MCMA0. This mount is designed for outdoor use and accommodates televisions ranging from 40 to 75 inches, with VESA patterns up to 600x400mm and a maximum weight capacity of 100 lbs (45.5 kg).
The mount features a robust double-arm articulated design, allowing for flexible adjustments including swivel, tilt, extension, and retraction to optimize your viewing experience.
2. Important Safety Information
WARNING: Failure to read and follow these instructions can result in serious personal injury, property damage, or voiding of your warranty.
- Professional Installation: It is highly recommended that this product be installed by qualified professional personnel.
- Wall Requirements: The installation wall must be solid and reliable. Suitable wall types include solid wood wall column structures, brick walls, or reinforced concrete vertical walls. Do not install on drywall or plaster without proper reinforcement.
- VESA Compatibility: Before purchasing and installing, confirm that the mounting hole size on the back of your television is compatible with the VESA patterns supported by this mount (200x200mm, 300x200mm, 300x300mm, 400x300mm, 400x400mm, 500x400mm, 600x400mm).
- Weight Capacity: Do not exceed the maximum weight capacity of 100 lbs (45.5 kg). Overloading can lead to mount failure and injury.
- Outdoor Placement: To prolong the service life of the mount, it is recommended to install it under sheltered eaves to avoid direct rain exposure.
- Cable Management: Ensure all cables are routed safely and securely to prevent tripping hazards or damage.
3. Package Contents
Verify that all components are present before beginning installation. If any parts are missing or damaged, do not proceed with installation and contact customer support.
- SYLVOX Full Motion Outdoor TV Wall Mount assembly
- Instruction manual
- Mounting hardware kit (includes bolts, nuts, screws, washers, etc. required for installation)

Image 1: Overview of the SYLVOX Full Motion Outdoor TV Wall Mount components.
4. Specifications
| Feature | Specification |
|---|---|
| Brand | SYLVOX |
| Model Number | S100MCMA0 |
| Mounting Type | Wall Mount |
| Movement Type | Articulating, Tilt |
| Material | Alloy Steel |
| Color | Black |
| Compatible TV Sizes | 40" - 75" |
| Maximum Weight Capacity | 100 lbs (45.5 kg) |
| VESA Compatibility | 200x200mm, 300x200mm, 300x300mm, 400x300mm, 400x400mm, 500x400mm, 600x400mm |
| Extension Distance | 1.9" (49mm) to 19.6" (500mm) |
| Swivel Angle | +/- 45° (depending on TV size) |
| Tilt Angle | Forward 8°, Backward 5° |
| Item Weight | 12.87 lbs (5.84 kg) |
| UPC | 810079220298 |
5. Setup and Installation
Before You Begin:
- Read all instructions thoroughly.
- Ensure you have all necessary tools (e.g., drill, stud finder, level, screwdriver, wrench).
- Confirm your wall type is suitable and can support the weight of the mount and your TV.
- Verify your TV's VESA pattern matches the mount's compatibility.
- It is strongly recommended to have at least two people for installation, especially when mounting the TV.
5.1 Attaching TV Brackets to Your TV
- Carefully place your TV face down on a soft, clean surface to prevent screen damage.
- Identify the VESA mounting holes on the back of your TV.
- Select the appropriate screws, washers, and spacers from the hardware kit that fit your TV's mounting holes.
- Attach the vertical TV brackets to the back of your TV, ensuring they are centered and securely fastened. Do not overtighten.

Image 2: Illustration of the two-arm articulated design and VESA compatibility, showing how TV brackets attach.
5.2 Mounting the Wall Plate to the Wall
- Determine the desired height and location for your TV. Use a stud finder to locate wall studs if installing on a wood stud wall. For concrete or brick walls, use appropriate anchors (not always included, consult a professional).
- Position the wall plate template (if provided, or the wall plate itself) on the wall and mark the pilot hole locations. Use a level to ensure it is perfectly horizontal.
- Drill pilot holes at the marked locations. The size of the drill bit will depend on your wall type and the lag bolts used.
- Secure the wall plate to the wall using the provided lag bolts and washers. Tighten all bolts firmly, but do not overtighten.

Image 3: Example of the wall mount installed on an outdoor stone wall, demonstrating its robust structure.
5.3 Hanging the TV on the Wall Plate
- With assistance, carefully lift the TV with the attached brackets and hook them onto the wall plate.
- Ensure the TV is securely seated on the wall plate.
- Engage any safety locking mechanisms (if present) to prevent the TV from accidentally disengaging from the mount.
6. Operating the Mount (Adjustments)
The SYLVOX Full Motion Outdoor TV Wall Mount offers various adjustments to achieve your optimal viewing angle.
6.1 Extension and Retraction
The mount features flexible 6 articulating dual arms that allow the TV to extend up to 19.6 inches (500mm) from the wall and retract back to a minimum distance of 1.9 inches (49mm).

Image 4: Visual representation of the mount's flexible articulated arms, demonstrating extension and retraction capabilities.
6.2 Swivel Adjustment
You can swivel the TV left or right by up to +/- 45 degrees, depending on the size of your television and its distance from the wall. Gently push or pull the TV to the desired angle.
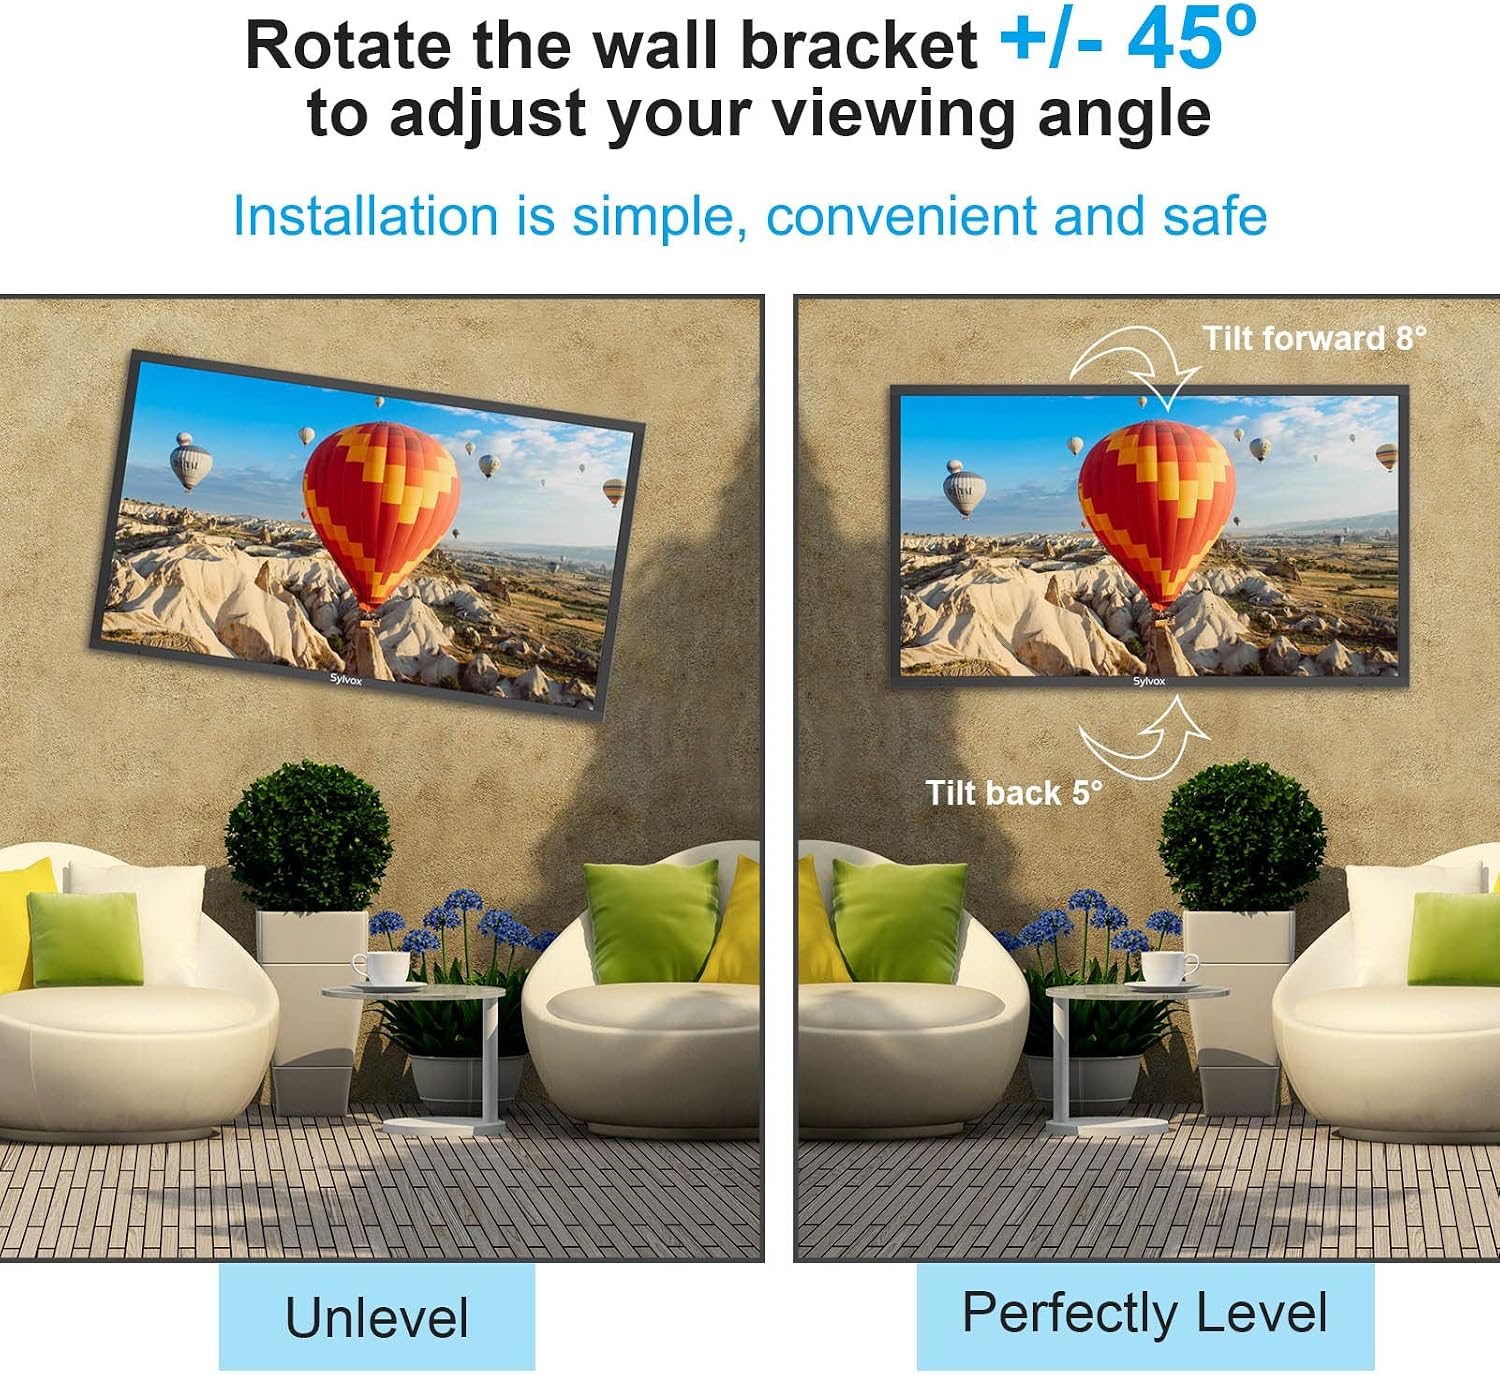
Image 5: Illustration of the swivel function, allowing adjustment of the viewing angle by rotating the TV +/- 45 degrees.
6.3 Tilt Adjustment
The mount allows for a forward tilt of 8 degrees and a backward tilt of 5 degrees. This can help reduce glare and provide a better viewing angle from different heights.
To adjust the tilt, loosen the tilt adjustment knobs or bolts on the TV brackets, set the TV to the desired angle, and then securely tighten the knobs/bolts.
6.4 Cable Management
The mount includes a free wire storage card slot and channels within the articulating arms to help organize and conceal power cables and other wires. This improves safety and maintains a tidy appearance.

Image 6: Detail of the mount's design, highlighting the integrated wire storage and cable management features for a clean installation.
7. Maintenance
- Regular Inspection: Periodically check all screws, bolts, and connections to ensure they remain tight and secure. Loose connections can lead to instability.
- Cleaning: Clean the mount with a soft, damp cloth. Avoid abrasive cleaners or solvents that could damage the finish.
- Outdoor Protection: As recommended, installing the mount under sheltered eaves will significantly extend its lifespan by protecting it from direct weather exposure.
- Lubrication: If the articulating arms become stiff over time, a small amount of silicone-based lubricant can be applied to the pivot points.
8. Troubleshooting
This section addresses common issues you might encounter with your TV wall mount.
- Mount feels unstable after installation:
- Ensure all wall plate bolts are securely tightened into a solid wall structure.
- Verify that the TV brackets are correctly attached to the TV and securely hooked onto the wall plate, with any safety locks engaged.
- Confirm the TV weight does not exceed the mount's maximum capacity.
- Difficulty adjusting the TV (swivel/tilt/extension):
- Check if any adjustment knobs or bolts are overtightened. Loosen them slightly to allow movement, then re-tighten once the desired position is achieved.
- Ensure no cables are snagged or obstructing movement.
- Apply a small amount of silicone lubricant to pivot points if movement is stiff.
- TV is not level:
- Most mounts allow for minor post-installation leveling adjustments. Consult the specific instructions for your mount to adjust the level.
- Ensure the wall plate was installed perfectly level initially.
- Missing parts or damaged components:
- Do not proceed with installation. Contact SYLVOX customer support immediately for assistance.
9. Warranty and Customer Support
The SYLVOX Full Motion Outdoor TV Wall Mount comes with a 5-year support and warranty from the date of purchase.
For warranty claims, technical assistance, or any questions regarding your product, please contact SYLVOX customer support through their official website or the retailer where the product was purchased. Please have your model number (S100MCMA0) and proof of purchase ready when contacting support.


