Introduction
Thank you for choosing the WALI Dual Monitor Gas Spring Desk Mount. This manual provides detailed instructions for assembly, operation, and maintenance to ensure optimal performance and longevity of your product. Please read this manual thoroughly before installation and keep it for future reference.

Image: The WALI Dual Monitor Gas Spring Desk Mount, showcasing its two arms and the included C-clamp and grommet mounting options.
Key Features
- Dual Monitor Support: Designed to hold two monitors, enhancing your workspace efficiency and productivity.
- Wide Compatibility: Suitable for monitors ranging from 17 to 32 inches, supporting up to 19.8 lbs per arm. Compatible with VESA patterns 75x75mm and 100x100mm.
- Full Adjustability: Features a high-quality gas spring arm for smooth extension and retraction. Monitor heads can tilt +75°/-45°, swivel +90°/-90°, and rotate 360° for optimal viewing angles.
- Ergonomic Design: Allows monitors to be raised to eye level, promoting a more comfortable and ergonomically correct working posture to reduce neck and eye strain.
- Flexible Installation: Includes both C-clamp and grommet base options to fit various desk thicknesses (0.4" to 3.3").
- Integrated Cable Management: Efficiently routes cables along the arms to maintain a clean and organized desktop.
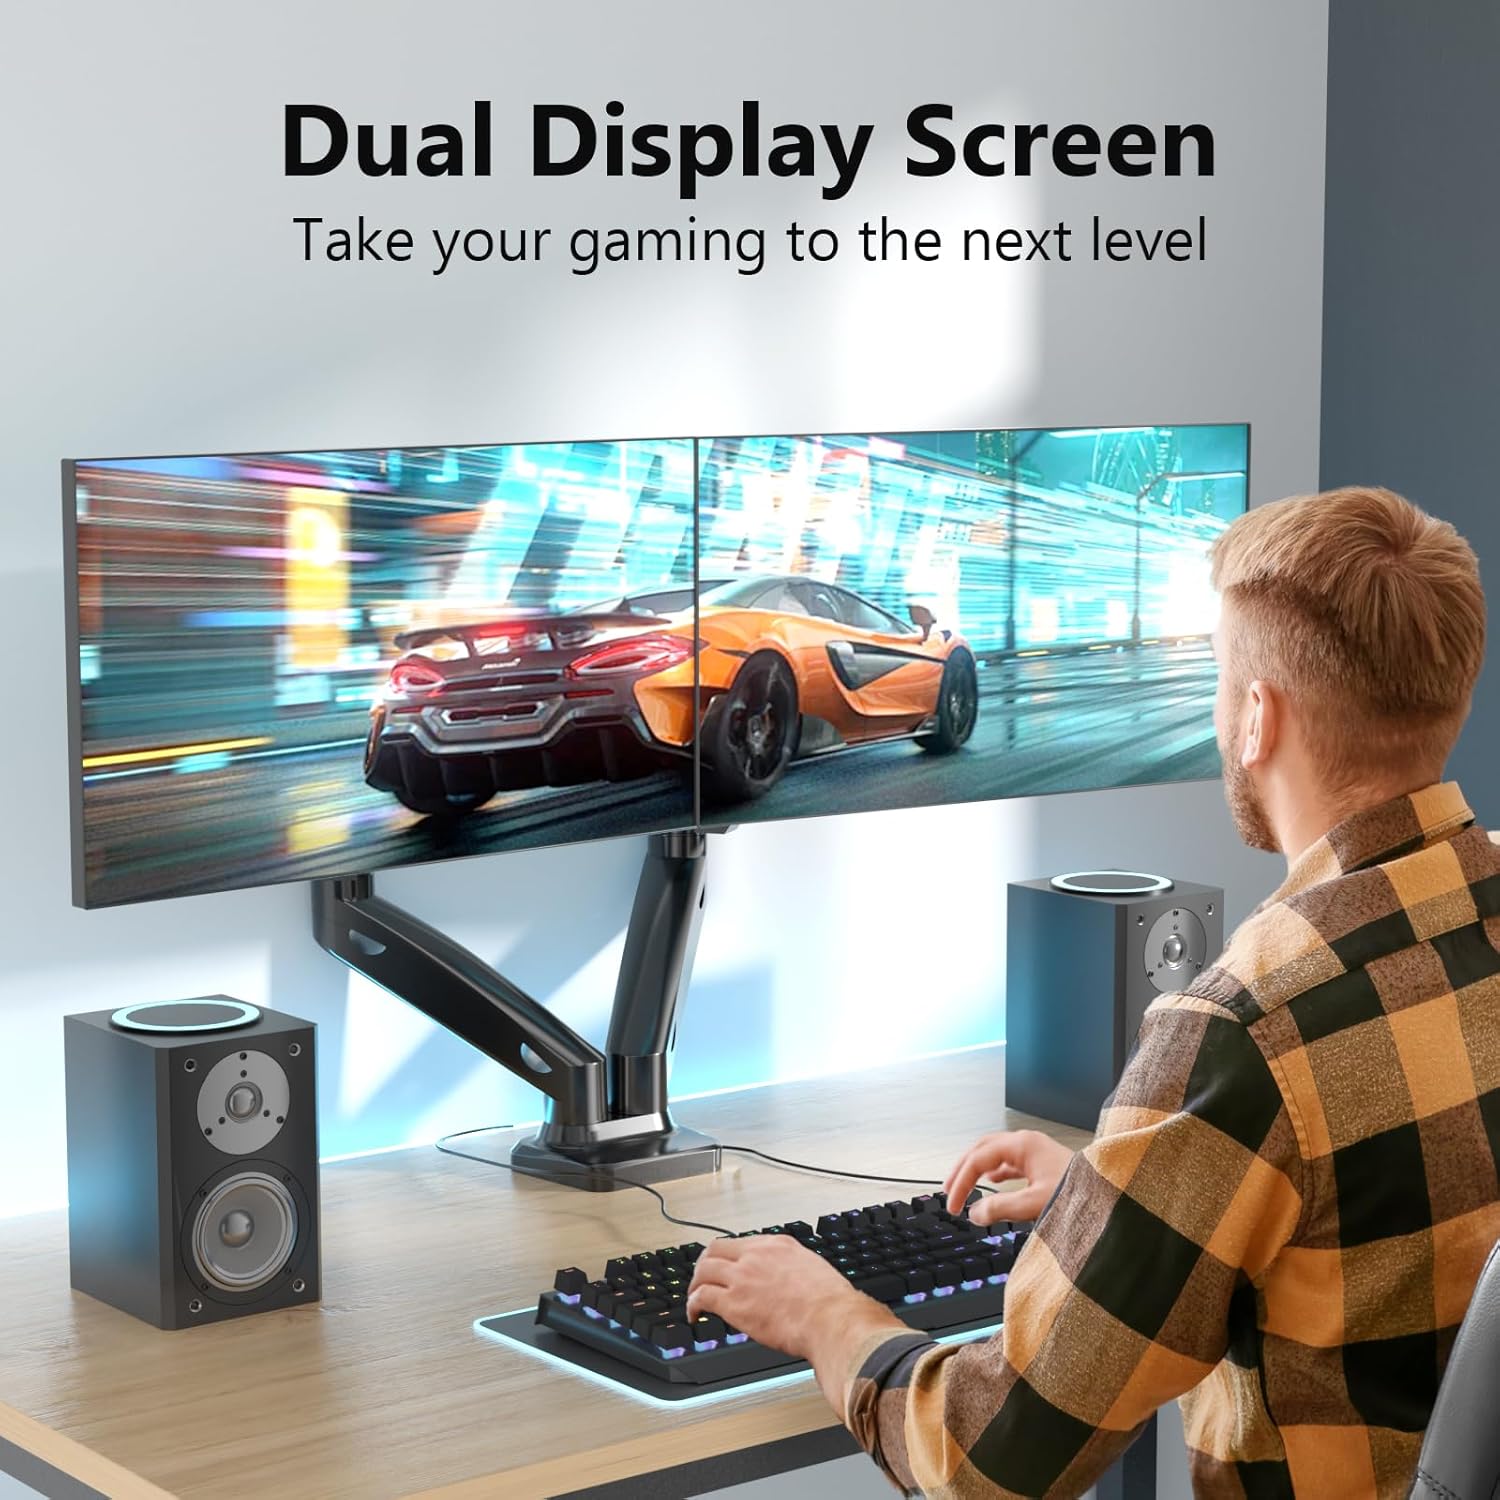
Image: A user demonstrating the dual display setup, highlighting the enhanced workspace and productivity.

Image: Visual representation of display compatibility, showing maximum weight capacity (19.8 lbs per arm), VESA sizes (75x75/100x100mm), and screen size range (17"-32").
Specifications
| Attribute | Value |
|---|---|
| Brand | WALI |
| Model Number | GSMP002 |
| Color | Matte Black |
| Material | Alloy Steel |
| Compatible Devices | Monitor |
| Screen Size Compatibility | 17 - 32 inches |
| Weight Capacity (per arm) | Up to 19.8 lbs (9 kg) |
| VESA Compatibility | 75x75mm, 100x100mm |
| Mounting Type | Table Mount (C-clamp or Grommet) |
| Desk Thickness (C-clamp/Grommet) | 0.4 - 3.3 inches (10-85mm) |
| Tilt Range | +75° to -45° |
| Swivel Range | +90° to -90° |
| Rotation | 360° |
| Max Height | 16 inches (40.6 cm) |
| Max Extension | 19.7 inches (50 cm) |
| UPC | 811278023659 |
Setup and Installation
Before you begin, ensure you have all components from the package and the necessary tools. Two installation options are available: C-clamp and Grommet Base.
Installation Flexibility: C-clamp vs. Grommet Base
Image: Illustration of the two primary installation methods: Option A (C-clamp base) and Option B (Grommet base), both supporting desk thicknesses from 0.4" to 3.3".
Step-by-Step Installation (General Guide):
- Choose Mounting Option: Decide whether to use the C-clamp for desk edges or the grommet base for desks with a pre-drilled hole.
- Assemble Base: Attach the chosen base (C-clamp or grommet) to the main pole according to the instructions provided in the included mounting tool kit.
- Secure to Desk: Securely fasten the assembled base to your desk. Ensure it is stable and tight to prevent wobbling.
- Attach Arms: Slide the monitor arms onto the main pole.
- Attach VESA Plates to Monitors: Secure the VESA mounting plates to the back of your monitors using the provided screws. Ensure the screws are compatible with your monitor's VESA holes.
- Mount Monitors: Carefully slide the monitors (with VESA plates attached) onto the arms. Ensure they click into place securely.
- Adjust Gas Spring Tension: Adjust the gas spring tension to match the weight of your monitors. This ensures smooth movement and stability. (Refer to Operating section for details).
- Cable Management: Route all cables through the integrated cable management channels on the arms for a tidy setup.
Operating and Adjustments
The WALI Dual Monitor Mount offers extensive adjustability to customize your viewing experience.
Angle Adjustment
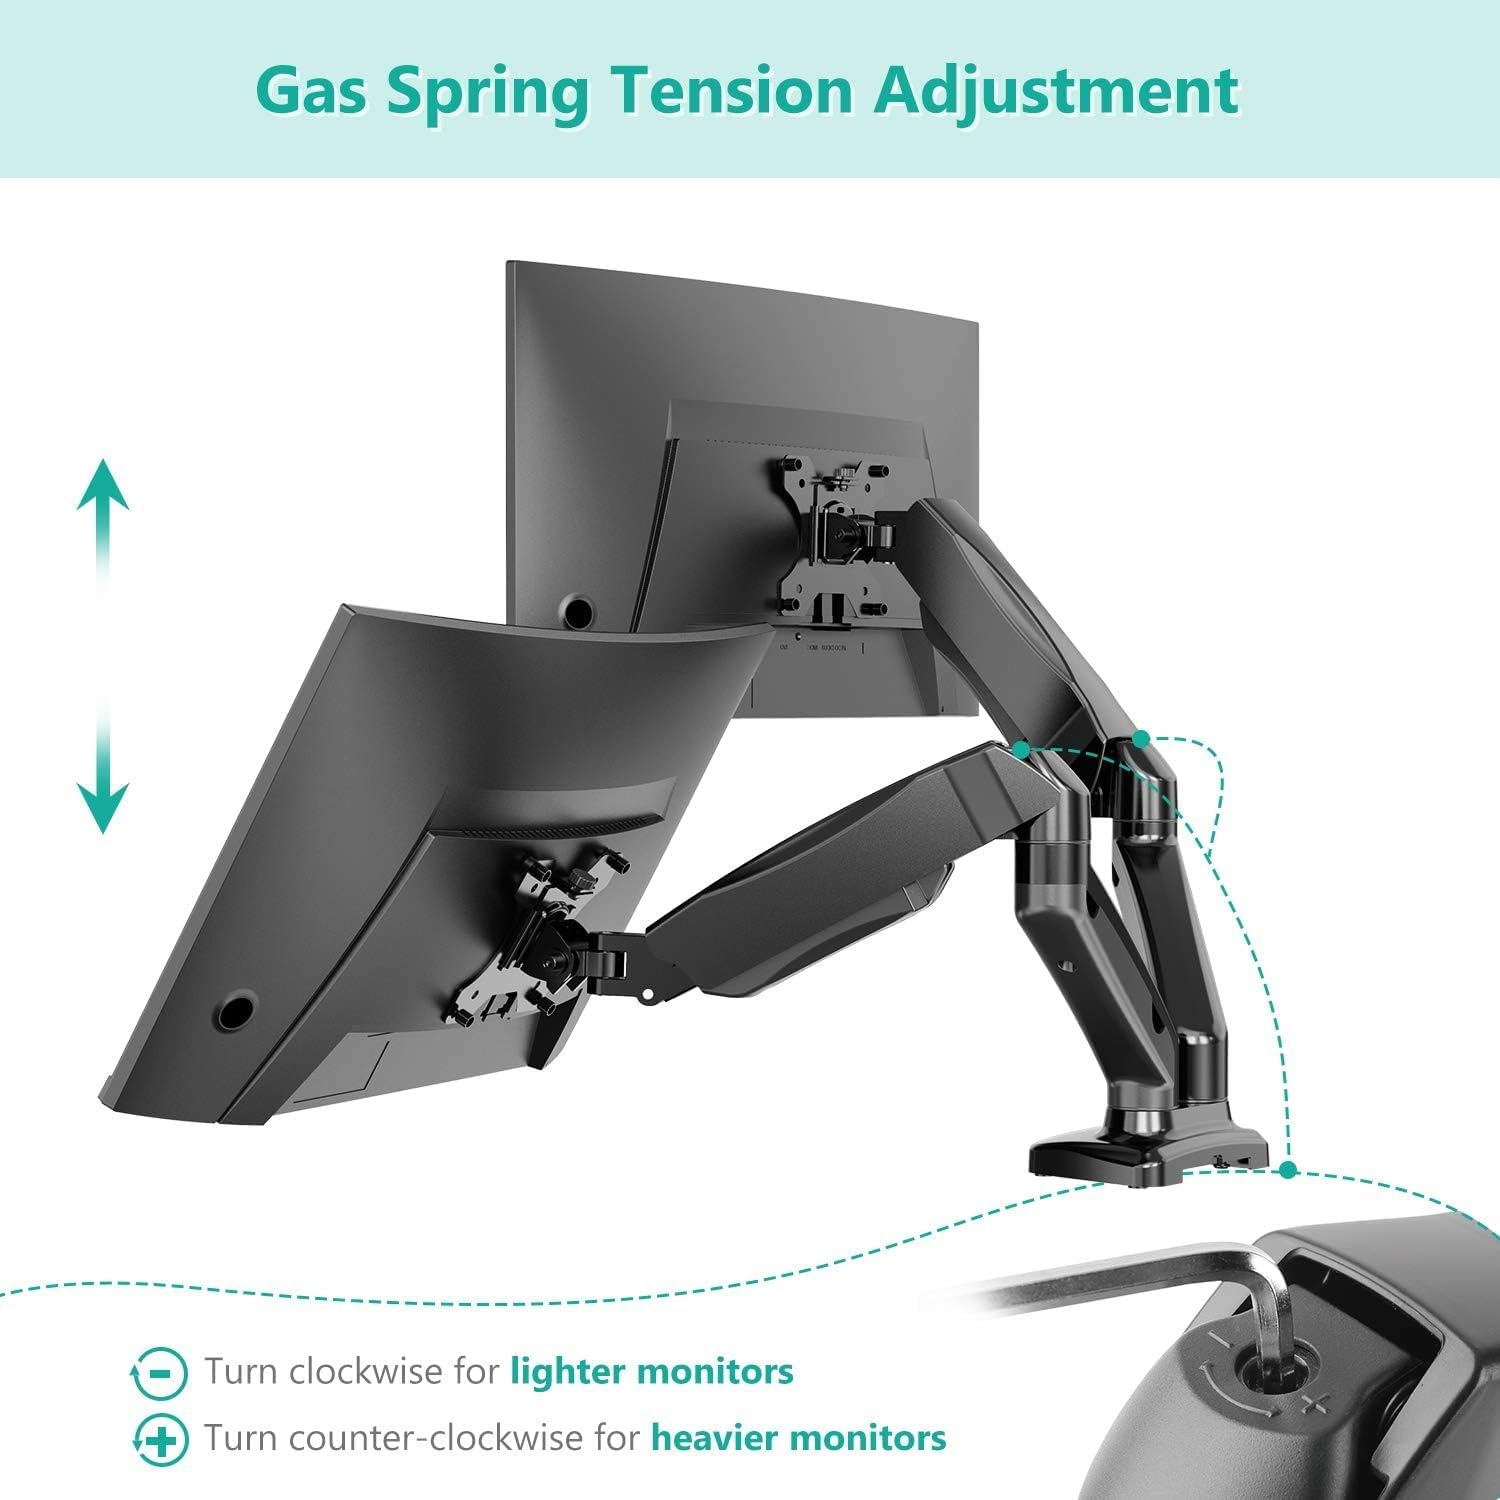
Image: Visual guide for angle adjustments, including swivel (+/-90°), tilt (+75°/-45°), and 360° rotation.
- Tilt: Adjust the monitor screen vertically from +75° to -45° to reduce glare and optimize viewing.
- Swivel: Pivot the monitor horizontally from +90° to -90° to share your screen with others or change viewing angles.
- Rotation: Rotate the monitor 360° to switch between landscape and portrait orientations.
Height and Extension Adjustment

Image: Diagram illustrating the maximum height (16 inches) and maximum extension (19.6 inches) of the monitor arm.
- Height: Use the gas spring arm to effortlessly raise or lower your monitors to your desired ergonomic height, up to a maximum of 16 inches.
- Extension: Extend or retract the arms to bring your monitors closer or push them further away, with a maximum extension of 19.7 inches.
Gas Spring Tension Adjustment

Image: Guide on adjusting gas spring tension: turn clockwise for lighter monitors (less tension) and counter-clockwise for heavier monitors (more tension) using the provided hex key.
The gas spring tension needs to be adjusted to match the weight of your monitors for optimal performance. Use the included hex key:
- For Lighter Monitors: Turn the adjustment screw clockwise to decrease tension.
- For Heavier Monitors: Turn the adjustment screw counter-clockwise to increase tension.
Adjust until the monitor stays in place when moved and can be repositioned smoothly with minimal effort.
Cable Management

Image: The monitor arm with yellow cables neatly routed through its integrated cable management system, demonstrating a clean desktop setup.
To maintain a clean and organized workspace, route your monitor and power cables through the designated cable management clips or channels along the underside of the arms. This helps prevent clutter and potential damage to cables.
Maintenance
- Regular Cleaning: Wipe down the mount with a soft, damp cloth to remove dust and dirt. Avoid using abrasive cleaners or solvents.
- Check Connections: Periodically check all screws and connections to ensure they remain tight and secure. Re-tighten if necessary.
- Gas Spring Adjustment: If your monitor starts to sag or becomes difficult to move, re-adjust the gas spring tension as described in the Operating section.
Troubleshooting
- Problem: Monitor sags or does not stay in position.
- Solution: The gas spring tension is likely too low for the monitor's weight. Increase the gas spring tension by turning the adjustment screw counter-clockwise with the hex key until the monitor holds its position firmly.
- Problem: Monitor is difficult to move or adjust.
- Solution: The gas spring tension might be too high. Decrease the gas spring tension by turning the adjustment screw clockwise with the hex key. Also, ensure all pivot points are not overly tightened.
- Problem: Mount feels unstable or wobbly.
- Solution: Check that the C-clamp or grommet base is securely tightened to the desk. Ensure the desk surface is sturdy enough to support the mount and monitors. Verify all arm connections are tight.
- Problem: VESA plate does not fit my monitor.
- Solution: Confirm your monitor's VESA pattern (distance between mounting holes) is either 75x75mm or 100x100mm. If it's different, your monitor is not compatible with this mount. Also, ensure you are using the correct screws provided for your monitor's VESA holes.
Warranty and Support
WALI is committed to providing high-quality solutions for home and office electronic setups. For any product support, technical assistance, or warranty inquiries, please contact WALI customer service. You can typically find contact information on the WALI official website or through your purchase platform.
WALI has a dedicated product support team available to answer your questions via email within 12 hours, ensuring the best shopping experience.

Image: The WALI brand logo, representing the company's commitment to electronic setup solutions.


