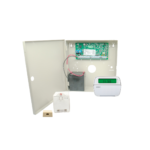
![]() ELK-M1
ELK-M1
Wiring Uplink’s Cellular Communicators
and Programming the Panel
ELK-M1 Cellular Communicators and Programming the Panel
CAUTION:
- It is advised that an experienced alarm installer programs the panel as further programming may be required to ensure proper performance and use of the full functionality.
- Do not route any wiring over circuit board.
- Full panel testing, and signal confirmation, must be completed by the installer.
NEW FEATURE: For 5530M Communicators, the status of the panel can be retrieved not only from the status PGM but now also from the Open/Close reports from the dialler. Therefore, wiring the white wire and programming of the status PGM of the panel is optional.
IMPORTANT NOTE: The Open/Close reporting needs to be enabled during the initial pairing procedure.
Wiring the 5530M communicators to ELK-M1

Programming the ELK-M1 Alarm Panel via the Keypad
Enable Contact ID reporting:
| Display | Keypad Entry | Action Description |
| Home screen | Menu > Installation programming > Enter code if required | To enter programming mode (default is 172839). |
| Available menus | Telephone Account Setup | |
| Telephone number: | 1, Select | To start configuring telephone number 1 options |
| T1 Option 01: Format | 1 = Contact ID, Next Option | Set reporting format to Contact ID |
| T1 Option 02: Type | Select, 0 = Always Report, Next Option | Set reporting type to “Always report” |
| T1 Option 03: Number | Select, 123456, Select option | Set telephone number to 123456 |
| T1 Option 03: Number | Next option, Next option | Press “Next option until you reach “T1 Option 05:” |
| T1 Option 05: Account Number Area 1 | Select, 001234, Next option | Enter the desired account number (001234 is an example). The first 2 digits will be trimmed |
| T1 Option 06: Account Number Area 2 | 13 | Press 13 to go to “T1 Option 13:” |
| T1 Option 13: Report Area, Alarm, Restore & Unbypass | Select, Yes, Next option | Enable reporting for these events. Press “Next option” to save and go to the next option |
| T1 Option 14: Report Bypasses | Select, Yes, Next option | Enable reporting for these events. Press “Next option” to save and go to the next option |
| T1 Option 15: Report Zone Troubles | Select, Yes, Next option | Enable reporting for these events. Press “Next option” to save and go to the next option |
| T1 Option 16: Report User Report Codes | Select, Yes, Next option | Enable reporting for these events. Press “Next option” to save and go to the next option |
| T1 Option 17: Report Global System Events | Select, Yes, Next option | Enable reporting for these events. Press “Next option” to save and go to the next option, Select phone number Menu to go to the main menu screen |
| Available menus | Area Reporting Codes | To go to Area Reporting Codes menu |
| Report Codes Area: 1 | Select | To go to Area 1’s reporting codes menu |
| Area 1 Option 01: Dialer Delay | Select, 000, Select option | Ensure that this option has a value of 000. |
| Area 1 Option 01: Dialer Delay | In the range 04 – 19 are the values for different events. Enable the ones required by your installation. When you’re done in this menu, go back to the main programming screen. | |
| Available menus | Next Page, User Report Code | Here are the settings for the users’ Open/Close reports. Set Open and Close settings to something different than 00 in order to enable the reporting for the event. |
| User 001: USER 1 Open = 00 Close = 00 |
Select, 01, 01 | Just for example we have enabled the Open/Close reports for User 001 in this row. When you enter the values, they are being automatically saved and the system moves the cursor to users selection. Enable the users required by your installation following this procedure. |
| User 001: USER 1 Open = 01 Close = 01 |
Menu, Menu, Exit Menu | Press these buttons to exit programming mode. |
Program Keyswitch zone and output:
Although the Keyswitch zone can be configured through the keypad, the OUTPUT can be configured only through the panels’ software – therefore in this manual we will configure both the zone and the output through the software.

From ZONES, select Zone 1, Configure as Key Momentary ARM/DISARM, Type 0 = EOL, Area 1, Press Send to Control

Go to account details > Automation > Rules > Click on New to create New rule


Whenever > Security/Alarms > Is Disarmed
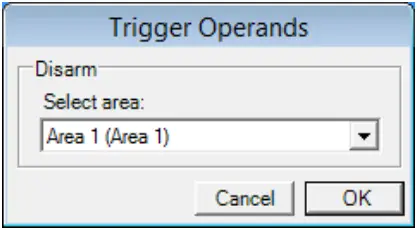
Select desired Area


Then > Turn Output On/Off
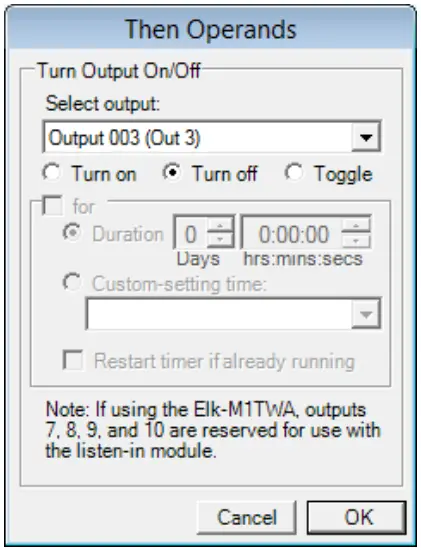
Select Output 003 > Turn off > OK

Select Done to go back to Rules menu

Select New to create new Rule

Whenever > Security/Alarms > Is Armed > Armed to any mode
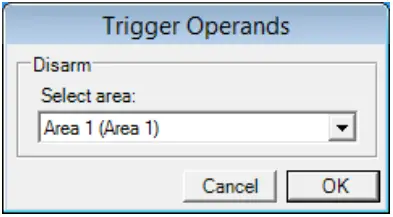
Select Area 1 and press OK


Select Then > Turn Output On/Off
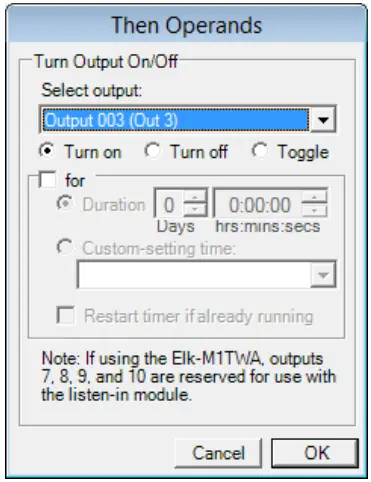
Select Output 003 > Turn On > OK

Press Done to confirm

Press Send to control to activate the rules
![]()
Documents / Resources
 |
Uplink ELK-M1 Cellular Communicators and Programming the Panel [pdf] User Manual 5530M, ELK-M1 Cellular Communicators and Programming the Panel, ELK-M1, Cellular Communicators and Programming the Panel, Communicators and Programming the Panel, Programming the Panel, Panel |