Safety Instructions
- Keep The Power Off During Installation (Before You Cover The Panel)
- Check The Terminal Connections Before Wiring
- Connect The Device In Accordance With The Relevant Diagrams
- Ensure That No Bare Wires From The Terminals In Case Of Electric Shock
General Wiring Instructions
- L Terminal Connect To Live Wire
- N Terminal Connect To Neutral Wire
- L1 L2 L3 Terminals Connect To Light Wire
- 2-Way Terminal Connect To Another 2 Way Terminal
Warning: Donít Switch On The Appliance Before Installation Is Finished Completely
Installation Steps

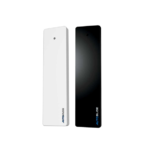
- Open The Box, Take Out The Parts, Distinguish The Front And Back Of The Metal Plate
(Note: The Side With CE And RoHS Is The Back Side) - Assemble Insert Parts And Metal Plate
(Note: Push The Insert Parts Into Metal Plate From The Front Side) - Follow The Wiring Instructions To Connect The Wires
- Screw To Fix The Switch To The Wall Box
- Push The Glass Panel Onto The Device And Finish The Installation
Disassemble Precautions
Separate The Glass Panel And Metal Plate From The Groove With A Screwdriver (Just In Case The Glass Panel Is Scratched)
Wiring Diagram
1-Way Light Switch1-Way Light Switch Is Used To Control A Light Only From 1 Position
2-Way Light Switch
2-Way Light Switch Is Used To Control A Light From 2 Different Position Like Upstairs And Downstairs
Note: BSEED Brand 2 Way Light Switch Can Only Work Together With The Same Brand 2 Way Light Switch. It Can Not Match With Other Brandís Switch


Wiring Connection
1-Way Dimmer Switch
1 Way Dimmer Switch Is Used To Adjust The Brightness Of The Lights Only From 1 Position
Note: The Capacitor Should Be Installed To The Light Bulbs
2-Way Dimmer Switch
2 Way Dimmer Switch Is Used To Adjust The Brightness Of The Lights From 2 Different Position Like Upstairs And Downstairs
Dimmer Switch Default Operation:

The Switch Is Activated By Pressing And Holding On The Front Panel To Adjust The
Lighting Intensity Of The Lights Bulbs
- Click The Middle Button To Turn On/Off
- Long Press The Middle Button To Brighten Your Light Bulbs
- Release And Long Press Again The Middle Button To Dim The Light Bulbs
Tip: To Avoid Any Damage May Leads To The Glass Panel and The Plastic Border, Carefully Lift Up The Screwdriver during the removal process
The Dimmer Switch Has A Memory function keeps The Level Of Dim. When You Turn ‘OFF’ Then ‘ON’ It Remembers The Adjustment Intensity By Decreasing And Increasing The Lights Bulbs
Compatible Bulbs(Min. 5W):
- Incandescent Bulb,
- Dimmable LED Bulb
Incompatible Bulbs:
- Fluorescent Bulb,
- Compact Fluorescent Bulb,
- Normal LED Bulb,
- Energy Saving Bulb
Capacitor: Designed To Eliminate The Current Leak And Stop The Flickering. It Installed To The Light Bulb As Below:

FAQ
- Q: How does the dimmer switch work?
- A: The dimmer switch is activated by pressing and holding on the front panel to adjust the lighting intensity of the light bulbs. Click the middle button to turn on/off, long press to brighten, release and long press again to dim.
- Q: What is the purpose of the capacitor?
- A: The capacitor is designed to eliminate current leaks and stop flickering. It should be installed with light bulbs for proper operation.
Documents / Resources
 |
SmartWise T1R1W 1 Button SmartWise Touch Switch [pdf] Instruction Manual 1 Way, 2 Way, 3 Way, T1R1W 1 Button SmartWise Touch Switch, T1R1W, 1 Button SmartWise Touch Switch, SmartWise Touch Switch, Touch Switch |


