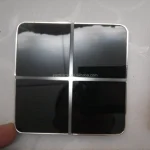
Bseedswitch WiFi Touch Switch Instruction Manual

Safety Instructions
- Keep The Power Off During Installation (Before You Cover The Panel)
- Check The Terminal Connections Before Wiring
- Connect The Device In Accordance With The Relevant Diagrams
- Ensure That No Bare Wires From The Terminals In Case Of Electric Shock
General Wiring Instructions
- L Terminal Connect To Live Wire
- N Terminal Connect To Neutral Wire
- L1 L2 L3 Terminals Connect To Light Wire
Warning: Don’t Switch On The Appliance Before Installation Is Finished Completely
Installation Steps


- Open The Box, Take Out The Parts, Distinguish The Front And Back Of The Metal Plate
(Note: The Side With CE And RoHS Is The Back Side) - Assemble Insert Parts And Metal Plate
(Note: Push The Insert Parts Into Metal Plate From The Front Side) - Follow The Wiring Instructions To Connect The Wires
- Screw To Fix The Switch To The Wall Box
- Push The Glass Panel Onto The Device And Finish The Installation
Note: Only The Metal Plate Notch Side Match With The Glass Panel Notch Side, They \Can Be Assembled Together Successfully
Warning: Keep The Power Off Until You Finish The Installation Otherwise The Switch May Fail
Disassemble Precautions

Separate The Glass Panel And Metal PlateFrom The Groove With A Screwdriver (Just In Case The Glass Panel Is Scratched)
Wiring Diagram
Way Wi fi Switch
Note: Neutral Wire Is Required To Be Connected
- Gang

- Gang

- Gang

Way Wi fi Switch
Note: Neutral Wire Is Required To Be Connected

WiFi Dimmer Switch
Note: Can only support dimmable LED lights and incandescent lights. If you use it together with other lamps, Lamps may flash


WiFi Curtain Switch
Note: Neutral Wire Is Required To Be Connected


Single Live WiFi Switch
Install The Capacitor To Work As A Single Live Switch
Note: The Capacitor Should Be Connected To Bulb1 Terminal As Below
- Gang

- Gang

- Gang

Download And Register
- Download The “SMART LIFE” Or “TUYA” App From The App Store/Google Player Or Scan The QR Code Below.


- Register an account and log in

Connect Steps
- Connect Your Smartphone To WIFI And Turn On The Bluetooth
- Long Press The Button On Switch Till The LED Indicator Flicker Rapidly (Make Sure The WIFI Switch Is Powered)
- Open The APP, And Then The Device Will Appear Automatically
[Tip: Only 2.4GHz WIFI Standard Is J ©) Supported Not Supports 5.0GHz

- Input Your Password To Start Adding
- Wait For The Adding Process To End
- Successful Pairing Will Be Confirmed

Home Centre Icons:
Icon “ + ” Refers To Device Adding Process
Icon “ 2 ” Refers To Device Rename Option
Voice Control
Connect Smart Life With Amazon Alexa Or Google Home, You Can Voice Control Your WiFi Sockets
Documents / Resources
 |
Bseedswitch WiFi Touch Switch [pdf] Instruction Manual WiFi Touch Switch, WiFi Smart Switch, Smart Switch, Switch, WiFi Switch, Touch Switch |


