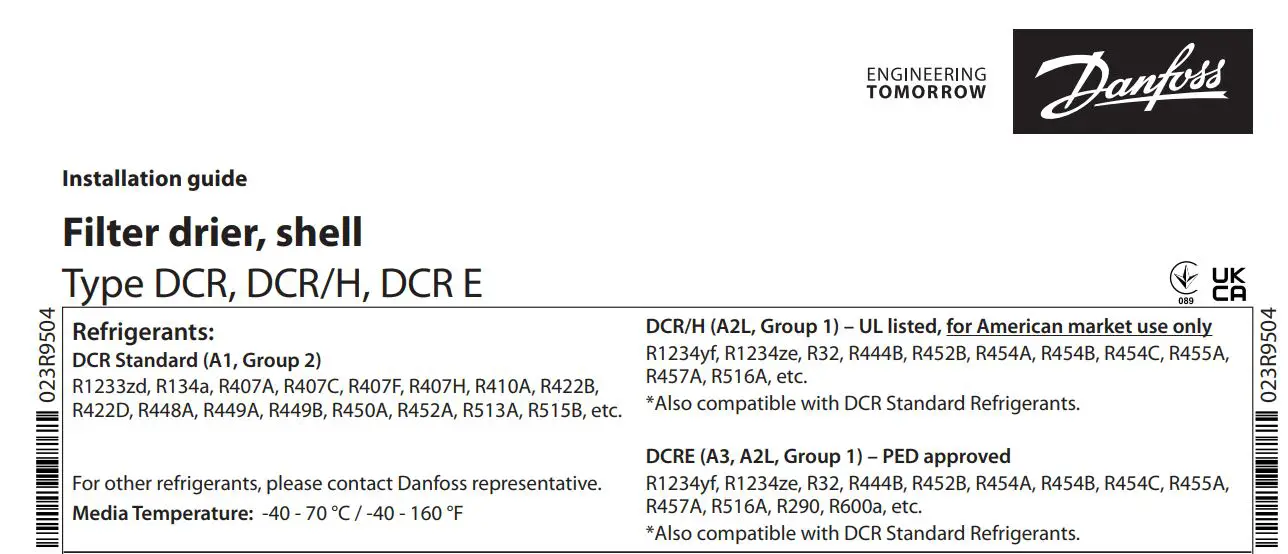
Danfoss DCR Filter Drier Shell
Installation Guide
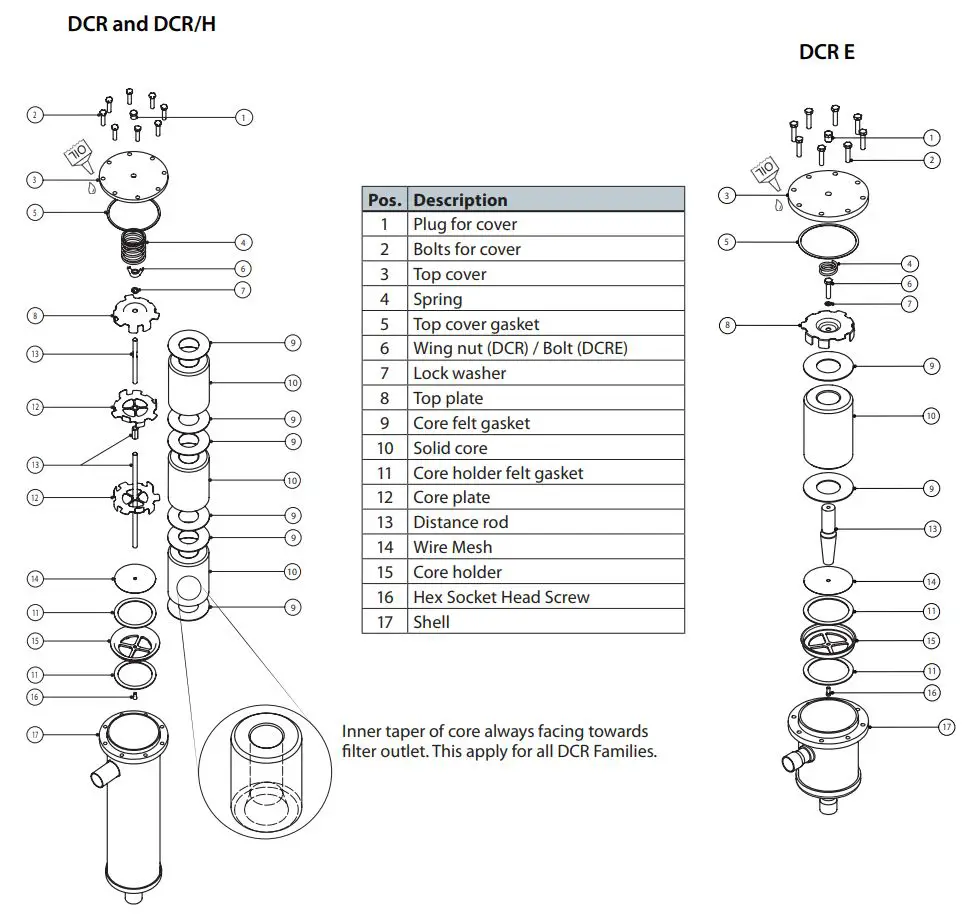
Design
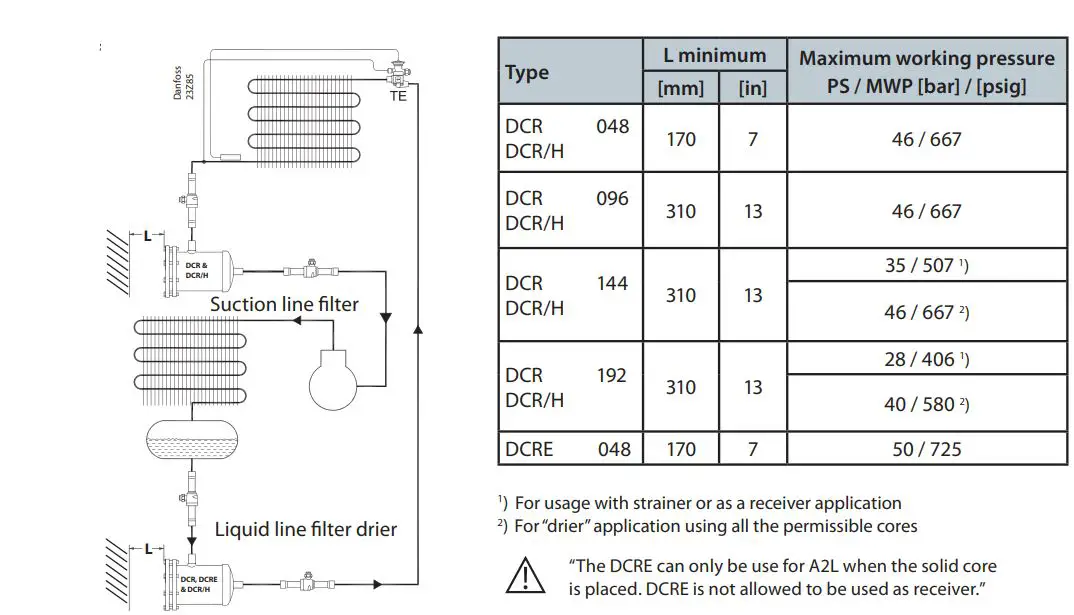
Installation
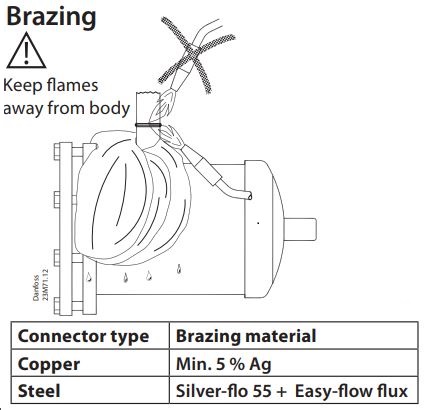
Brazing
Welding
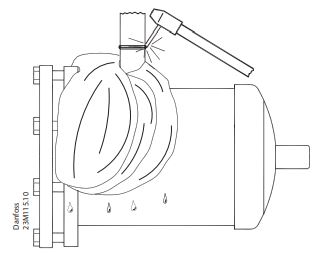
Customer best practice will still be needed:
- Use wet wrap when installing.
- Braze the joints.
- Let them cool down.
- Clean the brazing /welding area after the installation (remove remaining flux with a brush).
- This is an important operation and needs to be done with great care to remove all remaining flux.
- Paint / Anti-corrosive needs to cover all open steel parts, areas where the black original paint has been burnt due to brazing and at least 3 cm approx. of the copper.
- Paint the joints twice.
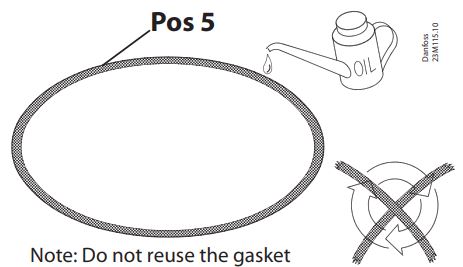
⚠ Do not install gasket before soldering.
Note: Confirm correct top cover Gasket is selected.
There are 2 gaskets:
– DCR and DCR/H
– DCRE
Recommendation:
Apply a small amount of oil to the gasket before assembly. Preferably synthetic POE or PVE oil, although any general-purpose oil can be used.
Gasket
How to tighten the bolts
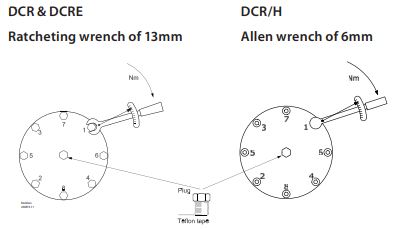
Optional Plug, recommended tightening torque: Plug: 1/4″ NPT: 50 Nm / 36.87 ft-lb applying 2 to 3 wraps of teflon tape.
The torque values mentioned only apply to bolts supplied by Danfoss.
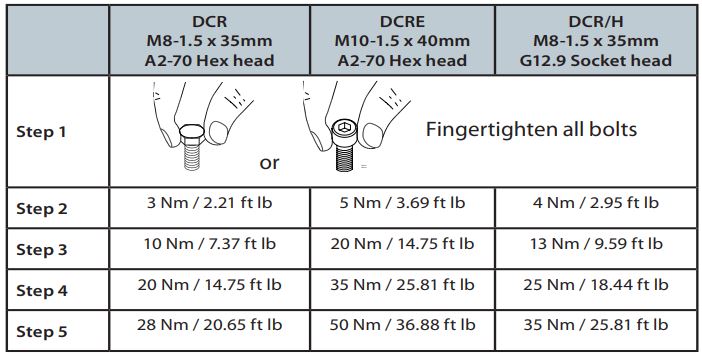
* Each step must be applied following the sequence of the image. AN164986434975en-000702 | 2
Documents / Resources
 |
Danfoss DCR Filter Drier Shell [pdf] Installation Guide 023R950 4, 23Z85, 23M71.12, 23M115.10, DCR Filter Drier Shell, DCR, Filter Drier Shell, Drier Shell, Shell |