Switch Profile is one of the features that are programmable to Razer mouse buttons which allows you to switch profiles by simple clicks without the need to access Razer Synapse.
Switch profile enables you to program if your mouse button will switch you to the next or previous profile, cycle up or down, or switch to a specific profile assigned with a chroma effect.
To assign your Razer mouse button to switch profile:
- Start off by Creating Mouse Profiles.
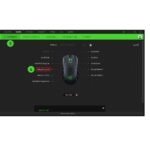
- On the mouse window of Razer Synapse, go to the “CUSTOMIZE” Tab.
- Find and click on the button you wish to program with.

- The available commands will appear on the left side of the mouse window. Click on “SWITCH PROFILE”.

- Select the type of switching you prefer to use.
- “Next” or “Previous” is clickable and will let you go to the next or previous profile used. You can program “Next” and “Previous” to separate buttons.

- “Cycle Up” or “Cycle Down” lets you cycle up or down between profiles. If you have reached the last profile, the next click will send you back to the first profile.

- “Specific Profile” will ask you to choose from your list of profiles and have one of them assigned to your button. It lets you choose which of your Chroma Effects will be applied for that profile. Clicking the button will switch to the chosen profile and its assigned lighting effect.

- “Next” or “Previous” is clickable and will let you go to the next or previous profile used. You can program “Next” and “Previous” to separate buttons.
- Click “SAVE” to complete the process. The button assigned will now appear with the type of switching method you have chosen. If you chose a specific profile, it will reflect as the name of the button.