
1. Product Overview
The RAINPOINT 3 Zone Sprinkler Timer is designed for efficient and customizable garden watering. Featuring a durable brass inlet and reinforced neck, it ensures a robust water flow and long-lasting performance. This timer supports individual watering plans across three independent zones, offering adjustable durations and frequencies. Its IP65 waterproof rating and sturdy ABS shell make it suitable for various outdoor conditions. The user-friendly interface with a large LCD display simplifies programming, and a low battery warning system helps prevent watering interruptions.
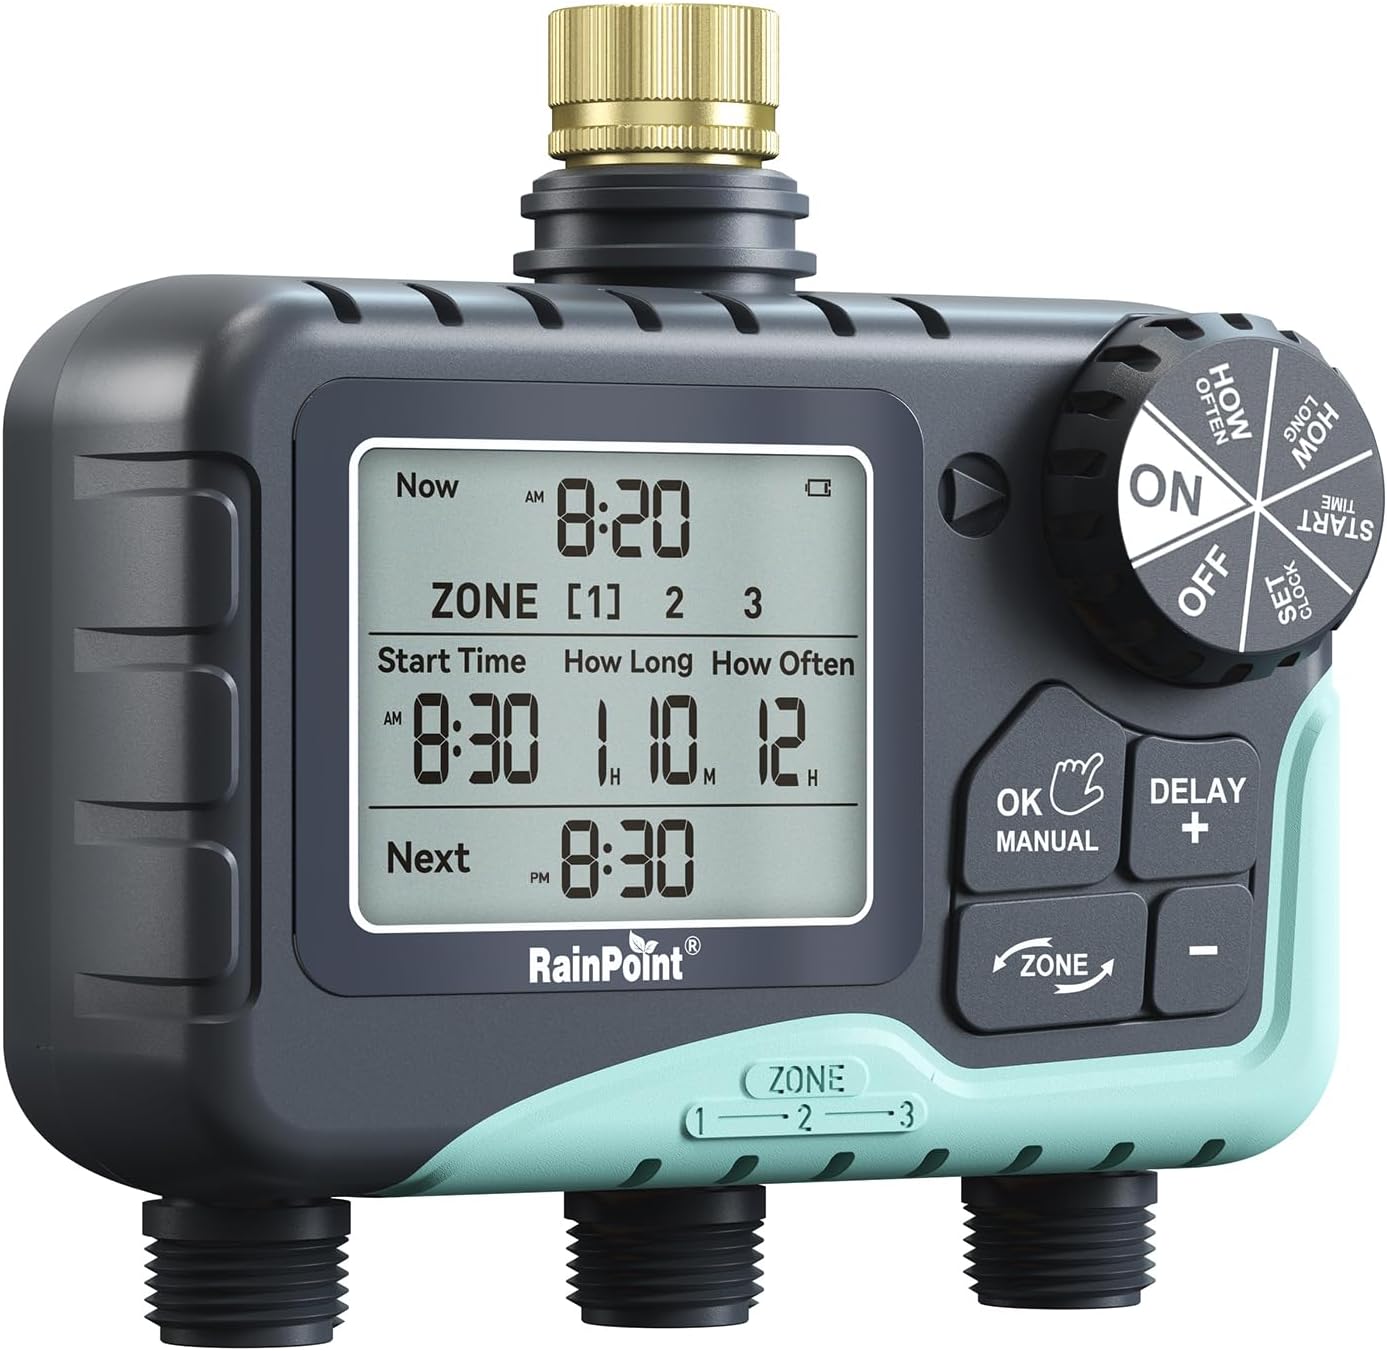
Image: Front view of the RAINPOINT 3 Zone Sprinkler Timer, highlighting its large LCD display and control dial.

Image: Comparison showing the upgraded coil valve design of the RAINPOINT timer versus an old steel cap valve, emphasizing reduced water pressure loss.
2. Setup
2.1 Battery Installation
The RAINPOINT 3 Zone Sprinkler Timer requires 4 new AA (1.5V) alkaline batteries (not included). To install:
- Remove the battery compartment cover located at the back of the timer.
- Insert 4 new AA (1.5V) alkaline batteries, ensuring correct polarity.
- Replace the battery compartment cover, pressing firmly to ensure it is completely sealed for waterproofing.
Note: Install the battery compartment cover securely after installing the battery to ensure waterproofing. When the timer is not used for a long time, please remove the batteries and dispose of them properly. Replace batteries when the low battery indicator displays. Don't dispose of batteries in fire; batteries may explode or leak. To ensure a longer lifespan, please use 4 new AA alkaline batteries (not included). Don't mix new and old alkaline, standard (carbon-zinc), or rechargeable batteries.
Video: This video demonstrates the battery installation process for the RAINPOINT 3 Zone Sprinkler Timer, showing how to open the compartment, insert batteries, and securely close it.
2.2 Mounting and Hose Connection
To install the timer to your outdoor faucet:
- Close the garden faucet.
- Apply Teflon tape to the faucet threads for a secure, leak-free connection.
- Attach the timer to the faucet, ensuring the display is vertical to prevent water ingress.
- Apply Teflon tape to the timer outlet threads.
- Connect your garden hoses to the timer outlets.
- Turn the faucet on after setting the timer.
Tips: If timer connections are loose or leaking, add more Teflon tape and align threads. Use a rubber washer if faucet threads don't reach the timer inlet. Install timer manually. Remove it during freezes to avoid damage. Properly install and maintain the filter.

Image: Close-up of the reinforced brass inlet being connected to a faucet, emphasizing the secure and durable design.

Image: A person holding the timer, showcasing its new exterior design with a fuselage grip that fits the hand line, and a large LCD screen for clear visibility.
3. Operating Instructions
The RAINPOINT 3 Zone Sprinkler Timer allows for flexible watering control with automatic, manual, and rain delay modes. Each zone can be programmed individually.
3.1 Setting the Clock
- Set the dial to "SET CLOCK".
- Use the "+" or "-" buttons to choose 24H/12H format, and press "OK" to confirm.
- Adjust the hour with "+" or "-" to match local time, noting AM/PM in 12H format. Press "OK" to toggle between hours, minutes, or formats.
- Rotate the dial to save and move on.
Note: To save changes, turn the dial instead of pressing "OK"; pressing "OK" will revert to previous settings. Hold "+" or "-" for 3 seconds to quickly adjust numbers.
3.2 Setting Automatic Watering Plans
This timer allows you to set unique start times, durations, and frequencies for each of the three zones. The timer will open one valve at a time to ensure optimal water volume and pressure.
- Set Start Time: Set the dial to "START TIME". The hour flashes; adjust start time with "+" and "-" buttons. Press "OK" to toggle between hours and minutes. Rotate the dial clockwise to save and continue.
- Set How Long (Duration): Set the dial to "HOW LONG". The hour flashes; adjust watering duration from 1 minute to 4 hours with "+" and "-". Press "OK" to toggle between hours and minutes. Rotate the dial to save and move on.
- Set How Often (Frequency): Set the dial to "HOW OFTEN". Use "+" and "-" to select frequency: 1 to 12 hours or 1 to 7 days. Rotate the dial to save and continue.
- Activate Automatic Watering: Turn the dial to "ON". The LCD will display the current time and automatically switch to show program details for each of the three zones.
Note: To ensure proper operation, set "HOW OFTEN" to be equal to or longer than "HOW LONG", which ranges from 1 minute to 4 hours, while "HOW OFTEN" ranges from 1 hour to 12 hours or 1 day to 7 days. Automatic watering only operates when the dial is on "ON".
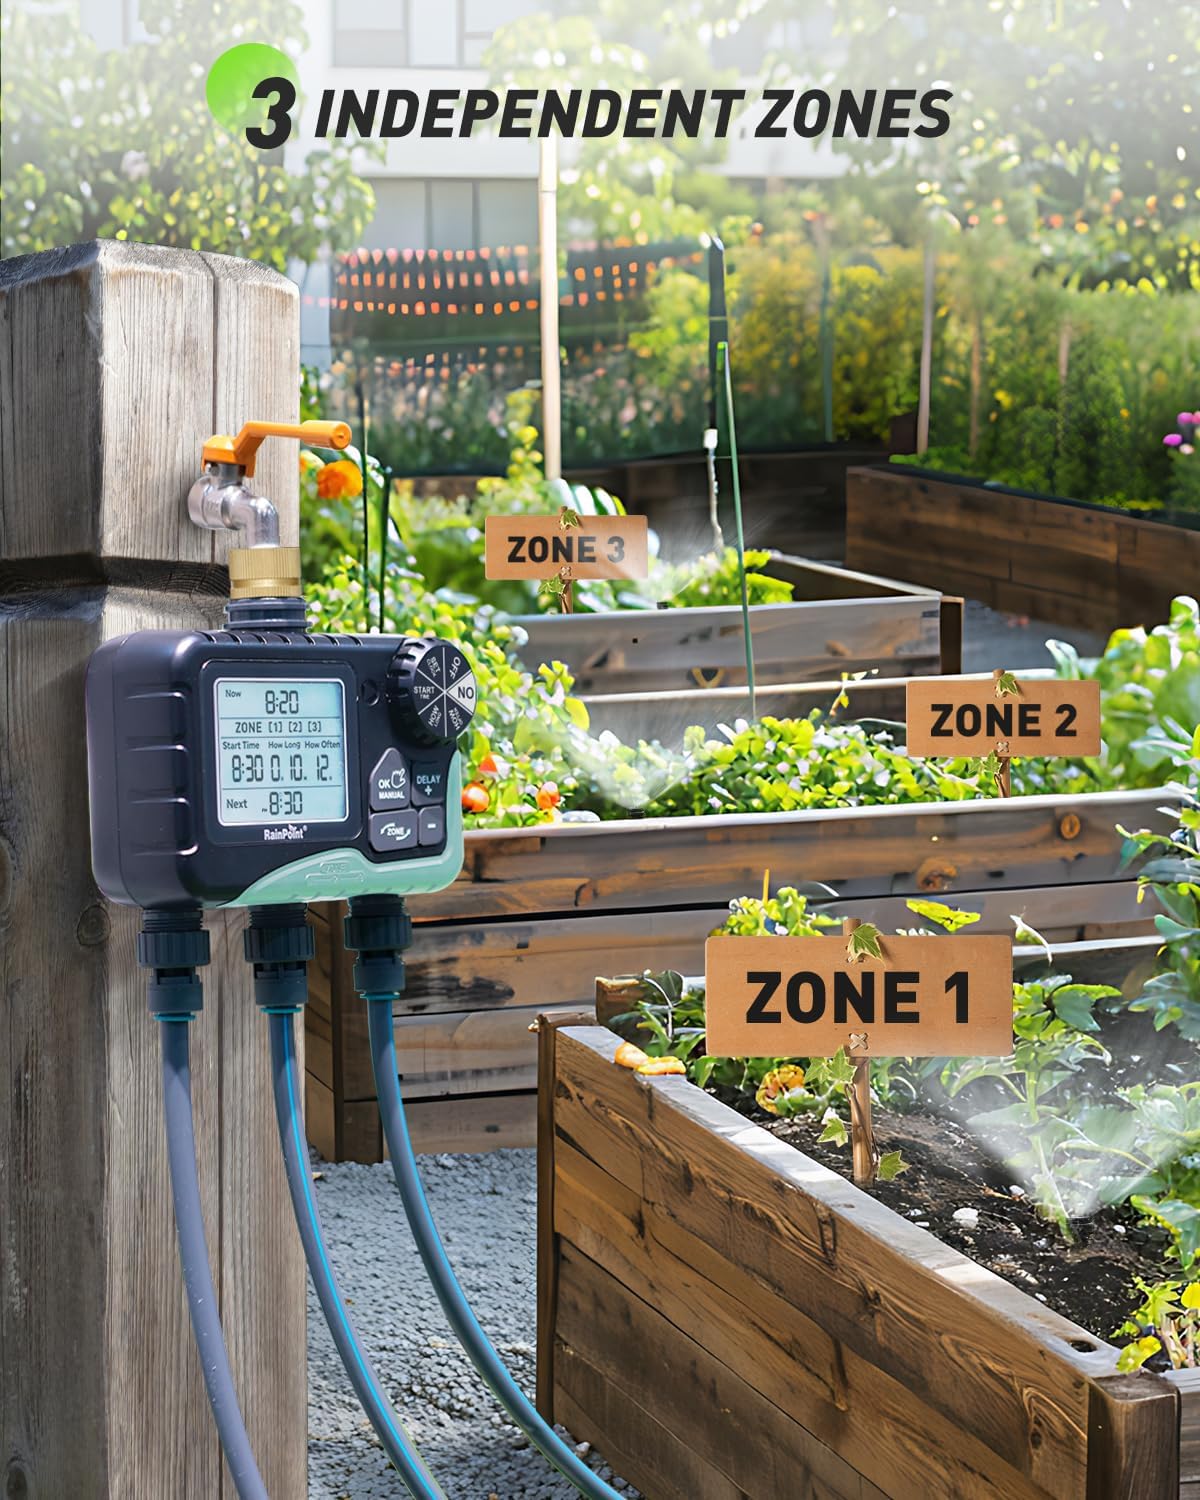
Image: The timer connected to three separate hoses, each watering a different garden zone, illustrating its multi-zone capability.

Image: The timer's display showing options for setting the clock, start time, watering duration (1 min-4 hours), and frequency (1H-7D).
Video: This video provides a step-by-step guide on how to set up automatic watering plans for the RAINPOINT 3 Zone Sprinkler Timer, including setting the clock, start time, duration, and frequency for each zone.
3.3 Manual Watering
Manual watering allows you to water immediately for a specified duration, overriding any automatic schedules.
- Set the dial to "ON".
- Hold "MANUAL" for 3-5 seconds to enter manual mode.
- Use "ZONE" to switch zones, "+" to select, and "-" to deselect. Press "OK" to set time.
- Adjust duration with "+" or "-" (1 minute to 8 hours), holding them for quick changes. The default watering duration is 10 minutes.
- Confirm and start watering by pressing "OK" when numbers flash; the screen shows remaining time.
Note: Pressing "OK" without selecting a zone will not activate any for watering. For multiple zones in manual mode, the device will water them one after another. Manual watering overrides automatic mode: If a manual watering is scheduled later, it interrupts ongoing automatic watering, losing the remaining time. During manual watering, any conflicting automatic watering is skipped, regardless of the zone.

Image: A person manually watering plants with a hose connected to the timer, demonstrating the manual watering function and zone selection.
Video: This video illustrates how to set up manual watering plans for the RAINPOINT 3 Zone Sprinkler Timer, including selecting zones and adjusting watering duration.
3.4 Rain Delay Mode
The rain delay function allows you to pause watering for a set period (24H, 48H, or 72H) to conserve water during rainy weather, without interrupting your programmed schedules.
- At "ON", hold "DELAY / +" for 3 seconds to access rain delay.
- Adjust the flashing "24H" to 0H, 24H, 48H, or 72H with "+" and "-"; 0H cancels delay.
- Press "OK/Manual" to activate the rain delay program.
Note: Press "OK" to activate the selected rain delay; settings exit after 3-5 seconds of flashing. Rain delay cannot be paused; to stop, hold "DELAY" or turn dial to "OFF" and back to "ON". Rain delay affects all three zones; setting it for one zone delays all zone plans.

Image: The timer installed outdoors during rain, with the display showing a rain delay option for 24, 48, or 72 hours.
Video: This video demonstrates how to activate and set the rain delay mode on the RAINPOINT 3 Zone Sprinkler Timer, allowing users to pause watering for a specified duration.
4. Maintenance
4.1 Filter Maintenance
The timer includes a built-in metal filter to prevent small particles from entering the system. Regularly check and clean the filter to ensure optimal performance and prevent blockages.
4.2 Winterization
During freezing temperatures, it is crucial to remove the timer from the faucet and store it indoors to prevent damage from ice. Ensure all water is drained from the unit before storage.
5. Troubleshooting
5.1 Low Battery Warning
When the batteries don't have enough power, a low battery icon will be shown on the screen. Please change batteries as soon as possible to avoid interruption of watering schedules. The timer features a low battery auto shut-off valve to prevent water loss.

Image: The timer display showing a low battery reminder and indicating the auto shut-off valve feature.
5.2 Leaks or Loose Connections
If you notice any leaks from the faucet or hose connections, ensure that Teflon tape has been applied correctly and that all connections are tightened firmly. If the faucet threads do not reach the timer inlet, use a rubber washer for a better seal.
6. Specifications
- Brand: RAINPOINT
- Model Number: B347-2026 (Manufacturer Part Number: 006)
- Color: Gray
- Material: Metal (inlet), ABS Shell (body)
- Product Dimensions: 0.97"D x 1.98"W x 0.97"H
- Number of Zones: 3
- Watering Duration: 1 minute to 4 hours
- Watering Frequency: 1 hour to 7 days
- Waterproof Rating: IP65
- Power Source: 4 x AA (1.5V) alkaline batteries (not included)
7. Warranty and Support
RAINPOINT offers a 5-year support period and lifetime support for its products. For any inquiries or assistance, please contact RAINPOINT customer support.
- Support: 5 Year
- Lifetime Support: Yes
- Customer Service: Available 24/7
Visit the RAINPOINT Store for more information and support resources.


