
1. Introduction
This instruction manual provides detailed guidance for the installation, operation, and maintenance of your OPT7 12-Piece Motorcycle LED Strip Lights kit. This kit offers RGB multicolor lighting with app and remote control, sound synchronization, and optional brake and turn signal integration to enhance visibility and customize your motorcycle's appearance.
2. What's in the Box
Verify that all components are present before beginning installation:
- 1 x Control Box
- 1 x Handheld Remote
- 1 x Keychain Remote
- 2 x 29" 1-to-6 Y Splitter Cables
- 4 x 4" LED Light Strips
- 4 x 8" LED Light Strips
- 4 x 12" LED Light Strips
- 1 x 5A Fuse
- 78" Extension Wires (Yellow x2, Black x1, Red x1, Blue x1)
- Double-Sided Tapes x2
- Fork Terminals x2 (Black & Red)
- On/Off Power Switch x1

Figure 2.1: All included components for the OPT7 motorcycle LED kit, including light strips, control box, remotes, and wiring.
3. Features
3.1. Safety Brake & Turn Signal Integration
This lighting system includes optional brake and turn signal inputs. When connected, the kit activates red warning alerts for braking and amber signals for turns, increasing rear and side visibility. This feature requires specific wiring connections.
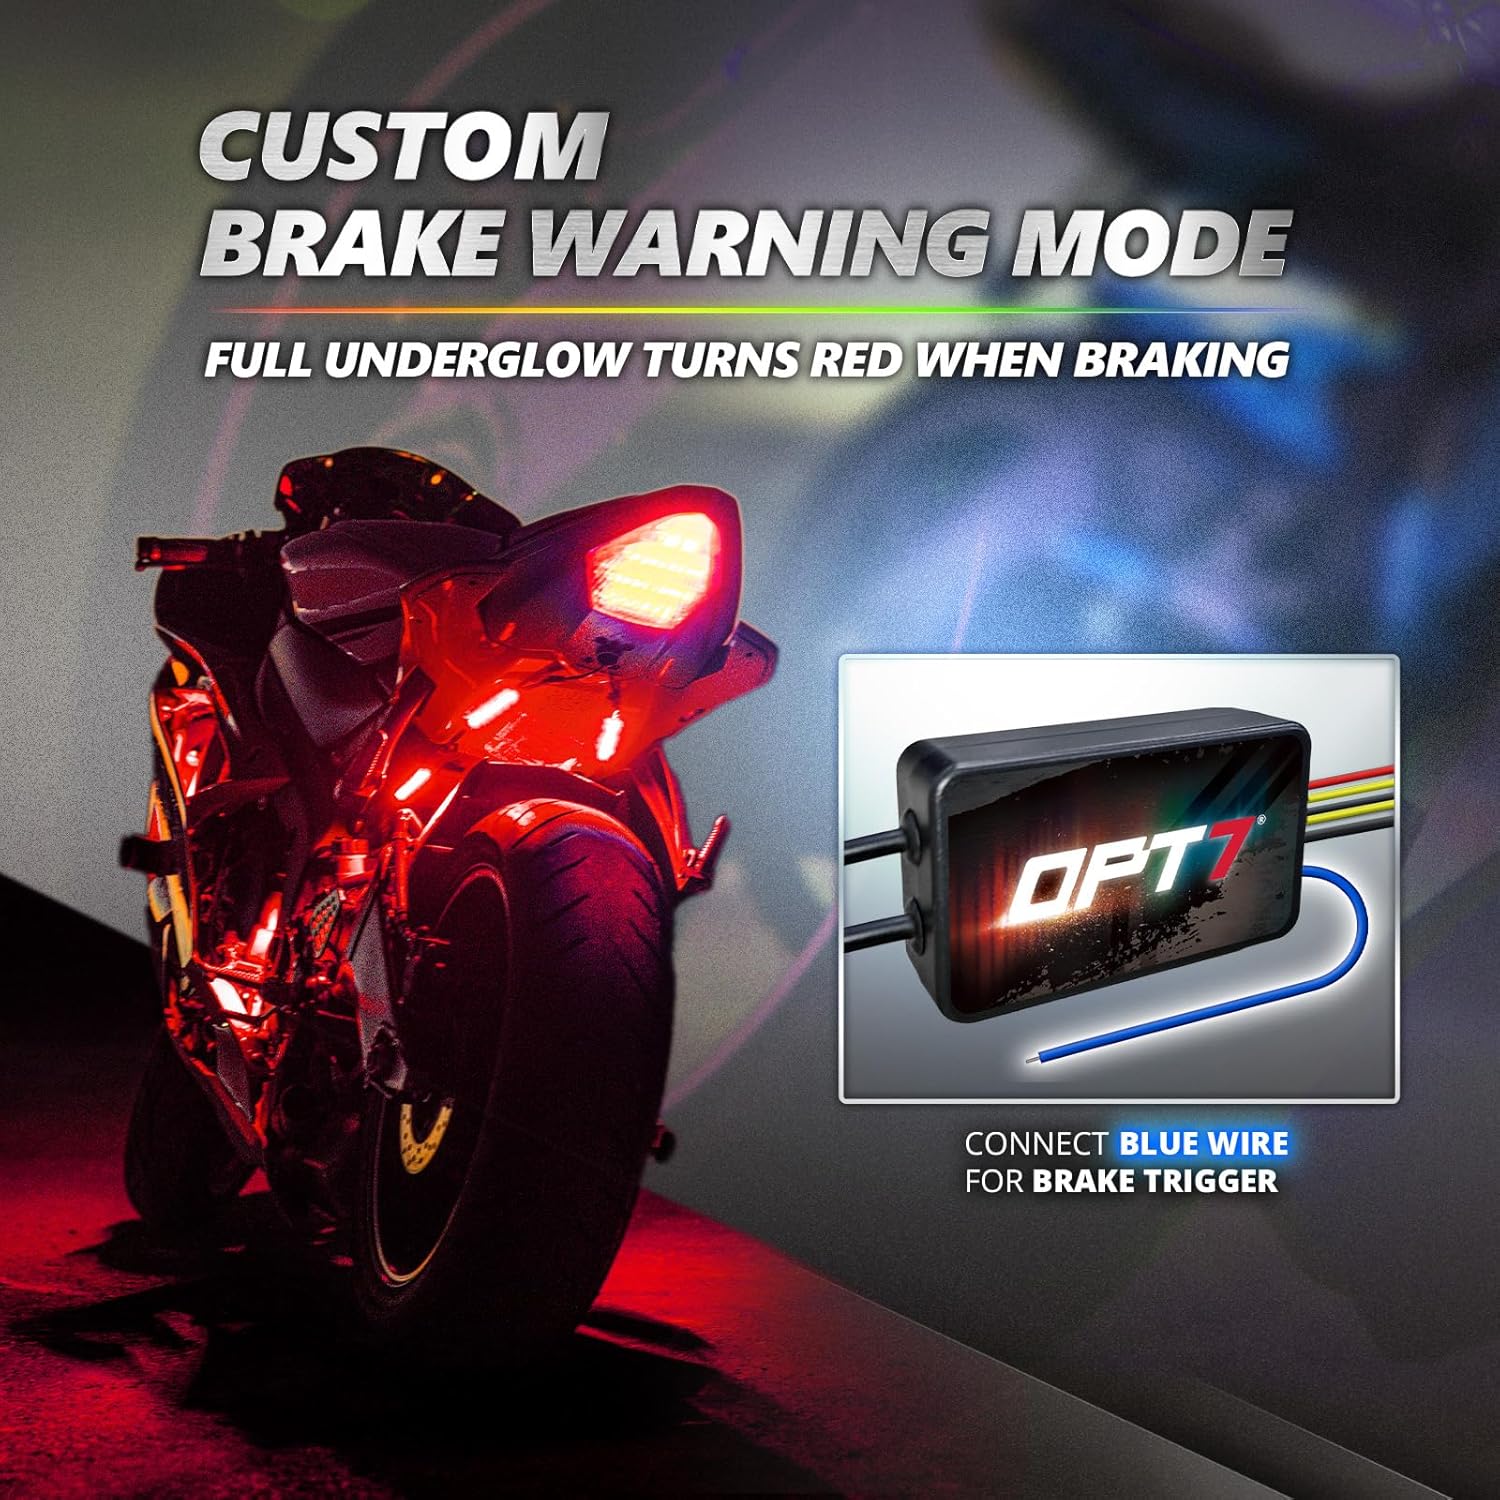
Figure 3.1: Motorcycle displaying red underglow lights when the brake is applied, enhancing safety.

Figure 3.2: Wiring diagram illustrating connections for brake (blue wire) and turn signal (yellow wire) integration.

Figure 3.3: Motorcycle displaying amber underglow lights during a turn signal, improving side visibility.
3.2. RGB Multicolor & Sound Sync
The kit provides RGB multicolor lighting options. Control is available via the included keychain remote, 24-key handheld remote, or the LotusLamp X app. The app allows for advanced customization, including multicolor effects, speed, brightness adjustments, and custom preset creation. Sound sync functionality allows lights to react to audio beats.

Figure 3.4: The keychain remote and 24-key handheld remote for basic control of the lighting system.

Figure 3.5: The LotusLamp X app interface, showing options for color selection, DIY effects, music rhythm modes, and animated lighting previews.

Figure 3.6: App screen demonstrating custom lighting mode design with adjustable parameters.

Figure 3.7: App screen illustrating the full RGB spectrum for color selection.

Figure 3.8: Motorcycle lights synchronizing with audio, showcasing the music-sync feature.
3.3. Durability
The LED strips are designed to withstand rain, dust, and road debris. They are encased in high-density silicone for durability.

Figure 3.9: Close-up view of the high-output flexible LED strips.
4. Setup & Installation
The installation process involves cleaning the surface, securing the LED strips and control box, connecting the wiring, and powering the system. Two 1-to-6 splitter cables are included to simplify wiring and reduce clutter.
4.1. General Installation Steps
- Clean Surface: Ensure all mounting surfaces are clean and dry before applying LED strips.
- Secure Components: Use the provided double-sided tape and zip ties to secure the LED strips and control box to desired locations on the motorcycle.
- Connect Wiring: Connect the LED strips to the control box using the splitter cables. Connect the control box to the motorcycle's 12V power source.
- Power & Test: Connect the 5A fuse and on/off power switch. Test the lights to ensure proper function.

Figure 4.1: Visual guide for the installation process: Clean, Secure, Connect, Power.
4.2. Brake and Turn Signal Wiring (Optional)
To enable the brake and turn signal features:
- Connect the blue wire from the control box to your motorcycle's brake light positive wire.
- Connect the yellow wire from the control box to your motorcycle's turn signal positive wire.
4.3. Power Connection
The handle power switch adapter allows for easy on/off control. Ensure the 5A fuse is correctly installed in the power line to protect the system.

Figure 4.2: Illustration of the inline fuse power adapter and the on/off power switch.
5. Operation
5.1. Remote Control
Use the provided keychain remote or 24-key handheld remote to change colors and lighting modes. Refer to the remote's markings for specific functions such as color selection, brightness, and mode changes.
5.2. LotusLamp X App Control
For full customization, download the LotusLamp X app (compatible with iOS 7+ and Android 4.3+). The app allows you to:
- Adjust multicolor effects.
- Control speed and brightness.
- Create and save custom presets.
- Utilize music rhythm modes for sound synchronization.

Figure 5.1: Overview of the lighting system with app and remote control options.
Video 5.1: Demonstration of OPT7 Multicolor Motorcycle Lights in action, showcasing various lighting effects and colors.
6. Maintenance
The LED strips are designed for durability and are water-resistant. Regular maintenance includes:
- Periodically inspect all wiring connections for security and integrity.
- Clean the LED strips with a damp cloth to remove dirt and debris. Avoid harsh chemicals.
- Ensure the control box is mounted in a location protected from direct impact or excessive heat.
7. Troubleshooting
| Problem | Possible Cause | Solution |
|---|---|---|
| Lights do not turn on. | No power, blown fuse, loose connection. | Check power connections, replace 5A fuse if blown, ensure all wires are securely connected. |
| Remote control not working. | Dead battery in remote, remote out of range, interference. | Replace remote battery, move closer to the control box, check for obstructions. |
| App control not connecting. | Bluetooth off, app not updated, control box not powered. | Ensure Bluetooth is enabled on your device, update the LotusLamp X app, verify the control box has power. |
| Brake/Turn signals not activating. | Incorrect wiring for brake/turn signal inputs. | Review wiring connections for the blue (brake) and yellow (turn signal) wires. Ensure they are connected to the correct positive wires on the motorcycle. |
8. Specifications
- Model: FBA-MOTOR-SINGLE-RGB-TURN-SIGNAL-KIT
- Brand: OPT7
- Voltage: 12 Volts
- Light Source Type: LED (5050 RGB LED Strip)
- Form Factor: Strip
- Water Resistance Level: Water Resistant
- Item Dimensions (L x W x H): 12 x 0.5 x 0.4 inches (for 12" strip)
- Item Weight: 16 ounces (total kit)
- Compatible Vehicle Types: Cruiser, Motorcycle, Sportbike
- Special Features: RGB LED Strip, Brake Lights, Custom Light Modes, Turn Signal Lights, Waterproof
9. Warranty & Support
OPT7 provides a 30-day warranty for this product. For any questions or concerns, please contact OPT7 customer support. Contact information can typically be found on the official OPT7 website or through your purchase platform.


