
DWVO MADWVJ0Wtz
DWVO Computer Desk with Drawers & Hutch Instruction Manual
Model: MADWVJ0Wtz
1. Important Safety Information
Please read all instructions carefully before assembly and use. Keep this manual for future reference.
- Ensure the desk is properly assembled and placed on a stable surface to prevent tipping.
- Adjustable foot pads are included to stabilize the desk on uneven ground.
- Always use the included anti-tip kit to secure the desk to a wall, especially if children are present.

Figure 1.1: Illustration of potential injury from tipping and the use of an anti-tip strap to prevent falling danger.
2. Product Overview
The DWVO Computer Desk with Drawers & Hutch is designed for home office and gaming environments, offering ample storage and integrated features for enhanced productivity and convenience.
Key Features:
- LED Light Strips: Customizable RGB LED lighting controlled via phone app or switch, with music sync and timer functions.
- Convenient Charging Station: Integrated with 2 USB ports and 4 power outlets, featuring a 6.56ft power cord.
- Detachable Top Hutch & Monitor Shelf: Maximizes desktop space and provides elevated display options.
- Large Storage Capacity: Includes 3 drawers (one with lock), side storage shelves, and a full monitor stand.
- Sturdy & Durable Construction: Made from 0.79" metal frame and 0.59" high-grade P2 particle board with adjustable foot pads.
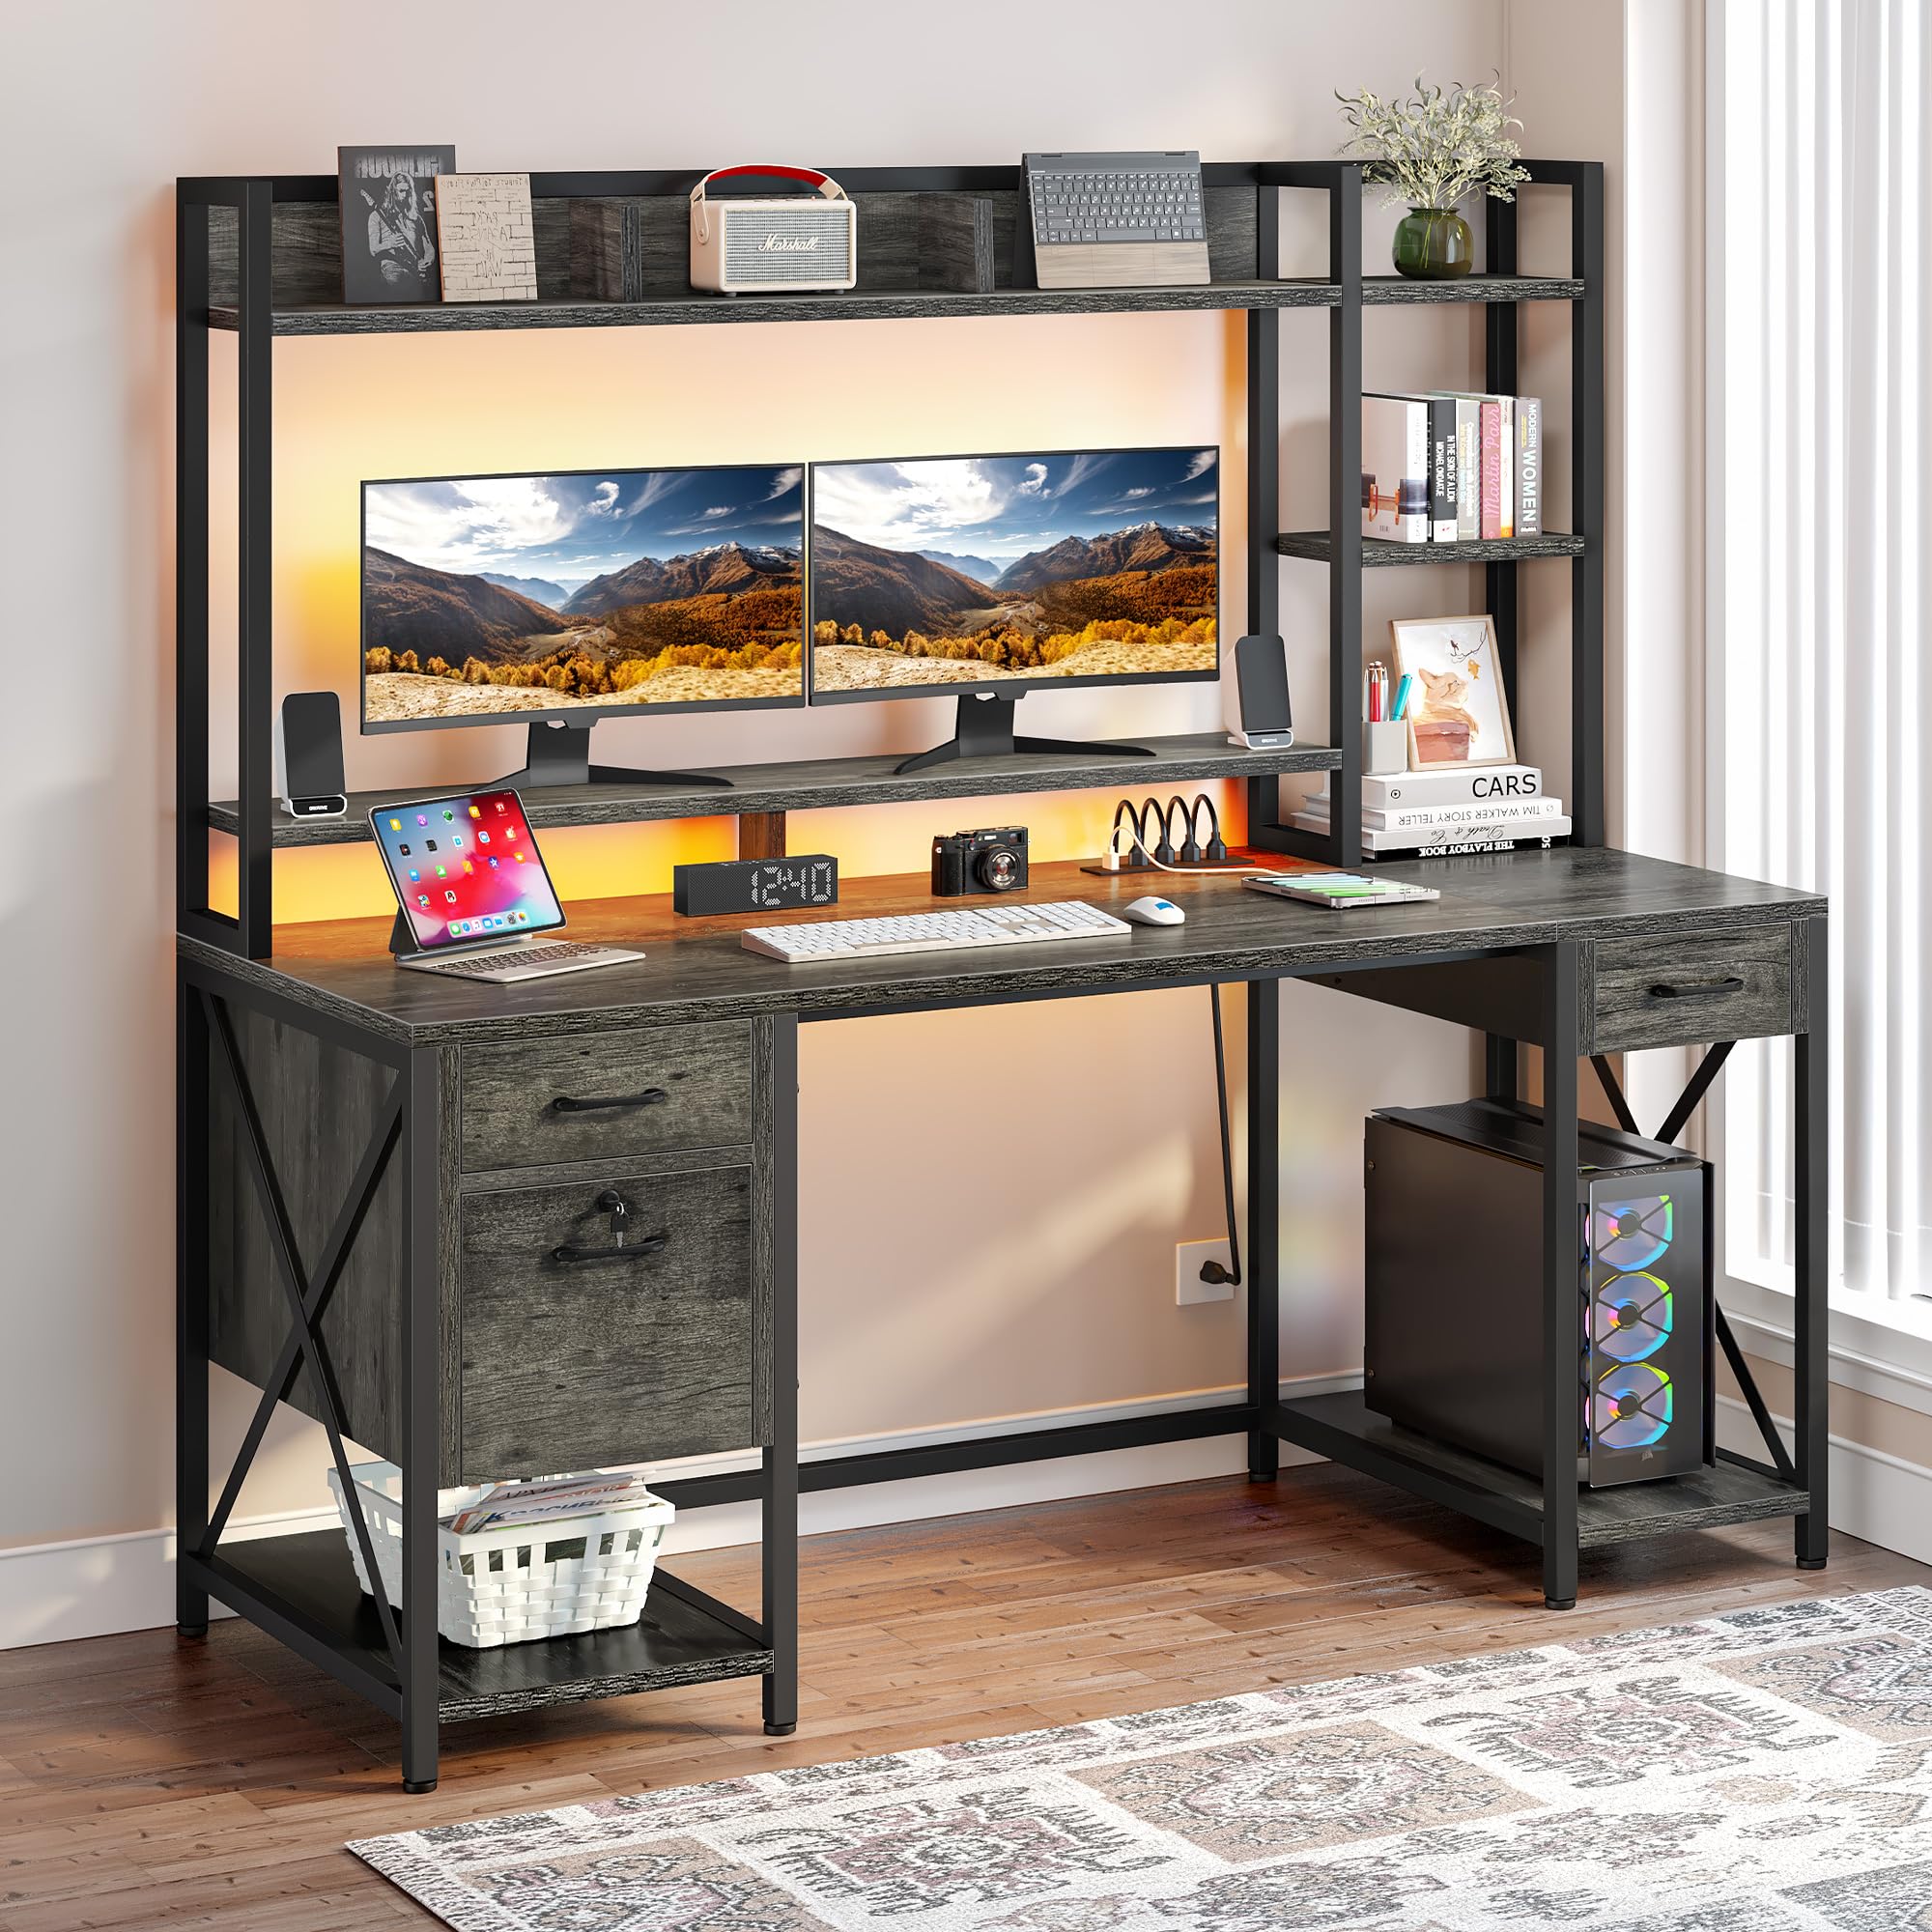
Figure 2.1: The DWVO Computer Desk with Drawers & Hutch.

Figure 2.2: Product dimensions for planning your space.
Video 2.1: An official overview of the DWVO Computer Desk with Drawers & Hutch, showcasing its features and design.
3. Package Contents
Verify that all components are present before beginning assembly. If any parts are missing or damaged, please contact customer support.
- 1 x Computer Desk (all desk panels and frame components)
- 1 x Packet of Fittings (screws, bolts, connectors, anti-tip kit)
- 1 x Instructions Manual (this document)
- 1 x LED Light Strip with controller
- 1 x Power Outlet & USB Hub
4. Setup and Assembly
Assembly is required for this product. It is recommended that two people assemble the desk to ensure stability and ease of construction. All necessary tools for assembly are included.
General Assembly Steps:
- Unpack and Identify Parts: Carefully unpack all components and lay them out. Refer to the included parts list to identify each piece.
- Assemble the Frame: Begin by connecting the metal frame components according to the diagrams in the separate assembly manual. Ensure all screws are tightened securely but do not overtighten until the entire frame is assembled.
- Attach Desk Panels: Secure the main desktop and hutch panels to the assembled frame.
- Install Drawers: Assemble the drawer boxes and install the drawer slides onto both the drawers and the desk frame. Ensure the slides are aligned correctly for smooth operation.
- Integrate Power Outlets and LED Lights: Install the power outlet strip into its designated slot. Attach the LED light strip to the underside of the hutch or monitor stand as indicated in the assembly manual.
- Final Adjustments: Once fully assembled, tighten all screws. Adjust the foot pads to level the desk on uneven surfaces.
- Install Anti-Tip Kit: Secure the desk to a wall using the provided anti-tip kit to prevent accidental tipping.
For detailed, step-by-step instructions and diagrams, please refer to the separate assembly manual included in your package.
5. Operating Instructions
5.1. LED Light Strips
The desk features an RGB LED light strip for customizable ambiance.
- Control: The LED lights can be controlled via a dedicated light strip switch or a smartphone application.
- Customization: Use the app to select any color, adjust brightness, and choose from various dynamic modes.
- Music Sync: The lights can synchronize with music played through a built-in microphone.
- Timer Function: Set schedules for the lights to turn on or off automatically.

Figure 5.1: LED light strip in operation, showing color customization.
5.2. Charging Station
The integrated charging station provides convenient power access.
- Power Outlets: Use the 4 AC outlets to power your computer, monitors, and other devices.
- USB Ports: The 2 USB ports (5V/2A) are suitable for charging smartphones, tablets, and other USB-powered accessories.
- Power Cord: The charging station is connected via a 6.56ft power cord. Plug it into a standard wall outlet.

Figure 5.2: Integrated power outlets and USB ports.
5.3. Drawers and Storage
Utilize the various storage options to keep your workspace organized.
- Drawers: The desk includes three drawers. The bottom drawer is designed as a file drawer, accommodating A4/Letter-sized documents and features a lock for security.
- Hutch and Shelves: Use the top hutch and side shelves for displaying items, storing books, or organizing office supplies.
- Monitor Stand: The elevated monitor stand provides ergonomic viewing and additional storage underneath.

Figure 5.3: File drawer with lock and adjustable file racks.
6. Maintenance
Regular maintenance ensures the longevity and optimal performance of your desk.
- Cleaning: Wipe surfaces with a soft, damp cloth. Avoid harsh chemicals or abrasive cleaners that may damage the finish.
- Hardware Check: Periodically check all screws and fasteners to ensure they remain tight. Retighten as necessary to maintain stability.
- LED Strip Adhesion: If the LED light strip begins to detach, re-secure it using additional adhesive tape or a suitable wood glue for a more permanent fix.
- Drawer Slides: Keep drawer slides free of dust and debris for smooth operation. Lubricate with a silicone-based spray if needed.
7. Troubleshooting
This section addresses common issues you might encounter.
| Problem | Possible Cause | Solution |
|---|---|---|
| LED light strip does not stick or falls down. | Original adhesive may be insufficient or surface not clean. | Clean the surface thoroughly. Apply additional strong adhesive tape or a small amount of wood glue to secure the strip. |
| Drawers do not align or close completely. | Screws on drawer tracks are not flush, or tracks are misaligned. | Ensure all screws securing the drawer tracks are tightened completely and are flush with the surface. Recheck track alignment according to the assembly manual. |
| Missing or mismatched parts during assembly. | Packaging error or manufacturing defect. | Double-check all packaging for small parts. Contact DWVO customer service with your model number and a description of the missing/mismatched parts. |
| Desk feels unstable or wobbly. | Loose fasteners or uneven floor. | Tighten all assembly screws. Adjust the leveling foot pads at the bottom of the desk legs to compensate for uneven flooring. |
8. Specifications
Detailed specifications for the DWVO Computer Desk with Drawers & Hutch.
| Feature | Detail |
|---|---|
| Brand | DWVO |
| Model Number | MADWVJ0Wtz |
| Product Dimensions (D x W x H) | 19.68" x 59.1" x 59.1" |
| Item Weight | 92.9 Pounds |
| Color | Grey |
| Material Type | Engineered Wood, Metal |
| Number of Drawers | 3 |
| Number of Shelves | Multi-shelves |
| Special Features | Power Outlets, USB Outlets, LED Lights, Drawers, Lock, Hutch |
| Required Assembly | Yes |
| Recommended People for Assembly | 2 |
| Included Assembly Tools | Yes |
| GTIN | 199449407010 |
9. Warranty and Support
This DWVO product comes with a limited warranty.
- Warranty Type: Limited Warranty. Specific terms and duration may vary. Please refer to your purchase documentation or contact DWVO customer service for details.
- Customer Support: For assembly assistance, missing parts, or any product-related inquiries, please contact DWVO customer service. Refer to the contact information provided with your purchase or visit the official DWVO website.
Related documentsMADWVJ0Wtz

Ask a question about this manual
Ask about setup, troubleshooting, compatibility, parts, safety, or missing instructions. Manuals+ will review the question and use this page’s manual context to help answer it.