
TOPPING E2X2 OTG, CL101
TOPPING E2X2 OTG Audio Interface & CL101 Condenser Microphone Bundle
User Manual
1. Introduction
This manual provides detailed instructions for the setup, operation, maintenance, and troubleshooting of your TOPPING E2X2 OTG Audio Interface and CL101 Condenser Microphone Bundle. This professional recording kit is designed for high-quality audio capture for vocals, instruments, podcasts, and streaming.
Please read this manual thoroughly before using the product to ensure optimal performance and longevity.
2. Package Contents
Verify that all items listed below are included in your package:
- TOPPING E2X2 OTG Audio Interface
- TOPPING CL101 Condenser Microphone
- Microphone Shock Mount
- Pop Filter
- USB-C to USB-A Cable
- XLR Microphone Cable
- User Manual (this document)

Image: Contents of the TOPPING CL101 microphone kit, including the microphone, shock mount, pop filter, and carrying case.
3. Product Overview
3.1 TOPPING E2X2 OTG Audio Interface

Image: Front view of the TOPPING E2X2 OTG Audio Interface, showing inputs, gain knobs, monitor knob, and headphone jack.
The E2X2 OTG is a compact 2-input, 2-output USB audio interface designed for high-fidelity recording. It features ultra-linear preamps, 48V phantom power, and zero-latency monitoring.
Front Panel Controls and Indicators:
- IN1 L / IN2 R Combo Inputs: Connect XLR microphones or 1/4" instrument cables.
- 48V Phantom Power Buttons: Activates 48V phantom power for condenser microphones (e.g., CL101).
- INST Buttons: Switches inputs to instrument level for guitars, basses, etc.
- MONITOR Knob: Adjusts the blend between direct input signal and computer playback for zero-latency monitoring.
- GAIN Knobs: Adjusts input gain for IN1 L and IN2 R.
- Headphone Output: 1/4" stereo jack for headphone monitoring.
- Level Meters: LED indicators for input and output signal levels.
- CLIP Indicator: Lights up when input signal is too high, indicating clipping.
- POWER Indicator: Shows power status.
- OTG Indicator: Lights up when connected to an OTG-compatible device (e.g., smartphone/tablet).
3.2 TOPPING CL101 Condenser Microphone
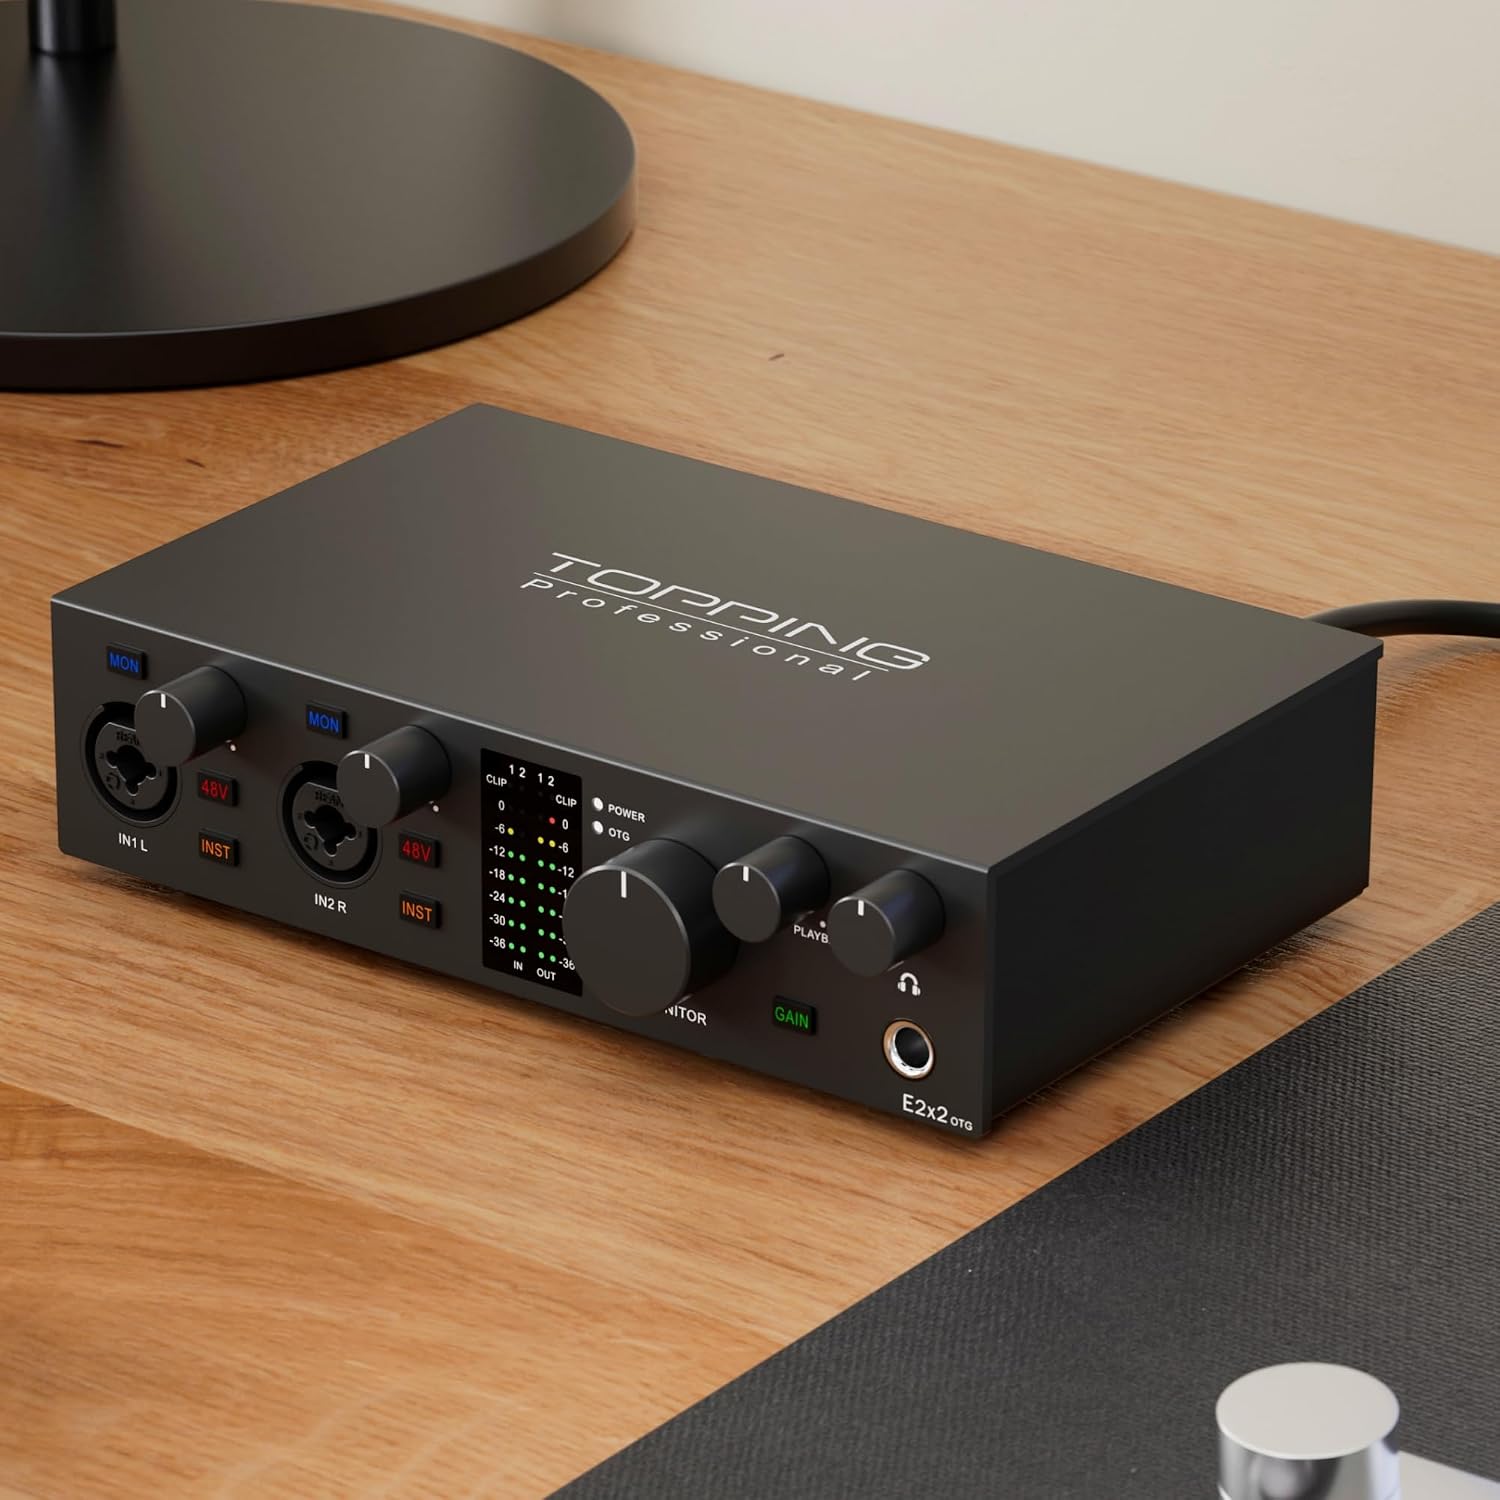
Image: Close-up view of the TOPPING CL101 Condenser Microphone, showing its mesh grille and branding.
The CL101 is a professional condenser microphone featuring a large 34mm gold-plated capsule and a cardioid pickup pattern. It is designed to capture clear, rich audio with ultra-low self-noise.

Image: Internal view of the TOPPING CL101 microphone, highlighting the 34mm fully gold-plated capsule and internal shock mount.
Key Features:
- 34mm Gold-Plated Capsule: Ensures detailed and rich sound capture.
- Cardioid Pickup Pattern: Focuses on sound directly in front of the microphone, reducing side and rear noise.
- Ultra-Low Noise: Designed for clear recordings with minimal self-noise (4dB SPL).
- Built-in Shock Mount: Minimizes mechanical noise and vibrations.
- Full-Metal Body: Durable construction for long-term use.
4. Setup Guide
4.1 Connecting the CL101 Microphone
- Attach the CL101 microphone to the included shock mount.
- Mount the shock mount onto a microphone stand (not included).
- Connect one end of the XLR microphone cable to the CL101 microphone.
- Connect the other end of the XLR microphone cable to one of the combo inputs (IN1 L or IN2 R) on the TOPPING E2X2 OTG Audio Interface.
- Position the pop filter in front of the microphone to reduce plosive sounds.
4.2 Connecting the E2X2 OTG Audio Interface
- Connect the USB-C end of the provided USB cable to the USB-C port on the E2X2 OTG interface.
- Connect the USB-A end of the cable to an available USB port on your computer (Windows/macOS) or a compatible OTG adapter for mobile devices (iOS/Android).
- The E2X2 OTG is bus-powered and does not require an external power supply. The POWER indicator on the interface will light up.
- For Windows users, the necessary drivers should install automatically. For macOS, iOS, and Android, it is plug-and-play.
- Connect your headphones to the 1/4" headphone output on the front panel for monitoring.

Image: The TOPPING E2X2 OTG Audio Interface connected to two smartphones, demonstrating its mobile compatibility for recording and streaming.
5. Operating Instructions
5.1 Initial Audio Setup (Computer/Mobile Device)
- Windows: Go to Sound Settings > Playback and Recording tabs. Select "TOPPING E2X2 OTG" as the default device.
- macOS: Go to System Preferences > Sound > Input and Output tabs. Select "TOPPING E2X2 OTG".
- iOS/Android: The device should automatically recognize the E2X2 OTG as an external audio device. Ensure your recording application is configured to use the external interface.
5.2 Recording with the CL101 Microphone
- Ensure the CL101 microphone is connected to an input on the E2X2 OTG.
- Press the 48V button corresponding to the input connected to the CL101. The LED will illuminate, providing phantom power to the microphone.
- If recording an instrument directly (e.g., guitar), connect it to an input and press the INST button for that input. Do not activate 48V phantom power for dynamic microphones or instruments that do not require it.
- Open your Digital Audio Workstation (DAW) or recording software. Select "TOPPING E2X2 OTG" as your audio input and output device.
- Create a new audio track and select the appropriate input (e.g., Input 1 for IN1 L).
- Speak or sing into the CL101 microphone. Slowly turn up the corresponding GAIN knob until the input level meters show a healthy signal, typically peaking around -6dB to -3dB. Avoid the CLIP indicator lighting up consistently.
- Adjust the MONITOR knob to blend between your direct input signal (for zero-latency monitoring) and the playback from your computer. Turn it towards "IN" to hear more of your live input, and towards "OUT" to hear more of your computer's playback.
- Adjust your headphone volume using the dedicated headphone volume knob.
- Begin recording.
5.3 Playback
Once the E2X2 OTG is selected as your default audio output device, all audio from your computer or mobile device will play through the interface's main outputs and headphone output. Adjust the MONITOR knob to control the blend of playback audio with live input.
6. Maintenance and Care
- Cleaning: Use a soft, dry cloth to clean the surfaces of the audio interface and microphone. Do not use liquid cleaners or abrasive materials.
- Storage: When not in use, store the microphone and interface in a dry, dust-free environment. The CL101 microphone comes with a protective carrying case for safe storage and transport.
- Handling: Avoid dropping or subjecting the devices to strong impacts. The CL101 microphone, especially its capsule, is delicate.
- Environmental Conditions: Do not expose the products to extreme temperatures, humidity, or direct sunlight.
- Cable Management: Ensure cables are not kinked or strained. Disconnect cables by pulling the plug, not the cable itself.
7. Troubleshooting
| Problem | Possible Cause | Solution |
|---|---|---|
| No sound from microphone |
|
|
| No sound from headphones/speakers |
|
|
| Distorted or clipped audio |
|
|
| Interface not recognized by computer/device |
|
|
8. Specifications
8.1 TOPPING E2X2 OTG Audio Interface
| Feature | Detail |
|---|---|
| Inputs | 2 x XLR/TRS Combo Jacks |
| Outputs | 2 x TRS Line Outputs, 1 x 1/4" Headphone Output |
| Phantom Power | +48V (switchable) |
| Preamp EIN | -130.5dBu (Ultra-linear) |
| Monitoring | Zero-latency direct monitoring |
| Connectivity | USB-C (Bus-powered) |
| Compatibility | Windows, macOS, iOS, Android |
8.2 TOPPING CL101 Condenser Microphone
| Feature | Detail |
|---|---|
| Type | Condenser |
| Capsule | 34mm Gold-Plated |
| Polar Pattern | Cardioid |
| Self-Noise | 4dB SPL |
| Power Requirement | 48V Phantom Power |
| Construction | Full-Metal Body |
9. Warranty and Support
For warranty information and technical support, please refer to the official TOPPING website or contact your authorized dealer. Keep your proof of purchase for warranty claims.
Online Resources:
Related documentsE2X2 OTG, CL101


Ask a question about this manual
Ask about setup, troubleshooting, compatibility, parts, safety, or missing instructions. Manuals+ will review the question and use this page’s manual context to help answer it.