
1. Introduction
The OLIGHT Warrior Ultra 2500 High Lumens Tactical Flashlight is a compact, rechargeable handheld light designed for outdoor, emergency, and searching applications. It features dual switches, a proximity sensor for automatic dimming, and a durable O-aluminum construction.
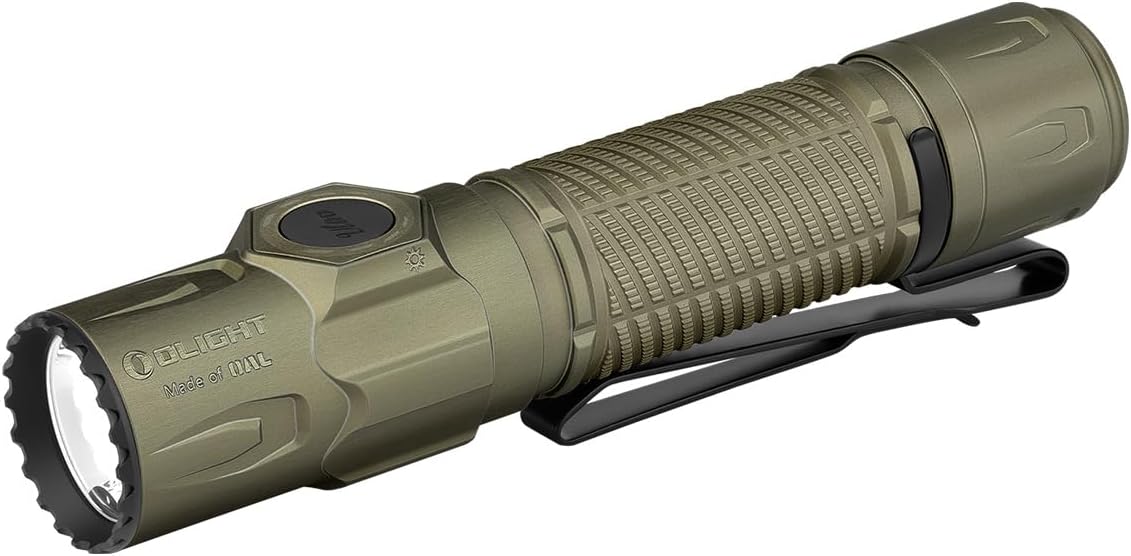
Image: OLIGHT Warrior Ultra 2500 High Lumens Tactical Flashlight in Olive Green.
2. What's in the Box
- OLIGHT Warrior Ultra Flashlight (Olive Green)
- Customized Rechargeable Battery (pre-installed)
- MCC3 Magnetic Charging Cable
- Flashlight Holster
- User Manual (this document)

Image: All items included in the product packaging.
3. Setup
3.1 Initial Charging
Before first use, fully charge the flashlight. The Warrior Ultra is equipped with a customized rechargeable battery and an MCC3 magnetic charging cable.
- Connect the MCC3 magnetic charging cable to a USB power source.
- Attach the magnetic end of the cable to the tail cap of the flashlight. The indicator on the cable will turn red during charging and green when fully charged.

Image: OLIGHT Warrior Ultra flashlight connected to the magnetic charging cable.
3.2 Battery Indicator
The side switch features a battery indicator to show the remaining power level. Green indicates high battery, yellow indicates medium, and red indicates low battery.
4. Operating Instructions
The Warrior Ultra features dual switches for versatile operation.
4.1 Side Switch Operation
- Turn On/Off: Single press the side switch.
- Change Brightness: When on, press and hold the side switch to cycle through Low, Medium, and High modes.
- Moonlight Mode: When off, press and hold the side switch for approximately 1 second to activate Moonlight mode.
- Button Lockout: Press and hold the side switch for about 2 seconds to access the button lockout mode. Repeat to unlock.
4.2 Tail Switch Operation
- The tail switch is designed for tactical use, offering quick access to Turbo and Strobe modes.
- Momentary Turbo: Press and hold the tail switch for instant Turbo output. Release to turn off.
- Constant Turbo: Double-press the tail switch for constant Turbo output.
- Strobe: Triple-press the tail switch for Strobe mode.

Image: Comparison showing the flashlight's brightness reduction when the proximity sensor is triggered.
4.3 Auto-Dimming Proximity Sensor
The flashlight features an auto-dimming proximity sensor that automatically reduces brightness when the light head is too close to an object. This prevents potential damage to both the LED and surrounding surfaces from excessive heat.
5. Maintenance
- Keep the threads and O-rings lubricated with silicone grease to prevent water ingress.
- Clean the lens with a soft, clean cloth. Avoid using harsh chemicals.
- Store the flashlight in a cool, dry place when not in use for extended periods.
- Ensure the magnetic charging port is clean and free of debris for optimal charging performance.
6. Troubleshooting
- Flashlight not turning on:
- Check if the battery is properly inserted and fully charged.
- Ensure the flashlight is not in lockout mode (press and hold side switch for 2 seconds to unlock).
- Clean the contact points of the battery and tail cap.
- Charging issues:
- Verify the MCC3 magnetic charging cable is securely connected to both the power source and the flashlight's tail cap.
- Ensure the charging cable and port are clean and free of obstructions.
- If the indicator remains red after prolonged charging, contact customer support.
- Proximity sensor issues:
- Ensure the sensor area on the flashlight head is clean and unobstructed.
- The sensor is designed to dim when close to objects; this is normal operation.
7. Specifications
| Feature | Detail |
|---|---|
| Brand | OLIGHT |
| Model | WarriorUltra-OLG#300000 |
| Color | Olive Green |
| Material | O-aluminum |
| Light Source Type | LED |
| Max Brightness | 2500 Lumens |
| Max Beam Distance | 320 meters |
| Power Source | Battery Powered (Lithium Ion) |
| Water Resistance Level | Waterproof |
| Product Dimensions | 4"D x 1.2"W x 8"H |
| Item Weight | 1.08 pounds |

Image: Detailed output specifications for the OLIGHT Warrior Ultra.
8. Warranty & Support
OLIGHT prides itself on providing high-quality flashlights and is committed to customer satisfaction. The OLIGHT Warrior Ultra comes with a Lifetime Warranty.
For further assistance, technical support, or warranty claims, please refer to the official user manual PDF or contact Olight® Direct, the seller.
- Official User Manual (PDF): Download PDF
- Visit the OLIGHT Store: OLIGHT Brand Store

Image: OLIGHT's commitment to quality and customer satisfaction.


