1. Introduction
Thank you for choosing the LINKChef 4-in-1 Immersion Blender. This manual provides essential information for the safe and efficient operation, maintenance, and care of your appliance. Please read all instructions carefully before first use and retain this manual for future reference.
Important Safety Instructions
- Always unplug the appliance from the power supply before assembly, disassembly, or cleaning.
- Do not immerse the motor unit in water or any other liquid. Clean with a damp cloth only.
- Keep hands, hair, clothing, and utensils away from moving blades during operation to prevent injury.
- Blades are sharp. Handle with care when assembling, disassembling, or cleaning.
- This appliance is not intended for use by children. Close supervision is necessary when any appliance is used near children.
- Do not operate any appliance with a damaged cord or plug, or after the appliance malfunctions or has been dropped or damaged in any manner.
- Ensure the voltage indicated on the appliance corresponds to your local mains voltage before connecting.
2. Product Components
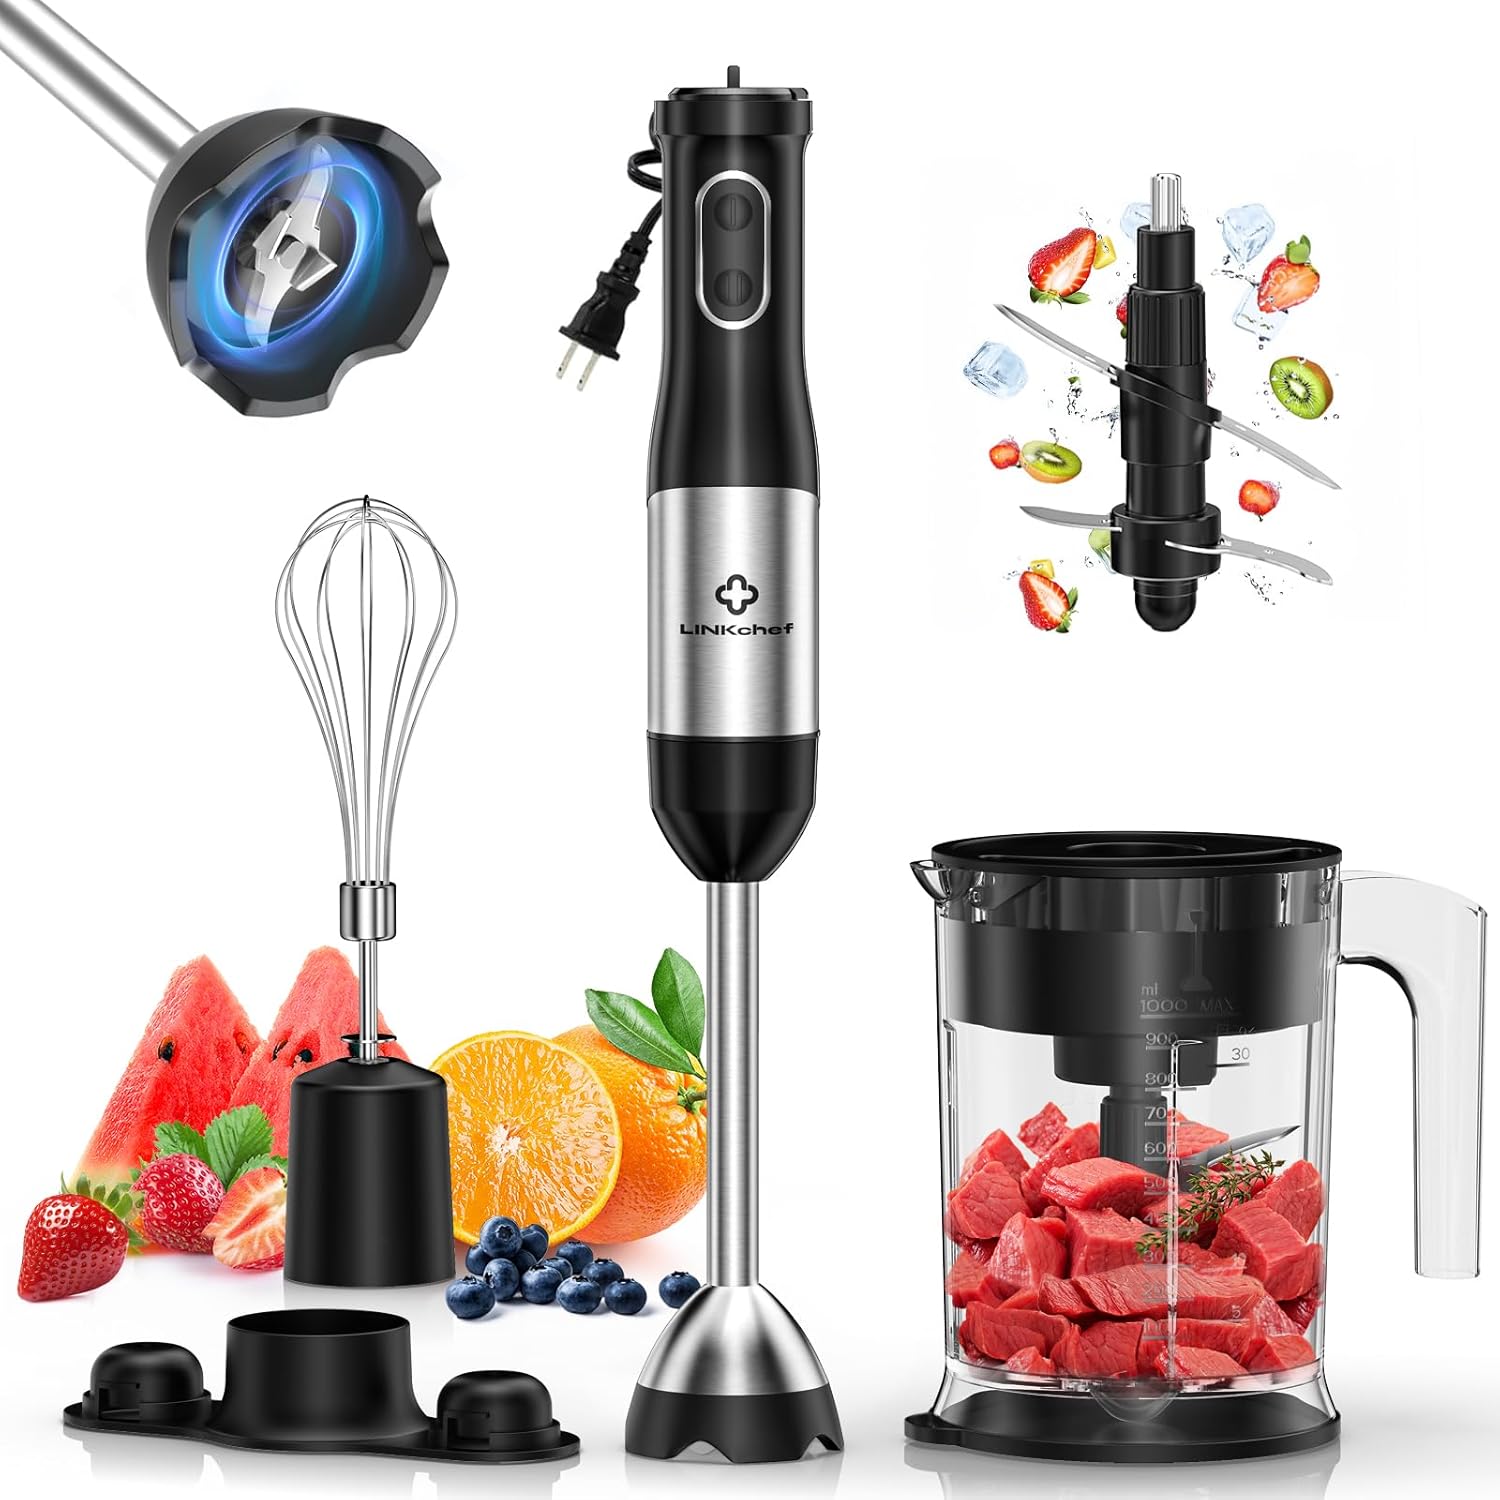
The LINKChef 4-in-1 Immersion Blender set includes the following parts:
- Motor Body: The main unit containing the 800W motor, speed control dial, and power buttons.
- Blending Stick: Stainless steel shaft with a 4-leaf titanium steel blade and bell-shaped splash guard.
- Whisk Attachment: For whipping and beating ingredients.
- Chopper Attachment: Includes a 1000ml chopper bowl, chopping blade, and lid.
- Storage Rack: For organized storage of components.
3. Assembly and Initial Setup
3.1 Attaching the Blending Stick
- Align the motor body with the blending stick.
- Twist the blending stick clockwise until it locks securely into place.
3.2 Attaching the Whisk Attachment
- Insert the whisk into the whisk coupler.
- Align the whisk coupler with the motor body.
- Twist the whisk coupler clockwise until it locks securely into place.
3.3 Assembling the Chopper Attachment
- Place the chopping blade onto the center pin inside the chopper bowl.
- Add ingredients to the chopper bowl.
- Place the chopper lid onto the chopper bowl, ensuring it is properly seated.
- Align the motor body with the chopper lid.
- Twist the motor body clockwise until it locks securely into place.
4. Operating Instructions
4.1 Immersion Blending
Use the blending stick for pureeing soups, making smoothies, sauces, and baby food directly in pots, bowls, or the included beaker.
- Attach the blending stick to the motor body as described in Section 3.1.
- Plug the appliance into a power outlet.
- Immerse the blending stick into the ingredients. Ensure the bell-shaped guard is fully submerged to prevent splashing.
- Adjust the speed using the 20-speed control dial on top of the motor body. Turn the dial to select your desired speed from 1 (low) to 20 (high).
- Press and hold the power button to start blending. For maximum power, press the Turbo Mode button.
- Move the blender gently up and down and in circles to ensure even blending.
- Release the power button to stop. Unplug the appliance before removing the blending stick.

Scratch Protection Feature
The blending stick features a food-grade blade guard designed to prevent scratching your cookware during use. This also helps reduce suction and splashing, contributing to a cleaner kitchen environment.

4.2 Chopping
The chopper attachment is suitable for chopping vegetables, nuts, herbs, and meat.
- Assemble the chopper attachment as described in Section 3.3.
- Plug the appliance into a power outlet.
- Place your hand firmly on the motor body to stabilize the chopper.
- Press and hold the power button to operate. Use short pulses for coarse chopping or hold longer for finer results.
- Release the power button to stop. Unplug the appliance before disassembling.

4.3 Whisking
Use the whisk attachment for whipping cream, beating eggs, and mixing batters.
- Attach the whisk attachment to the motor body as described in Section 3.2.
- Plug the appliance into a power outlet.
- Immerse the whisk into the ingredients.
- Press and hold the power button to operate. Adjust speed as needed using the speed dial.
- Release the power button to stop. Unplug the appliance before disassembling.

5. Cleaning and Maintenance
Proper cleaning and maintenance ensure the longevity and optimal performance of your LINKChef Immersion Blender.
5.1 Cleaning
- Always unplug the appliance before cleaning.
- Motor Body: Wipe the motor body with a damp cloth. Do not immerse it in water or any other liquid.
- Blending Stick, Whisk, Chopper Bowl, Chopping Blade, Chopper Lid: These detachable parts are dishwasher safe (top rack recommended) or can be hand-washed in warm, soapy water. Rinse thoroughly and dry immediately.
- Exercise extreme caution when handling the sharp blades of the blending stick and chopper.

5.2 Storage
After cleaning and drying all parts, store the appliance and its attachments in a dry place. The included storage rack helps keep all components organized and easily accessible.

6. Troubleshooting
If you encounter any issues with your LINKChef Immersion Blender, please refer to the following table for common problems and solutions.
| Problem | Possible Cause | Solution |
|---|---|---|
| Appliance does not turn on. | Not plugged in; power outlet malfunction; attachment not securely locked. | Ensure the appliance is properly plugged in. Test the outlet with another device. Re-attach the blending stick or chopper/whisk until it locks into place. |
| Motor stops during operation. | Overload; ingredients too tough or too much. | Unplug the appliance. Reduce the amount of ingredients or cut them into smaller pieces. Allow the motor to cool down for a few minutes before resuming. |
| Poor blending/chopping results. | Insufficient liquid (for blending); ingredients too large; incorrect speed setting. | For blending, add more liquid. For chopping, cut ingredients into smaller, uniform pieces. Adjust to a higher speed or use Turbo mode. |
| Splashing during blending. | Blending stick not fully submerged; too high speed initially. | Ensure the bell-shaped guard is fully immersed in the ingredients. Start at a lower speed and gradually increase. |
If the problem persists after attempting these solutions, please contact customer support.
7. Product Specifications
- Brand: LINKChef
- Model: HB-2180-21
- Power: 800W
- Speed Settings: 20 adjustable speeds + Turbo Mode
- Blade Material: Titanium Steel (SUS304)
- Chopper Capacity: 1000 ml
- Material Type Free: BPA Free
- Voltage: 120V
- Item Weight: Approximately 4.09 pounds
- Product Dimensions: 1"D x 1"W x 1"H (Motor Body with Blending Stick)
8. Warranty and Customer Support
8.1 Warranty Information
The LINKChef 4-in-1 Immersion Blender comes with a 5-year warranty from the date of purchase. This warranty covers manufacturing defects under normal household use. It does not cover damage resulting from misuse, accident, alteration, neglect, or commercial use.
8.2 Customer Support
For any questions, concerns, or assistance with your product, LINKChef offers lifetime customer service and 24/7 support. Please refer to the contact information provided with your purchase or visit the official LINKChef website for support details.


