
Introduction
This manual provides comprehensive instructions for the installation, operation, maintenance, and troubleshooting of your RESTMO Sprinkler Timer. Please read this manual carefully before use to ensure proper function and longevity of your device.

Image: Front view of the RESTMO 2-Zone Sprinkler Timer, displaying its large LCD screen, control dial, and brass connections.
Product Overview
Key Features
- Reliable & Leak-Proof Design: Features pure brass inlet and outlet metal threads for enhanced durability and high working pressure (max. 120psi) to prevent water leakage. Weatherproof construction with UV-resistant material.
- Dual Independent Zones: Two independent outlets, each capable of setting up to 3 separate watering programs.
- Multiple Programming Options: Each zone supports 3 distinct programs (P1, P2, P3) for a total of 6 customizable schedules.
- Flexible Watering Schedules: Watering frequency from 1-23 hours or 1-30 days. Watering duration from 1 minute to 299 minutes.
- User-Friendly Interface: Large 3.2-inch LCD display for easy readability. Oversized dial for setting clock, start time, duration, and frequency.
- Manual & Rain Delay Functions: Manual watering without interrupting preset programs. Long press delay button to pause programs for 0, 24, 48, or 72 hours during rainy conditions.
Components

Image: Detailed diagram illustrating the components of the RESTMO Sprinkler Timer, including the LCD screen, control dial, buttons, and brass inlet/outlet dimensions.
- Brass Inlet: Connects to faucet (3/4" NH thread).
- Brass Outlets (x2): Connects to hoses (3/4" NH thread).
- LCD Screen: Displays time, program settings, and zone status.
- Control Dial: Used to navigate through settings (SET CLOCK, START TIME, HOW LONG, HOW OFTEN, ON/OFF).
- OK Button: Confirms selections.
- +/- Buttons: Adjust values and activate Delay function.
- ZN/P Button: Switches between zones (Left/Right) and selects programs (P1/P2/P3).
- MANUAL Button: Activates manual watering.
- Battery Compartment: Located on the back, requires 2 AA alkaline batteries.
Setup
1. Battery Installation
- Locate the battery compartment on the back of the timer.
- Slide the battery cover off.
- Insert two (2) new AA alkaline batteries (not included), ensuring correct polarity (+/-).
- Replace the battery cover securely.

Image: View of the open battery compartment, showing the correct placement of two AA batteries.
2. Connecting the Timer
- Ensure the faucet is turned off.
- Thread the brass inlet of the timer onto your outdoor faucet. Hand-tighten until secure. The 360° swivel brass inlet allows for easy positioning.
- Connect your garden hoses or drip irrigation lines to the brass outlets at the bottom of the timer. Ensure a tight, leak-proof connection.
- Turn on the faucet fully. The timer is designed to withstand high pressure, but ensure there are no leaks at the connections.

Image: The sprinkler timer connected to a faucet, with close-ups of the pure brass inlet thread and pure brass outlet, emphasizing durability and leak-proof design.
Operating Instructions
1. Setting the Clock
- Rotate the control dial to SET CLOCK.
- The hour digits will flash. Use the +/- buttons to adjust the hour.
- Press OK to confirm the hour. The minute digits will flash.
- Use the +/- buttons to adjust the minutes.
- Press OK to confirm the minutes. The day of the week will flash.
- Use the +/- buttons to select the current day (e.g., MO for Monday).
- Press OK to save the clock settings.
2. Programming Watering Schedules (P1, P2, P3)
Each zone (Left and Right) can have up to three independent programs (P1, P2, P3). You can switch between zones using the ZN/P button.

Image: A close-up view of the LCD screen, illustrating the display of program settings (P1, P2, P3) and current time.
- Select Zone: Short press the ZN/P button to switch between ZONE L (Left) and ZONE R (Right).
- Select Program: Long press the ZN/P button to cycle through P1, P2, P3. Select the program you wish to set.
- Set Start Time:
- Rotate the dial to START TIME.
- Use +/- to set the desired start hour and minute.
- Press OK to confirm.
- Set How Long (Duration):
- Rotate the dial to HOW LONG.
- Use +/- to set the watering duration from 1 minute to 299 minutes.
- Press OK to confirm.
- Set How Often (Frequency):
- Rotate the dial to HOW OFTEN.
- Use +/- to set the watering frequency:
- Every 1-23 hours.
- Every 1-30 days.
- Specific days of the week (e.g., MO, TU, WE...).
- Press OK to confirm.
- Activate Program: Rotate the dial to ON. The timer will now run according to your programmed schedules. To turn off all programs, rotate the dial to OFF.

Image: Visual representation of setting up three distinct watering programs (P1, P2, P3) with different start times, durations, and frequencies.
3. Manual Watering
The manual watering function allows for immediate watering without affecting your preset programs.
- Ensure the dial is set to ON.
- Long press the MANUAL button. The display will show a flashing duration.
- Use the +/- buttons to set the desired manual watering duration (1 to 299 minutes).
- Press OK to start manual watering.
- To stop manual watering, long press the MANUAL button again, or rotate the dial to OFF and then back to ON.

Image: Instructions for activating manual watering by long-pressing the MANUAL button, and for activating rain delay by long-pressing the DELAY button.
4. Rain Delay Function
The rain delay function temporarily pauses your watering programs to conserve water during rainy periods.
- Ensure the dial is set to ON.
- Long press the DELAY button. The display will show "0h".
- Use the +/- buttons to select the desired delay duration: 24 hours, 48 hours, or 72 hours.
- Press OK to activate the rain delay. The timer will resume its programmed schedule after the selected delay period.
- To cancel the rain delay, long press the DELAY button again until "0h" is displayed, then press OK.

Image: The timer displaying the rain delay function, showing options to delay watering for 0, 24, 48, or 72 hours.
5. Zone Selection
The RESTMO Sprinkler Timer features two independent zones (Left and Right) that can be controlled separately.
- Short press the ZN/P button to toggle between ZONE L (Left) and ZONE R (Right).
- When setting programs, ensure you are in the correct zone (L or R) for which you intend to create or modify a schedule.
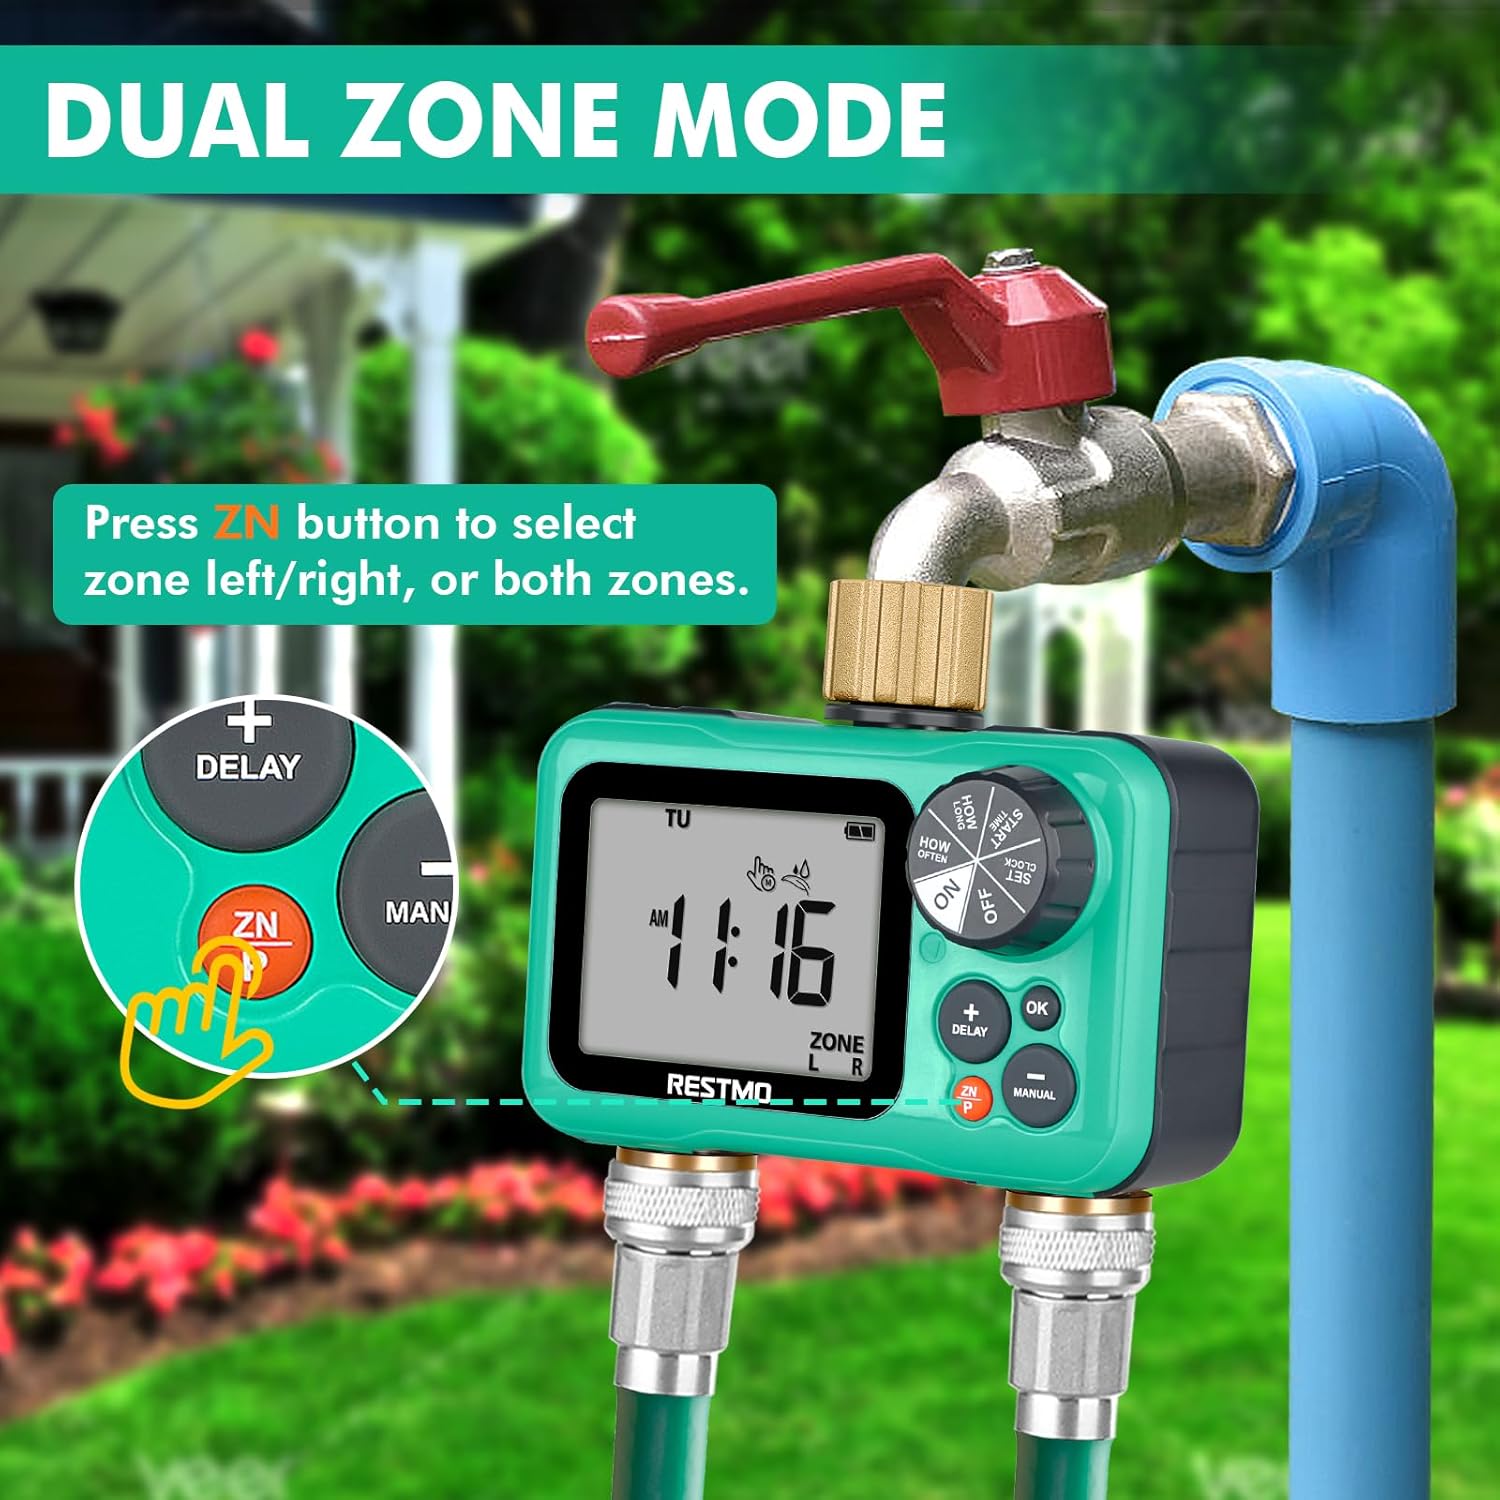
Image: The timer displaying "ZONE L" and "ZONE R", with an arrow pointing to the ZN button, indicating how to switch between the left and right watering zones.
Maintenance
- Battery Replacement: Replace batteries annually or when the low battery indicator appears on the LCD screen. Always use new AA alkaline batteries.
- Cleaning: Clean the timer's exterior with a soft, damp cloth. Do not use abrasive cleaners or solvents.
- Filter Screen: Periodically check the filter screen inside the brass inlet for debris. If clogged, remove and rinse it under running water.
- Winterization: Before freezing temperatures, disconnect the timer from the faucet and hoses. Remove batteries. Store the timer indoors in a dry, frost-free location. Failure to do so may result in damage not covered by warranty.
- Leak Prevention: Ensure all connections are hand-tightened. If leaks occur, check for worn washers and replace if necessary.
Troubleshooting
| Problem | Possible Cause | Solution |
|---|---|---|
| Timer not turning on/LCD blank. | Dead or incorrectly installed batteries. | Replace batteries with new AA alkaline batteries. Ensure correct polarity. |
| Water not flowing. | Faucet is off; timer is set to OFF; low water pressure; clogged filter; program not set correctly. | Turn on faucet. Rotate dial to ON. Check water pressure (8-120 psi required). Clean inlet filter. Verify program settings. |
| Timer leaks at connections. | Loose connections; worn washers; damaged threads. | Tighten connections. Replace rubber washers if worn. Inspect threads for damage. |
| Programs not running at scheduled times. | Timer set to OFF; incorrect clock setting; rain delay active; program deleted or incorrectly set. | Ensure dial is ON. Reset clock. Check if rain delay is active. Re-program schedules. |
| LCD screen is faded or unreadable. | Exposure to direct, intense sunlight/heat; low battery. | Relocate timer to a shaded area if possible. Replace batteries. If problem persists, contact customer support. |
Specifications
- Model: O-HT-2
- Inlet/Outlet Thread: 3/4" NH (pure brass)
- Independent Zones: 2
- Independent Programs: Up to 3 per zone (P1, P2, P3)
- Working Pressure: 8 - 120 PSI (0.5 - 8 Bar)
- Maximum Flow Rate: 10 GPM (35 LPM)
- Working Temperature: 38 - 120°F (3 - 50°C)
- Watering Frequency: 1-23 hours or 1-30 days
- Watering Duration: 1 minute to 299 minutes
- Power Source: 2 x AA Alkaline Batteries (not included)
- Screen Size: 3.2 Inches
- Dimensions: 3"D x 5"W x 3"H (approximate)
- Weight: 1.06 pounds (0.48 kg)
- Material: Brass, UV-resistant plastic
Warranty and Support
Restmo is committed to providing reliable and intelligent watering solutions. For any questions, concerns, or technical assistance regarding your sprinkler timer, please contact Restmo Customer Service.
While specific warranty details are not provided in this manual, Restmo aims to ensure customer satisfaction. Please retain your proof of purchase for any warranty claims.
For further support, visit the official Restmo store or contact their customer service channels as provided with your product packaging or on their official website.

Image: The official Restmo brand logo.


