
maXpeedingrods MU69YU
maXpeedingrods 5600 lbs Rear Air Suspension Bags Kit User Manual
Model: MU69YU
Product Overview
The maXpeedingrods 5600 lbs Rear Air Suspension Bags Kit is designed to enhance the stability, comfort, and load-leveling capability of your vehicle. This kit provides adjustable air support to reduce squat, minimize trailer sway, and prevent bottoming out, ensuring a safer and more comfortable ride when hauling or towing heavy loads.

Image: Overview of the maXpeedingrods 5600 lbs Rear Air Suspension Bags Kit, showing all included components.
Application and Compatibility
This air suspension kit is specifically designed for the following vehicles:
- VW Crafter 4X4: All year models.
- Mercedes-Benz Sprinter 4X4: All year models.
It is compatible with vehicles featuring a dual rear wheel configuration and a 4-inch axle tube.

Image: Compatibility guide for modified vehicles. The kit fits if the rear is lifted (may need spacer) or front is lifted. It does not fit if both front and rear are lowered.
Important Note on Modified Vehicles:
- If the rear of your vehicle is lifted, an additional spacer may be required to support the kit.
- If only the front of your vehicle is lifted, the kit will fit.
- If both the front and rear of your vehicle are lowered, this kit is not compatible.
Package Contents
Please verify that all components listed below are present in your package before beginning installation.
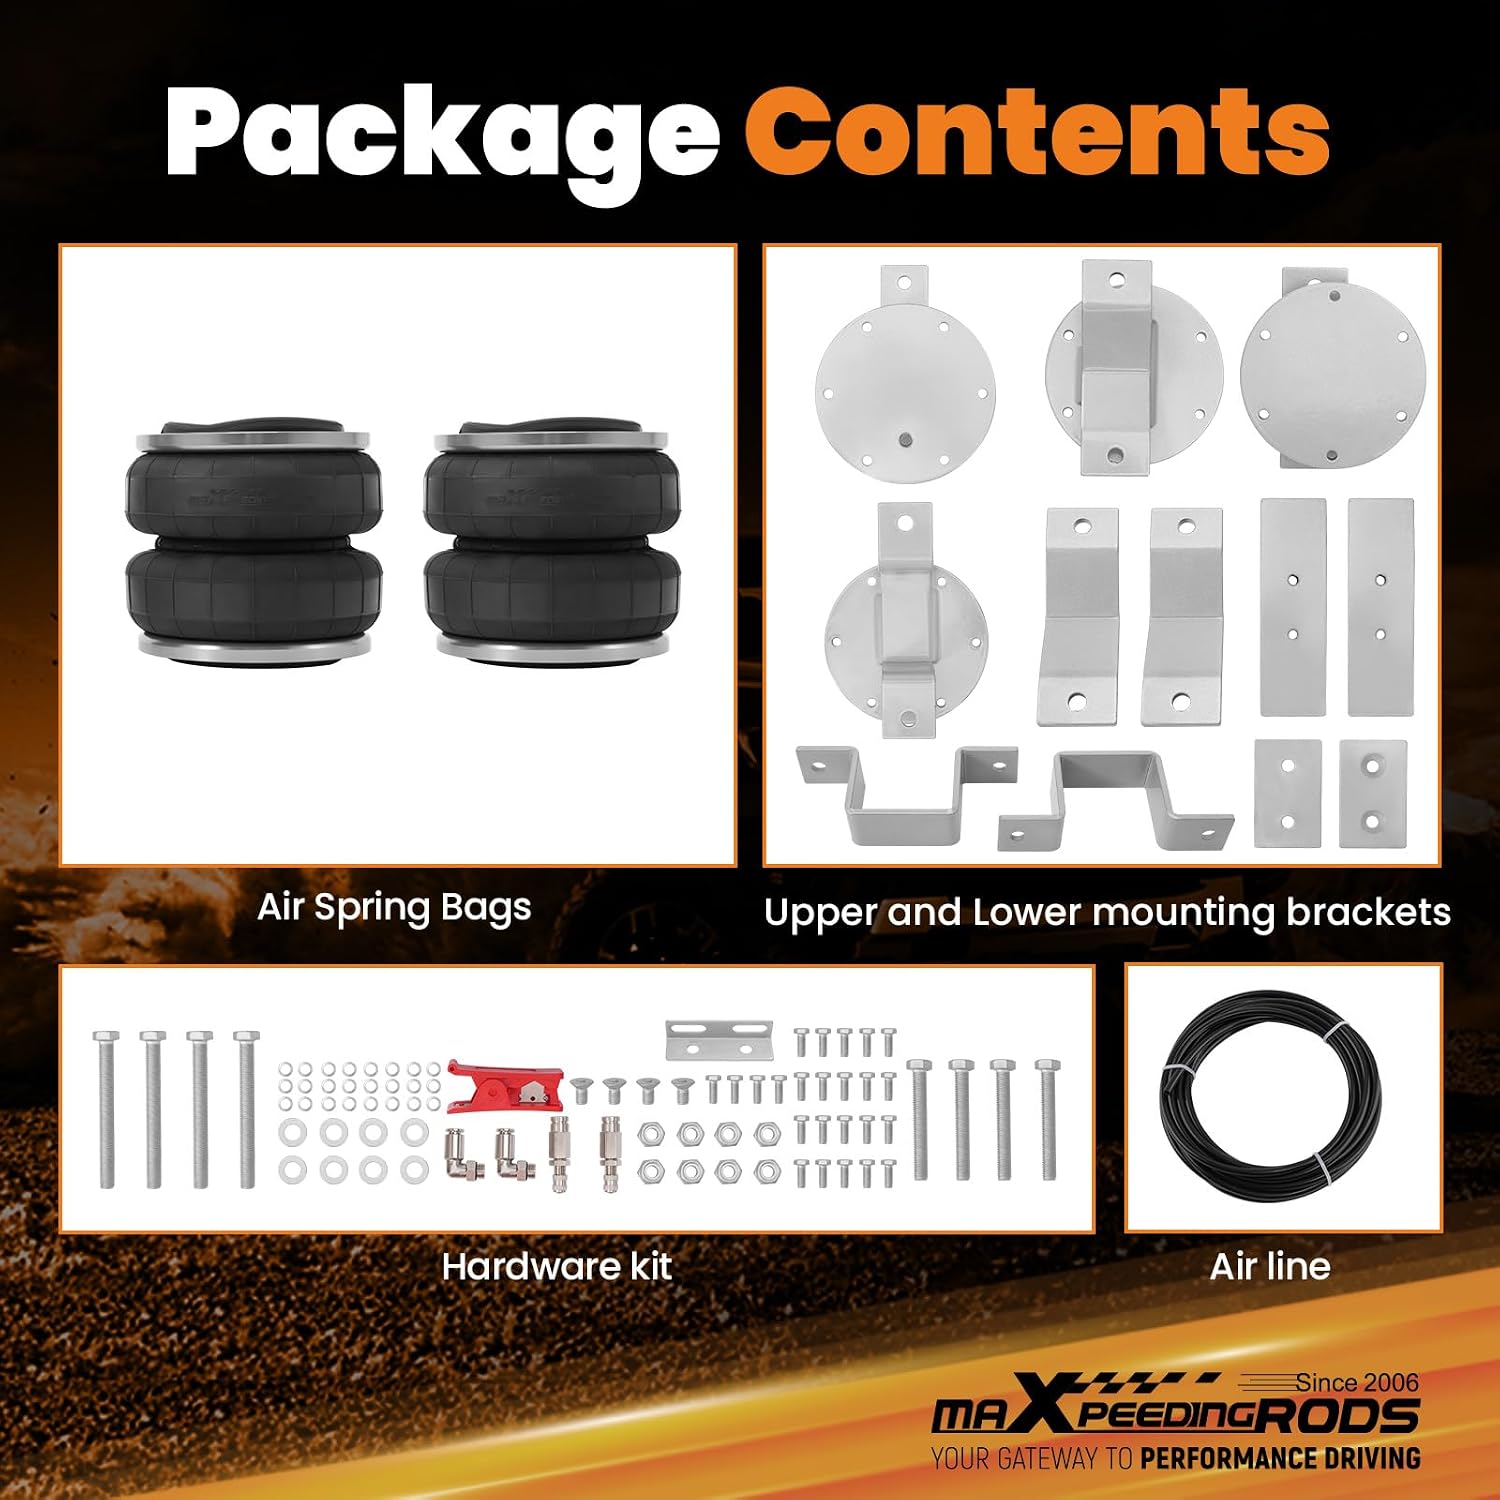
Image: A comprehensive view of the package contents, including air spring bags, mounting brackets, hardware, and air line.
- 2 x Suspension Bags (Air Spring Bags)
- 4 x Upper and Lower Mounting Brackets
- 2 x Elbow Air Fittings
- 2 x Inflation Valves
- 1 x Air Line
- Assorted Hardware (bolts, nuts, washers, etc.)
Key Features
- High Load Leveling Capability: Provides up to 5,600 pounds of load leveling capacity, significantly improving vehicle stability when hauling or towing.

Image: Visual representation of the 5600 lbs load leveling capacity.
- Adjustable Air Pressure: Air pressure is adjustable from 5 to 100 PSI, allowing for customization based on different road conditions and load requirements for a safe and comfortable ride.
- Enhanced Stability and Comfort: Reduces wear and tear on suspension components, eliminates vehicle squat, minimizes trailer sway, and prevents bottoming out.

Image: Illustration of vehicle posture before and after loading with the air suspension kit, demonstrating improved leveling and stability.
- Durable Construction: Features high-strength ST12 steel end caps, thicker rubber air sleeves and seals, and a multi-ply rubber structure for increased longevity and reliability.

Image: Detailed view of the durable material construction of the air bags.

Image: Diagram illustrating the multi-ply rubber sleeve construction for enhanced durability and leak prevention.
- Reliable Mounting Accessories: Includes premium Q235 steel brackets and Dacromet anti-rust surface treatment for bolts, ensuring secure and long-lasting installation.

Image: Close-up of the reliable mounting accessories, highlighting the steel brackets and anti-rust bolts.
- Rigorous Testing: Subjected to fatigue testing over 5,000,000 times and burst pressure testing at ≥2.0MPa to ensure high compressive strength, less noise, and overall product safety and durability.

Image: Illustration of the fatigue testing process, demonstrating the product's endurance.

Image: Visual of the burst pressure testing, confirming high compressive strength.

Image: Composite image showing various quality tests: Burst Pressure, Fatigue Testing, and 100% Airtightness Test.
Setup and Installation
Installation of the maXpeedingrods air suspension kit requires mechanical aptitude and proper tools. It is recommended to have the installation performed by a qualified professional if you are not confident in your abilities. Always refer to the detailed installation guide provided with your kit for specific step-by-step instructions.
General Installation Guidelines:
- Safety First: Ensure the vehicle is securely lifted and supported on jack stands. Disconnect the battery if working near electrical components.
- Prepare the Area: Clean the mounting surfaces on the vehicle's frame and axle to ensure proper fitment of brackets.
- Mount Brackets: Install the upper and lower mounting brackets according to the vehicle-specific instructions. Ensure all bolts are tightened to the manufacturer's specifications.
- Install Air Bags: Carefully position and secure the air suspension bags between the mounted brackets.
- Connect Air Lines: Attach the air lines to the elbow air fittings on the bags. Ensure a clean, straight cut on the air line for a proper seal.

Image: Important tips for preventing air leaks during installation, showing correct air line preparation and fitting connection.
- Install Inflation Valves: Mount the inflation valves in an accessible location, typically near the rear bumper or in the wheel well.
- Route Air Lines: Route the air lines away from hot exhaust components, sharp edges, and moving parts. Secure them with zip ties or clips.
- Leak Test: After installation, inflate the bags to a moderate pressure (e.g., 50 PSI) and perform a leak test using a soap and water solution. Spray all fittings and the bag itself; look for bubbles.
- Final Check: Double-check all connections and hardware for tightness before lowering the vehicle.
Preventing Leaks:
- Ensure the air line is cut perfectly smooth and straight to create a tight seal with the fittings.
- Verify that the air line is properly placed and routed without kinks or sharp bends.
- Use a spray bottle filled with soap and water to spray down all fittings and the air bag itself. Any bubbles indicate a leak that needs to be addressed.
Operating Instructions
The maXpeedingrods air suspension kit allows for adjustable air pressure to optimize your vehicle's ride quality and load support.
Adjusting Air Pressure:
- Determine Load: Assess the weight of the cargo or trailer you are carrying.
- Inflate/Deflate: Use an air compressor (not included) to inflate the air bags via the inflation valves. For deflation, simply press the valve stem.
- Recommended Pressure Range: The air bags are adjustable from 5 PSI (minimum) to 100 PSI (maximum).
- Light Loads/Unloaded: Maintain a minimum of 5-10 PSI to prevent damage to the bags.
- Heavy Loads: Increase pressure as needed to achieve a level stance and comfortable ride, up to 100 PSI. Do not exceed 100 PSI.
- Monitor Ride Height: Adjust pressure until the vehicle achieves a level stance, which helps maintain proper headlight aim and reduces tire wear.
- Test Drive: After adjusting, take a short test drive to ensure the desired ride quality and stability are achieved. Make further small adjustments if necessary.
Benefits of Proper Adjustment:
- Protects cargo from shifting.
- Prevents unbalanced loads.
- Reduces bottoming out over bumps.
- Keeps headlights level for improved visibility.
- Increases overall ride comfort.
- Improves steering control and braking performance.
- Preserves tire life by ensuring even wear.
- Eliminates vehicle sag.
Maintenance
Regular maintenance ensures the longevity and optimal performance of your maXpeedingrods air suspension kit.
- Regular Inspection: Periodically inspect the air bags, air lines, and fittings for any signs of wear, cracks, chafing, or leaks.
- Check Air Pressure: Check the air pressure in the bags regularly, especially before and after hauling heavy loads. Adjust as necessary.
- Clean Components: Keep the air bags and surrounding components clean from dirt, debris, and road salt, which can degrade materials over time.
- Tighten Hardware: Occasionally check all mounting bolts and nuts for tightness and re-torque if necessary.
- Avoid Over-Inflation/Under-Inflation: Always operate the air bags within the recommended pressure range (5-100 PSI) to prevent damage.
Troubleshooting
This section addresses common issues you might encounter with your air suspension kit.
| Problem | Possible Cause | Solution |
|---|---|---|
| Air bag loses pressure |
|
|
| Vehicle remains low after inflation |
|
|
| Uneven ride height (side to side) |
|
|
Specifications
| Attribute | Value |
|---|---|
| Brand | maXpeedingrods |
| Model Number | MU69YU |
| Load Leveling Capacity | Up to 5,600 lbs |
| Adjustable Air Pressure Range | 5 PSI to 100 PSI |
| Material | Metal (Brackets), Multi-ply Rubber (Bags) |
| Item Weight | 27.9 pounds |
| Product Dimensions | 17.28 x 14.61 x 8.54 inches |
| Manufacturer | maXpeedingrods |
Warranty and Support
maXpeedingrods stands behind the quality of its products.
- Warranty: maXpeedingrods warrants its products against manufacturing defects under normal use for 1 year from the date of purchase.
- Technical Support: Technical support and customer service are available to assist with any questions or issues you may encounter.
- Contact Information: For warranty claims, technical assistance, or general inquiries, please refer to the contact information provided on the official maXpeedingrods website or the documentation included with your product.

Image: maXpeedingrods commitment to quality, highlighting thorough quality control, extensive product tests, and skilled personnel.
Related documentsMU69YU


Ask a question about this manual
Ask about setup, troubleshooting, compatibility, parts, safety, or missing instructions. Manuals+ will review the question and use this page’s manual context to help answer it.