1. Introduction
Thank you for choosing the Gevi 10 Cup Drip Coffee Maker with Built-in Grinder. This appliance is designed to provide fresh, delicious coffee with convenience and versatility. This manual contains important information regarding the safe operation, use, and maintenance of your coffee maker. Please read it thoroughly before first use and retain it for future reference.
Model: DCMF0-BK0A1
Brand: Gevi

Image 1: Gevi 10-Cup Drip Coffee Maker with Built-in Grinder.
2. Important Safety Instructions
- Read all instructions before operating the appliance.
- Do not touch hot surfaces. Use handles or knobs.
- To protect against fire, electric shock, and injury to persons, do not immerse cord, plugs, or appliance in water or other liquid.
- Close supervision is necessary when any appliance is used by or near children.
- Unplug from outlet when not in use and before cleaning. Allow to cool before putting on or taking off parts, and before cleaning the appliance.
- Do not operate any appliance with a damaged cord or plug, or after the appliance malfunctions or has been damaged in any manner. Contact customer support for examination, repair, or adjustment.
- The use of accessory attachments not recommended by the appliance manufacturer may result in fire, electric shock, or injury to persons.
- Do not use outdoors.
- Do not let cord hang over edge of table or counter, or touch hot surfaces.
- Do not place on or near a hot gas or electric burner, or in a heated oven.
- Always attach plug to appliance first, then plug cord into the wall outlet. To disconnect, turn any control to “off,” then remove plug from wall outlet.
- Do not use appliance for other than intended use.
- The carafe is designed for use with this appliance. It must never be used on a range top.
- Do not place a hot carafe on a wet or cold surface.
- Do not use a cracked carafe or a carafe having a loose or weakened handle.
- Do not clean carafe with cleansers, steel wool pads, or other abrasive materials.
3. Product Overview and Components
Familiarize yourself with the various parts of your Gevi coffee maker:
- Bean Hopper (with lid)
- Grinder
- Water Reservoir (removable)
- Control Panel (Smart Touchscreen LED)
- Filter Basket (with reusable filter and drip stop)
- Coffee Carafe (glass pot)
- Warming Plate
- Scoop
- Filter Ring

Image 2: Included Accessories.
4. Setup
4.1 Unpacking
Carefully remove all packaging materials and components from the box. Retain packaging for future transport or storage if necessary.
4.2 Initial Cleaning
Before first use, wash the coffee carafe, filter basket, reusable filter, and scoop in warm, soapy water. Rinse thoroughly and dry. Wipe the exterior of the coffee maker with a damp cloth.
4.3 First Brew Cycle (Cleaning Cycle)
To clean the internal components, perform a brew cycle with only water:
- Fill the water reservoir with clean water up to the MAX line.
- Place the empty filter basket with the reusable filter into position.
- Place the empty carafe on the warming plate.
- Press the power button to start a brew cycle.
- Once complete, discard the water and rinse the carafe.
4.4 Placement
Place the coffee maker on a flat, stable, heat-resistant surface, away from the edge of the counter. Ensure adequate clearance around the unit for proper ventilation.
5. Operating Instructions
5.1 Control Panel Overview
The Gevi coffee maker features an intuitive touchscreen LED control panel for easy operation.
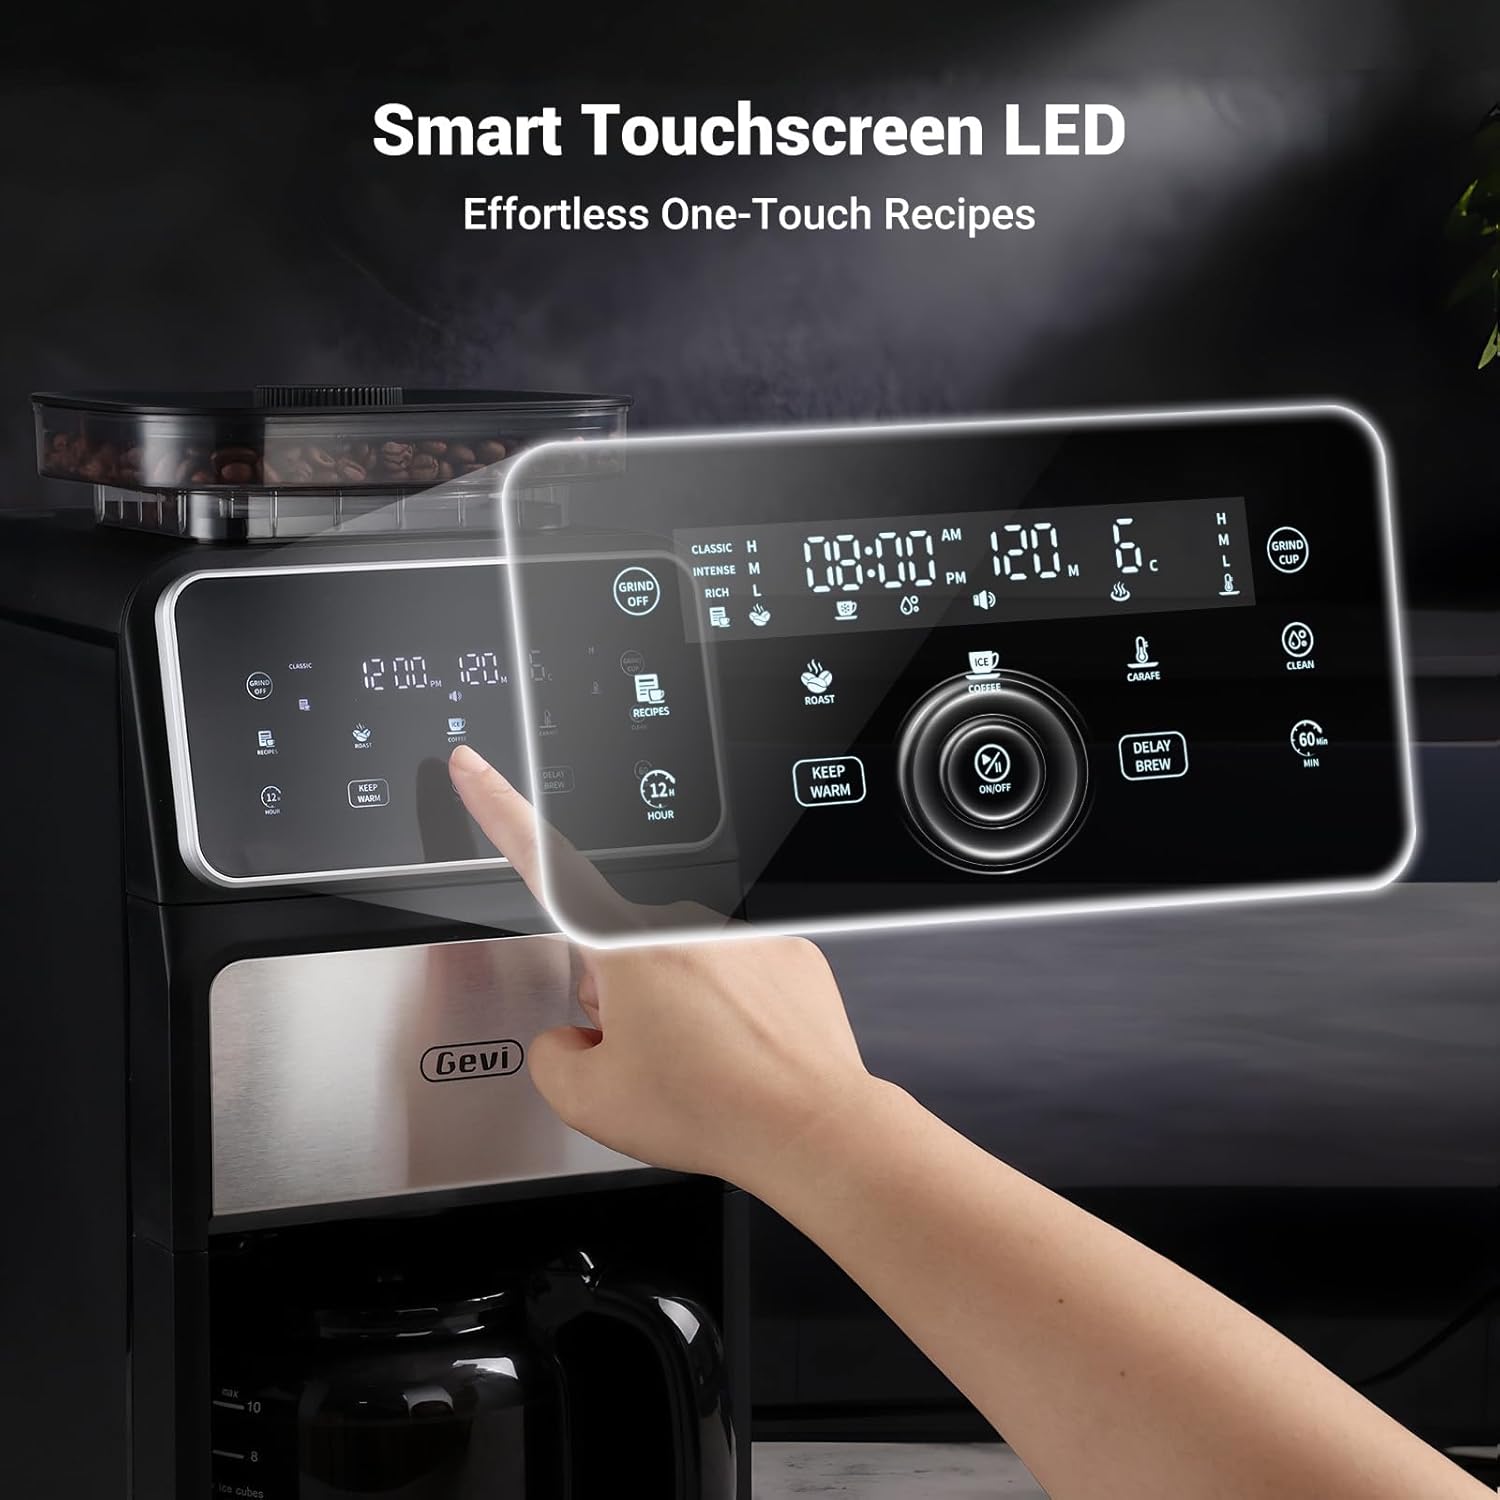
Image 3: Smart Touchscreen LED Control Panel.
5.2 Brewing Coffee
Follow these steps for brewing:
- Add Water: Remove the water reservoir and fill it with fresh, cold water to the desired cup marking (4-10 cups). Ensure the water level matches the intended coffee quantity. Reinsert the reservoir securely.

Image 4: Filling the Water Reservoir.
- Add Coffee:
- For Whole Beans: Open the bean hopper lid and pour whole coffee beans into the hopper. The grinder will automatically process the beans before brewing.
- For Pre-Ground Coffee: Place the reusable filter into the filter basket. Add the desired amount of pre-ground coffee into the filter. Ensure the grinder function is turned OFF on the control panel if using pre-ground coffee.

Image 5: Adding Ground Coffee to the Filter.
- Place Carafe: Ensure the glass carafe is correctly positioned on the warming plate.
- Select Settings: Use the touchscreen to select your desired settings:
- Cup Quantity: Adjust from 4 to 10 cups.
- Brew Style: Choose from CLASSIC, INTENSE, RICH, or ICE.
- Grind ON/OFF: Select ON for whole beans, OFF for pre-ground coffee.
- Start Brewing: Press the START/ON button to begin the brewing process. The machine will grind (if selected) and then brew your coffee.
5.3 Programmable Delay Brew
You can program the coffee maker to start brewing at a specific time within a 24-hour period:
- Prepare the coffee maker with water and coffee as described in Section 5.2.
- Press the DELAY BREW button on the touchscreen.
- Use the time adjustment buttons to set the desired start time.
- Confirm your selection. The coffee maker will display a timer and begin brewing at the set time.

Image 6: Setting the 24-Hour Auto-Brew.
5.4 Keep Warm Function
After brewing, the warming plate will automatically activate to keep your coffee hot. The default keep-warm time is 4 hours (240 minutes). You can adjust this duration:
- Press the KEEP WARM button on the touchscreen.
- Adjust the time from 60 to 240 minutes using the corresponding controls.

Image 7: Keep Warm Function.
6. Maintenance and Cleaning
Regular cleaning ensures optimal performance and extends the lifespan of your coffee maker.
6.1 Daily Cleaning
- Carafe and Filter Basket: After each use, remove the carafe and filter basket. Discard used coffee grounds. Wash the carafe, filter basket, and reusable filter in warm, soapy water. Rinse thoroughly and dry.
- Exterior: Wipe the exterior surfaces of the coffee maker with a soft, damp cloth. Do not use abrasive cleaners or scouring pads.
6.2 Cleaning the Bean Hopper and Grinder
The bean hopper and grinder should be cleaned periodically to prevent oil buildup and ensure consistent grinding performance.
- Ensure the coffee maker is unplugged and cooled.
- Remove any remaining coffee beans from the hopper.
- Carefully remove the bean hopper from the top of the unit.

Image 8: Removing the Bean Hopper.
- Use a small brush (often included with grinders) to clean out any coffee residue from the grinder burrs and the hopper.
- Wipe the hopper with a damp cloth and dry thoroughly before reattaching.
6.3 Descaling
Mineral deposits (limescale) can build up in your coffee maker over time, affecting performance and coffee taste. Descale your machine every 2-4 months, or more frequently if you have hard water.
- Prepare a descaling solution using white vinegar and water (1:2 ratio) or a commercial descaling agent according to its instructions.
- Pour the solution into the water reservoir.
- Place the empty carafe on the warming plate.
- Start a brew cycle without coffee grounds.
- After half the solution has brewed, turn off the coffee maker and let it sit for 15-20 minutes to allow the solution to work.
- Turn the coffee maker back on to complete the brew cycle.
- Discard the solution and rinse the carafe.
- Run 2-3 full cycles with fresh, clean water to rinse out any remaining descaling solution.
7. Troubleshooting
| Problem | Possible Cause | Solution |
|---|---|---|
| Coffee does not brew. | No water in reservoir; Power not connected; Delay brew set. | Fill reservoir; Check power plug; Cancel delay brew or wait for programmed time. |
| Coffee tastes weak. | Insufficient coffee grounds; Water-to-coffee ratio incorrect; Brew strength setting too low. | Add more coffee grounds; Adjust water level; Select a stronger brew setting (e.g., INTENSE or RICH). |
| Coffee overflows from filter basket. | Too much coffee grounds; Filter basket clogged; Carafe not properly placed. | Reduce coffee grounds; Clean filter basket and reusable filter; Ensure carafe is centered on warming plate. |
| Grinder not working. | No beans in hopper; Grinder setting OFF; Grinder clogged. | Fill bean hopper; Ensure grinder setting is ON; Clean grinder burrs (refer to Section 6.2). |
| Water leaks from unit. | Water reservoir not seated correctly; Internal component issue. | Ensure water reservoir is firmly in place; If problem persists, contact customer support. |
8. Specifications
| Feature | Specification |
|---|---|
| Model Number | DCMF0-BK0A1 |
| Product Dimensions (D x W x H) | 10.7 x 7.9 x 17.8 inches |
| Item Weight | 15.57 pounds |
| Capacity | 10 Cups (1.5L / 50oz water reservoir) |
| Keep Warm Time | Adjustable 60-240 minutes |
| UPC | 767791978955 |

Image 9: Product Dimensions.
9. Warranty and Support
Every Gevi product purchased through official or authorized channels includes a 12-month warranty and lifetime technical support.
If you encounter any problems during the use of your Gevi coffee machine, please do not hesitate to contact Gevi customer support for assistance. Please have your model number (DCMF0-BK0A1) and proof of purchase ready when contacting support.


