
Introduction
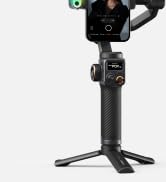
The Hohem iSteady M7 is a 3-axis smartphone gimbal stabilizer designed for capturing smooth and stable video footage. It features an AI tracking sensor, a detachable touchscreen remote control, a built-in extension rod, and adjustable fill light, making it a versatile tool for mobile videography.
What's in the Box
The Hohem iSteady M7 package includes the following items:
- Hohem iSteady M7 Gimbal
- Magnetic AI Tracker with Fill Light
- Detachable Touchscreen Remote Controller
- Tripod
- USB-TypeC Charging Cable
- TypeC-TypeC Charging Cable
- Carry Case
- User Manual
- Warranty Card

Setup
Charging the Gimbal
Before first use, fully charge the iSteady M7 gimbal. It is recommended to use a 5V-3A USB charger.

Tripod Installation & Axes Unlocking
Attach the tripod to the bottom of the iSteady M7 handle by screwing it in clockwise. Before using the gimbal, ensure the tilt, roll, and pan locks are in the unlocked position. Toggle the switches down to unlock the tilt and roll motors, and toggle the switch up to unlock the pan motor.

Mounting & Balancing
To ensure stable footage and maximize the gimbal's performance, balancing is required before use. Failure to adjust the balance may result in reduced stability, shorter battery life, and, in severe imbalance cases, overheating of the motors, leading to a sleep protection mode.
The iSteady M7 is compatible with smartphones up to 7 inches, weighing up to 500g, with a width of 58-90mm, and thickness up to 12.5mm.
Mounting in Landscape Mode
Attach your smartphone to the phone clamp. Position the camera of your smartphone on the left side. Ensure the smartphone is tightly pressed against both the phone clamp and the motor pad.

Balancing in Landscape Mode
Unlock the roll arm latch. Push the arm to the left or right until the phone is level with the ground. Then, tighten the latch to secure the position.
Mounting in Portrait Mode
Rotate the phone clamp by 90° to the left. Attach your mobile phone with the camera positioned on the top. Ensure the back of the smartphone is tightly pressed against the phone clamp.
Balancing in Portrait Mode
Unlock the roll arm latch. Push the arm to the left or right until the phone is level with the ground. Then, tighten the latch to secure the position.
Powering On
Make sure the tilt, roll, and pan locks are in the unlocked position before using the gimbal. Press and hold the power button for 3 seconds to power on/off the gimbal. The gimbal's axis arms will activate and the touchscreen will light up, indicating that the device has successfully powered on.

Bluetooth Connection & Hohem Joy App
Activate Bluetooth on your smartphone. Select the device named "IM7-XXXXXX" from the list of available devices. Follow the on-screen instructions to connect and pair. The Bluetooth icon on the gimbal's screen becoming blue signifies a successful connection.
To clear the Bluetooth connection, press the side roller seven times. When using it next time, please re-pair the devices.
Search for "Hohem Joy" in your app store or scan the QR code to download the app. This app unlocks additional features and functionality for your gimbal.
Operating
Usage Modes
The iSteady M7 supports various usage modes for different shooting scenarios:
- Handheld Mode: Simply hold the gimbal for on-the-go shooting.
- Extended Mode: Pull out the built-in extension pole to achieve unique gimbal moves at high or low angles.
- Remote Mode: Using the touchscreen remote, you can remotely control shooting and enable real-time preview of AI tracking footage.

Status Bar & Indicators
The status bar icons at the top of the touchscreen represent the following:
- Gimbal battery level
- Bluetooth connection status
- AI tracking status
- Remote connection status
- Remote battery level
After removing the touchscreen remote, you will see three indicator lights arranged from top to bottom:
- Bluetooth Indicator (Solid: Bluetooth Connected; Quick flash*3: Connection cleared; Slow flash: Firmware updating; Off: Disconnected)
- Gimbal Battery Indicator (Solid: 50%-100% Fully charged; Solid: 25%-50%; Solid: <25%; Quick flash: Shutting down soon)
- Remote Connection Indicator (Solid: Remote connected; Quick flash*3: Power on/off; Slow flash: Repairing; Off: Disconnected; Solid: Firmware anomaly; Pulse: Gimbal standby)
AI Tracking
Before using gesture control, ensure the AI tracker is powered on. Face the AI tracker at a distance of 0.5 to 5 meters. For optimal performance, ensure the subject is well-lit and unobstructed.
AI Tracking - Person
To activate tracking, face the AI tracker and make an "OK" hand gesture. The indicator light will turn solid green, indicating that tracking is active. To stop tracking, perform the "Stop" hand gesture (open palm). The AI tracker's indicator light will turn solid red, indicating that tracking has stopped.

AI Tracking - Any Subject
Before use, make sure the AI Tracker is turned on. At this point, the AI icon on the touchscreen is red. Swipe right to go to the real-time preview transmitted from the AI tracker.
Tracking Method 1: Double tap
Double tap your target on the screen. You'll see a green box on the screen, and the AI icon turns to green. The iSteady M7 will automatically identify and track the subject.
Tracking Method 2: Drag Selection
Frame the subject with a red box on the screen. Press the side button (or the trigger) once. The box and the AI icon will turn to green. The iSteady M7 will automatically identify and track the subject.
To stop AI Tracking, press the touchscreen three times to clear the current tracking subject. After stopping tracking, quick composition setting will be cleared, but it remains your customized composition for tracking next time.
Notes:
- Ensure ample lighting for optimal AI tracking performance; low light can negatively affect tracking.
- The optimal distance for gesture recognition is 0.5 to 5 meters, while the best tracking distance is between 0.5 to 7 meters.
- Both the face and the gesture must be visible in the AI tracker simultaneously for the AI tracking to activate.
Buttons
Power Button
- Long press (3s): Power on/off the gimbal.
- Double press: Enter/Exit standby mode.
- Single press (when powered off): Enable reverse charging.
- Double press (when powered off): Exit reverse charging.
- Press five times: Auto gimbal calibration.
Trigger Button
- Single press: Start/Pause AI tracking (used during tracking).
- Double press: Recenter the gimbal.
- Triple press: Change to forward-facing/backward-facing phone position.
- Press four times: Switch to ultra-wide angle mode (the roll motor shifts to the front to avoid appearing in the frame, ideal for wide, sweeping shots).
- Single press and long press: Activate Sport (S) Mode (for tracking fast-moving subjects or creating rapid transitions).
- Hold down: Enter All Lock (L) Mode (all three axes are locked, perfect for capturing linear movements).
Side Roller
- Long press: Power on/off the fill light.
- Single press (in CCT mode): Toggle between brightness (%) and color temperature (K). Then use the side roller to adjust within the range.
- Triple press (in RGB mode): Toggle between brightness (%) and color. Then use the side roller to adjust within the range.
- Double press: Switch between Focus Control and Motor Control.
- Single press (in Focus Control): Rotate the side roller to adjust the focal point of the phone camera.
- Single press (in Motor Control): Rotate the side roller to control the angles of the pan, tilt, and roll motors.
Mode Button
- Single press: Switch the gimbal's working mode (PF Mode, PTF Mode, POV Mode, Custom Mode, ICP Mode).
- Triple press: Auto gimbal calibration.
A-B Button
Set the starting and ending point for track shooting or time-lapse footage along a designated path.
- Setting: Position the camera angle with the joystick to the start point, and long press Button A to set. Move to another angle and long press Button B to set.
- Motion: Single press Button A/B to quickly return to the A/B position from the current position. Double press Button A/B to start A-B motion at a constant speed.
*Duration by default: 1 minute. You can customize duration in the Hohem Joy App or through the touchscreen.
Note: This function should be used separately from the time-lapse feature in the Hohem Joy app.
Touchscreen Interface
The 1.4" full-color touchscreen allows for quick parameter setting and real-time preview. You can easily double tap or drag-select the tracking target on the touchscreen to quickly capture any subject, centered or positioned just where you want.

The full-colored touchscreen features an intuitive UI, allowing quick setting of both gimbal and shooting parameters, simple and user-friendly.

Maintenance
To ensure the longevity and optimal performance of your Hohem iSteady M7, follow these maintenance guidelines:
- Keep the gimbal clean and free from dust and debris. Use a soft, dry cloth for cleaning.
- Avoid exposing the gimbal to extreme temperatures or direct sunlight for prolonged periods.
- Store the gimbal in its provided carry case when not in use to protect it from impacts and dust.
- Regularly check the axis locks and ensure they function smoothly.
- Keep the charging ports clean and dry.
Troubleshooting
If you encounter any issues with your Hohem iSteady M7, try the following troubleshooting steps:
- Gimbal not powering on: Ensure the battery is fully charged. Check the power button for proper function.
- Gimbal not balancing correctly: Re-check the mounting and balancing steps, ensuring the smartphone is centered and the axes are unlocked.
- Unstable footage: Verify that the gimbal is properly balanced and all axis locks are disengaged. Ensure the firmware is up to date via the Hohem Joy app.
- AI tracking issues: Ensure the AI tracker is powered on and the subject is well-lit and within the recommended distance (0.5 to 7 meters). Check for any obstructions between the tracker and the subject.
- Bluetooth connection problems: Clear the Bluetooth connection on the gimbal and your smartphone, then attempt to re-pair.
For more complex issues, refer to the official Hohem support resources or contact customer service.
Specifications
| Feature | Detail |
|---|---|
| Item Weight | 1.39 pounds |
| Product Dimensions | 4.8 x 4.65 x 12.87 inches |
| Item Model Number | HPG-M7 |
| Batteries | 1 Lithium Ion battery required (included) |
| Display Type | LCD |
| Built-in Extension Pole | 193mm |
| Payload Capacity | Up to 500g |
| Battery Life | 12 Hours |
Warranty & Support
The Hohem iSteady M7 comes with a 1-Year Manufacturer Warranty.
For detailed user guides, troubleshooting, and support, please refer to the official Hohem website or contact their customer service. You can also find additional resources and tutorials on the Hohem Joy App.


