
1. Introduction
This manual provides detailed instructions for the installation, operation, and maintenance of your LUTEC 84W 9500LM LED Security Flood Light. Please read this manual thoroughly before installation and retain it for future reference. This product is designed to provide powerful, energy-efficient outdoor illumination with advanced motion sensing capabilities and a night light feature.
2. Safety Information
WARNING: Risk of electric shock. Disconnect power at the fuse or circuit breaker before installation or servicing.
- Ensure all electrical connections comply with local codes and ordinances, as well as the National Electrical Code (NEC).
- If you are unfamiliar with electrical wiring, consult a qualified electrician.
- Do not install this fixture on surfaces that are unstable or prone to vibration.
- This product is intended for outdoor use only.
- Do not look directly into the LED light source when illuminated, as it may cause eye damage.
3. Package Contents
Verify that all components are present before beginning installation:
- LED Security Flood Light Fixture (1)
- Mounting Bracket (1)
- Wire Nuts (3)
- Mounting Screws (2)
- Gasket (1)
- Rubber Plug (1)
- M4*50 Screw (1)
- M4*35 Screw (1)
4. Product Overview and Features
The LUTEC 84W 9500LM LED Security Flood Light is designed for robust outdoor lighting, featuring four adjustable heads, a sensitive motion sensor, and an integrated night light.

Image: Front view of the LUTEC 84W 9500LM LED Security Flood Light, showing its four adjustable light heads and the motion sensor unit below.
Key Features:
- High Brightness: 84W power output delivering 9500 lumens of 5000K daylight illumination.
- Adjustable Heads: Four independently adjustable light heads for wide and even light distribution.
- Sensitive Motion Sensor: Detects movement up to 59 feet away with a 180° detection angle.
- Integrated Night Light: A 200LM night light with a separate switch for ambient, energy-efficient lighting.
- Multiple Lighting Modes: Includes Motion-activated, Dusk-to-Dawn, Manual Override, and Test modes.
- Durable and Weatherproof: Robust aluminum housing with an IP65 waterproof rating for reliable outdoor performance.
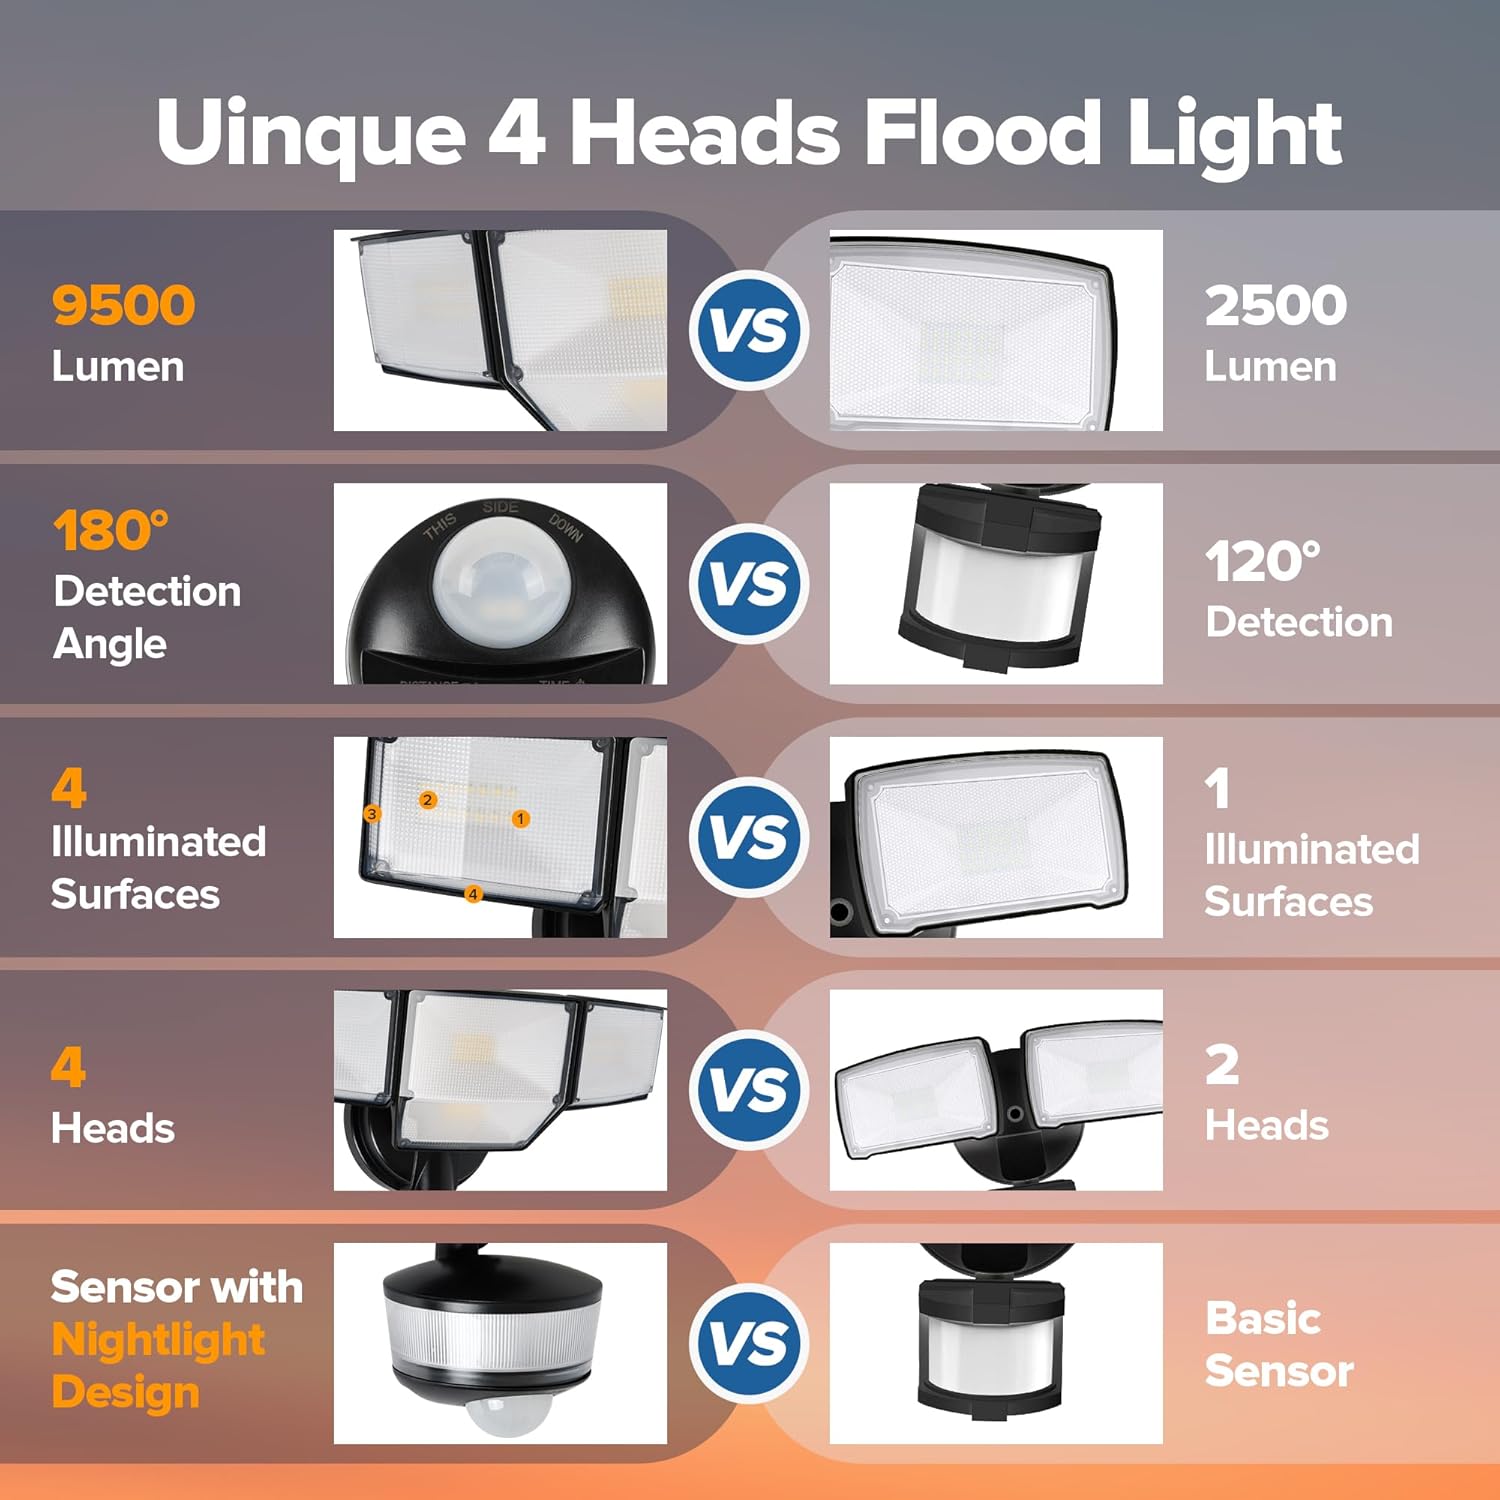
Image: A visual comparison highlighting the advantages of the LUTEC 4-head flood light, including higher lumen output, wider detection angle, more illuminated surfaces, and an integrated night light sensor, compared to a typical 2-head flood light.
5. Installation Guide
5.1 Before You Begin
- Turn off power at the circuit breaker or fuse box.
- Ensure the mounting surface is structurally sound to support the fixture.
- Gather necessary tools: screwdriver, wire strippers, pliers, electrical tape, safety glasses.
5.2 Mounting Options
The flood light can be installed in two primary configurations:
- Eave Mounted: Mounted under an eave or soffit. Ensure the motion sensor faces outwards.
- Wall Mounted: Mounted directly on a vertical wall surface.

Image: Illustrations demonstrating two installation methods: eave mounting, where the light is attached to the underside of an overhang, and wall mounting, where it is fixed to a vertical wall. A note emphasizes that the motion sensor must face outside when eave mounted.
5.3 Wiring Instructions
This fixture requires hardwiring to a standard 120V AC electrical supply. A junction box is required but not included.
- Prepare Wiring: Pull the supply wires from the junction box. Strip 3/8 inch of insulation from the ends of the house supply wires (black, white, ground) and the fixture wires.
- Connect Ground Wire: Connect the bare copper (ground) wire from the fixture to the bare copper (ground) wire from the junction box using a wire nut.
- Connect Neutral Wire: Connect the white wire from the fixture to the white (neutral) wire from the junction box using a wire nut.
- Connect Live Wire: Connect the black wire from the fixture to the black (live) wire from the junction box using a wire nut.
- Secure Connections: Ensure all wire nuts are securely tightened. Wrap electrical tape around each wire nut and connection for added insulation.
- Mount Fixture: Align the fixture's mounting plate with the junction box. Secure the fixture to the mounting bracket using the provided screws. Ensure the gasket is properly seated to maintain IP65 waterproof rating.
- Adjust Light Heads: Loosen the screws on the light heads to adjust their angle and direction as desired. Tighten screws once adjusted.

Image: An illustration detailing the easy installation process, showing the mounting bracket, screws, wire nuts, gasket, and rubber plug. It also depicts the wiring connections (L, E, N) and the dimensions for the mounting base.

Image: A step-by-step visual guide for installing the flood light, indicating the dimensions of the fixture and the mounting base, along with the sequence of attaching it to a wall.
6. Operating Instructions
The flood light offers several operating modes, controlled by switches on the motion sensor unit.
6.1 Lighting Modes

Image: A graphic illustrating the three primary lighting modes. Motion Sensor Mode activates 100% brightness upon motion detection. Dusk to Dawn Mode provides 20% brightness at night, increasing to 100% with motion. Manual Override Mode maintains 100% brightness for 6 hours.
- Motion Sensor Mode: The light activates at 100% brightness when motion is detected during nighttime. It turns off after motion ceases and the set time duration expires.
- Dusk to Dawn Mode: The light automatically turns on at 20% brightness at dusk and turns off at dawn. If motion is detected at night, the brightness increases to 100%.
- Manual Override Mode: The light stays on at 100% brightness for 6 hours, regardless of day or night. This mode can be activated for continuous illumination.
- Test Mode: This mode allows you to test the sensor's functionality at any time. The light (including the night light) will automatically turn on for 5 seconds when motion is detected.
6.2 Adjusting Sensor Settings
The motion sensor unit has controls for Sensitivity (Distance) and Time (Duration).

Image: A close-up view of the motion sensor unit, highlighting the 'Distance' (Sensitivity) and 'Time' adjustment dials. Sensitivity settings are L (0-20 ft), M (0-39 ft), H (0-59 ft). Time settings are 1 MIN, 3 MIN, and 10 MIN. A note explains the Test Mode functionality.
- Sensitivity (Distance): Adjust the dial to set the detection range.
- L (Low): 0-20 ft
- M (Medium): 0-39 ft
- H (High): 0-59 ft
- Time: Adjust the dial to set how long the light remains on after motion is no longer detected.
- 1 MIN: 1 minute
- 3 MIN: 3 minutes
- 10 MIN: 10 minutes
6.3 Night Light Function
The integrated 200LM night light provides a soft, ambient glow. It can be activated or deactivated using the circular switch located on the sensor unit.

Image: A hand operating the circular switch on the motion sensor unit, labeled 'ON/OFF', which controls the convenient 200LM night light. Icons indicate energy efficiency and ease of operation.
When the circular switch is set to ON, the night light automatically turns on at night and off during the day, offering soft, energy-efficient lighting.
7. Maintenance
Regular maintenance ensures optimal performance and longevity of your flood light.
- Cleaning: Clean the fixture and motion sensor lens periodically with a soft, damp cloth. Do not use abrasive cleaners or solvents, as they may damage the finish or sensor.
- Inspection: Periodically check for any loose wiring, damaged components, or signs of wear. Address any issues promptly.
- LEDs: The LED light source is integrated and not user-replaceable.
8. Troubleshooting
Refer to the table below for common issues and their solutions.
| Problem | Possible Cause | Solution |
|---|---|---|
| Light does not turn on. | No power; faulty wiring; sensor settings incorrect; ambient light too high. | Check circuit breaker/fuse. Verify wiring connections. Adjust sensor sensitivity/time. Ensure it's dark enough for operation. |
| Light stays on continuously. | Continuous motion detected; Manual Override Mode active; faulty sensor. | Check for obstructions or constant movement in detection area. Deactivate Manual Override Mode. If issue persists, contact support. |
| Light flashes or flickers. | Unstable power supply; loose wiring; faulty LED driver. | Check power supply stability. Inspect and secure all wiring connections. If flickering continues, contact support. |
| Motion sensor range is too short/long. | Sensitivity setting incorrect; sensor obstructed. | Adjust the 'Distance' (Sensitivity) dial on the sensor. Clear any obstructions from the sensor's view. |
| Night light not working. | Night light switch off; ambient light too high. | Ensure the circular night light switch on the sensor is set to ON. Verify ambient light conditions are dark enough. |
9. Specifications
| Feature | Specification |
|---|---|
| Brand | LUTEC |
| Model Number | 7632813012 |
| Power Source | Corded Electric |
| Voltage | 120 Volts (AC) |
| Wattage | 84 Watts |
| Brightness | 9500 Lumens (Flood Light) |
| Night Light Brightness | 200 Lumens |
| Light Color | 5000K Daylight (Cool White) |
| Light Source Type | LED |
| Number of Light Sources | 4 Heads |
| Motion Sensor Detection Angle | 180° |
| Motion Sensor Detection Range | Up to 59 feet |
| Material | Aluminum Housing, Plastic Shade |
| Finish Type | Matte |
| IP Rating | IP65 (Waterproof, Dustproof) |
| Product Dimensions | 8.66"L x 8.66"W x 6.69"H |
| Item Weight | 2.68 pounds |
| Installation Type | Wall Mount |
| Indoor/Outdoor Usage | Outdoor |
10. Warranty and Support
LUTEC products are manufactured to high-quality standards. For warranty information or technical support, please refer to the product packaging or contact LUTEC customer service directly. Keep your purchase receipt as proof of purchase.
For assistance, please visit the official LUTEC website or contact their customer support channels.


