1. Introduction
Thank you for choosing the WAMPAT Floating TV Stand. This manual provides essential information for the safe and correct assembly, operation, and maintenance of your new entertainment center. Please read these instructions thoroughly before beginning assembly and retain them for future reference.
This floating TV stand, model W15E218YW-CAW, is designed to accommodate TVs up to 80 inches. It features a built-in charging station, sliding barn doors for storage, and a rustic antique white finish, making it a functional and stylish addition to your living space.
2. Safety Information
WARNING: Failure to follow these safety instructions could result in serious injury or property damage.
- Ensure the TV stand is securely attached to a suitable wall surface to prevent tip-overs.
- DO NOT install on cavity walls or gypsum board walls. This product is designed for concrete, wooden, and brick walls only.
- Always follow the provided assembly instructions for safe installation.
- Do not exceed the maximum load capacity of 80 lbs (36.3 kg) for the floating console.
- Keep small parts and packaging materials away from children to prevent choking hazards.
- Use only the hardware provided or specified by the manufacturer.
- Periodically check all connections to ensure they remain tight and secure.
3. Setup & Assembly
Assembly is required. Tools and detailed instructions are included. It is recommended to have two people for assembly due to the size and weight of the unit. Please ensure you have ample space to work and keep all components organized.
3.1 Package Contents
Before starting, verify that all parts and hardware listed in the assembly guide are present. If any parts are missing or damaged, please contact customer support.
(Note: A detailed list of parts and hardware is typically provided in the physical manual. This section serves as a placeholder for that information.)
3.2 Assembly Steps
Follow the steps below carefully. Refer to the provided assembly video for visual guidance.
Assembly Video Guide
This video provides a comprehensive guide to assembling the WAMPAT Floating TV Stand, model W15E218WR (similar to W15E218YW-CAW). It demonstrates each step of the assembly process, from inserting dowels and cam locks to attaching panels and installing the sliding doors. Follow along for clear visual instructions.
- Prepare Panels: Insert dowels (C) into panels (1,4). Insert cam locks (B) into panels (1), then insert parts (D) into panels (1). Rotate the cam locks (B) 90° to secure the parts (D). Repeat for all specified panels.

Image: Overview of the WAMPAT Floating TV Stand with key dimensions, showing its suitability for TVs up to 80 inches.
- Assemble Main Structure: Screw bolts (A) into panels (1,2,3,4,5,6). Attach panels (2,3) to panel (1) correctly. Insert and secure cam locks (B) to lock them, then secure parts (B) on the other side of parts (D).
- Install Side Panels: Insert dowels (C) into panels (7,11). Attach panels (7,11) to panels (1,2,3) correctly. Insert and secure cam locks (B) to lock them.
- Install Internal Dividers: Insert dowels (C) into panels (12). Attach panels (12) to panels (1,2,3) correctly. Insert and secure cam locks (B) to lock them.
- Install Back Panels: Insert dowels (C) into panels (8,9). Attach panels (8,9) to panels (1,2,3) correctly. Insert and secure cam locks (B) to lock them.
- Install Top Panel: Attach panels (10) to panels (1,2,3) correctly. Insert and secure cam locks (B) to lock them.
- Install Charging Station: Insert dowels (C) into panels (5,6). Attach panels (5,6) to panel (4) correctly. Attach part (M) to panel (4). Attach part (O) to panel (4) with screws (L).

Image: A close-up view of the built-in charging station, featuring two AC outlets and two USB ports, along with its 6.5-foot power cord.
- Attach Backboard: Insert dowels (C) into panels (7,8,9,11). Attach panels (4,5,6) to panels (7,8,9,11) with screws (E). Insert and secure cam locks (B) to panels (10) to lock it.
- Install Sliding Door Rails: Secure part (13) to panel (12) with parts (H,I) correctly. Insert dowels (G) into panels (5,6).
- Install Sliding Doors: Place the doors (14,15) 45° onto the part (G) and place it correctly. Attach parts (J) to panel (14,15) with screws (K) correctly, but do not fix the screws tight. Adjust door height and leveling, then fix screws tight and slide doors. Attach part (M) to panel (1).

Image: The assembled floating TV stand, mounted on a wall, highlighting its design with sliding barn doors and central open shelves.
- Wall Mounting: This floating console shelf works with concrete wall, wooden wall and brick walls. DO NOT use with cavity wall or gypsum board wall. Ensure proper wall anchors are used for your specific wall type.
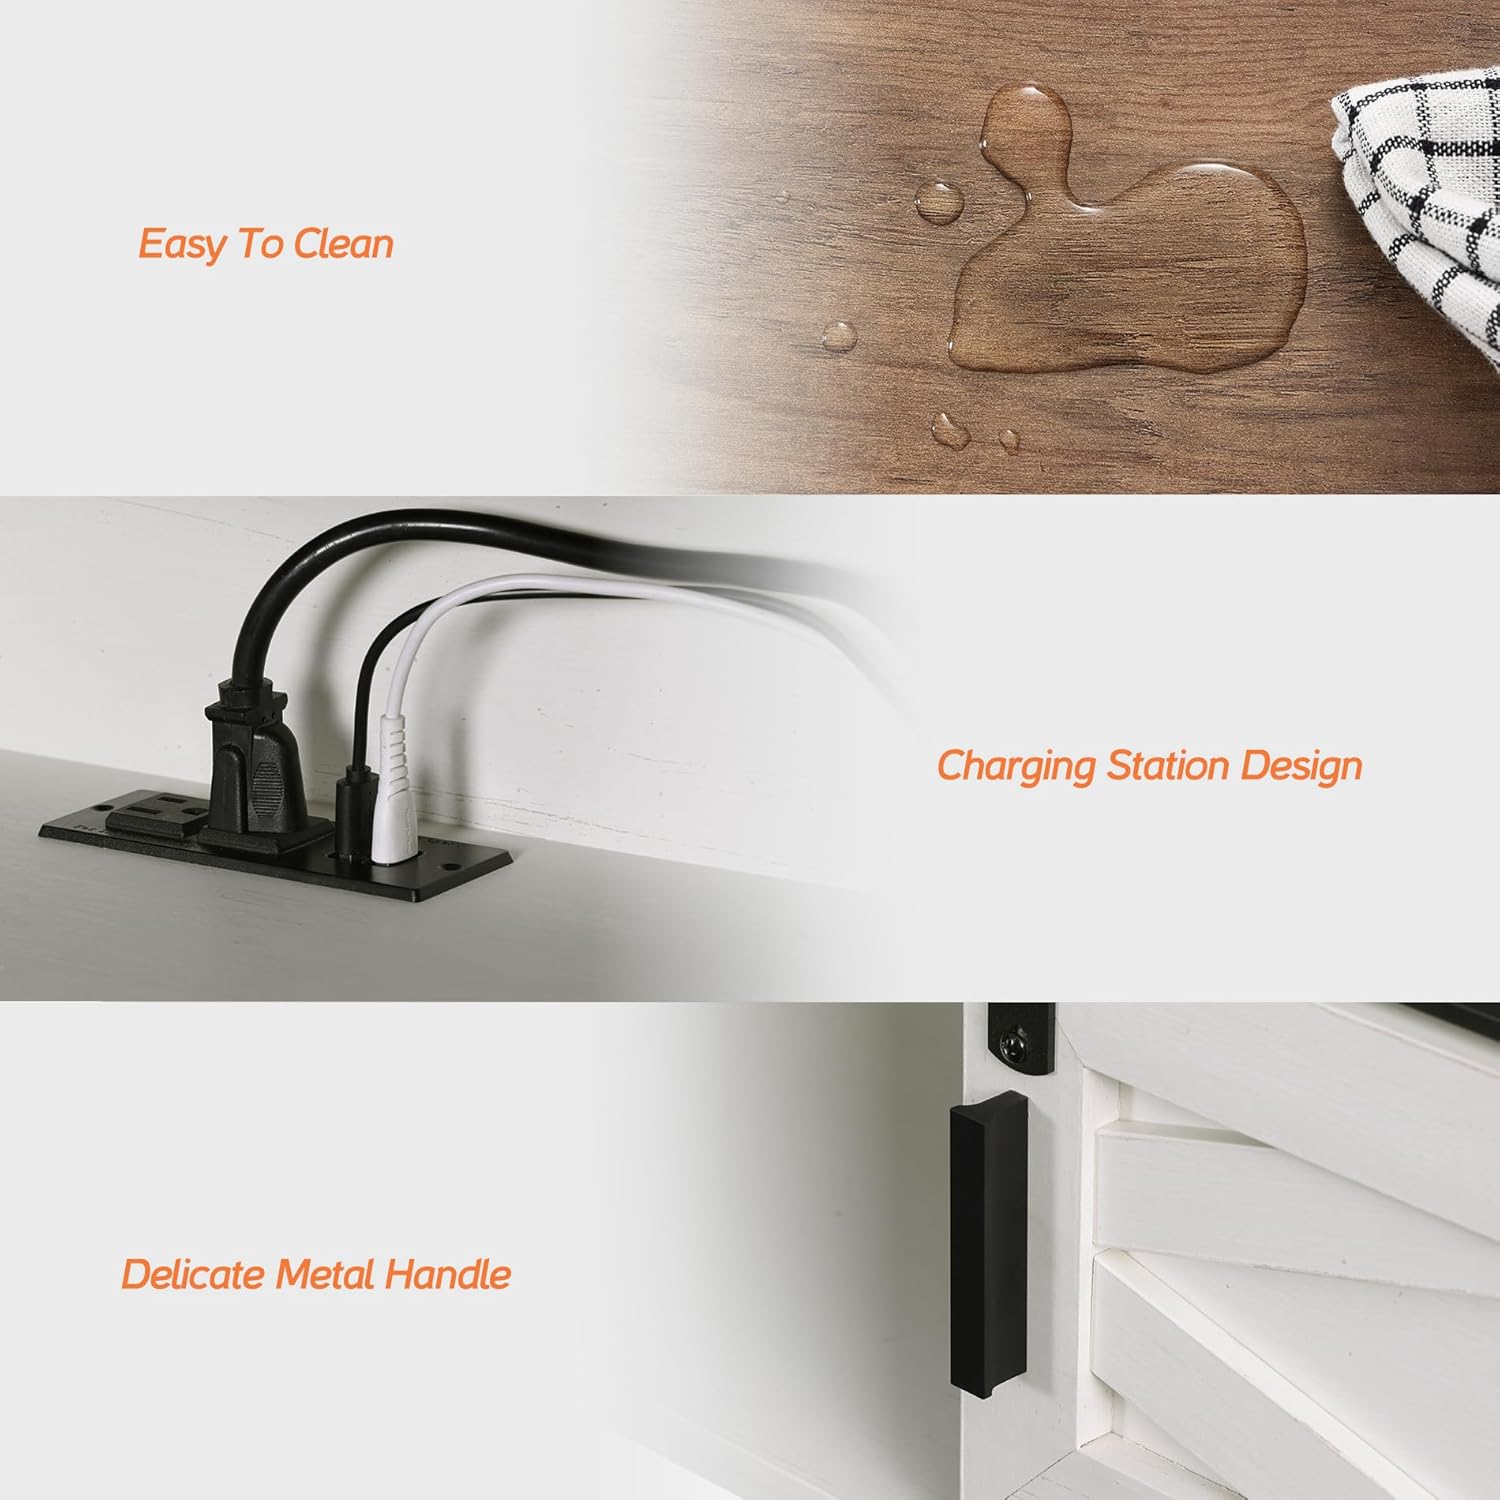
Image: Illustration detailing suitable wall types for mounting (concrete, brick, wooden) and explicitly stating that hollow walls are not compatible.
4. Operating Instructions
4.1 Charging Station Usage
The integrated power strip features 4 outlets (2 AC, 2 USB) for convenient charging of your electronic devices such as TVs, DVD players, phones, and more. Simply plug the TV stand's power cord into a wall outlet, then connect your devices to the charging station.
The shelves include wire management cutouts to help keep your cords organized and prevent tangling, ensuring a neat appearance.
4.2 Sliding Barn Doors
The floating TV stand features two sliding barn doors. These doors can be moved horizontally along the track to conceal or reveal the storage compartments as desired. Gently slide the doors using the metal handles.
5. Maintenance
5.1 Cleaning
To clean the surface of the TV stand, wipe with a dry cloth. For more stubborn marks, a damp cloth can be used, followed immediately by a dry cloth to prevent moisture damage. Avoid using harsh chemicals or abrasive cleaners, as these can damage the finish.
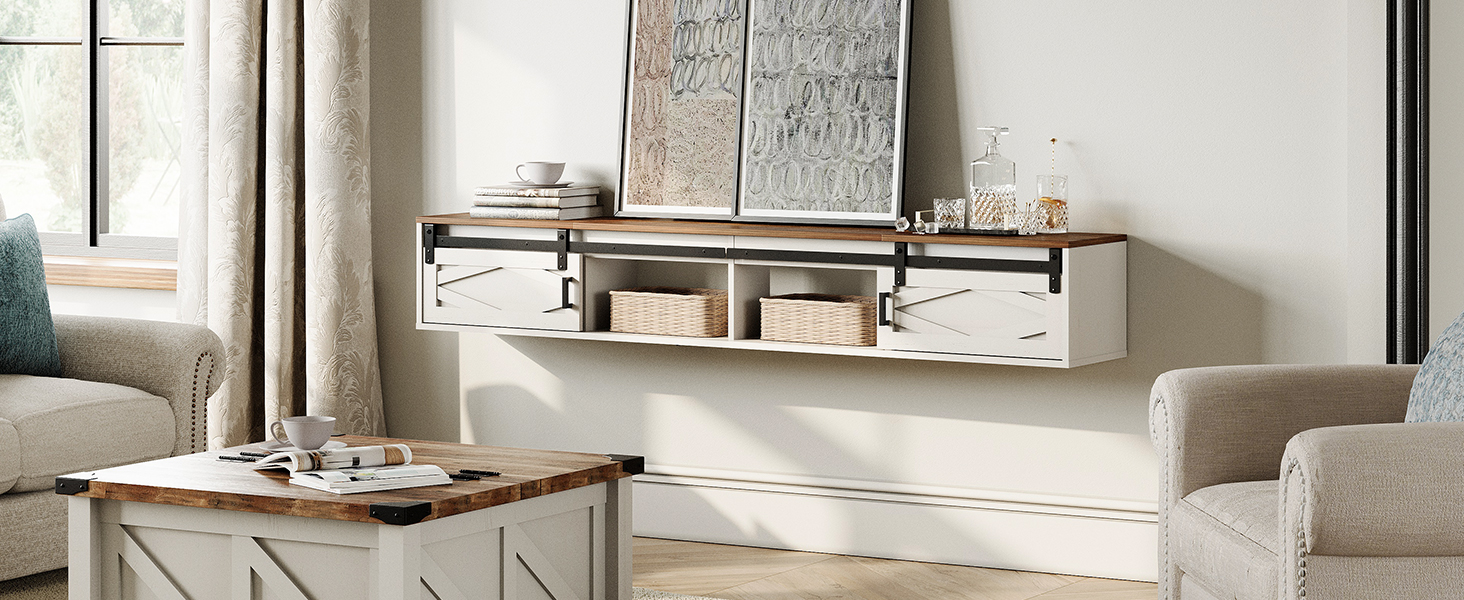
Image: A close-up showing water droplets on the surface of the TV stand, illustrating its easy-to-clean properties.
5.2 General Care
- Periodically check all screws and connections to ensure they are tight. Re-tighten if necessary.
- Avoid placing hot items directly on the surface. Use coasters or protective pads.
- Keep the TV stand away from direct sunlight and excessive moisture to prevent warping or discoloration.
6. Troubleshooting
This section addresses common issues you might encounter with your WAMPAT Floating TV Stand.
| Problem | Possible Cause | Solution |
|---|---|---|
| Stand feels unstable after assembly. | Screws or cam locks are not fully tightened; incorrect wall mounting. | Ensure all screws and cam locks are securely fastened. Verify the stand is mounted on a solid wall (concrete, wood, or brick) using appropriate hardware. |
| Sliding doors do not move smoothly. | Rails are not properly aligned or screws are too tight. | Check the alignment of the sliding door rails. Loosen the screws (K) slightly, adjust the door height and leveling, then re-tighten. Ensure no debris is in the track. |
| Charging station not working. | Power cord not plugged in; faulty outlet; internal wiring issue. | Ensure the TV stand's power cord is securely plugged into a functional wall outlet. Test the wall outlet with another device. If the issue persists, contact customer support. |
| Missing parts during assembly. | Packaging error. | Review the package contents list. Contact WAMPAT customer support with the model number and a description of the missing parts. |
7. Specifications
| Feature | Detail |
|---|---|
| Model Number | W15E218YW-CAW |
| Brand | WAMPAT |
| Color | Antique White |
| Material | Engineered Wood |
| Product Dimensions (L x W x H) | 70.87 x 11.81 x 11.02 inches (180 x 30 x 28 cm) |
| Item Weight | 50.6 pounds (23 kg) |
| Maximum Load Capacity | 80 lbs (36.3 kg) |
| TV Size Compatibility | Up to 80 inches |
| Charging Station | 4-outlets (2 AC, 2 USB), 6.5-foot power cord |
| Wall Compatibility | Concrete wall, Wooden wall, Brick walls (Not for cavity or gypsum board walls) |
8. Warranty & Support
8.1 Protection Plans
Extended protection plans may be available for your WAMPAT Floating TV Stand. Please refer to your purchase documentation or the retailer's website for details on available 2-Year or 3-Year Protection Plans.
8.2 Customer Support
For any questions, missing parts, or assistance with assembly or operation, please contact WAMPAT customer support. You can typically find contact information on the product packaging, the retailer's website, or by visiting the WAMPAT store page.
Online Support: Visit the WAMPAT Store on Amazon
Returns: This product typically includes a 30-day easy return policy. Refer to your purchase details for specific return instructions.


