
Introduction
Welcome to your new Domi Hardtop Grill Gazebo. This manual provides essential information for the safe assembly, operation, and maintenance of your 8x5FT grill gazebo. Please read all instructions carefully before beginning assembly or use to ensure proper setup and longevity of your product.
Important Safety Information
To prevent injury or damage to the product, observe the following safety guidelines:
- Secure the shelter to a stable foundation.
- Be aware of weight limits for shelves and overall structure.
- Take precautions during assembly and disassembly to avoid potential hazards, such as pinching or falling parts.
- Ensure all parts are present and undamaged before assembly. Do not proceed with assembly if parts are missing or compromised.
- Do not attempt to assemble the gazebo in strong winds, heavy rain, or other adverse weather conditions.
- Two or more people are recommended for safe and efficient assembly.
- Keep children and pets away from the assembly area to prevent accidents.
- Periodically check all connections and fasteners for tightness. Re-tighten as necessary to maintain structural integrity.
- Do not hang heavy objects from the gazebo frame.
- Keep open flames and heat sources away from the gazebo structure, except for the intended use of a grill within the designated area. Ensure adequate clearance around the grill.
Package Contents
Before assembly, verify that all components listed below are present and undamaged. If any parts are missing or damaged, contact Domi customer service immediately for assistance.
- Main Frame Components (posts, beams, connectors)
- Galvanized Steel Roof Panels
- Two Side Shelves
- Hardware Kit (bolts, screws, washers, nuts, hex keys)
- Built-in Bottle Opener
- Instruction Manual
Assembly Instructions
Follow these steps carefully for proper assembly. It is recommended to have at least two people for this process.
Step 1: Prepare the Assembly Area
Choose a flat, level surface for assembly. Clear the area of any obstructions and ensure sufficient space to work around the gazebo. Lay out a tarp or blanket to protect parts and prevent small hardware from getting lost.
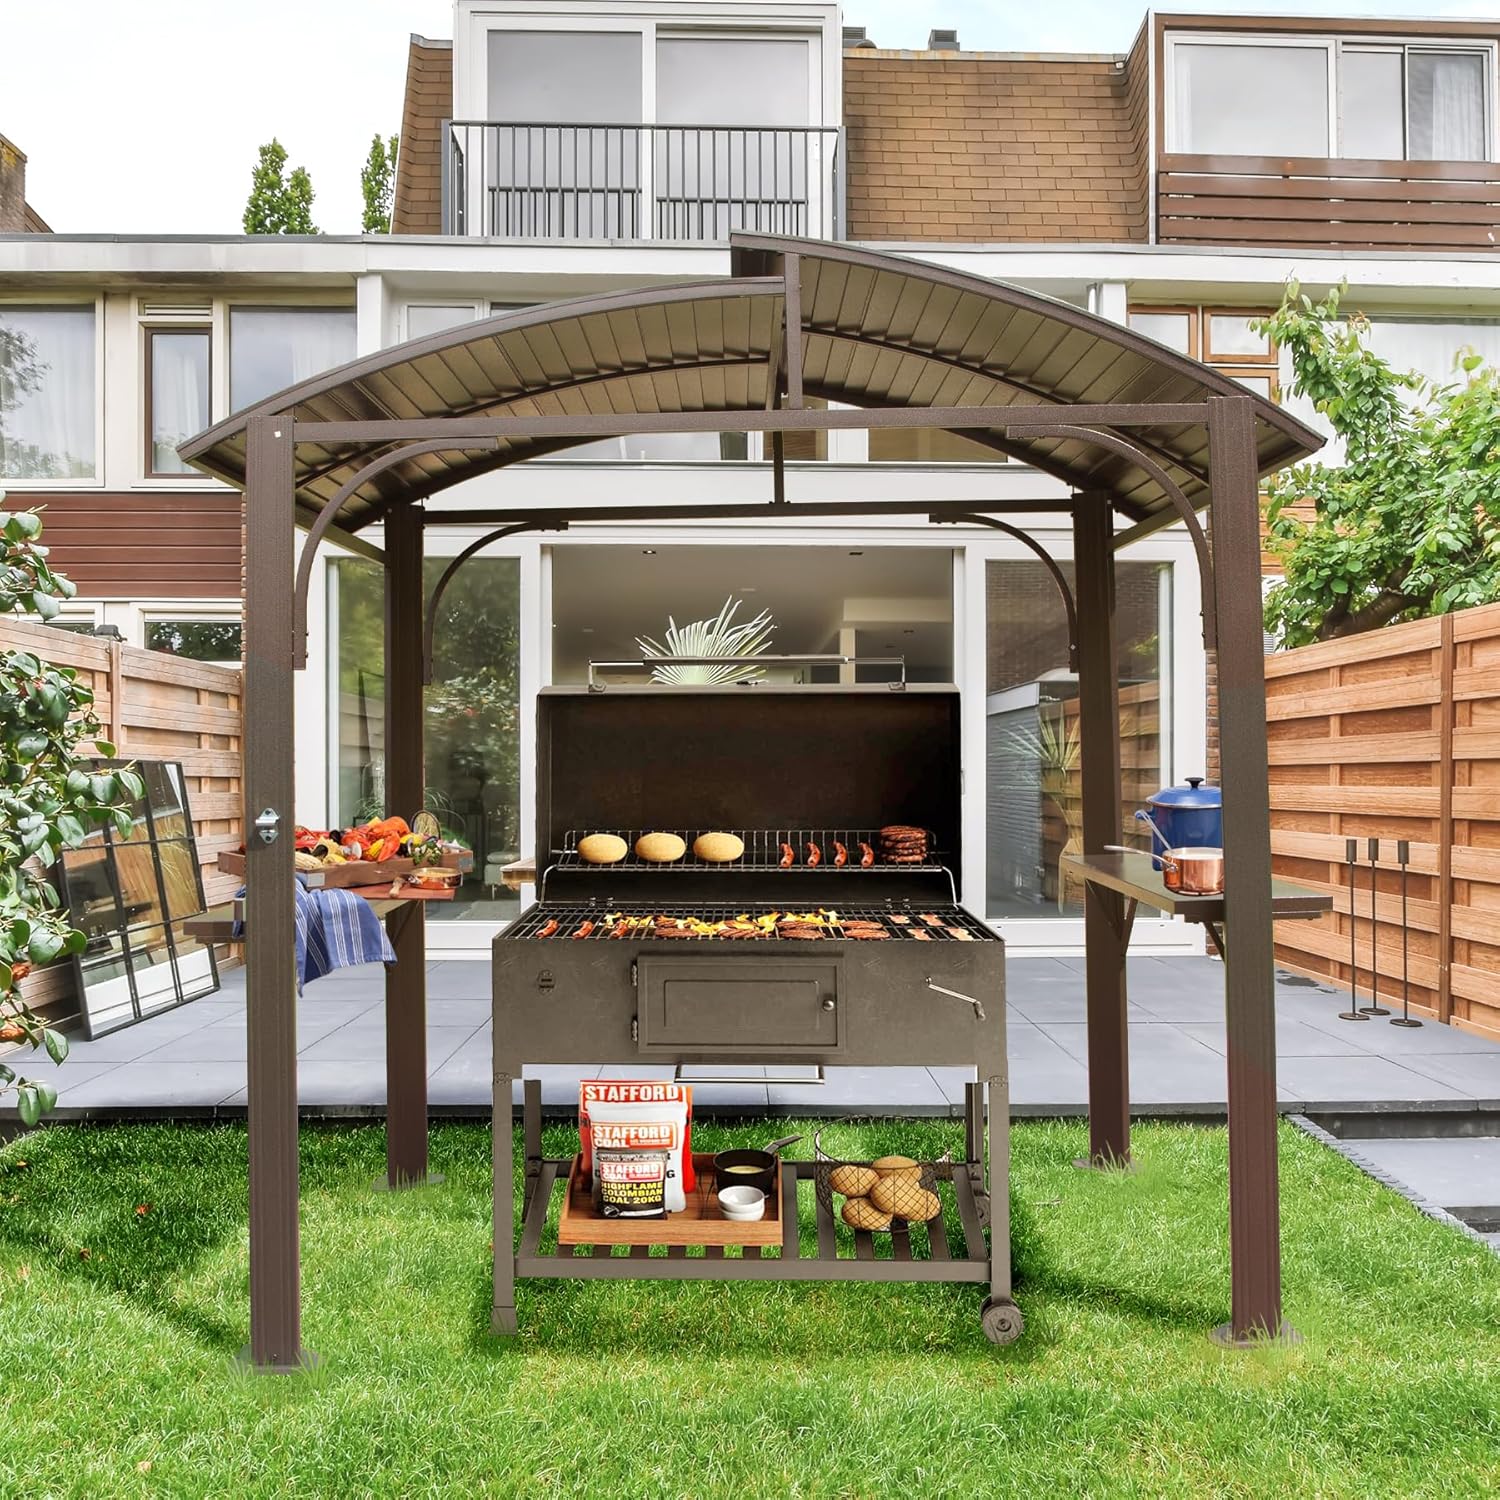
Figure 1: Fully assembled Domi Hardtop Grill Gazebo in a backyard setting, with a grill and food on the side shelves. This image provides a visual reference for the completed structure.
Step 2: Identify Components and Dimensions
Familiarize yourself with the different parts and their dimensions. Refer to the diagram below for an overview of the gazebo's measurements, which are crucial for planning your installation space.

Figure 2: A technical diagram illustrating the overall dimensions of the 8'x5' Arc Roof Grill Gazebo, including height, length, and width, along with detailed measurements for various structural elements.
Step 3: Assemble the Main Frame
Begin by connecting the main support posts and crossbeams according to the detailed diagrams in your included manual. Ensure all connections are secure but do not fully tighten bolts until the entire frame is assembled and squared. The frame features a robust powder-coated steel structure for enhanced durability and rust resistance.

Figure 3: A comparison image highlighting the robust, powder-coated steel frame of the Domi gazebo (labeled 'Ours') versus a generic, potentially rust-prone frame (labeled 'Others'). This illustrates the quality and construction of the frame components.

Figure 4: A close-up image showcasing the triangular powder-coated steel structure, emphasizing its stability and rust-proof properties, which contribute to the gazebo's overall strength.
Step 4: Install the Roof Structure
Carefully attach the roof support beams and then the galvanized steel roof panels. The double-layered roof design is engineered to promote efficient air circulation, allowing smoke and heat to escape while grilling.

Figure 5: A diagram illustrating the 2-tier ventilated roof design, showing how it allows for optimal airflow to escape while providing UV resistance and protection from rain and snow.
Step 5: Attach Side Shelves and Accessories
Secure the two side shelves to the main frame using the provided hardware. These shelves offer convenient storage space for grilling utensils, condiments, and prepared food. Install the built-in bottle opener on one of the posts at a comfortable height.

Figure 6: An image demonstrating the utility of the two side shelves, showing them holding various food items and grilling essentials, highlighting their convenience during outdoor cooking.

Figure 7: A close-up image showing the integrated bottle opener attached to a gazebo post and the pre-drilled holes at the base of the post for securing the gazebo with ground stakes or anchors (stakes not included).
Step 6: Secure the Gazebo
Once the gazebo is fully assembled and all components are in place, ensure all bolts are securely tightened. Use the pre-drilled holes at the base of each post to secure the gazebo to a stable foundation using appropriate ground stakes or anchors (not included). This step is crucial for stability and safety, especially in windy conditions.
Operating Your Grill Gazebo
Using the Side Shelves
The two integrated side shelves are designed to hold grilling utensils, condiments, and prepared food, keeping them within easy reach. Do not exceed the recommended weight capacity for each shelf to prevent damage or instability.
Using the Bottle Opener
The built-in bottle opener provides a convenient and readily accessible tool for opening bottled beverages while you are grilling or entertaining.
Ventilation
The 2-tier ventilated roof is specifically designed to allow smoke and heat from your grill to escape efficiently, ensuring a more comfortable and enjoyable grilling environment under the gazebo.
Maintenance and Care
- Cleaning: Clean the frame and roof panels with a mild soap solution and water. Rinse thoroughly with clean water and dry immediately to prevent water spots and mineral buildup. Avoid using abrasive cleaners, harsh chemicals, or scrubbers that could damage the finish.
- Seasonal Care: While designed for outdoor use, it is advisable to consider disassembling and storing the gazebo during periods of extreme weather conditions, such as heavy snow, prolonged freezing temperatures, or exceptionally strong winds, to prolong its lifespan and prevent potential damage.
- Fastener Check: Periodically inspect all bolts, screws, and connections to ensure they remain tight. Re-tighten any loose fasteners as necessary to maintain the structural integrity and stability of the gazebo.
- Rust Prevention: The frame features a rust-resistant coating. However, regularly inspect for any scratches or chips in the coating. Promptly touch up any damaged areas with appropriate outdoor-grade paint to prevent rust formation.
Troubleshooting Common Issues
Gazebo is unstable after assembly.
Solution: Ensure all bolts and fasteners are fully tightened. Verify that the gazebo is placed on a flat, level surface. Secure the gazebo to the ground using appropriate stakes or anchors through the pre-drilled holes in the base plates (stakes/anchors not included).
Roof panels do not align correctly.
Solution: Loosen all roof panel fasteners slightly. Adjust the panels until they align properly, then re-tighten all fasteners evenly. Ensure the main frame was assembled squarely before installing roof panels.
Missing or damaged parts.
Solution: Refer to the "Package Contents" section to confirm all items. If parts are missing or damaged upon arrival, contact Domi customer service immediately for assistance with replacements.
Product Specifications
| Feature | Detail |
|---|---|
| Brand | domi outdoor living |
| Model Number | LGMF1653-BR-0604 |
| Material | Galvanized Steel Roof, Alloy Steel, Aluminum |
| Product Dimensions | 96.14"L x 64.17"W x 93.11"H |
| Item Weight | 147.7 Pounds |
| Frame Material | Alloy Steel, Aluminum |
| Water Resistance Level | Waterproof |
| Shape | Rectangular |
| Ultraviolet Light Protection | UV Resistant |
| Assembly Required | Yes |
| Color | Brown |
| Floor Area | 40 Square Feet |
Warranty and Customer Support
Domi outdoor living is committed to providing quality products and customer satisfaction. Our customer service team is available to assist with inquiries regarding missing or damaged parts, as well as any installation issues you may encounter.
For specific warranty details pertaining to your Domi Hardtop Grill Gazebo, please refer to the warranty documentation included with your original purchase. You may also find additional support and contact information on the official Domi outdoor living website.
Please retain your purchase receipt for warranty claims.


