1. Introduction
This manual provides essential information for the safe and effective operation, maintenance, and troubleshooting of your Cerycose 3/8-inch Cordless Brushless Impact Wrench, Model 83. This tool is designed for various fastening and loosening tasks, offering up to 250 ft-lbs of tightening torque and 270 ft-lbs of loosening torque. It is compatible with Makita 18V lithium-ion batteries (battery not included).
2. Safety Information
Always observe basic safety precautions to reduce the risk of fire, electric shock, and personal injury when using power tools. Read and understand all instructions before operation.
General Power Tool Safety Warnings:
- Work Area Safety: Keep your work area clean and well-lit. Cluttered or dark areas invite accidents. Do not operate power tools in explosive atmospheres, such as in the presence of flammable liquids, gases, or dust.
- Electrical Safety: This tool is cordless and operates on battery power. Ensure the battery is compatible and properly inserted. Avoid accidental starting.
- Personal Safety: Always wear eye protection. Use hearing protection when operating for extended periods. Dress properly; avoid loose clothing or jewelry that can get caught in moving parts.
- Tool Use and Care: Do not force the power tool. Use the correct power tool for your application. Disconnect the battery pack from the power tool before making any adjustments, changing accessories, or storing power tools.
- Battery Tool Use and Care: Recharge only with the charger specified by the manufacturer. Use power tools only with specifically designated battery packs.
3. Package Contents
The Cerycose 3/8-inch Cordless Brushless Impact Wrench (Model 83) package includes:
- 1 x Cerycose 3/8-inch Cordless Brushless Impact Wrench (Bare Tool Only)
Note: Battery, charger, and impact sockets are NOT included and must be purchased separately.
4. Product Overview
Familiarize yourself with the components of your impact wrench for proper and safe operation.

Figure 1: Cerycose Impact Wrench Components
This image displays the key parts of the impact wrench. It highlights the 3/8-inch square drive for socket attachment, an integrated LED work light for improved visibility, a speed control button with a gear display, a forward/reverse button for directional control, a variable speed trigger for precise power delivery, and a belt hook mounting point for convenient storage.
- 3/8-inch Square Drive: For attaching compatible impact sockets.
- LED Work Light: Illuminates the work area for better visibility.
- Speed Control Button: Adjusts between low and high-speed modes.
- Speed Gear Display: Indicates the currently selected speed mode.
- Forward/Reverse Button: Changes the rotation direction for tightening or loosening.
- Variable Speed Trigger: Controls the operating speed based on pressure applied.
- Belt Hook Mounting Point: Allows for attachment of a belt hook (not included) for portability.
5. Setup
Battery Installation
This impact wrench is compatible with Makita 18V lithium-ion batteries (e.g., BL1815B, BL1820B, BL1830B, BL1840B, BL1850B, BL1860B).

Figure 2: Makita 18V Battery Compatibility
This image illustrates the compatibility of the Cerycose impact wrench with various Makita 18V lithium-ion battery models, emphasizing that the tool is sold without a battery.
- Ensure the impact wrench is turned off and the forward/reverse switch is in the neutral (locked) position.
- Align the battery pack with the receptacle on the bottom of the tool.
- Slide the battery pack into the tool until it clicks securely into place.
- To remove, press the battery release button and slide the battery pack out.
Socket Attachment
- Ensure the tool is off and the battery is removed for safety.
- Select the appropriate 3/8-inch square drive impact socket for your task.
- Push the socket firmly onto the square drive anvil until it locks into place.
- To remove, pull the socket off the anvil.
6. Operating Instructions
Powering On/Off
The tool is activated by pressing the variable speed trigger. Releasing the trigger turns the tool off.
Forward/Reverse Rotation
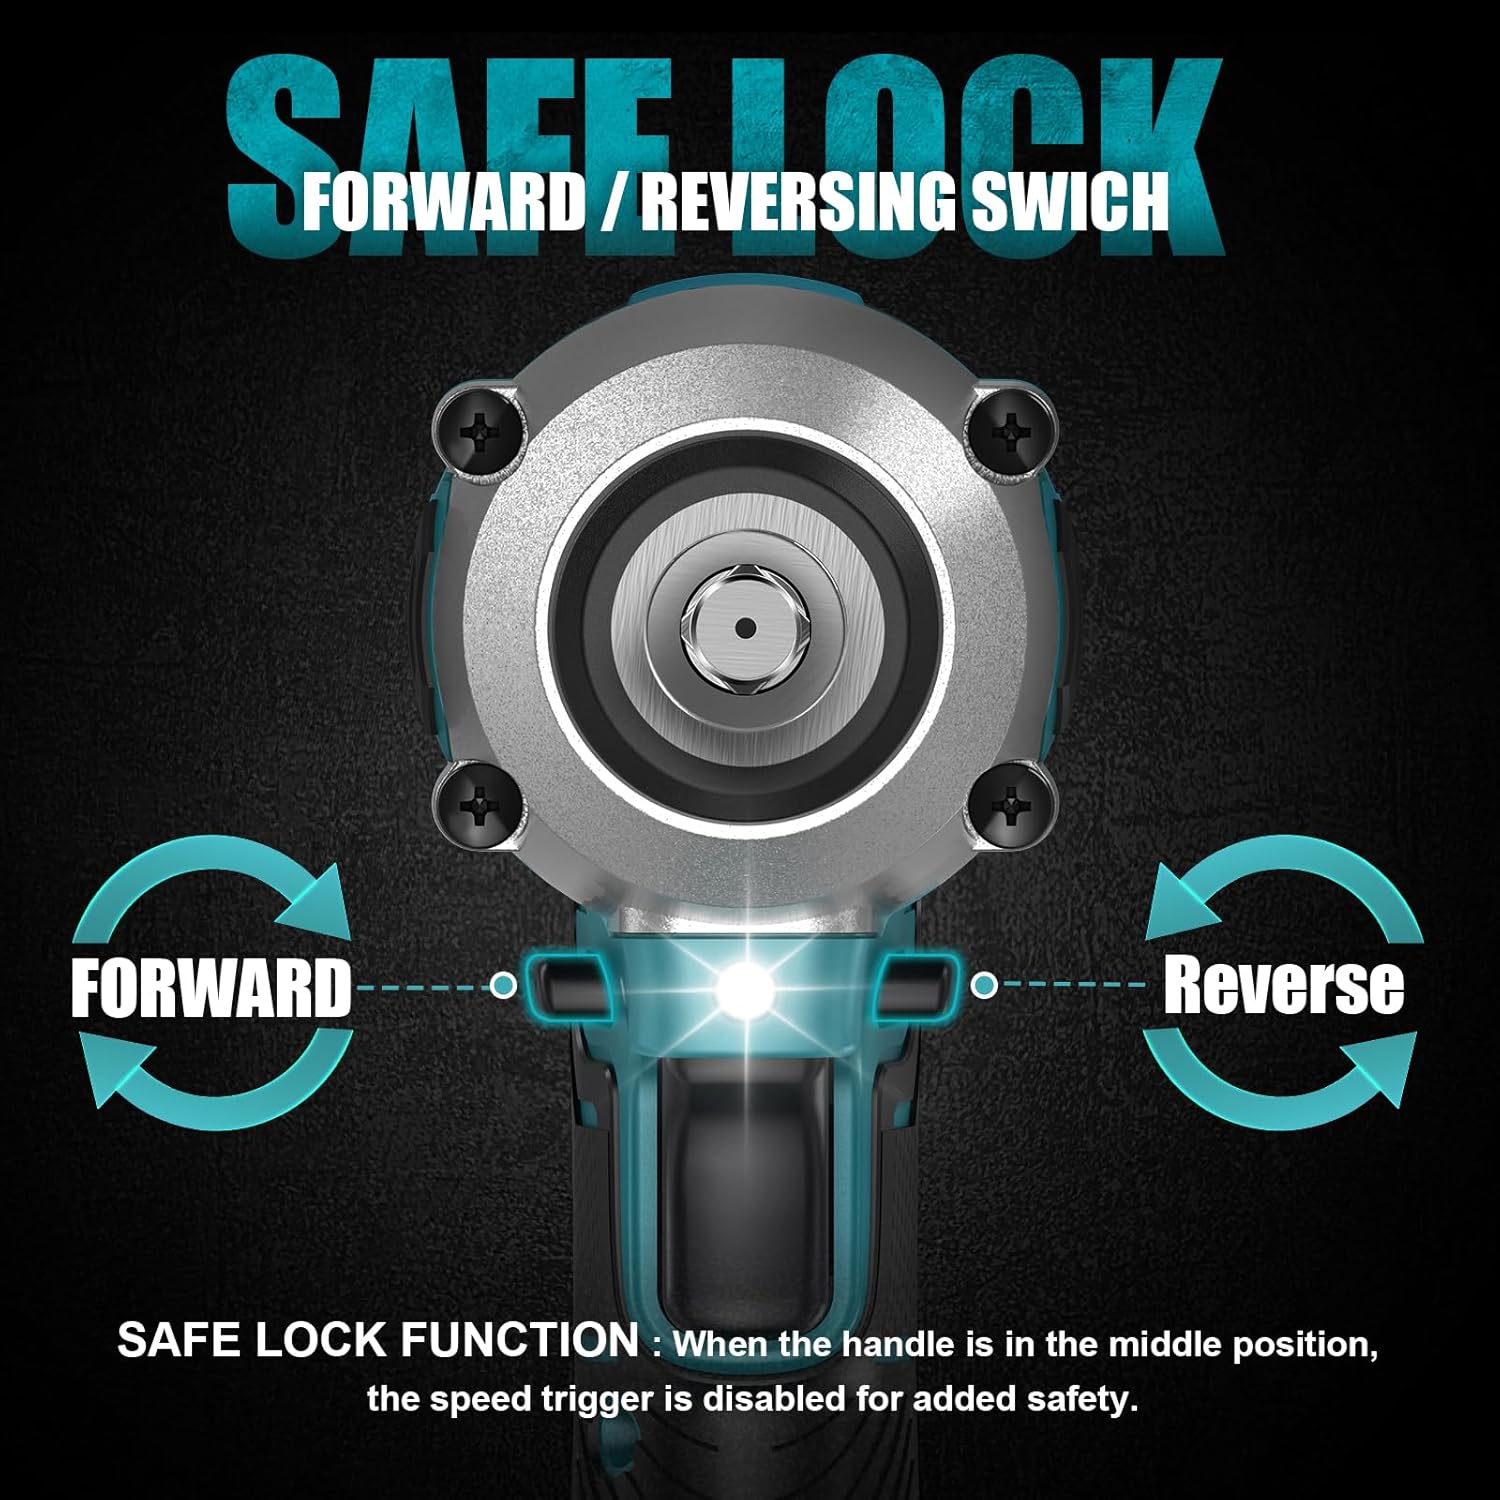
Figure 3: Forward/Reverse and Safe Lock Function
This image demonstrates the forward and reverse rotation settings, controlled by a switch near the trigger. It also highlights the 'Safe Lock Function,' where placing the switch in the middle position disables the speed trigger, preventing accidental operation and enhancing user safety.
- To select forward rotation (tightening), push the forward/reverse button to the left.
- To select reverse rotation (loosening), push the forward/reverse button to the right.
- For safety, place the forward/reverse button in the center position to lock the trigger and prevent accidental starting.
Speed Modes
The impact wrench features two speed modes for versatile applications.

Figure 4: Speed Mode Selection
This image illustrates the two distinct speed modes available on the impact wrench: 'Low Mode' for tasks requiring 0-180 ft-lbs of torque, and 'High Mode' for applications up to 0-250 ft-lbs. The active mode is indicated by LED lights on the control panel, allowing users to select the appropriate power setting for their specific task.
- Press the speed control button to toggle between Low and High modes.
- Low Mode: Provides 0-180 ft-lbs of torque, suitable for lighter tasks or when more control is needed.
- High Mode: Provides 0-250 ft-lbs of torque, ideal for demanding applications requiring maximum power.
LED Work Light
The integrated LED work light automatically illuminates when the trigger is pressed, providing visibility in dimly lit areas.
7. Maintenance
Regular maintenance ensures the longevity and optimal performance of your impact wrench.
- Cleaning: Keep the tool's ventilation openings clear and free of debris. Use a soft, damp cloth to clean the exterior. Do not use harsh chemicals or abrasive cleaners.
- Inspection: Periodically inspect the tool for any signs of damage, loose screws, or worn parts. Replace damaged parts immediately.
- Storage: Store the tool in a dry, secure location out of reach of children. Remove the battery pack before storing for extended periods.
- Brushless Motor: The brushless motor requires no carbon brush replacement, reducing maintenance needs.
8. Troubleshooting
If you encounter issues with your impact wrench, refer to the following common problems and solutions.
| Problem | Possible Cause | Solution |
|---|---|---|
| Tool does not start | Battery not inserted correctly Battery discharged Forward/reverse switch in neutral (locked) position | Ensure battery is fully seated Charge battery pack Move switch to forward or reverse position |
| Reduced power/torque | Battery low Incorrect speed mode selected Tool overheating | Charge battery pack Switch to High mode for demanding tasks Allow tool to cool down |
| LED light not working | Faulty LED Battery low | Contact customer support Charge battery pack |
If the problem persists after attempting these solutions, please contact Cerycose customer support.
9. Specifications
Key technical specifications for the Cerycose 3/8-inch Cordless Brushless Impact Wrench (Model 83).
| Feature | Specification |
|---|---|
| Model Number | 83 |
| Drive Size | 3/8 inch Square Drive |
| Max Tightening Torque | 250 ft-lbs (340 N.m) |
| Max Loosening Torque | 270 ft-lbs |
| No-Load Speed | Up to 2400 RPM |
| Motor Type | Brushless |
| Voltage | 18 Volts (DC) |
| Battery Compatibility | Makita 18V Lithium-Ion (e.g., BL1815B, BL1820B, BL1830B, BL1840B, BL1850B, BL1860B) |
| Item Weight | 1.9 Pounds |
| Material | Chrome Vanadium Steel |
| Special Features | LED Work Light, Ergonomic Design |
10. Warranty and Support
For warranty information or technical support, please refer to the product packaging or contact Cerycose customer service through the retailer where the product was purchased. Keep your purchase receipt as proof of purchase.


