
1. Introduction
Thank you for purchasing the KOSUMOSU Digital LED Alarm Clock, Model ACD-330. This versatile clock features a 6.7-inch mirror-style LED display, dual alarms, 12/24-hour time format, date, day of the week, seconds, and temperature display (in ℉ or ℃). It also includes automatic and manual dimming functions, making it suitable for various environments such as bedrooms and living rooms. Its clear, large numbers ensure easy readability.
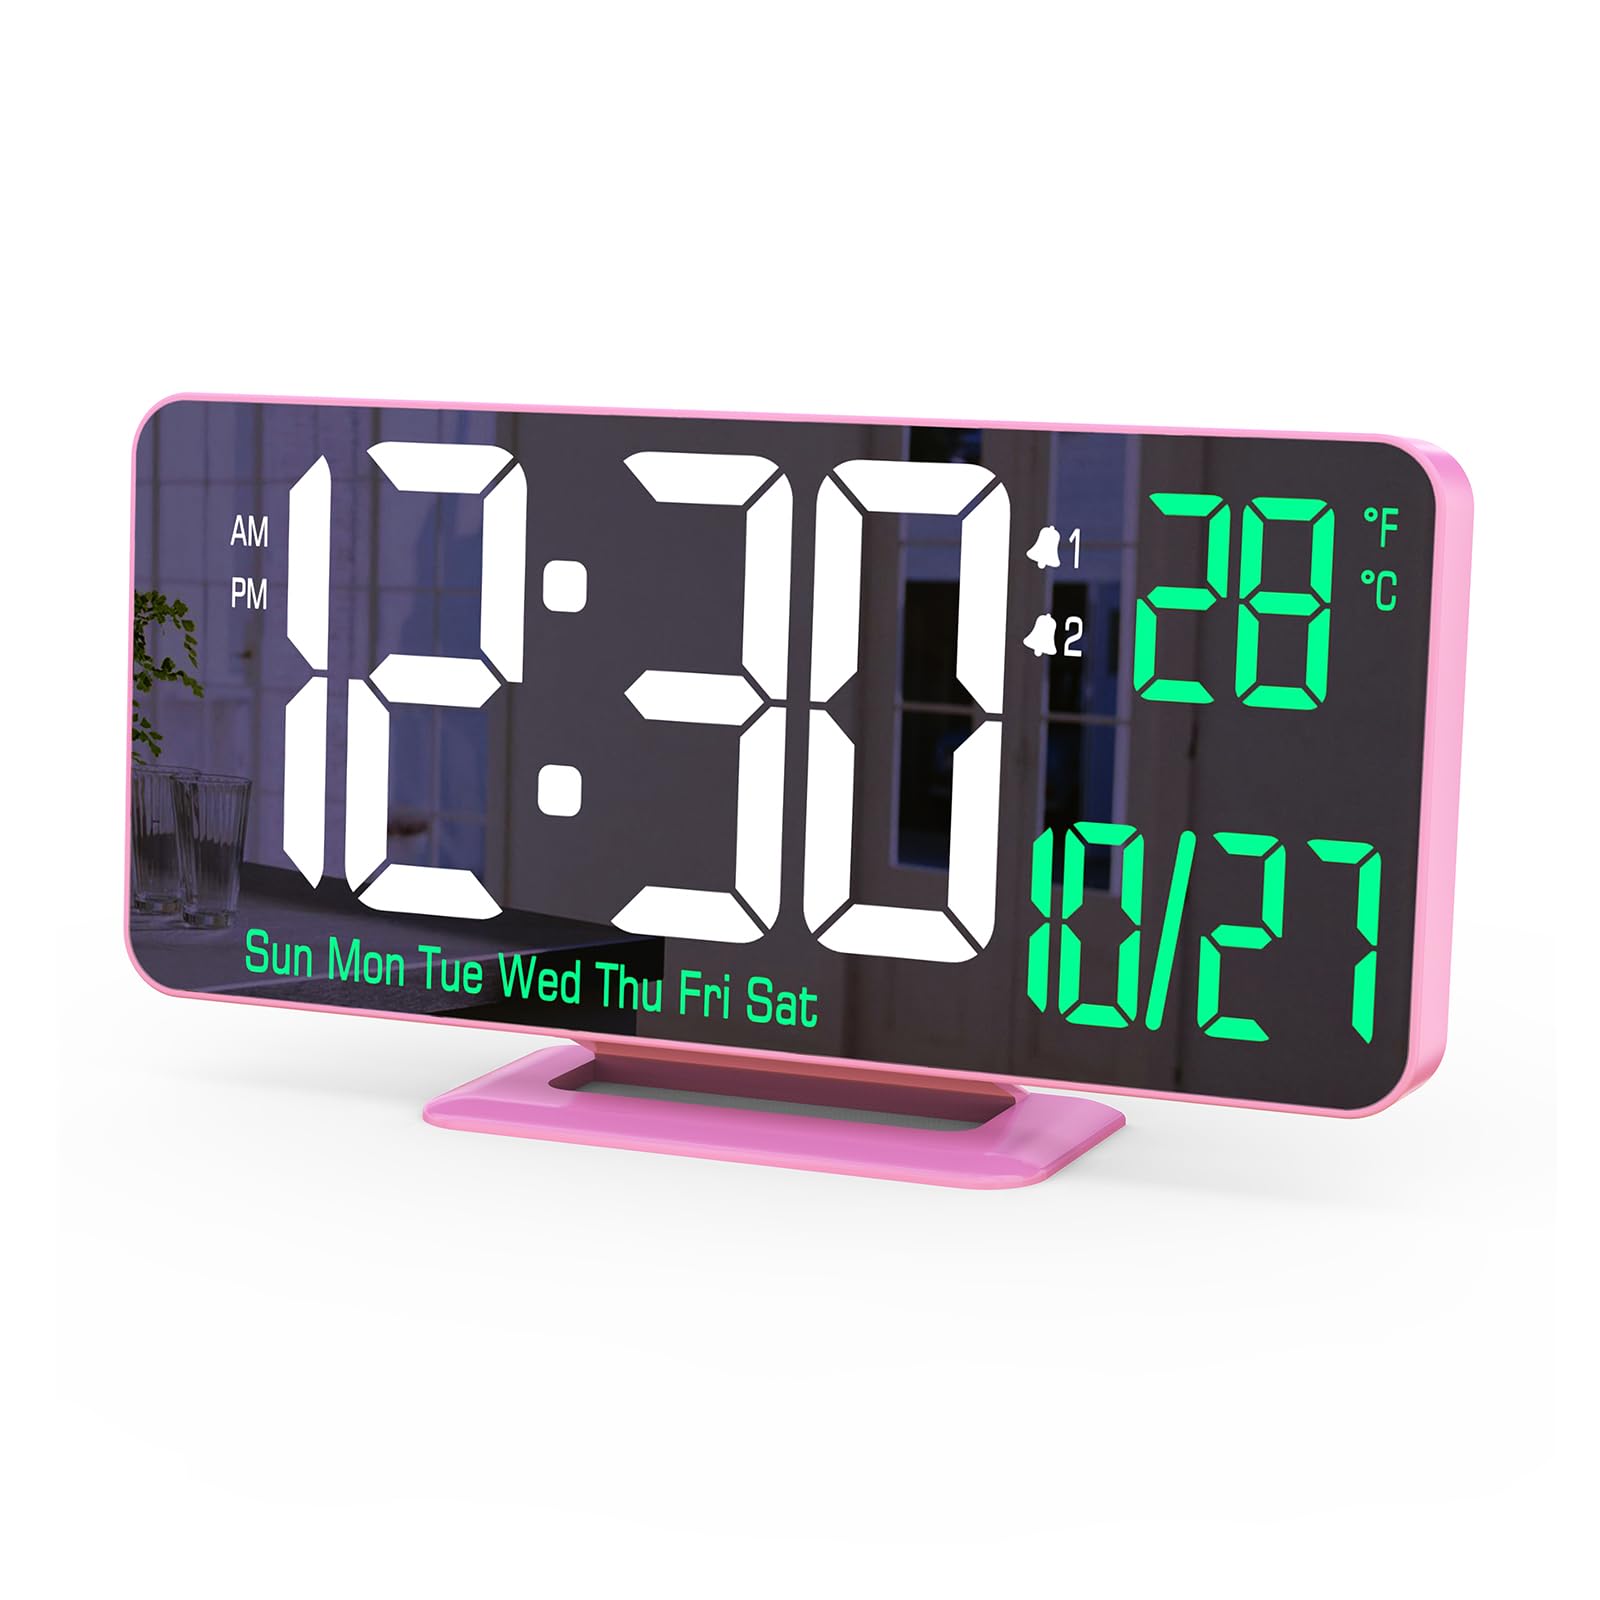
Figure 1: KOSUMOSU Digital LED Alarm Clock ACD-330 (Pink variant)
2. Package Contents
Please ensure all items are present in the package:
- KOSUMOSU Digital LED Alarm Clock (ACD-330)
- USB Power Cable (1.5 meters)
- Button Battery (for time retention during power outages)
- Bracket Base
- User Manual

Figure 2: Contents of the product package, including the clock, USB cable, and bracket.
3. Setup
3.1 Power Connection
The digital clock requires a 5V/1A AC adapter (sold separately) for operation. Connect the provided 1.5-meter USB cable to the clock and then to a compatible AC adapter plugged into a power outlet. A button battery is included to retain time settings during power outages; it is not for continuous power supply.

Figure 3: Rear view of the clock with USB power port and control buttons.
3.2 Placement
The clock can be placed on a tabletop using the included bracket base or mounted on a wall. Ensure it is placed on a stable surface or securely mounted.

Figure 4: The clock connected to a USB power source.
4. Operating Instructions
4.1 Button Functions
The clock features several buttons on the back for setting and control:
- + Button: Increase value, adjust brightness up.
- - Button: Decrease value, adjust brightness down.
- SET Button: Enter setting mode, confirm settings.
- Alarm 1 Button: Set Alarm 1.
- Alarm 2 Button: Set Alarm 2.
4.2 Time and Date Settings
- Press the SET button to enter time setting mode. The hour digits will flash.
- Use the + and - buttons to adjust the hour.
- Press SET again to move to minute setting. Adjust with + and -.
- Continue pressing SET to cycle through year, month, day, and 12/24-hour format settings. Adjust each with + and -.
- Press SET one last time to exit setting mode.
4.3 Alarm Settings (Dual Alarms)
The clock supports two independent alarms with options for weekdays, weekends, or everyday cycles.
- Press the Alarm 1 or Alarm 2 button to enter alarm setting mode. The alarm hour digits will flash.
- Use the + and - buttons to adjust the alarm hour.
- Press the respective Alarm button again to move to minute setting. Adjust with + and -.
- Press the Alarm button again to select the alarm cycle: Weekdays, Weekends, or Everyday. Adjust with + and -.
- Press the Alarm button one last time to confirm and activate the alarm. An alarm icon will appear on the display.
4.4 Snooze Function
When an alarm sounds, press any button (except the alarm off button, if applicable) to activate the snooze function. The alarm will pause for 5 minutes and then sound again.

Figure 5: Illustration of the dual alarm and snooze feature.
4.5 Brightness Adjustment (Automatic/Manual Dimming)
The clock offers both automatic and manual brightness control.
- Manual Dimming: Short press the + or - button to cycle through brightness levels: High, Medium, Low, Off.
- Automatic Dimming: Long press the + button to activate automatic dimming. The clock will adjust its brightness based on ambient light conditions using its built-in light sensor. Long press + again to deactivate.

Figure 6: Displaying various brightness settings and the automatic dimming feature.
4.6 Temperature Display
The clock displays indoor temperature. To switch between Fahrenheit (℉) and Celsius (℃), short press the - button when not in setting mode.

Figure 7: Detailed view of the clock display, showing time, date, day, and temperature.
5. Maintenance
To ensure the longevity and optimal performance of your KOSUMOSU Digital LED Alarm Clock, follow these maintenance guidelines:
- Cleaning: Wipe the clock surface with a soft, dry cloth. Avoid using abrasive cleaners or solvents, as they may damage the display or casing.
- Placement: Keep the clock away from direct sunlight, extreme temperatures, and high humidity.
- Power: Always use a compatible 5V/1A AC adapter. Disconnect power during thunderstorms or if the clock will be unused for extended periods.
6. Troubleshooting
| Problem | Possible Cause | Solution |
|---|---|---|
| Clock does not turn on. | No power or faulty connection. | Ensure the USB cable is securely connected and the AC adapter is plugged into a working outlet. Verify the AC adapter is 5V/1A. |
| Display is too dim or too bright. | Brightness setting needs adjustment or automatic dimming is active. | Short press + or - to manually adjust brightness. Long press + to toggle automatic dimming. |
| Alarm does not sound. | Alarm is not set or is deactivated. | Check alarm settings (Section 4.3) and ensure the alarm icon is visible on the display. |
| Time is inaccurate. | Time drift (common for non-radio controlled clocks). | Manually reset the time as needed (Section 4.2). |
If you encounter any issues not listed here, please refer to the Warranty and Support section for assistance.
7. Specifications
| Feature | Detail |
|---|---|
| Brand | KOSUMOSU |
| Model Number | ACD-330 |
| Color | Pink |
| Display Type | Digital LED |
| Style | Modern |
| Product Dimensions (W x H) | 16.2 cm x 8.3 cm (6.4 inches x 3.3 inches) |
| Item Weight | 170 grams |
| Power Source | Corded Electric (USB 5V/1A adapter required, not included) |
| Backup Battery | 1 Lithium Metal battery (included, for time retention only) |
| Mounting Type | Tabletop, Wall Mount |
| Material | Plastic (ABS Frame) |
| Special Features | Dual Alarm, Snooze, Automatic/Manual Dimming, Temperature Display (℉/℃), Date, Day of Week, 12/24 Hour Format |
8. Warranty and Support
KOSUMOSU provides a 2-year warranty for this product. If you encounter any quality issues or problems with usage, please contact our customer service promptly. We will assist you with troubleshooting, provide guidance on usage and settings, or arrange for a replacement if necessary.
For customer support, please visit the KOSUMOSU Store on Amazon or contact us through your purchase platform.


