1. Introduction
This manual provides essential information for the safe and efficient operation, installation, and maintenance of your RENODLAD 60 cm Integrated Dishwasher, Model IK.904.756.16. Please read these instructions carefully before using the appliance and retain them for future reference.
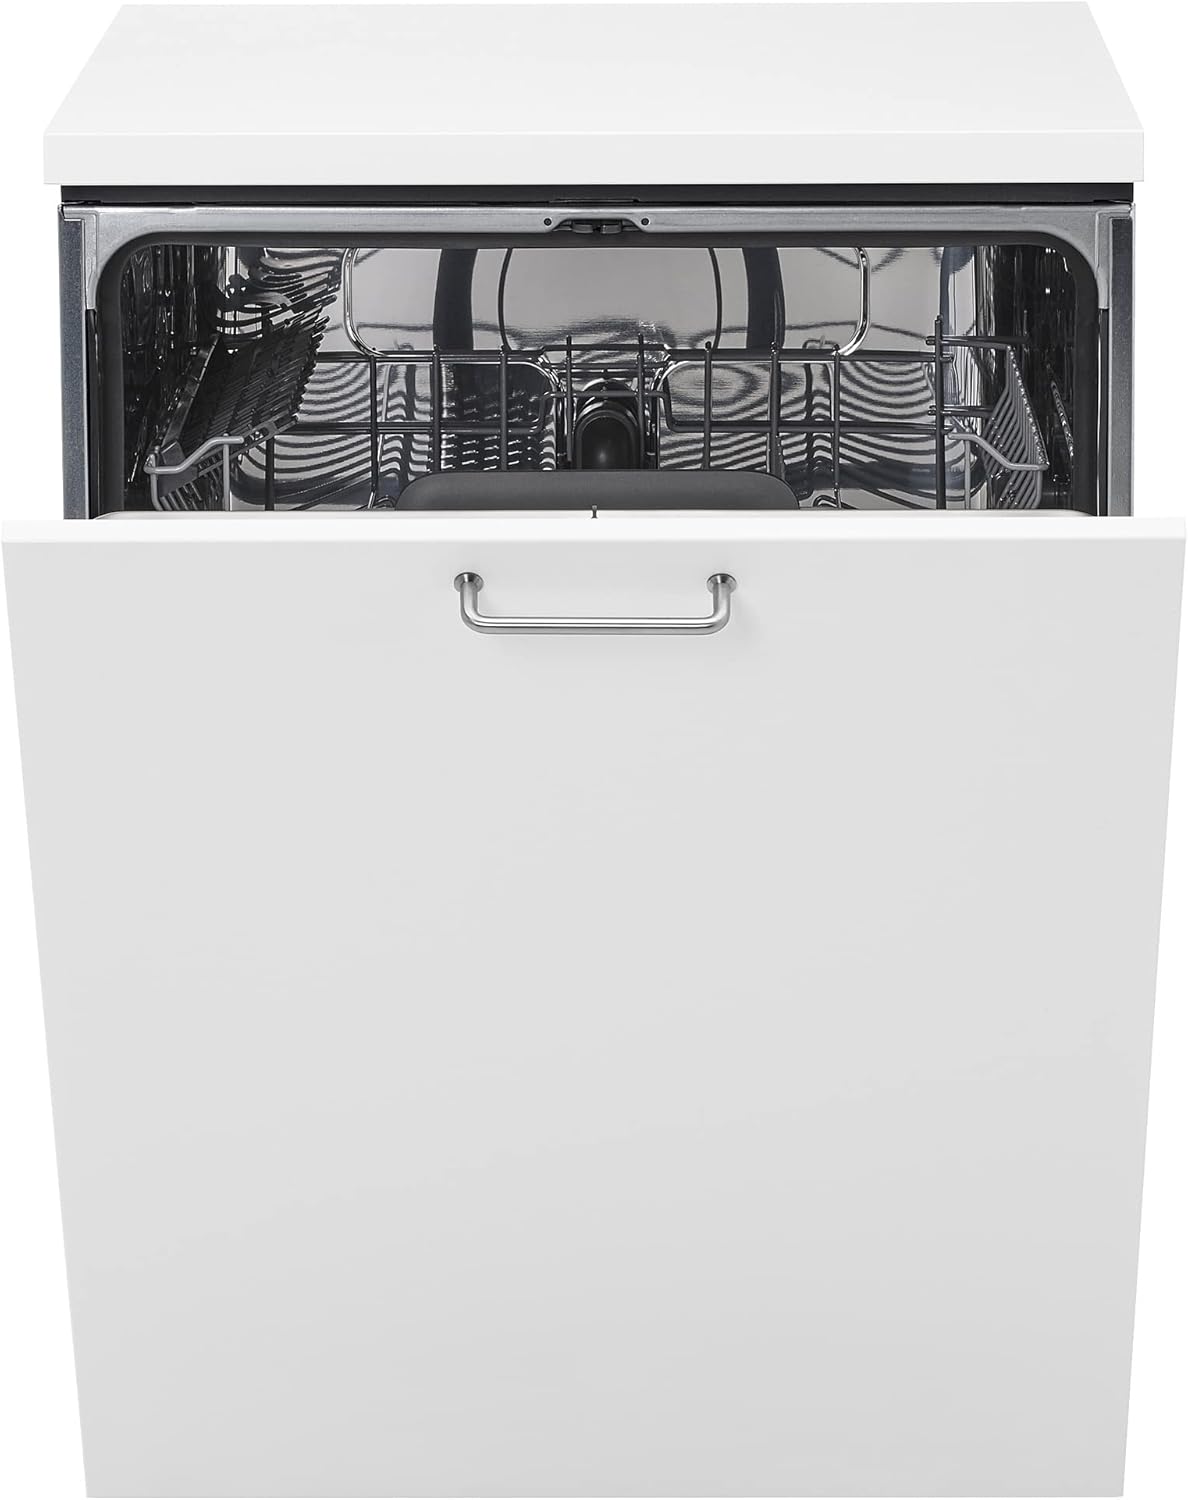
Image 1: Front view of the RENODLAD 60 cm Integrated Dishwasher with its door slightly open, revealing the interior.
2. Safety Information
To prevent personal injury or damage to the appliance, always observe the following safety precautions:
- Electrical Safety: Ensure the dishwasher is properly grounded. Do not use extension cords. Disconnect power before any maintenance or repair.
- Water Safety: Ensure water connections are secure to prevent leaks. Do not operate if there is visible water leakage.
- Child Safety: Keep children away from the dishwasher, especially when it is operating. Detergents are corrosive; keep them out of reach of children.
- Sharp Objects: Load sharp items (knives, forks) with handles pointing up to minimize the risk of injury.
- Flammable Materials: Do not store or use flammable materials near the dishwasher.
- Proper Use: Use the dishwasher only for its intended purpose of washing household dishes.
3. Installation (Setup)
Proper installation is crucial for the performance and safety of your dishwasher. It is recommended that installation be performed by a qualified technician.
3.1 Dimensions and Placement
- Width: 59.6 cm
- Depth: 55 cm
- Height: 81.8 cm
- Minimum Installation Height: 82 cm
- Maximum Installation Height: 90 cm
- Cord Length: 140 cm
- Weight: 38 kg
Ensure the installation area provides adequate space and access to water, drainage, and electrical connections.
3.2 Connection Diagrams
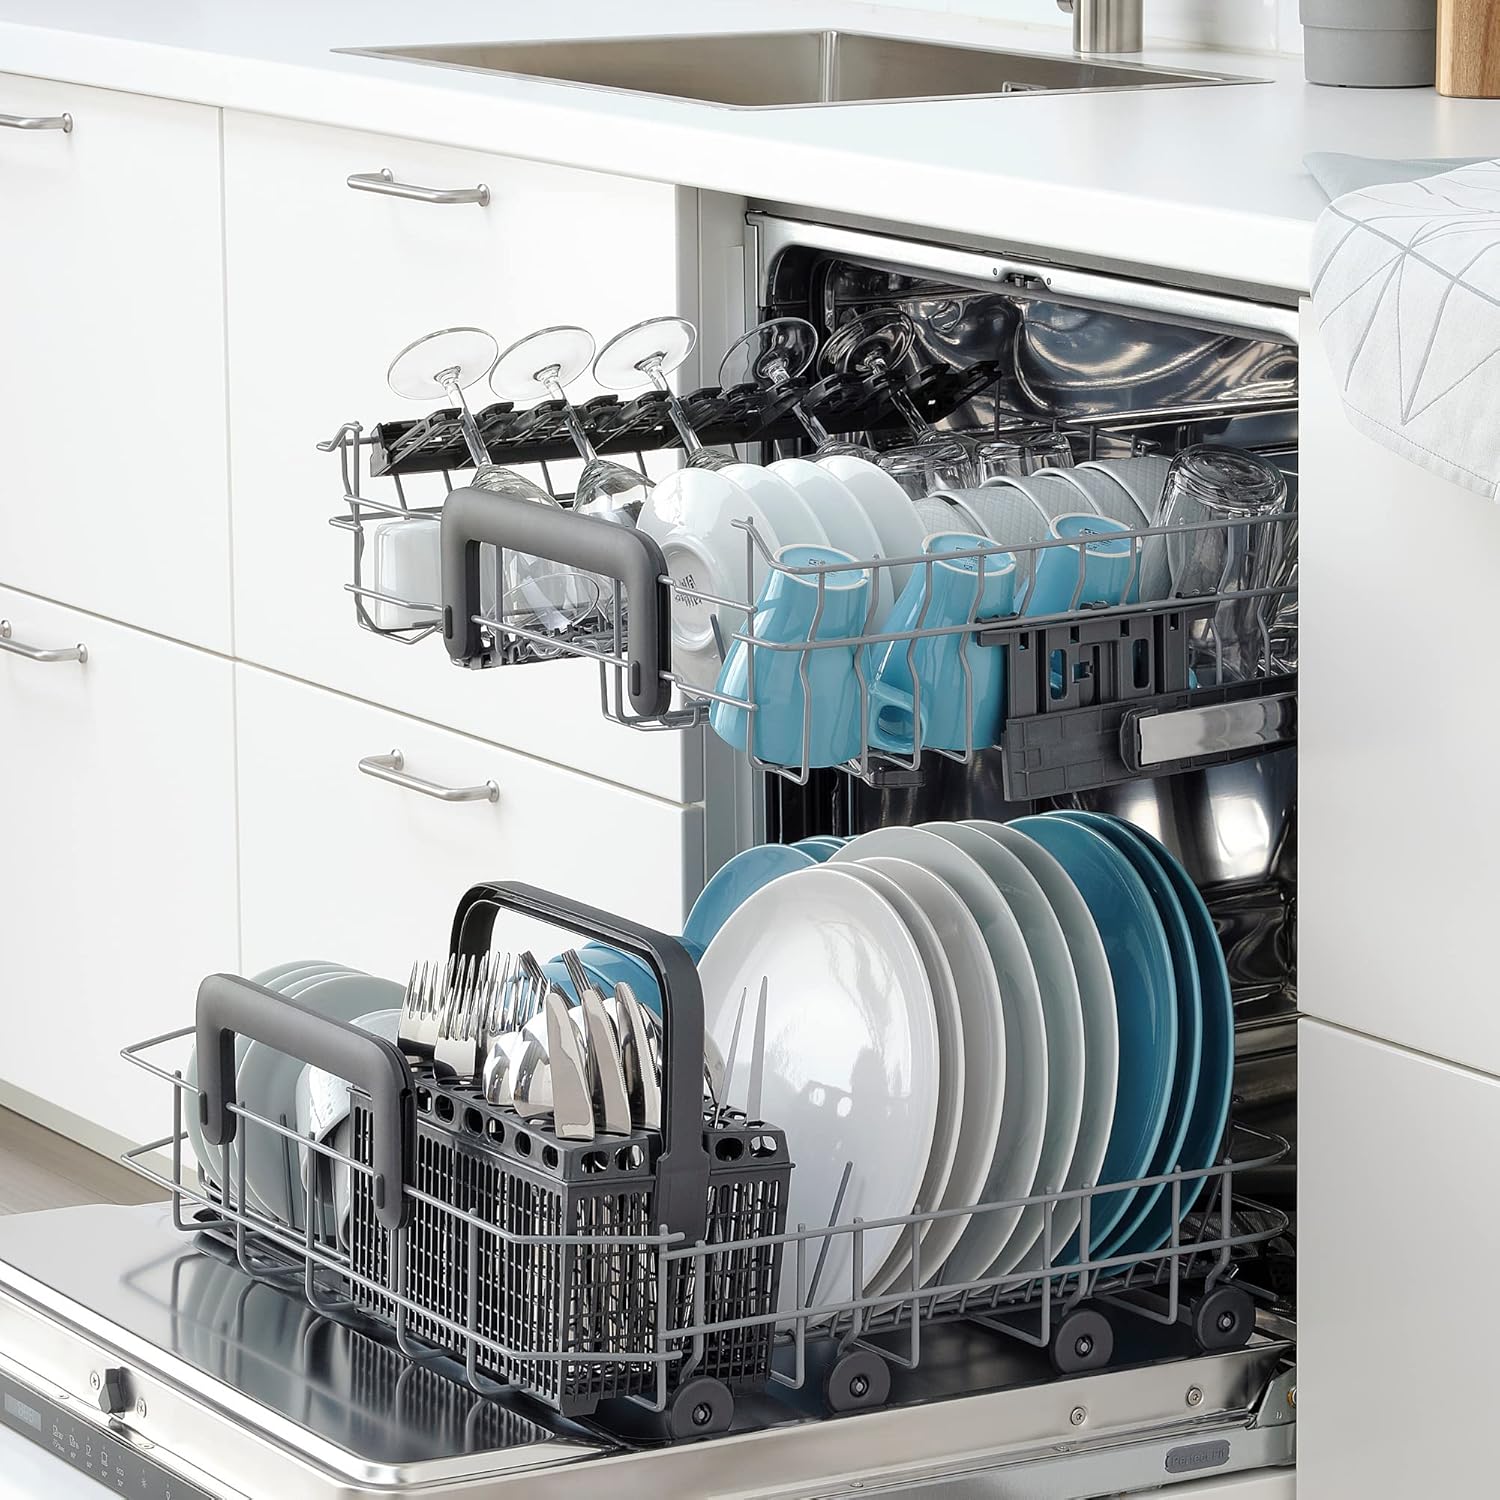
Image 2: Top-down view of the dishwasher installation diagram, illustrating water inlet, drain hose, and electrical connections. Dimensions for hose lengths and minimum drain height are indicated.
Image 3: Side view of the dishwasher installation diagram, detailing the placement of water and electrical connections relative to the appliance and cabinet.
Refer to the diagrams for correct positioning of water supply, drain hose, and electrical outlet. The drain hose requires a minimum height of 40 cm for proper drainage.
4. Operating Instructions
Follow these steps for effective dishwashing:
- Prepare Dishes: Scrape off large food particles. No pre-rinsing is typically needed.
- Load Dishwasher: Arrange dishes as shown in Section 5.
- Add Detergent: Fill the detergent dispenser according to the program and soil level.
- Add Rinse Aid (Optional): Fill the rinse aid dispenser for improved drying and shine.
- Select Program: Choose the appropriate wash program using the control panel.
- Start Cycle: Close the dishwasher door firmly. Press the start button to begin the cycle.

Image 4: Close-up view of the dishwasher's control panel, displaying program options such as 'Reset 3sec', 'Delay', '40°', '60°', 'ECO', 'Auto 50°-60°', and indicators for salt and rinse aid.
5. Loading the Dishwasher
Proper loading ensures optimal cleaning and drying results.
- Place larger items in the lower basket.
- Place glasses, cups, and smaller plates in the upper basket.
- Ensure items do not block the spray arms.
- Load cutlery into the cutlery basket with handles up for safety, except for knives.
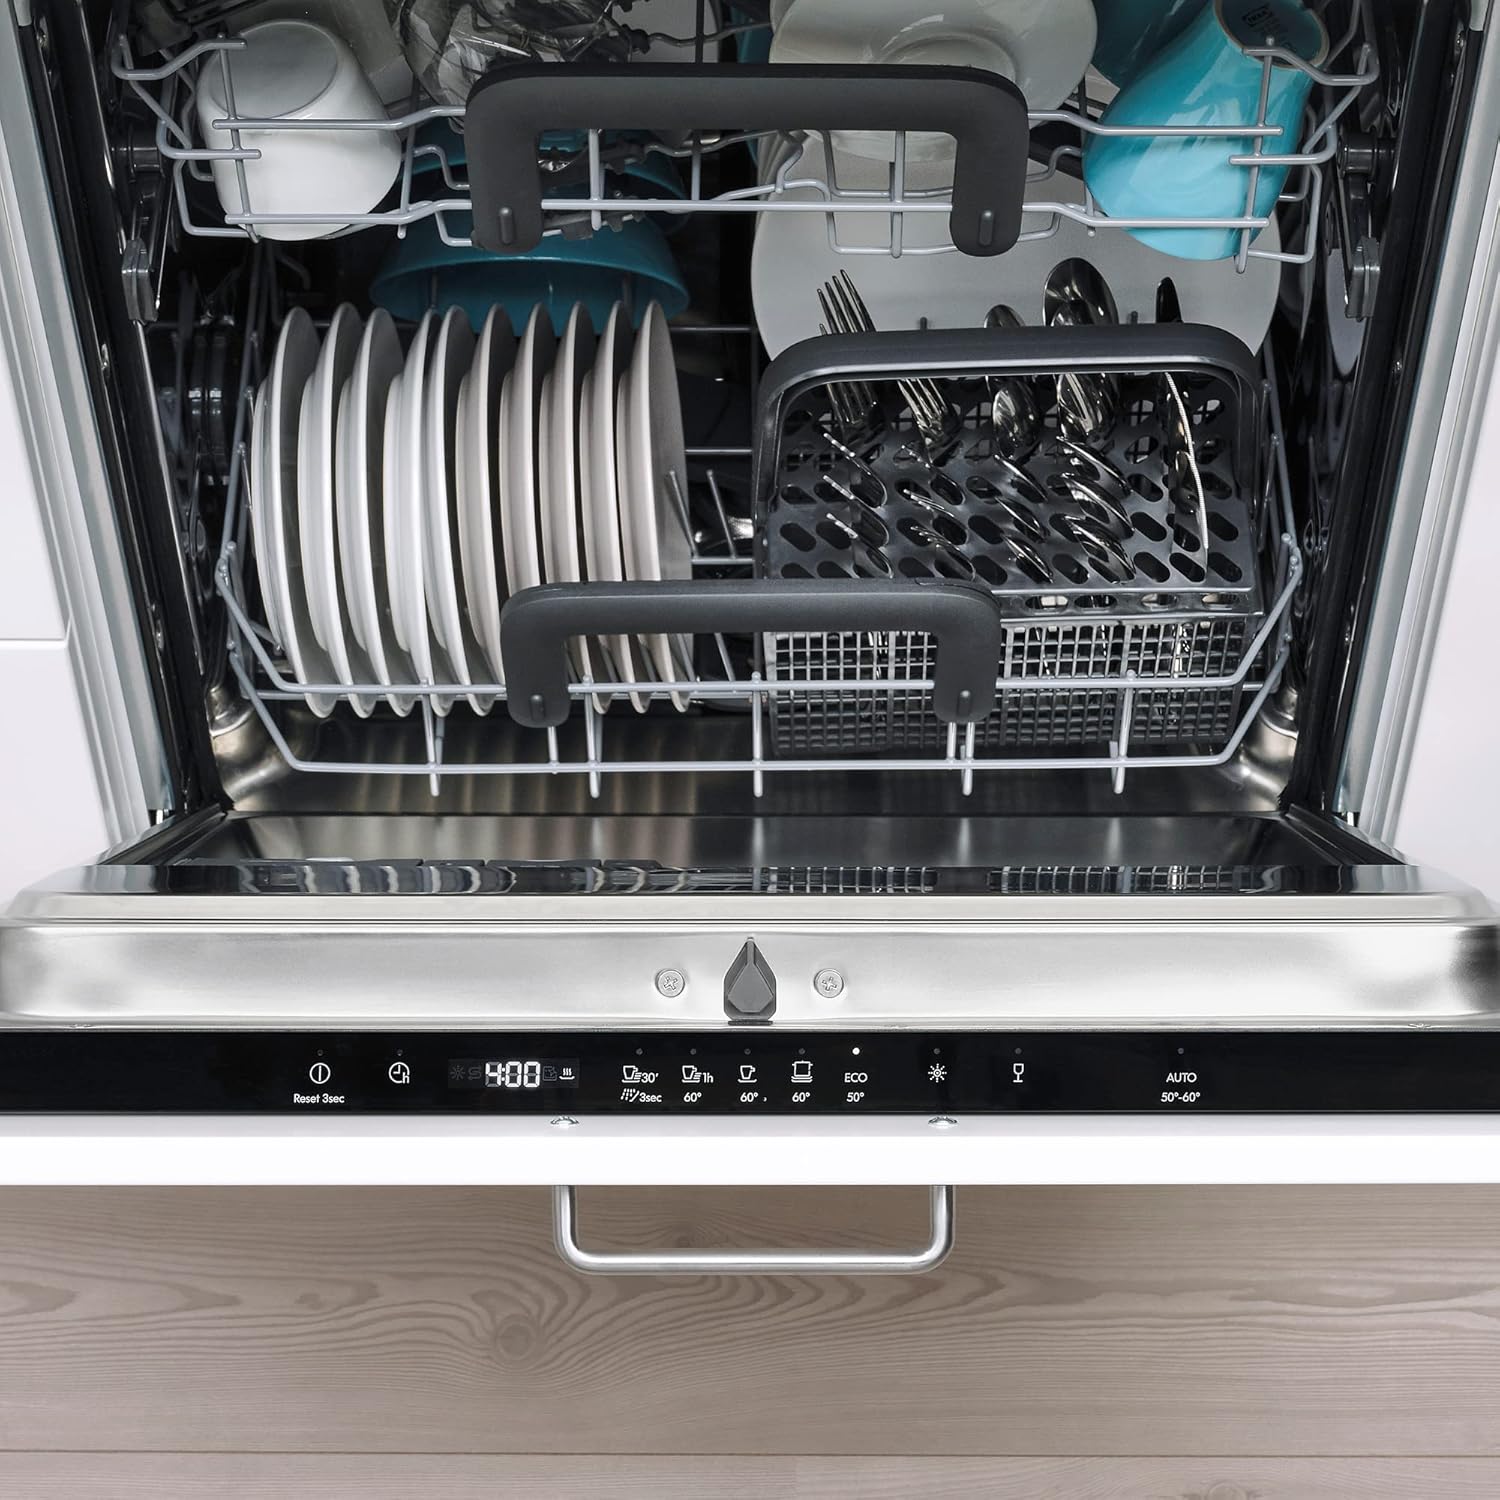
Image 5: The interior of the dishwasher, fully loaded with plates, bowls, glasses, and cutlery, demonstrating an efficient loading arrangement.
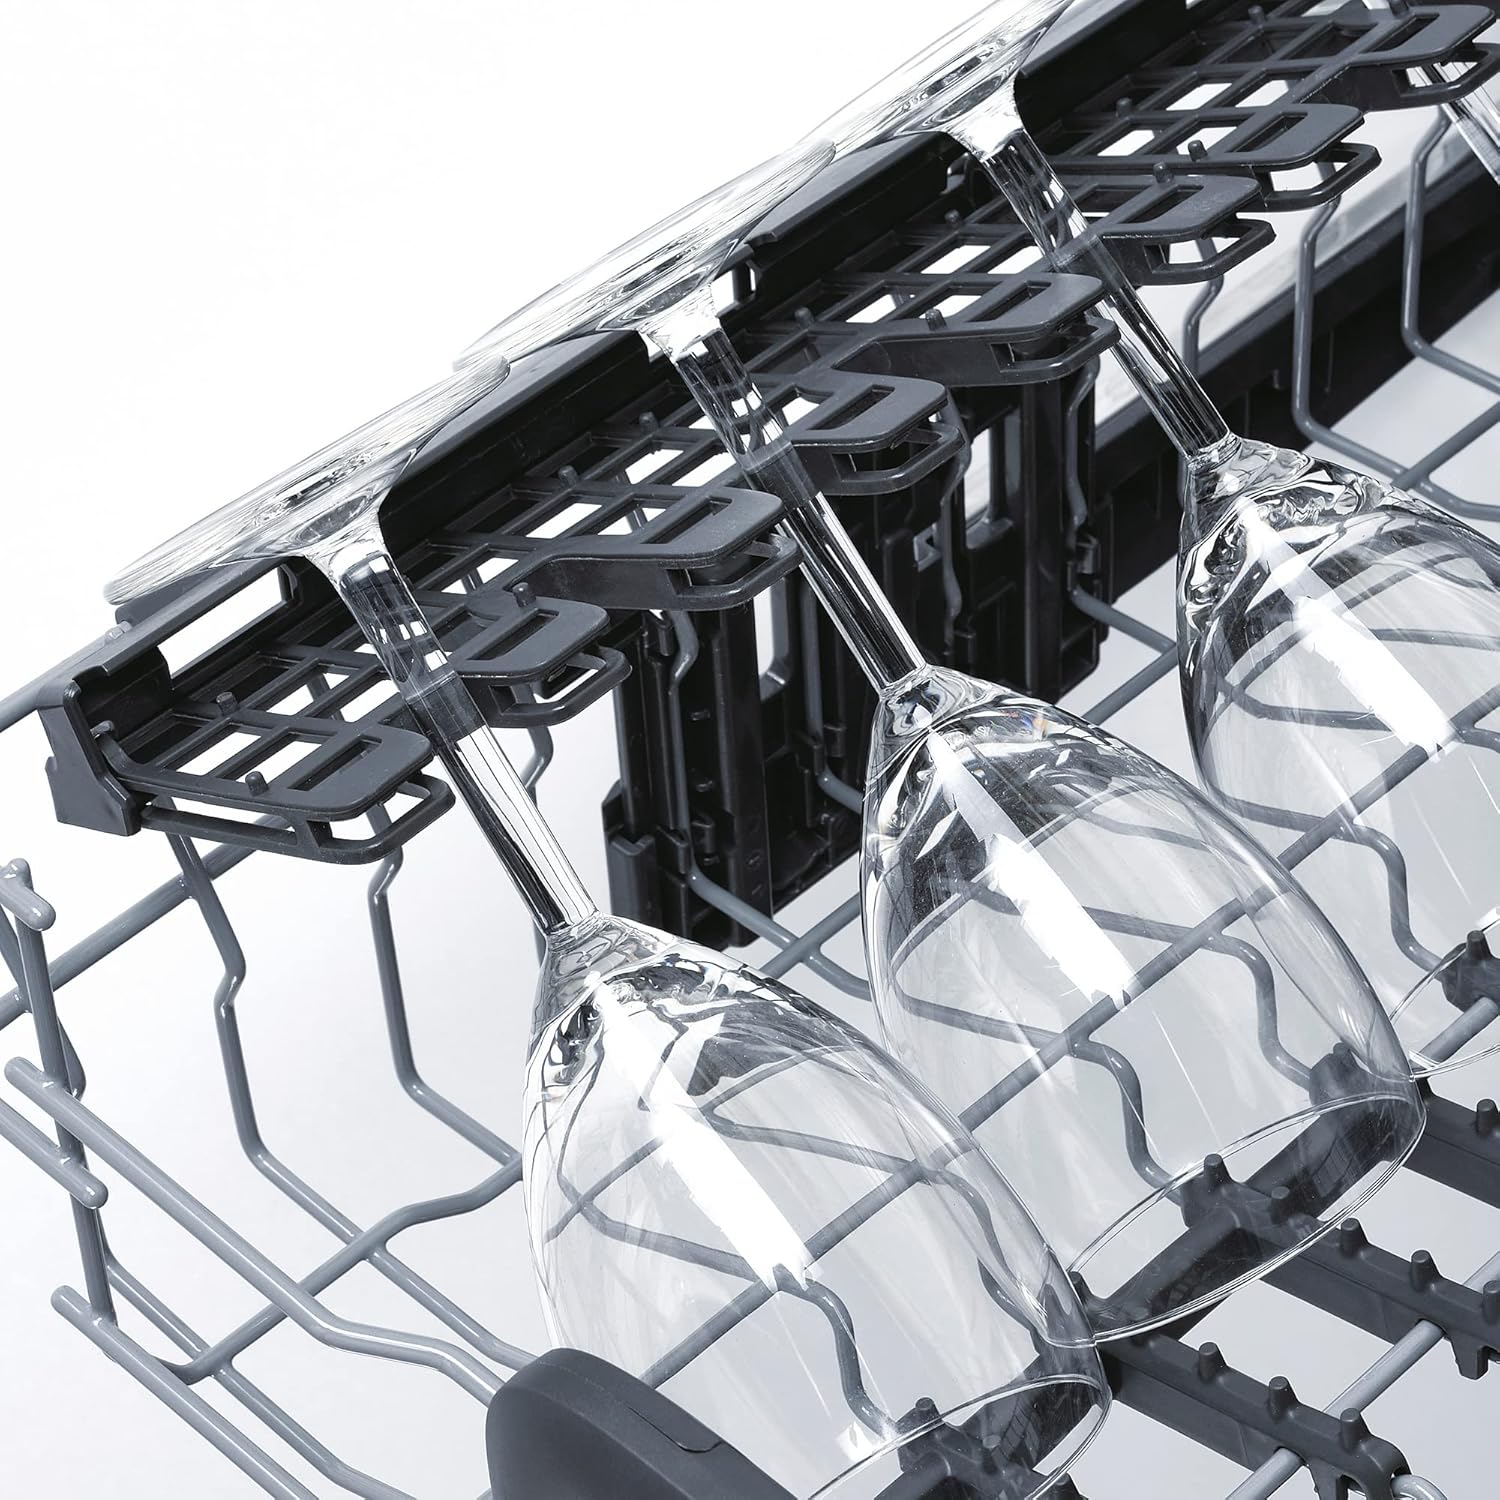
Image 6: A close-up view of the dishwasher's cutlery basket, showing various utensils neatly arranged.
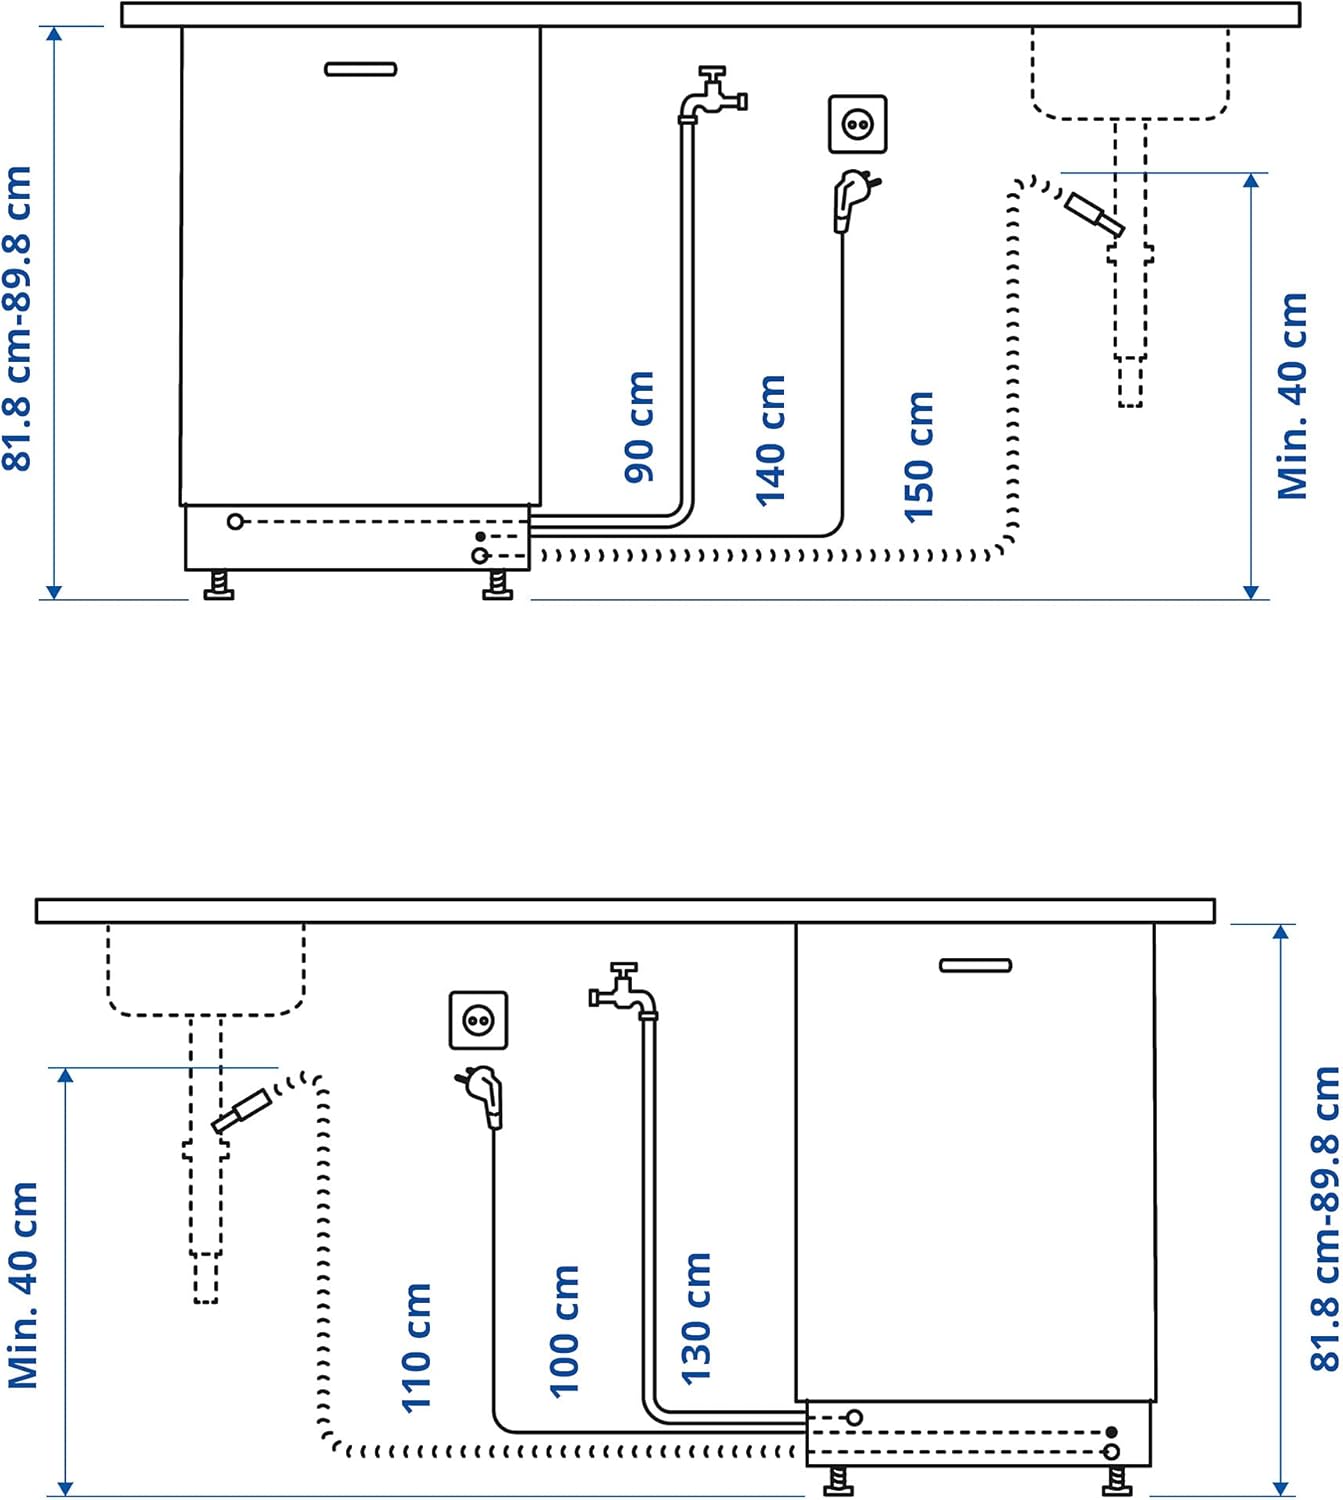
Image 7: A detailed view of the upper rack, highlighting the specialized holders designed for securely washing wine glasses.
6. Maintenance and Cleaning
Regular maintenance ensures optimal performance and longevity of your dishwasher.
- Filter Cleaning: Regularly check and clean the filter system at the bottom of the dishwasher to remove food debris.
- Spray Arms: Ensure the spray arm nozzles are not clogged. Remove and clean if necessary.
- Exterior Cleaning: Wipe the exterior surfaces with a soft, damp cloth. Do not use abrasive cleaners.
- Salt and Rinse Aid: Refill dishwasher salt and rinse aid as indicated by the appliance's indicators to prevent limescale and improve drying.
7. Troubleshooting
Before contacting service, refer to the following common issues and solutions:
| Problem | Possible Cause | Solution |
|---|---|---|
| Dishwasher does not start | Door not closed properly; Power supply issue; Program not selected. | Ensure door is latched; Check power connection and circuit breaker; Select a wash program. |
| Poor cleaning results | Improper loading; Clogged spray arms/filters; Insufficient detergent; Incorrect program. | Reload dishes correctly; Clean spray arms and filters; Use adequate detergent; Select a more intensive program. |
| Water not draining | Clogged drain hose/filter; Kinked drain hose. | Clean filter; Check and straighten drain hose. |
| White film on dishes | Hard water; Insufficient rinse aid or salt. | Adjust water softener settings; Refill rinse aid and dishwasher salt. |
8. Specifications
| Brand | RENODLAD (Manufacturer: ProTuning) |
| Model Number | IK.904.756.16 |
| ASIN | B0CY3DNTY5 |
| Width | 59.6 cm |
| Depth | 55 cm |
| Height | 81.8 cm |
| Weight | 38 kg |
| Cord Length | 140 cm |
9. Warranty Information
This RENODLAD dishwasher comes with a 5-year warranty. For detailed terms and conditions, please refer to the separate warranty brochure provided with your purchase or contact the manufacturer.
10. Support and Service
If you encounter issues not covered in the troubleshooting section or require technical assistance, please contact your retailer or the manufacturer, ProTuning, for support. Ensure you have your model number (IK.904.756.16) and purchase details available when contacting support.


