
Introduction
This instruction manual provides comprehensive guidance for the safe and effective installation, operation, and maintenance of your VIVO MOUNT-VC90-10 Ceiling Swivel TV Mount. Please read all instructions carefully before assembly and use. If you have any questions or require assistance, refer to the support section.
Important Safety Information
WARNING: Failure to read and follow all instructions can result in personal injury or property damage.
- Ensure the mounting surface can safely support the combined weight of the mount and the display.
- Do not install into drywall alone. The mount must be secured into wood studs, concrete, or brick walls/ceilings.
- Use appropriate tools and hardware for your specific installation type.
- Always use two people for lifting and positioning the TV.
- Do not exceed the maximum weight capacity of 110 lbs (50 kg).
- Regularly check all screws and connections to ensure they remain secure.
Product Overview
The VIVO MOUNT-VC90-10 is a heavy-duty ceiling swivel TV mount designed for screens ranging from 37 to 90 inches. It features telescoping height adjustment, tilt, and 360° swivel capabilities, and integrated cable management for a clean installation.
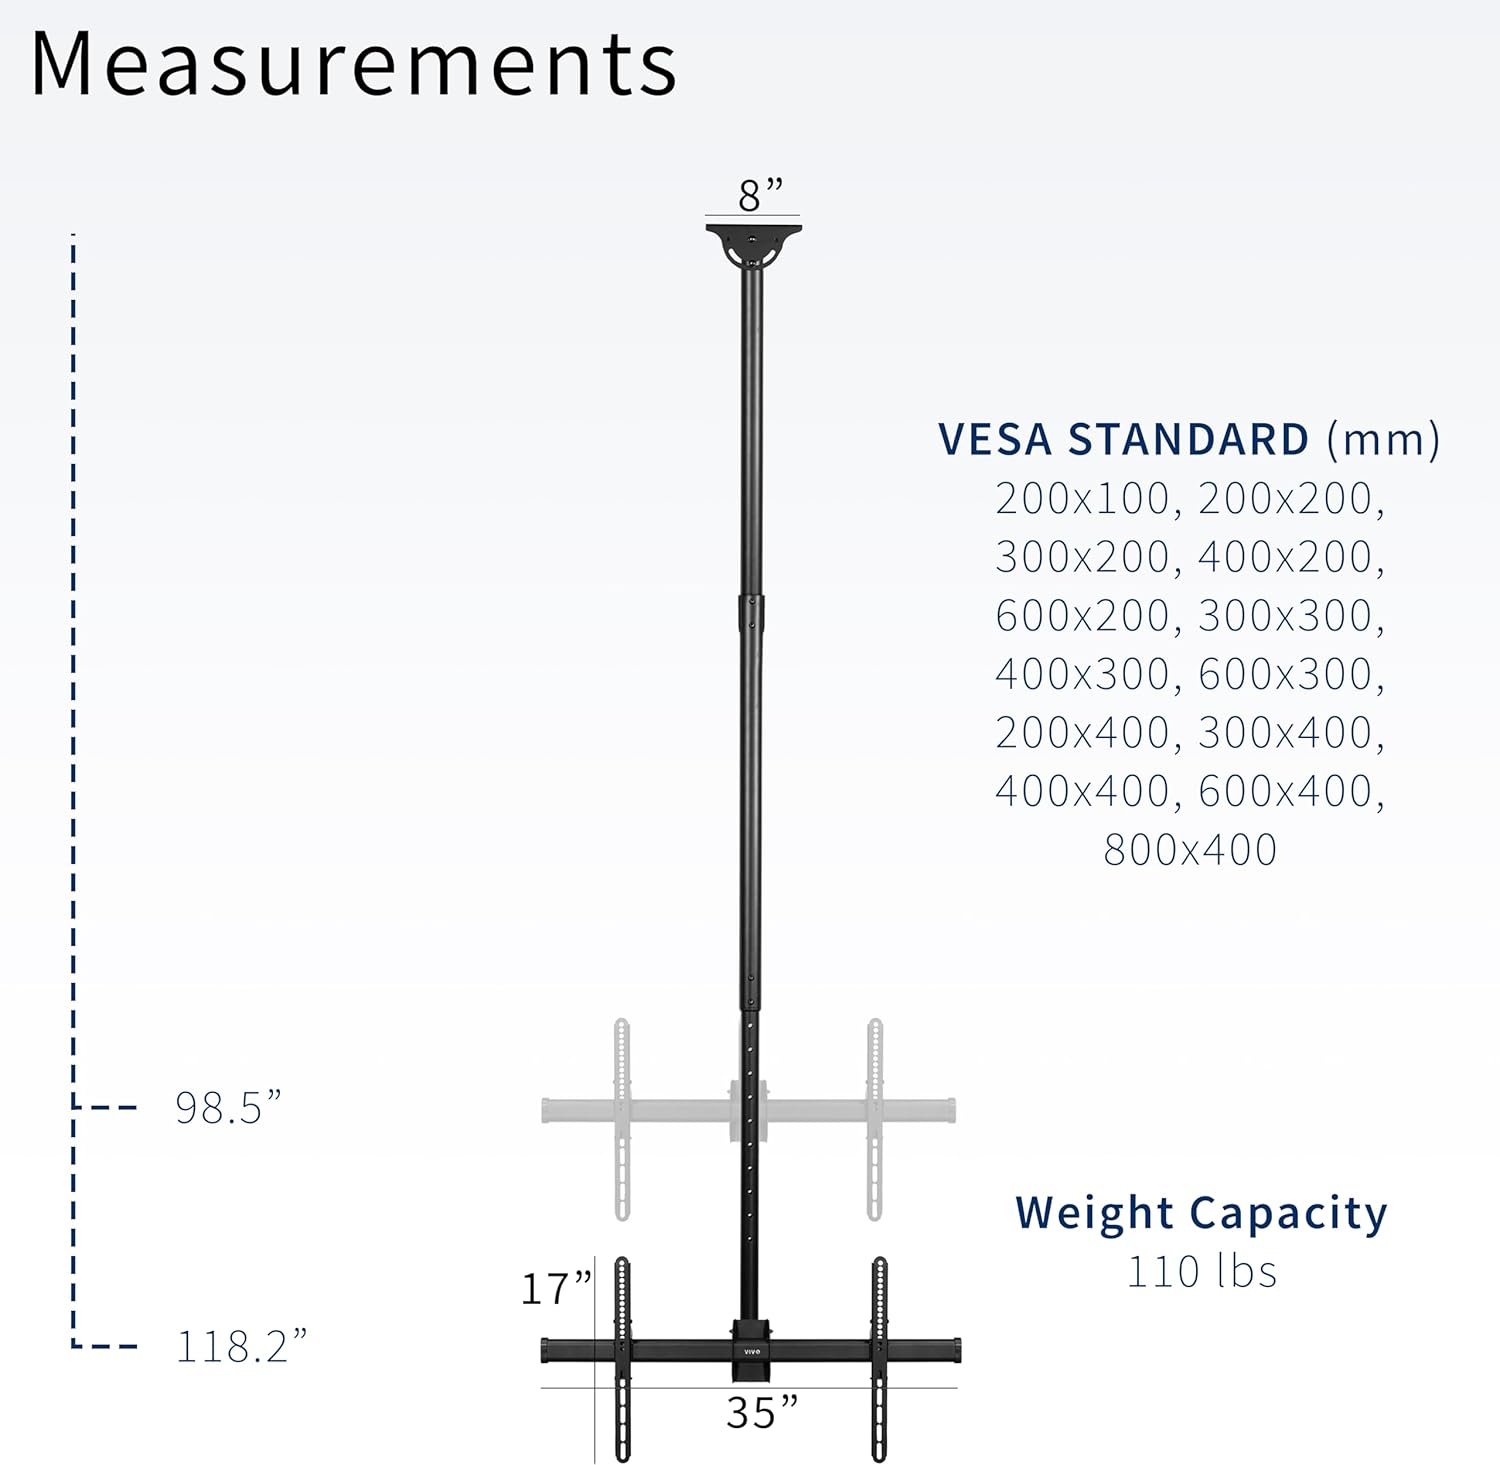
Figure 1: Product dimensions, VESA compatibility (200x100mm to 800x400mm), and maximum weight capacity (110 lbs).
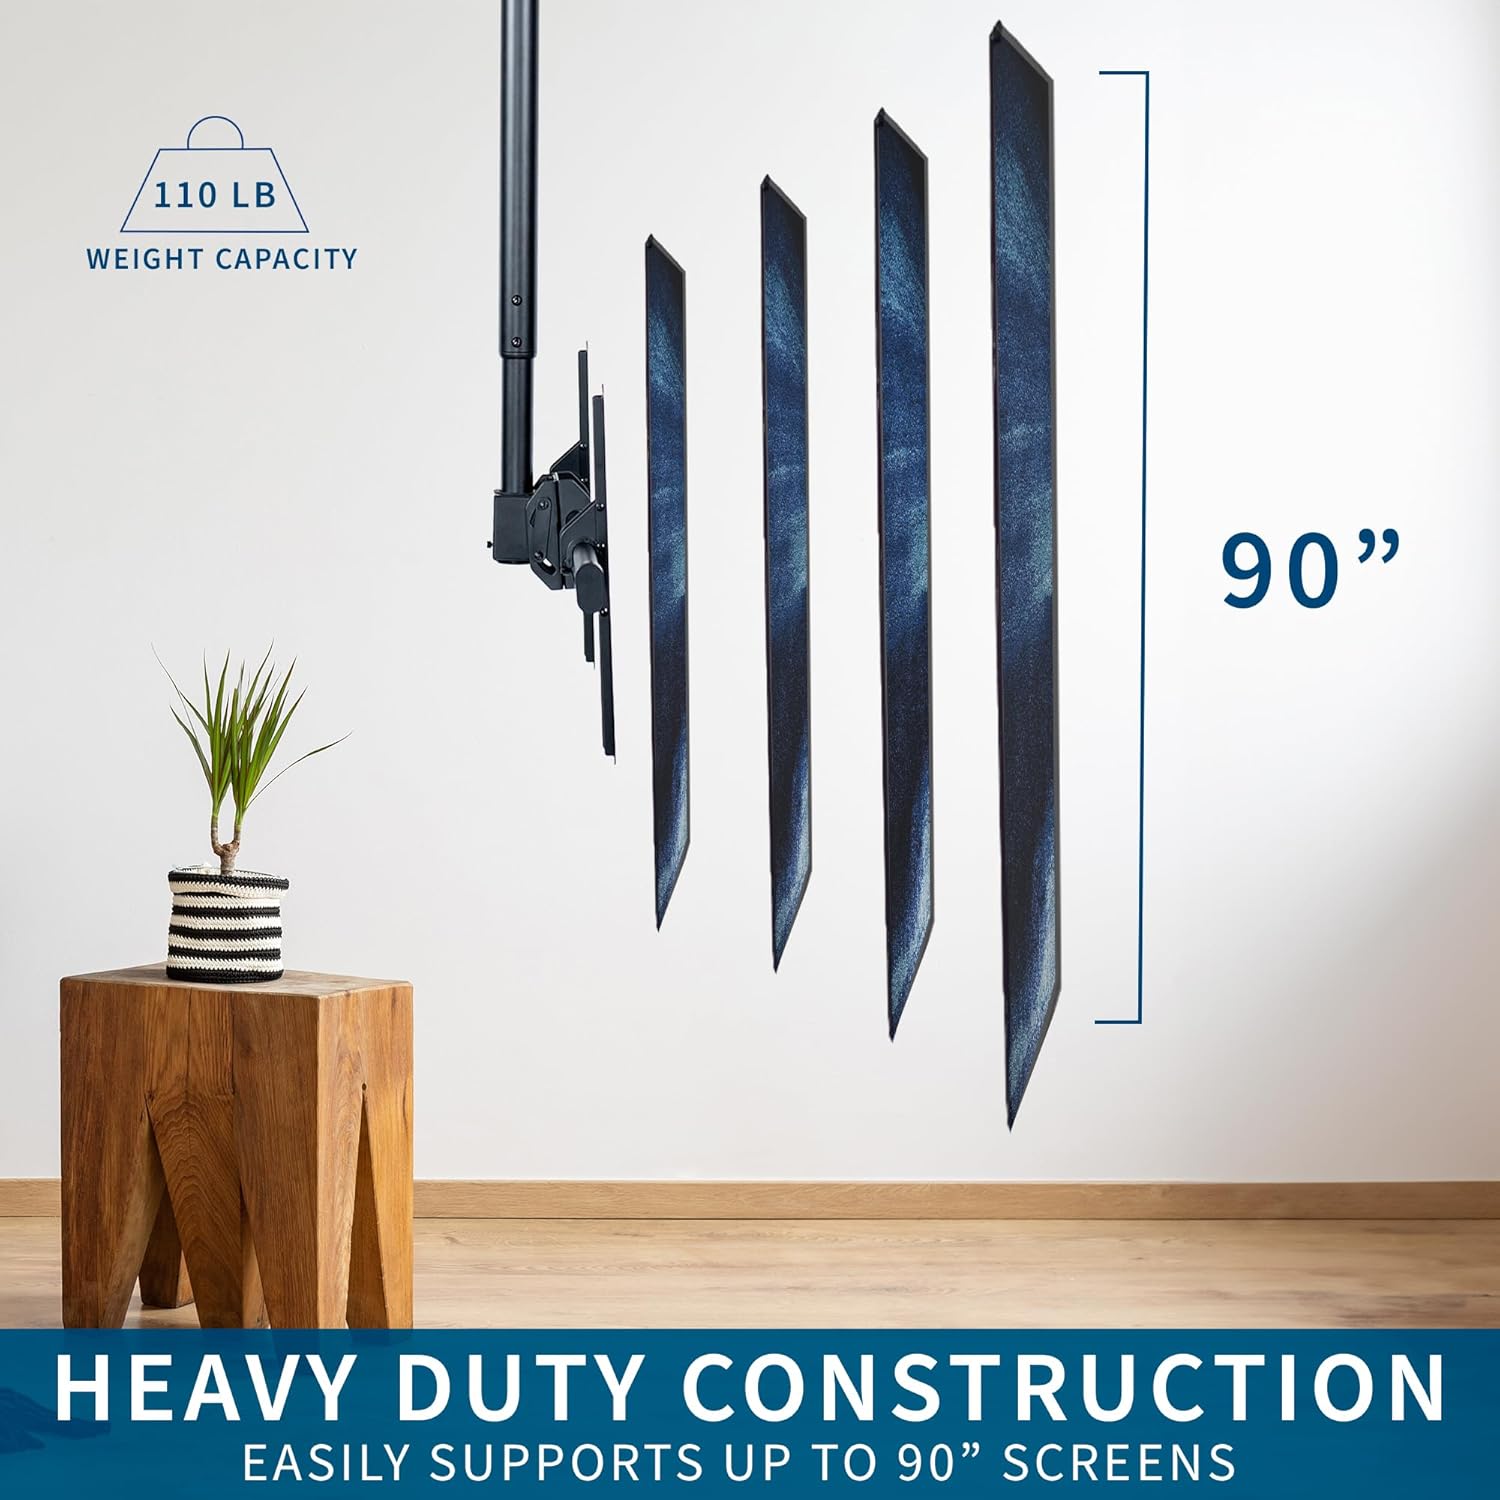
Figure 2: Heavy-duty construction ensures support for screens up to 90 inches and 110 lbs.
Setup and Installation
Careful installation is crucial for the safety and stability of your TV mount. Ensure you have all necessary tools and hardware before beginning.
1. Ceiling Preparation
This mount is compatible with both flat and sloped/vaulted ceilings. It must be installed into a solid wood stud, concrete, or brick. Do not install into drywall alone.

Figure 3: The mount is designed for installation on flat or sloped ceilings, requiring secure attachment to wood, brick, or concrete.
Mark the desired location for pilot holes on your ceiling. Pre-drill holes as per the manual's specifications and attach the mounting pole using appropriate screws.
2. Assembling the Pole
Slide the lower pole into the mounting pole to achieve the desired height. Secure it using the provided screws and nuts. The 10ft model allows for height adjustment from 98.5” to 118.2” from the ceiling.

Figure 4: Adjust the telescoping pole to set your TV at the optimal viewing height.
3. Attaching VESA Support
Slide the VESA support onto the front of the mounting adapter and tighten the nuts to secure it. This forms the horizontal bar to which the TV's VESA brackets will attach.
4. Installing VESA Brackets on TV
Attach the VESA brackets to the back of your television using the screws appropriate for your TV's VESA pattern. Ensure they are securely fastened.
5. Mounting the TV
With assistance, carefully lift and hang the TV with the VESA brackets onto the VESA support bar. Secure the VESA brackets by re-installing the collar screws. This step requires at least two people for safety.
6. Cable Management
Route power cords and other cables through the integrated cable management system within the pole for a clean and organized appearance.

Figure 5: Integrated cable management keeps wires tidy and out of sight.
Installation Video Guide
Video 1: Detailed assembly instructions for the VIVO MOUNT-VC90-10 Ceiling TV Mount.
Operating Instructions
Your VIVO MOUNT-VC90-10 mount offers flexible viewing options:
- Height Adjustment: The telescoping pole allows you to adjust the TV's vertical position. Loosen the securing screws on the pole, adjust to the desired height, and re-tighten securely.
- Tilt Adjustment: The screen mount features a tilt range of 0° to -25°. Loosen the tilt adjustment screws, set the desired angle to reduce glare or optimize viewing, and re-tighten.
- Swivel Adjustment: The mount provides a full 360° swivel, allowing you to rotate the TV horizontally to face any direction in the room.

Figure 6: Adjust the screen's tilt and swivel for optimal viewing angles.
Feature Overview Video
Video 2: Overview of the features and adjustability of the VIVO MOUNT-VC90-10 Ceiling TV Mount.
Maintenance
To ensure the longevity and safe operation of your VIVO TV mount, perform the following maintenance checks periodically:
- Regular Inspection: Every few months, visually inspect all components for any signs of wear, damage, or corrosion.
- Tighten Fasteners: Check all screws, bolts, and nuts to ensure they are tight and secure. Over time, vibrations or adjustments can cause fasteners to loosen.
- Clean Surfaces: Wipe down the mount with a soft, dry cloth to remove dust and debris. Avoid using abrasive cleaners or solvents.
Troubleshooting
If you encounter any issues with your VIVO MOUNT-VC90-10 mount, refer to the following common solutions:
- TV is not level: Check the VESA brackets on the back of the TV and the main support bar. Adjust as needed to ensure the TV is perfectly horizontal.
- Difficulty adjusting height/tilt/swivel: Ensure all locking screws or nuts related to the adjustment mechanism are sufficiently loosened before attempting to move the TV. Re-tighten after adjustment.
- Mount feels unstable: Immediately remove the TV from the mount. Re-check all installation steps, especially the ceiling attachment points and the security of all fasteners. Ensure the mounting surface is adequate and the weight capacity is not exceeded.
- Missing parts: If any parts are missing upon unboxing, contact VIVO customer support immediately.
Specifications
| Feature | Detail |
|---|---|
| Model Number | MOUNT-VC90-10 |
| Mounting Type | Ceiling Mount |
| Movement Type | Tilt and Swivel |
| Compatible Screen Sizes | 37 to 90 inches |
| VESA Compatibility | 200x100mm up to 800x400mm |
| Weight Capacity | 110 lbs (50 kg) |
| Height Adjustment (for 10ft pole) | 98.5” to 118.2” from ceiling |
| Tilt Angle | 0° to -25° |
| Swivel Angle | 360° |
| Material | Alloy Steel, Aluminum |
| Color | Black |
Warranty Information
This VIVO product is covered by a 3-Year Manufacturer's Warranty. For specific terms and conditions, please refer to the warranty documentation included with your purchase or contact VIVO customer support.
Customer Support
VIVO is a US-based company committed to providing high-quality ergonomic solutions. Our dedicated Sales and Technical Support team members are based in the U.S. and are available to assist you with any questions or concerns.
For further assistance, please visit the Official VIVO Store on Amazon or refer to the contact information provided in your product packaging.


