
1. Safety Information
Read this manual carefully before use. Failure to follow instructions may result in serious injury.
- Always wear a helmet and protective gear (knee pads, elbow pads, wrist guards) when riding.
- Adult supervision is recommended for children aged 2-8.
- Do not ride on uneven surfaces, near traffic, or on wet/slippery ground.
- Ensure all clamps and fasteners are securely tightened before each use.
- Maximum weight limit: 110 pounds (50 kg).
- Check wheels and brakes for wear and tear regularly.
- This scooter is designed for recreational use only.
2. Product Overview
The Gotrax KS3 Pro is a versatile 3-wheel kick scooter designed for children aged 2 and above, featuring an adjustable handlebar, a removable seat, and light-up wheels for enhanced visibility and fun.
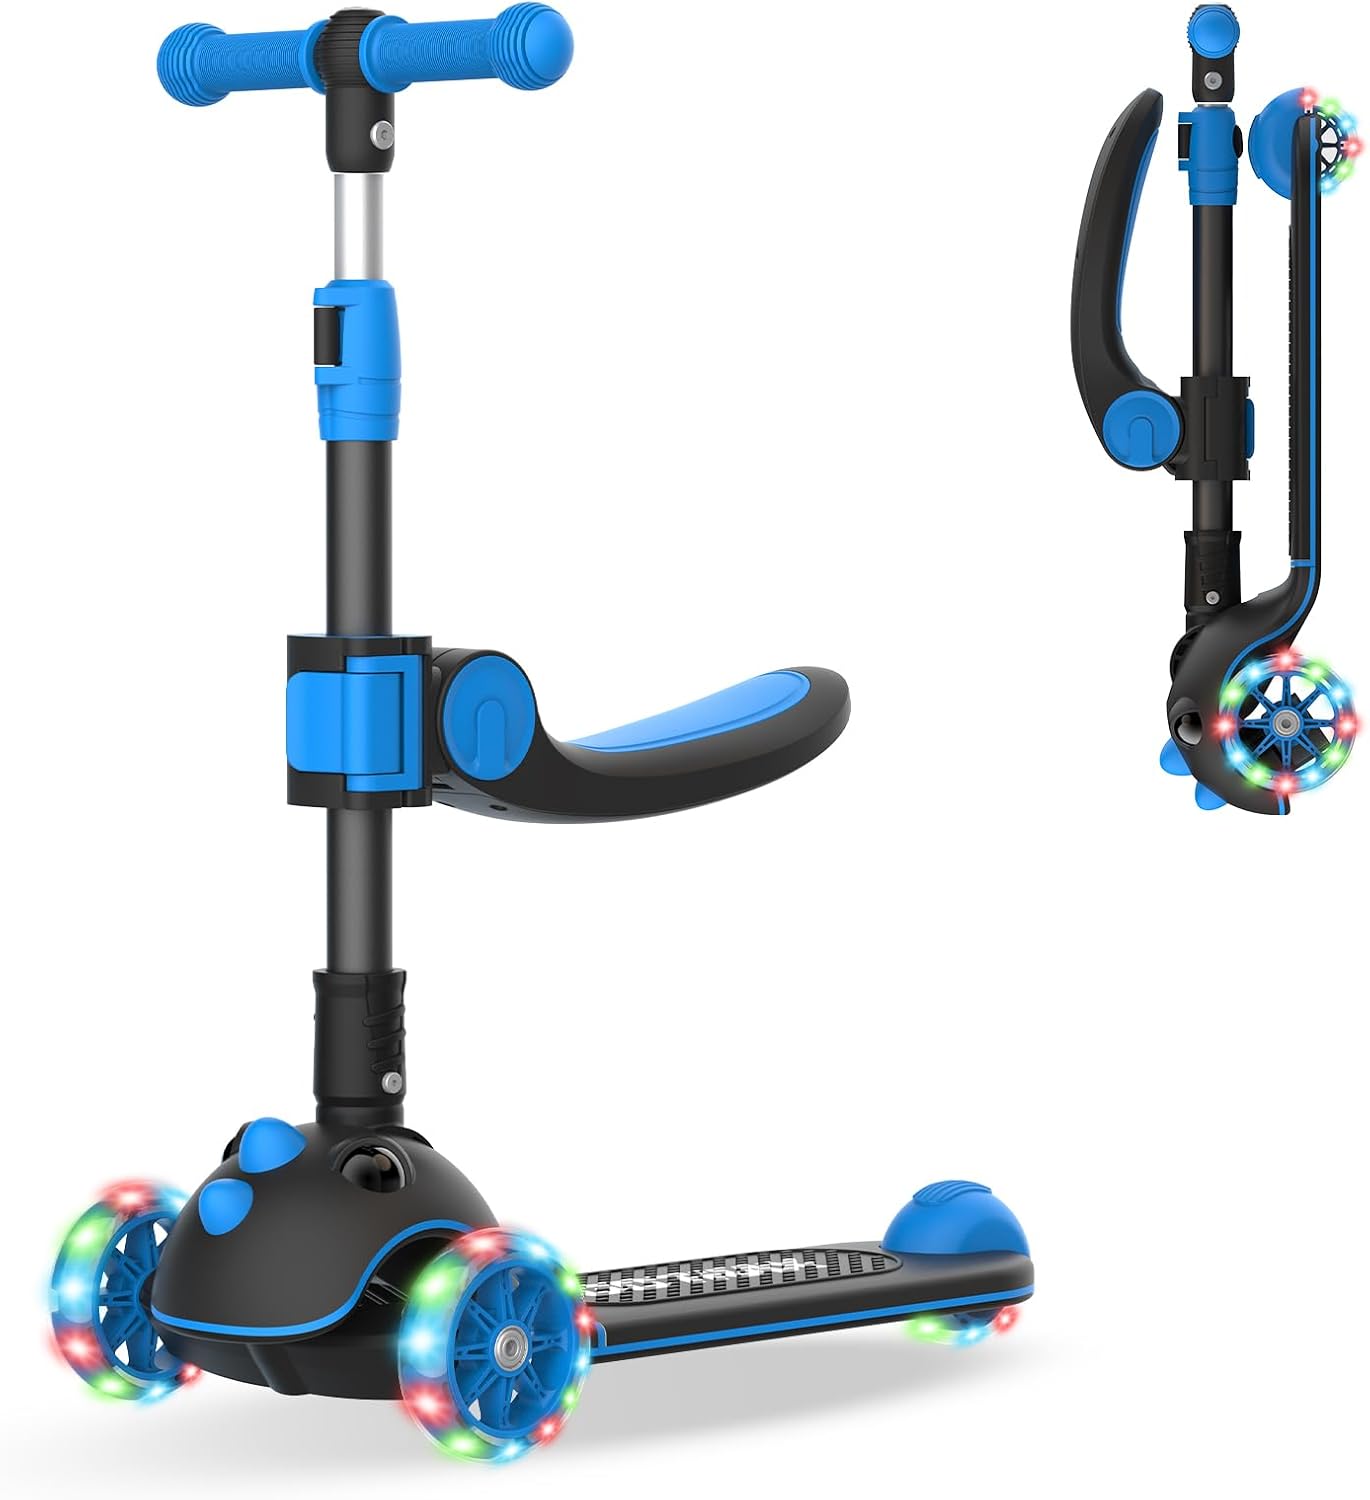
Figure 2.1: Gotrax KS3 Pro Kick Scooter with seat and adjustable handlebar.
Key Features:
- Light-Up Wheels: Three extra-wide PU wheels with LED lights that illuminate during motion.
- Removable Seat: A one-key removable seat allows for sitting or standing modes.
- Adjustable Handlebar: Four height settings (25.5, 27.5, 29.5, 31.5 inches) to accommodate growing children.
- Lean-to-Steer: Steering mechanism that promotes balance and coordination.
- Extra-Wide Anti-Slip Deck: Provides stability and secure footing.
- Wide Foot Brake: Rear brake for steady and controlled stopping.
- Foldable Design: Compact folding mechanism for easy storage and transport.
3. Setup and Assembly
The Gotrax KS3 Pro scooter comes partially assembled. Follow these steps for complete setup:
- Unboxing: Carefully remove all components from the packaging. Ensure all parts listed in the packing list are present.
- Handlebar Installation:
- Insert the handlebar stem into the main body of the scooter until it clicks securely into place.
- Ensure the quick-release clamp is tightened to prevent movement.

Figure 3.1: Handlebar insertion and adjustment.
- Seat Attachment (Optional):
- Align the seat post with the designated slot on the handlebar stem.
- Press the button on the seat post and slide it down until it locks into position.
- To remove, press the button and pull the seat upwards.

Figure 3.2: Attaching and detaching the seat.
- Final Check: Before first use, ensure all connections are secure and the wheels spin freely.
4. Operating Instructions
4.1 Riding the Scooter (Standing Mode)
- Place one foot firmly on the anti-slip deck.
- Use the other foot to push off the ground, gaining momentum.
- To steer, lean your body in the desired direction (Lean-to-Steer technology).
- To stop, press down firmly on the rear foot brake with your heel.
Video 4.1: Official product video demonstrating the Gotrax KS3 Pro Kick Scooter in use, highlighting its features and how children interact with it.
4.2 Riding the Scooter (Sitting Mode)
- Ensure the seat is securely attached and adjusted to a comfortable height.
- Sit on the seat and use your feet to push off the ground, similar to a balance bike.
- Steer by leaning the handlebars and your body.
- To stop, use your feet to slow down or apply the rear foot brake if accessible.
4.3 Adjusting Handlebar Height
- Locate the quick-release clamp on the handlebar stem.
- Open the clamp, then press the button on the stem.
- Adjust the handlebar to one of the four height settings (25.5, 27.5, 29.5, 31.5 inches).
- Ensure the button snaps into a hole, then close the quick-release clamp firmly.
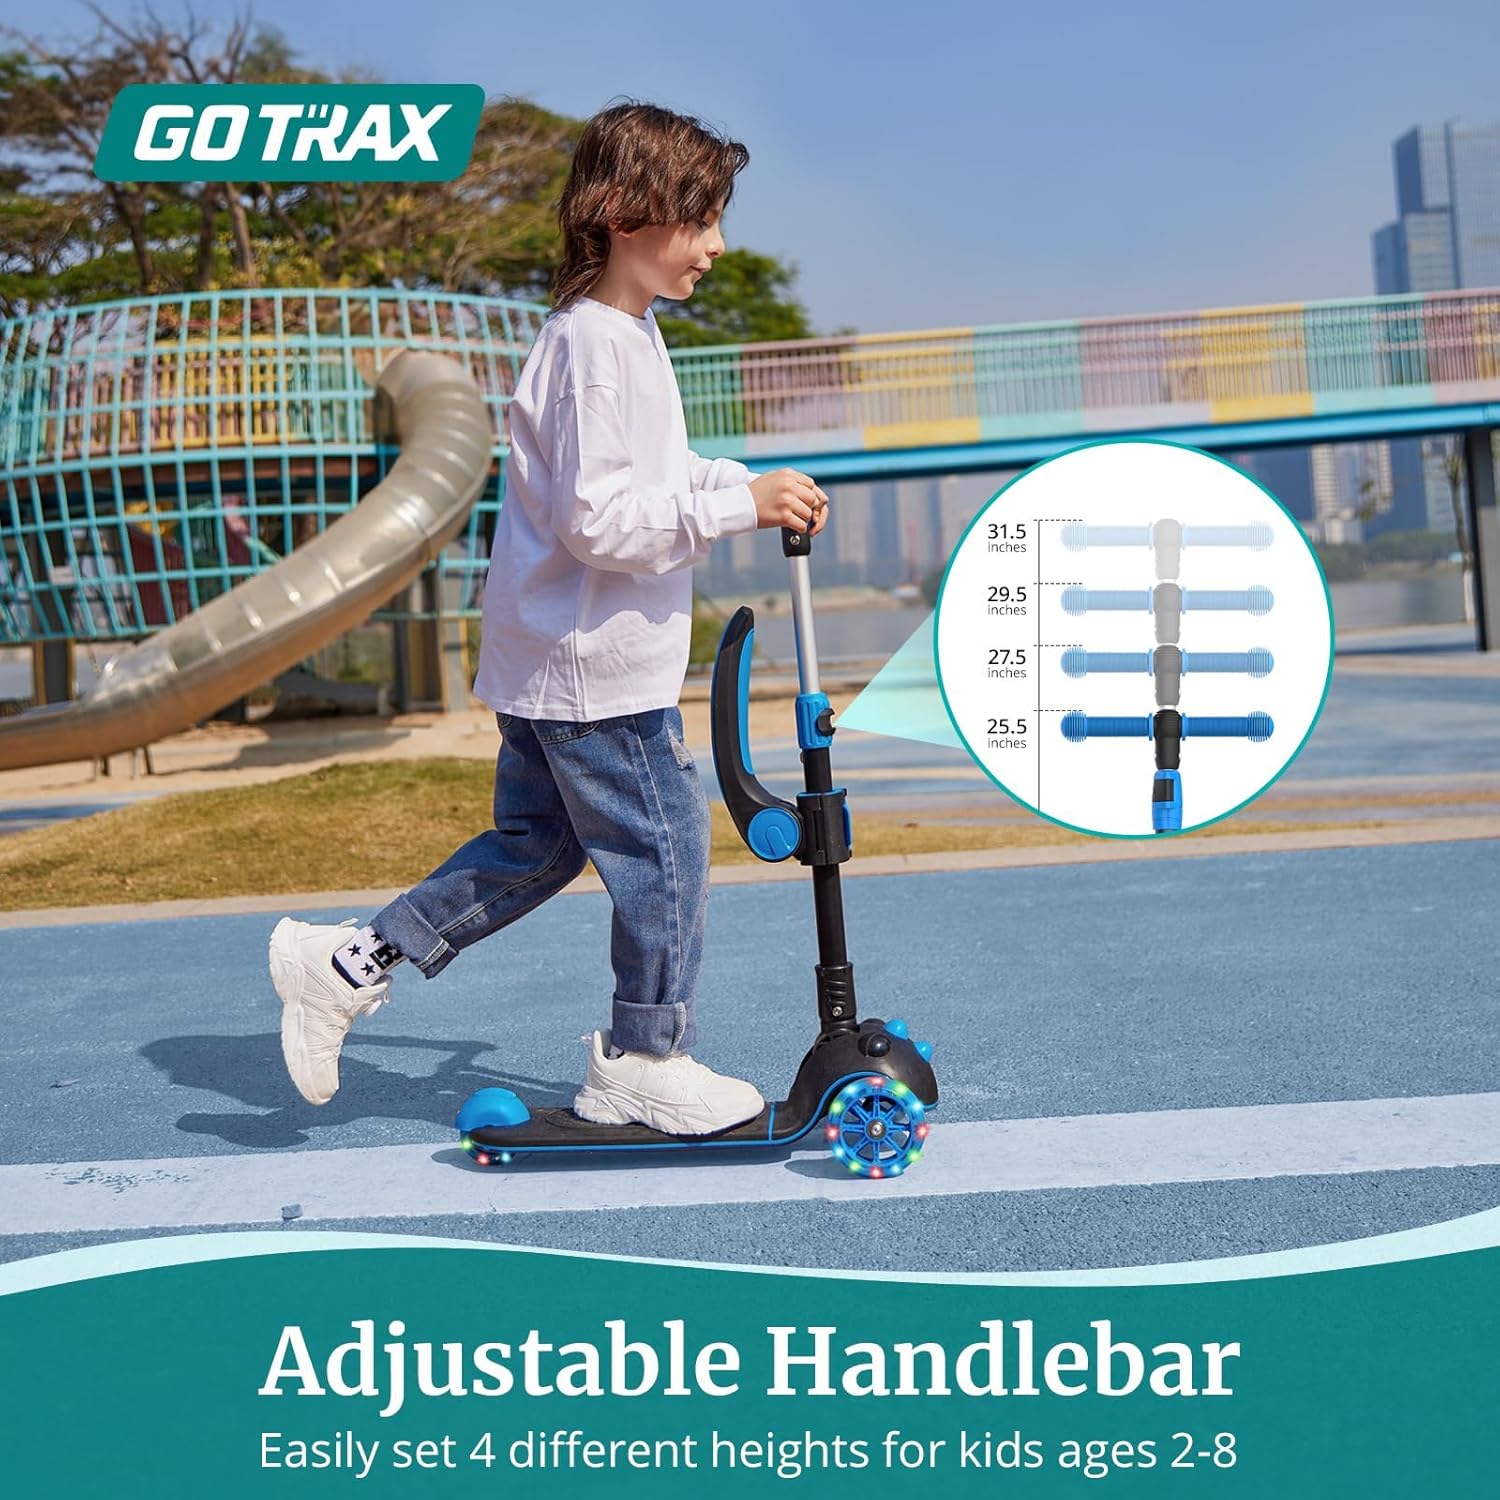
Figure 4.2: Visual guide for adjusting handlebar height.
5. Folding and Portability
The KS3 Pro features a one-step folding mechanism for convenient storage and transport.
- Ensure the seat (if attached) is removed or folded down.
- Locate the folding mechanism at the base of the handlebar stem.
- Pull the release lever/button (refer to product diagram for exact location).
- Fold the handlebar stem down towards the deck until it locks into its folded position.

Figure 5.1: Step-by-step visual for folding the scooter.
6. Maintenance
Regular maintenance ensures the longevity and safe operation of your scooter.
- Cleaning: Wipe the scooter with a damp cloth after each use. Avoid harsh chemicals.
- Wheels: Periodically check the wheels for wear and tear. Replace if significantly worn. Ensure the ABEC-7 bearings are free of debris.
- Brake: Inspect the rear foot brake for proper function and wear.
- Fasteners: Regularly check all screws, bolts, and clamps to ensure they are tight.
- Storage: Store the scooter in a dry, cool place away from direct sunlight and moisture.
7. Troubleshooting
| Problem | Possible Cause | Solution |
|---|---|---|
| Wheels not lighting up. | Insufficient speed or worn-out internal generator. | Ensure sufficient speed for light activation. If still not working, contact customer support. |
| Handlebar is loose. | Quick-release clamp not tightened or stem not fully engaged. | Ensure handlebar stem is fully inserted and the quick-release clamp is securely closed. |
| Brake not effective. | Worn brake pad or debris. | Check brake pad for wear. Clean any debris from the brake area. |
8. Specifications
| Feature | Detail |
|---|---|
| Brand | Gotrax |
| Model Name | KS3PRO |
| Age Range | Kids aged 2+ |
| Weight Limit | 110 Pounds (50 kg) |
| Product Dimensions (LxWxH) | 23" x 11" x 29" (approximate, varies with handlebar height) |
| Number of Wheels | 3 |
| Wheel Material | Polyurethane (PU) |
| Wheel Size | Front: 5 inches, Rear: 3 inches |
| Frame Material | Aluminum |
| Item Weight | 9 Pounds (4.08 kg) |
| Handlebar Type | Adjustable (4 heights: 25.5/27.5/29.5/31.5 inches) |
| Brake Style | Rear Braking |

Figure 8.1: Key dimensions and weight information.
9. Warranty and Support
Gotrax offers a 1-year manufacturer's warranty on the KS3 Pro Folding Kick Scooter, ensuring quality and durability.
For any questions, concerns, or warranty claims, please contact Gotrax customer service. Refer to the official Gotrax website or your purchase documentation for the most current contact information.
Online Support: Visit the official Gotrax Store for FAQs and support resources: Gotrax Store
