
1. Introduction
This manual provides essential instructions for the assembly, operation, and maintenance of your MCombo HTS401 Power Recliner Chair. Please read this manual thoroughly before use to ensure proper function and safety. Keep this manual for future reference.

Image 1.1: MCombo HTS401 Power Recliner Chair (Blue Faux Leather)
2. Safety Information
Observe the following safety guidelines to prevent injury or damage to the product:
- Do not exceed the maximum weight capacity of 350 lbs.
- Ensure the chair is stable and fully assembled before use.
- Keep children and pets away from the chair when it is in operation to avoid entanglement with moving parts.
- Avoid placing hands or feet near the reclining mechanism during adjustment.
- Only use the provided power adapter. Do not use damaged cords or plugs.
- Unplug the chair from the power outlet before cleaning or maintenance.
3. Package Contents
Your MCombo HTS401 Power Recliner Chair is typically shipped in three boxes. Verify that all components are present before beginning assembly.
- Backrest Section
- Seat Base Section (with armrests and footrest mechanism)
- Power Adapter and Cable
- Instruction Manual
4. Setup and Assembly
Assembly of the MCombo HTS401 Power Recliner Chair is designed to be tool-free and typically takes approximately 15 minutes.
4.1 Assembly Steps
- Carefully unpack all components from the boxes.
- Place the seat base section in the desired location, ensuring a wall clearance of at least 7.5 inches for full recline.
- Align the backrest section with the mounting brackets on the seat base. Slide the backrest down firmly until it locks into place. You should hear an audible click.
- Connect the power cables from the backrest to the seat base, ensuring all connections are secure.
- Connect the power adapter to the chair and then plug it into a wall outlet.
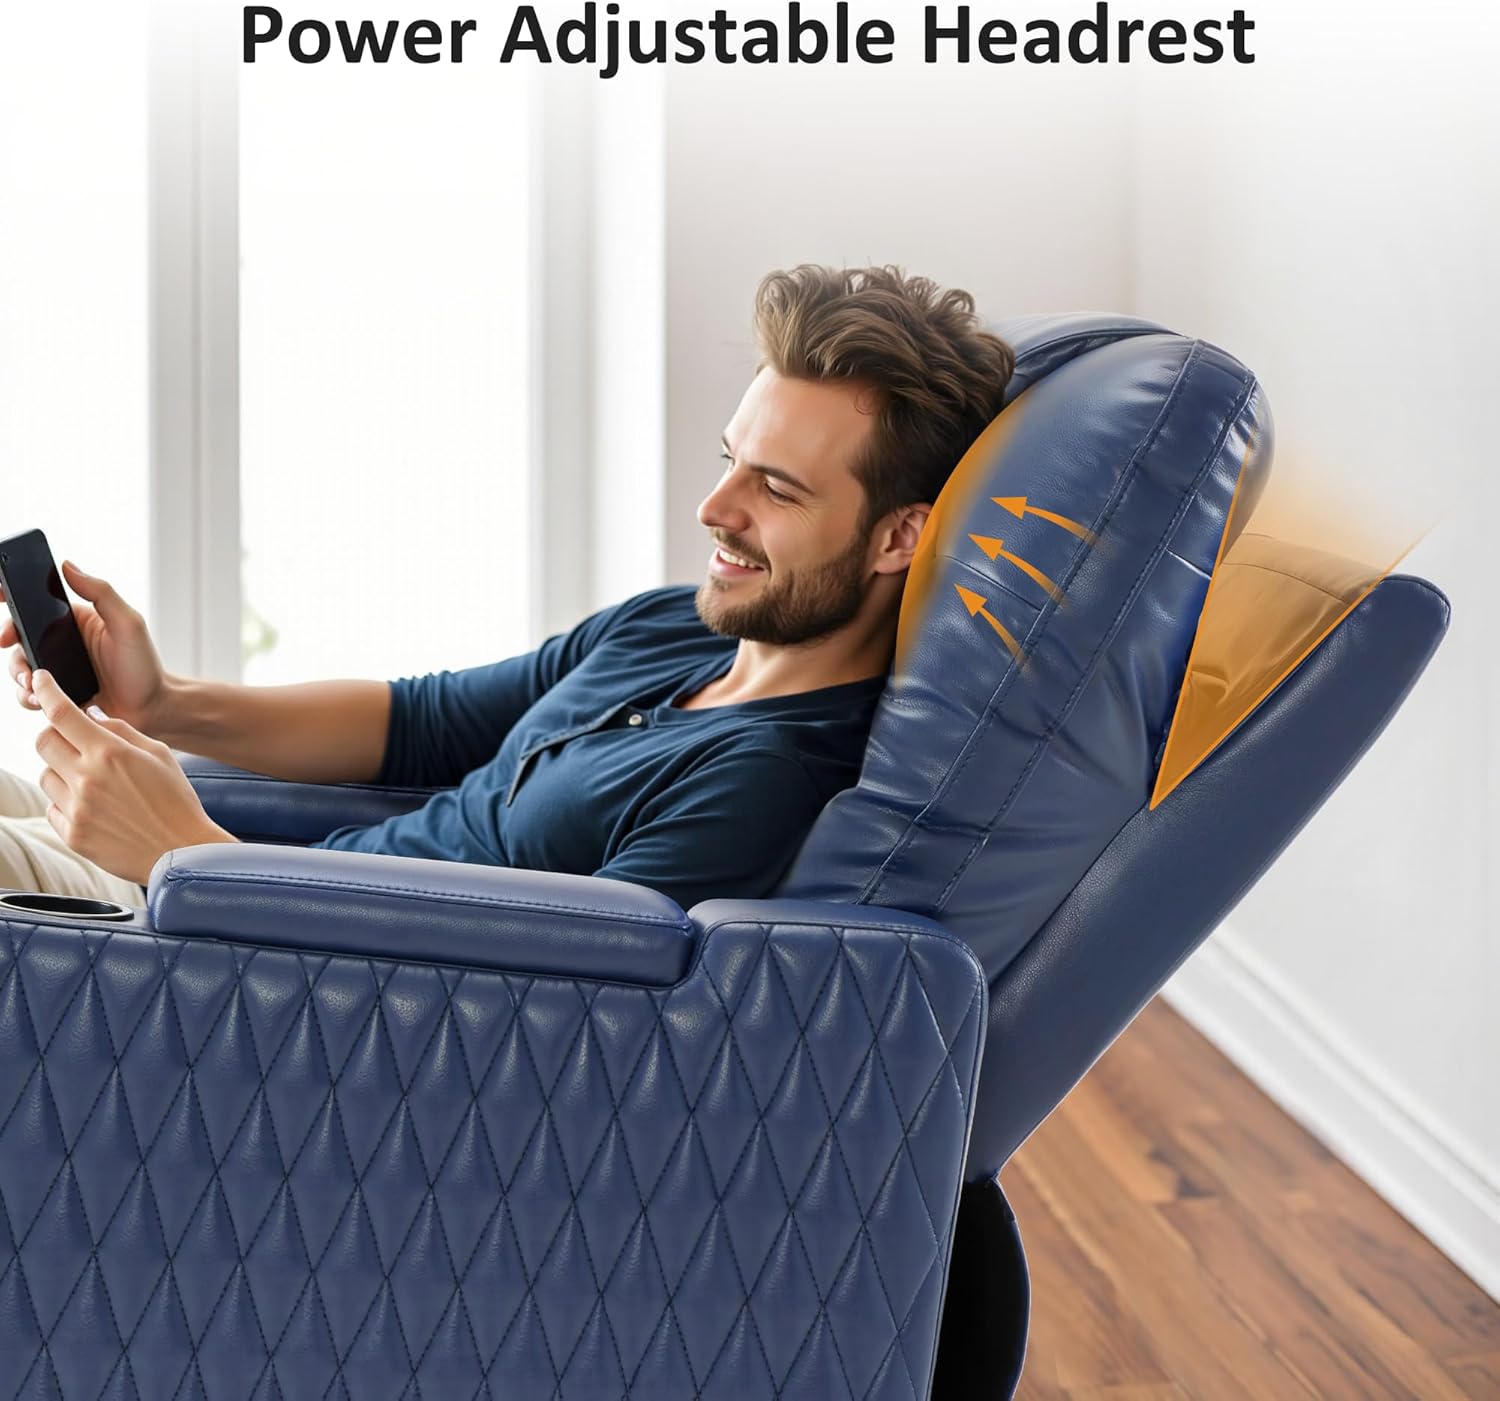
Image 4.1: Recliner Assembly Diagram
For a visual guide, a 60-second assembly video is available from the manufacturer. (Note: Specific video URL not provided in data.)
5. Operating Instructions
The MCombo HTS401 Power Recliner Chair features integrated controls for ease of use.
5.1 Control Panel Overview
The control buttons are located on the right armrest of the chair.

Image 5.1: Multiple Function Button Control Panel
- Button 1 (Headrest): Adjusts the power headrest position.
- Button 2 (Reclining): Adjusts the backrest and footrest angle (116° to 155°).
- Button 3 (Home Button): Returns the backrest, footrest, and headrest to the original upright position in approximately 9 seconds.
- Button 4 (LED): Controls the under-chair LED light.
- Ports 5 (Type-C & USB): Provides dual charging ports for electronic devices.
5.2 Reclining and Headrest Adjustment
Use Button 2 to recline the chair to your desired position. The footrest will extend as the chair reclines. Use Button 1 to adjust the headrest independently for optimal neck and head support, especially when viewing screens.

Image 5.2: Power Adjustable Headrest in use
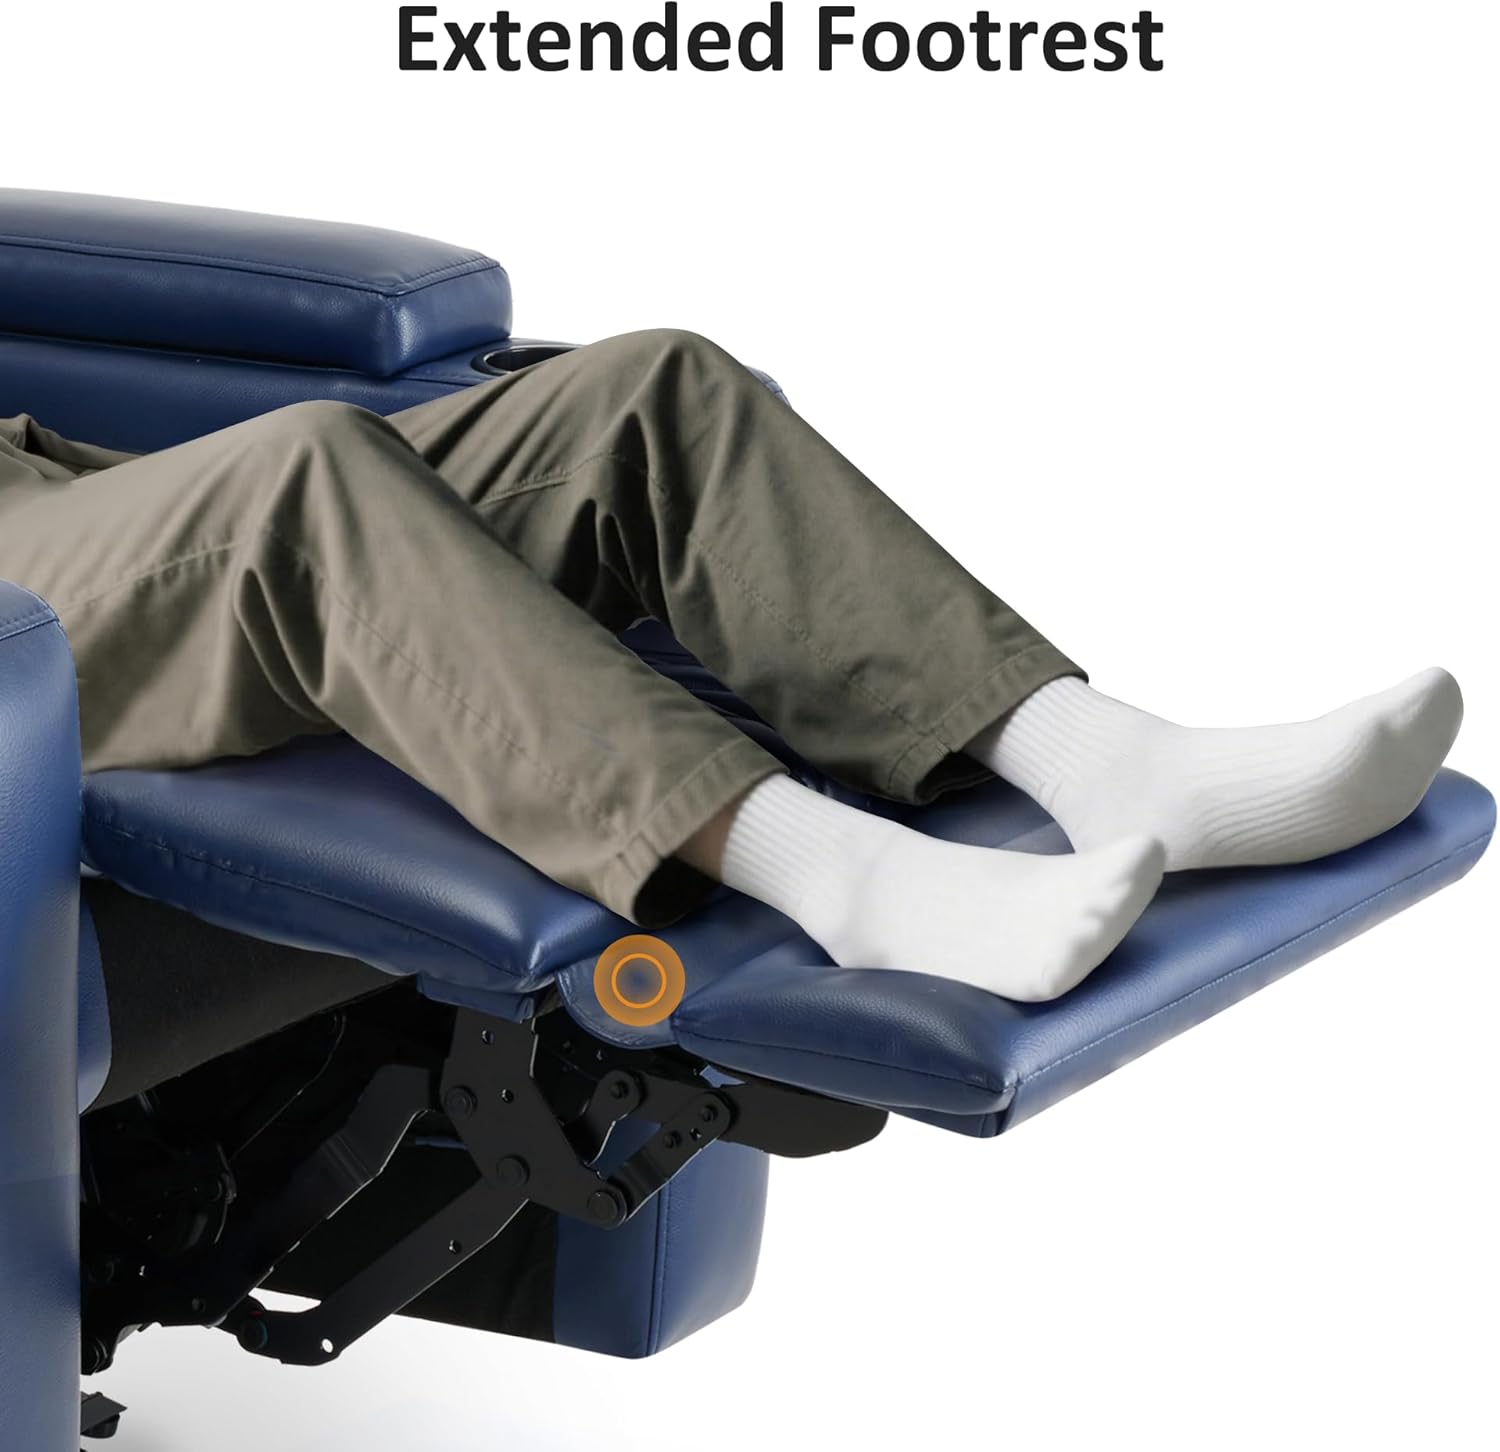
Image 5.3: Extended Footrest
5.3 Zero Gravity Position
The chair is designed to achieve a zero-gravity position, which can be found within the 116°-155° recline range. Adjust the backrest and footrest using Button 2 until you find a comfortable, weightless sensation.
5.4 Armrest Storage and Cup Holders
The armrests feature integrated storage compartments and dual cup holders for convenience.
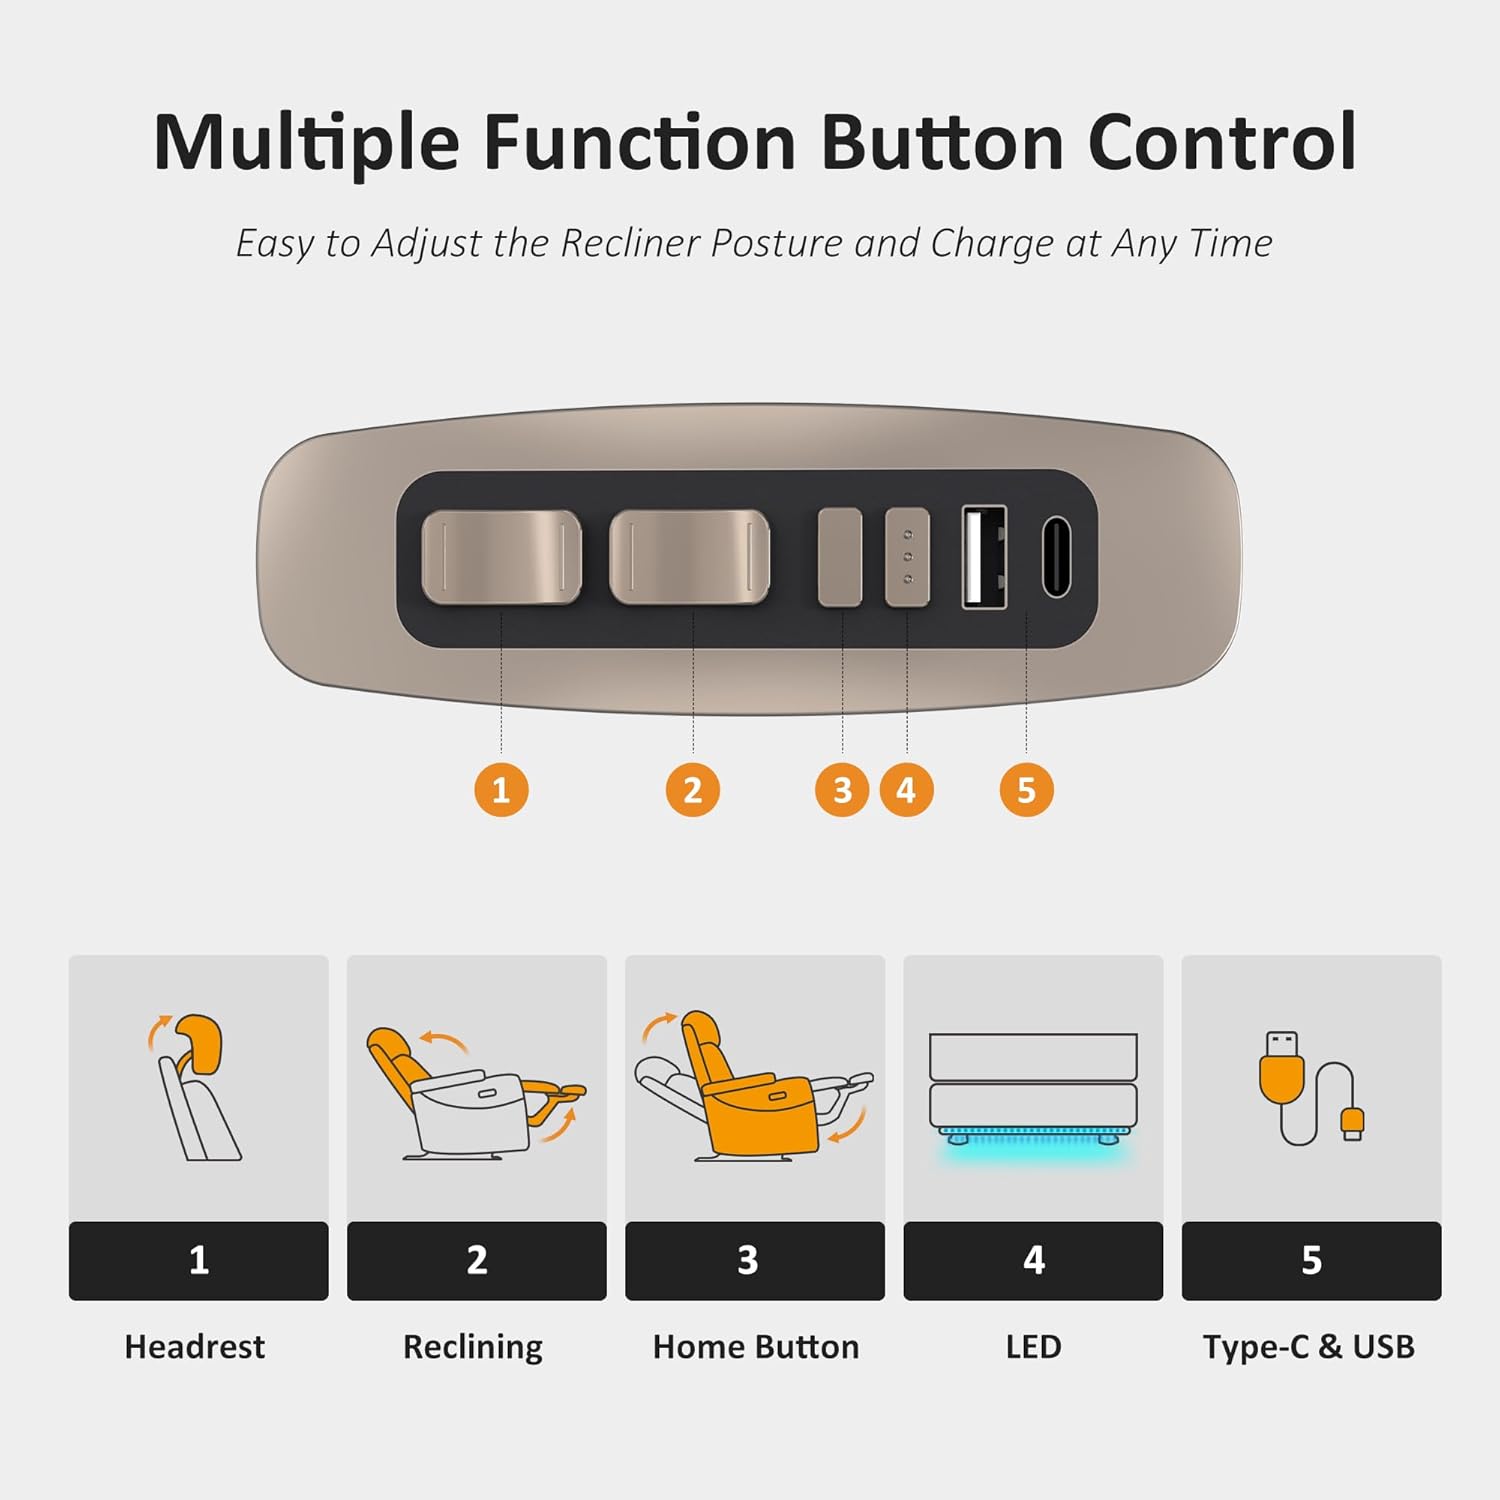
Image 5.4: Armrest Storage
6. Maintenance
Regular maintenance helps prolong the life and appearance of your recliner.
- Cleaning Faux Leather: Wipe with a soft, damp cloth. For stubborn stains, use a mild soap solution and wipe dry immediately. Avoid harsh chemicals or abrasive cleaners.
- Electrical Components: Ensure all cables are securely connected and free from damage. Do not attempt to repair electrical components yourself.
- Moving Parts: Periodically check the reclining mechanism for any loose fasteners. Tighten if necessary. Avoid obstructing the mechanism.
7. Troubleshooting
If you encounter issues with your recliner, refer to the following common solutions:
| Problem | Possible Cause | Solution |
|---|---|---|
| Chair does not recline/power on. | Power cable disconnected or not plugged in. | Check all power connections, including the wall outlet. Ensure the power adapter is functioning. |
| Reclining mechanism is noisy or stiff. | Mechanism needs lubrication or has loose fasteners. | Apply silicone-based lubricant to moving joints. Check and tighten any loose bolts. |
| Headrest does not adjust. | Headrest cable disconnected or motor issue. | Verify the headrest cable connection. If the issue persists, contact customer support. |
8. Specifications
| Feature | Detail |
|---|---|
| Brand | MCombo |
| Model Name | 6160-HTS401 |
| Product Dimensions (Overall) | 40.2"(W) x 39"(D) x 45.3"(H) |
| Recommended Height | 5'-6' |
| Maximum Weight Capacity | 350 lbs |
| Reclining Angle Range | 116° - 155° |
| Wall Clearance Required | 7.5 inches |
| Upholstery Material | Faux Leather |
| Charging Ports | USB & Type-C |
| Special Features | Power Recline, Power Adjustable Headrest, LED Light, Armrest Storage, Cup Holders |

Image 8.1: Product Dimensions and Recline Positions
9. Warranty Information
The MCombo HTS401 Power Recliner Chair comes with a 2-Year Limited Warranty. This warranty covers:
- Reclining Mechanism
- Electrical Parts
- Upholstery Material
- Cushions
- Wood and Metal Frame
Please retain your proof of purchase for warranty claims. For detailed terms and conditions, refer to the warranty card included with your product or contact MCombo customer support.
10. Customer Support
For any questions, assistance, or warranty claims, please contact MCombo customer support through the retailer where you purchased the product or visit the official MCombo website for contact information.


