Introduction
This manual provides detailed instructions for the safe installation, operation, and maintenance of your hykolity 52-inch ceiling fan with integrated LED light and remote control. Please read all instructions carefully before beginning installation and retain this manual for future reference.
Safety Information
- Always disconnect power at the circuit breaker before installation or servicing.
- Ensure all electrical connections comply with local codes and ordinances, as well as the National Electrical Code (NEC).
- Consult a qualified electrician if you are unfamiliar with electrical wiring.
- The mounting structure must be capable of supporting the weight of the fan (approximately 7.7 lbs).
- Do not bend the blade holders during installation or cleaning.
- Keep hands clear of the fan blades when the fan is operating.
- This fan is designed for indoor use only.
Package Contents
Verify that all components are present before beginning installation:
- Ceiling Fan Motor Housing
- 3 Reversible Fan Blades
- LED Light Kit
- Remote Control with Wall Mount
- Receiver for Remote Control
- 2 Downrods (5-inch and 12-inch)
- Mounting Bracket
- Hardware Pack (screws, wire nuts, washers)
- Instruction Manual
Setup and Installation
Follow these steps for proper installation. Professional installation is recommended if you are unsure about any steps.
1. Mounting Options
The fan supports both downrod and flush mount installations, and can be installed on standard flat ceilings or sloped ceilings up to 15 degrees.

Figure 1: Fan Dimensions and Mounting Options. The diagram illustrates the fan's 52-inch diameter, 13.4-inch height for flush mount, and 20-inch height with a downrod. It also shows options for flat and sloped ceiling mounts.
2. Assembling the Fan
- Attach the mounting bracket to the ceiling junction box.
- Select the desired downrod (5-inch or 12-inch) and secure it to the motor housing.
- Carefully lift the fan assembly and hang it from the mounting bracket.
- Connect the electrical wiring according to the wiring diagram provided in the full manual (not included here). Ensure all connections are secure.
- Attach the fan blades to the motor housing. The blades are reversible with black on one side and walnut on the other. Choose the finish that matches your decor.
- Install the LED light kit to the bottom of the fan.
Operating Instructions
Your hykolity ceiling fan is controlled by the included remote control.
Remote Control Functions
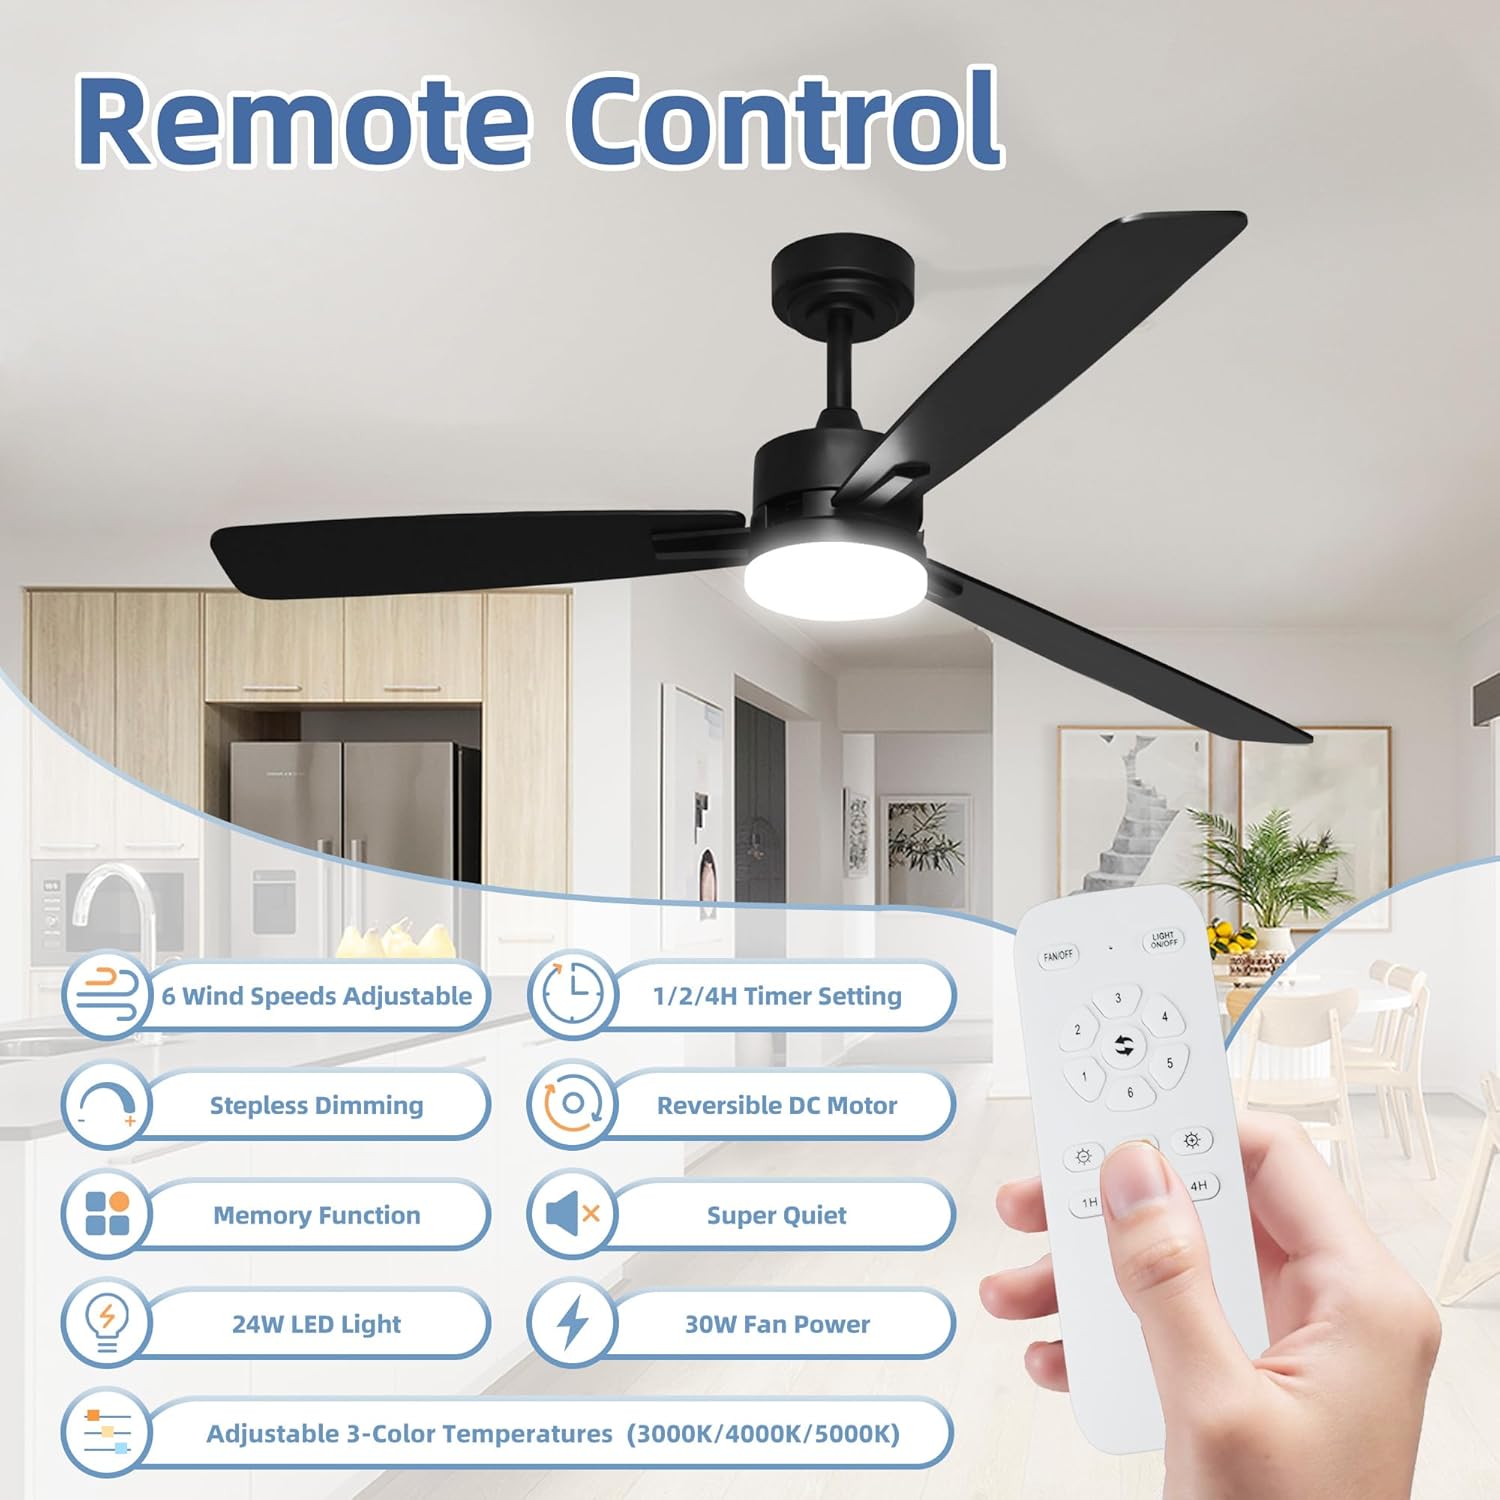
Figure 2: Remote Control Layout. The remote features buttons for power, fan speed adjustment (1-6), light on/off, light dimming, color temperature selection, timer settings (1H, 2H, 4H), and fan direction reversal.
- Fan ON/OFF: Press the power button to turn the fan on or off.
- Fan Speed: Use the speed buttons (1-6) to adjust the fan's airflow. Level 1 is a gentle breeze, and Level 6 provides maximum airflow (4200 CFM).

Figure 3: Fan Speed Settings. The fan offers 6 adjustable wind speeds, powered by an energy-efficient DC motor, providing airflow up to 4200 CFM.
- Light Control: Press the light button to turn the LED light on or off.
- Light Dimming: Hold the light button to adjust the brightness of the 24W LED light (1660 LM) from 10% to 100%.
- Color Temperature: Press the CCT button to cycle through 3 color temperatures: 3000K (Warm Light), 4000K (Natural White), and 5000K (White Light).

Figure 4: Customizable Light Settings. The integrated LED light offers dimmable brightness and three adjustable color temperatures (3000K, 4000K, 5000K) to suit various moods and activities.
- Timer Function: Set the fan to turn off automatically after 1, 2, or 4 hours using the respective timer buttons.
- Reversible DC Motor: Press the reverse button to switch between forward (summer) and reverse (winter) rotation.

Figure 5: Reversible DC Motor. The fan's reversible motor allows for downdraft mode in summer to create a cooling breeze and updraft mode in winter to circulate warm air.
- Memory Function: The fan and light retain your last settings (speed, brightness, color temperature) after being turned off and on again.
Quiet Operation
The fan's DC motor is engineered for quiet operation, typically below 30 dB, making it suitable for bedrooms, nurseries, and offices.
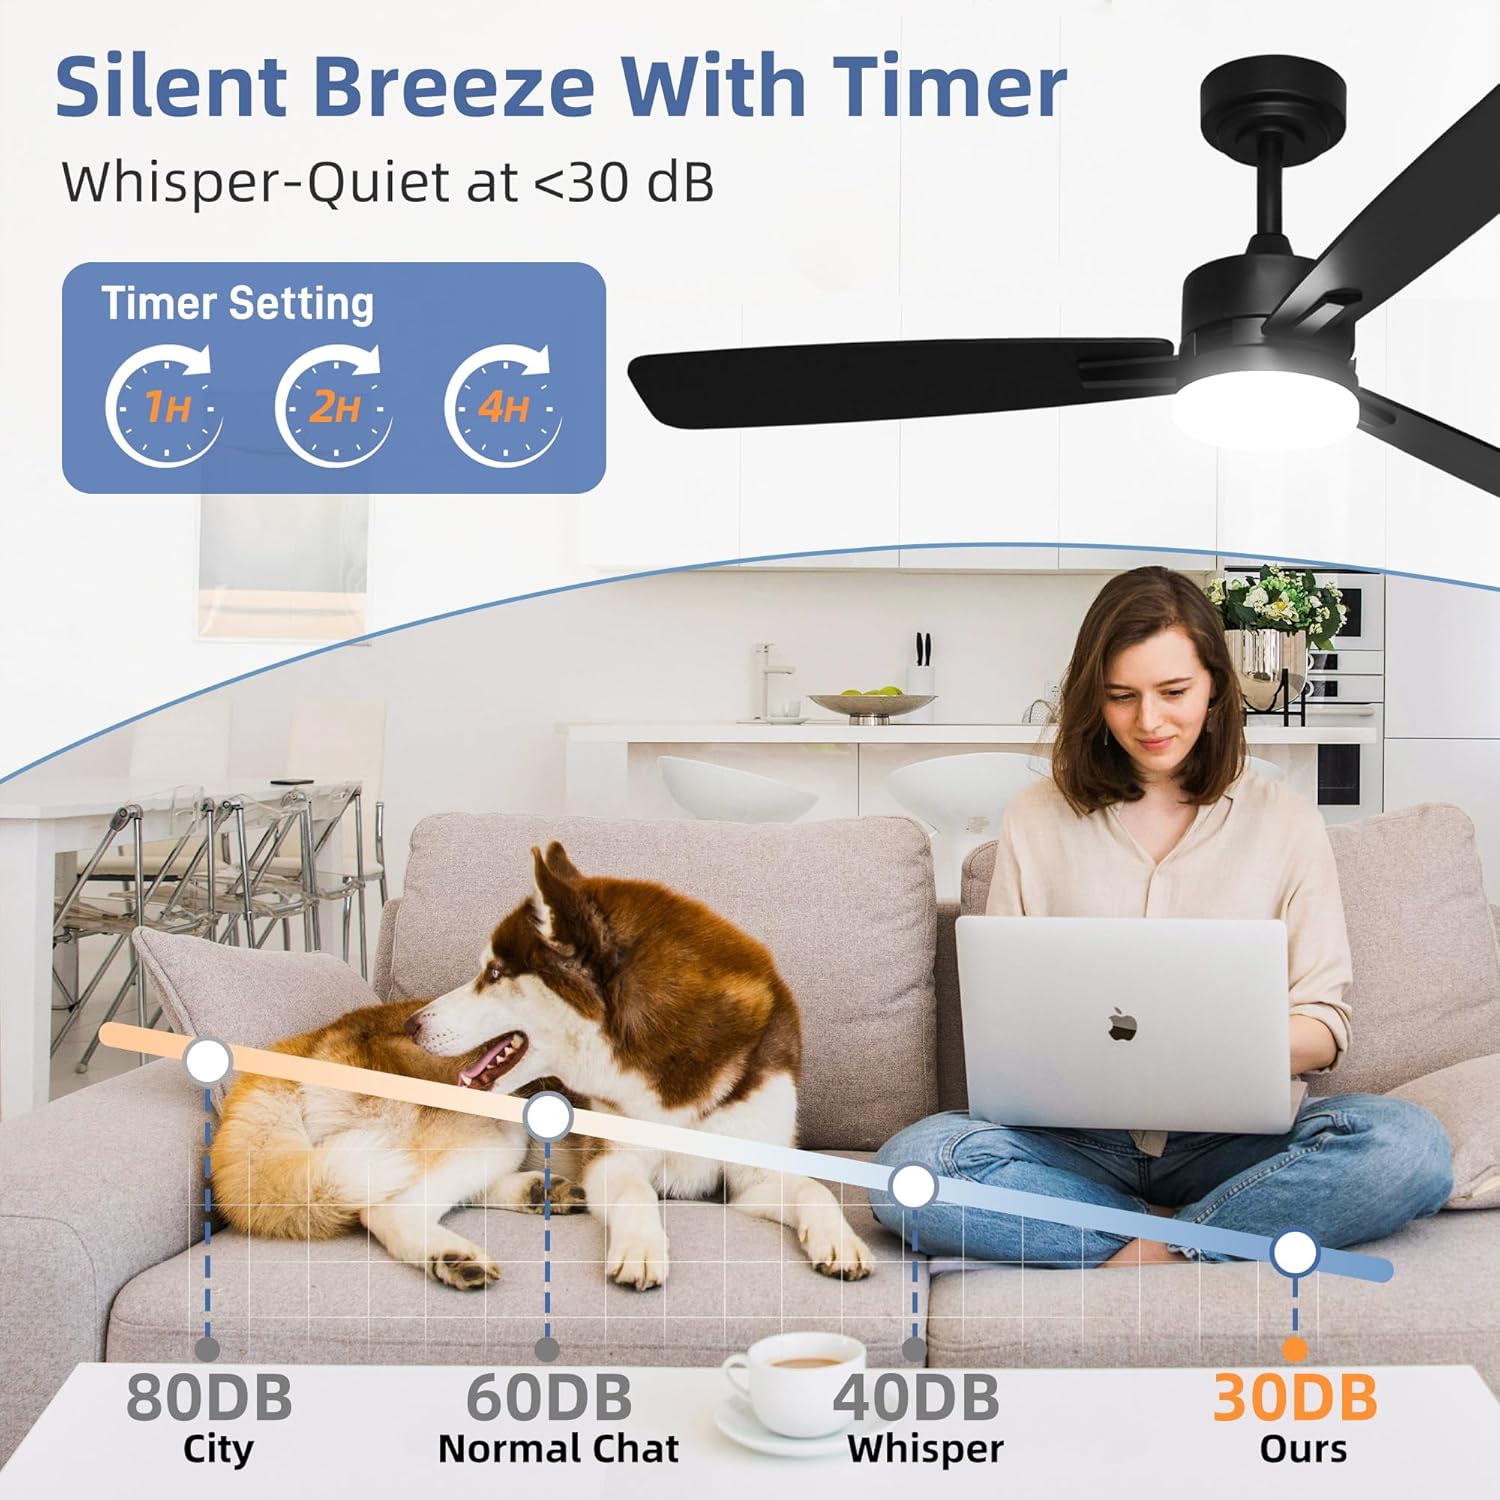
Figure 6: Silent Breeze with Timer. The fan operates at a whisper-quiet level, typically below 30 dB, ensuring a peaceful environment, especially when using the timer function.
Maintenance
Regular maintenance ensures optimal performance and longevity of your ceiling fan.
- Cleaning: To clean the fan, wipe with a soft, damp cloth. Do not use abrasive cleaners or solvents, as these may damage the finish.
- Blade Cleaning: Dust the fan blades regularly to prevent dust buildup, which can affect balance and airflow.
- Tightening Screws: Periodically check all screws for tightness, especially those securing the fan blades and mounting bracket.
- Light Kit: The LED light source is integrated and not user-serviceable. Do not attempt to replace individual LEDs.
Troubleshooting
| Problem | Possible Cause | Solution |
|---|---|---|
| Fan does not start | No power to the fan; Loose wire connections; Remote control battery low. | Check circuit breaker; Verify all wire connections are secure; Replace remote control batteries. |
| Fan wobbles | Loose blade screws; Unbalanced blades; Loose mounting bracket. | Tighten all blade screws; Ensure blades are balanced (balancing kit may be needed); Secure mounting bracket. |
| Light does not work | Loose wire connection to light kit; Faulty LED driver. | Check light kit wiring; Contact customer support if LED driver is suspected. |
| Remote control not working | Low or dead batteries; Remote not paired with receiver. | Replace batteries; Refer to the full manual for remote pairing instructions. |
Specifications
- Model Name: CFB-1984
- Brand: hykolity
- Size: 52 inches
- Color: Black
- Number of Blades: 3
- Motor Type: DC Motor
- Air Flow Capacity: 4200 CFM
- Noise Level: < 30 Decibels
- Wattage: 30 watts
- Voltage: 120 Volts
- Light Type: Integrated LED
- Light Wattage: 24W (1660 LM)
- Color Temperature: 3000K/4000K/5000K (Dimmable)
- Control Method: Remote Control
- Number of Power Levels: 6 (Fan Speeds)
- Timer Settings: 1H/2H/4H
- Downrod Lengths: 5 inches, 12 inches
- Installation Type: Downrod & Flush Mount
- Indoor/Outdoor Usage: Indoor
- Item Weight: 7.7 Pounds
- Product Dimensions: 44"D x 44"W x 12"H (Flush Mount) / 44"D x 44"W x 20"H (with 12" Downrod)
- Certification: ETL
Warranty and Support
Your hykolity ceiling fan is backed by a 3-year manufacturer warranty. This warranty covers defects in materials and workmanship under normal use.
For technical assistance, troubleshooting, or warranty claims, please contact hykolity customer support. Contact information can typically be found on the product packaging or the official hykolity website.


