1. Introduction
The oneisall CW16018 Pet Grooming Vacuum is designed to simplify pet grooming by effectively removing loose hair and dander directly into a vacuum canister. This system helps maintain a clean home environment by capturing up to 99% of shed pet hair. It features a powerful 12000Pa suction, operates with low noise, and includes a 1.5-liter dust cup for extended use. The kit comes with four specialized grooming tools to address various pet grooming needs.
2. Product Overview
The oneisall CW16018 system consists of the main vacuum unit, a flexible hose, and a set of interchangeable grooming tools. Familiarize yourself with each component before use.

Figure 2.1: The oneisall CW16018 Pet Grooming Vacuum, showcasing the main unit, hose, and all included grooming attachments.
Included Components:
- Main Vacuum Unit: Houses the motor, dust cup, and control panel.
- Flexible Hose: Connects the grooming tools to the vacuum unit.
- Slicker Brush: Designed for general grooming, removing loose hair and tangles.
- Deshedding Brush: Effective for removing undercoat and reducing shedding.
- Crevice Tool: For cleaning pet hair from tight spaces, sofas, and corners.
- Cleaning Brush: For general cleaning of surfaces and clothing.
- Storage Bag: For convenient storage of tools.
3. Setup
- Unpack Components: Carefully remove all items from the packaging.
- Connect Hose: Insert one end of the flexible hose securely into the suction port on the main vacuum unit. Ensure it clicks into place or is firmly attached to prevent air leaks.
- Attach Grooming Tool: Select the desired grooming tool (e.g., Slicker Brush) and attach it to the other end of the flexible hose. Ensure a secure connection.
- Power Connection: Plug the power cord into a suitable electrical outlet.
4. Operating Instructions
4.1 General Operation
- Power On: Press the power button on the main unit to turn on the vacuum.
- Adjust Suction Level: The unit features three adjustable suction levels. Start with the lowest setting, especially for pets new to grooming vacuums, to allow them to acclimate to the sound and sensation. Gradually increase the suction as needed and as your pet becomes comfortable. The operating noise level is typically below 60dB.
- Grooming: Gently brush your pet's coat with the attached tool. The vacuum will draw loose hair directly into the dust cup, preventing it from scattering.
- Power Off: After grooming, press the power button to turn off the vacuum.
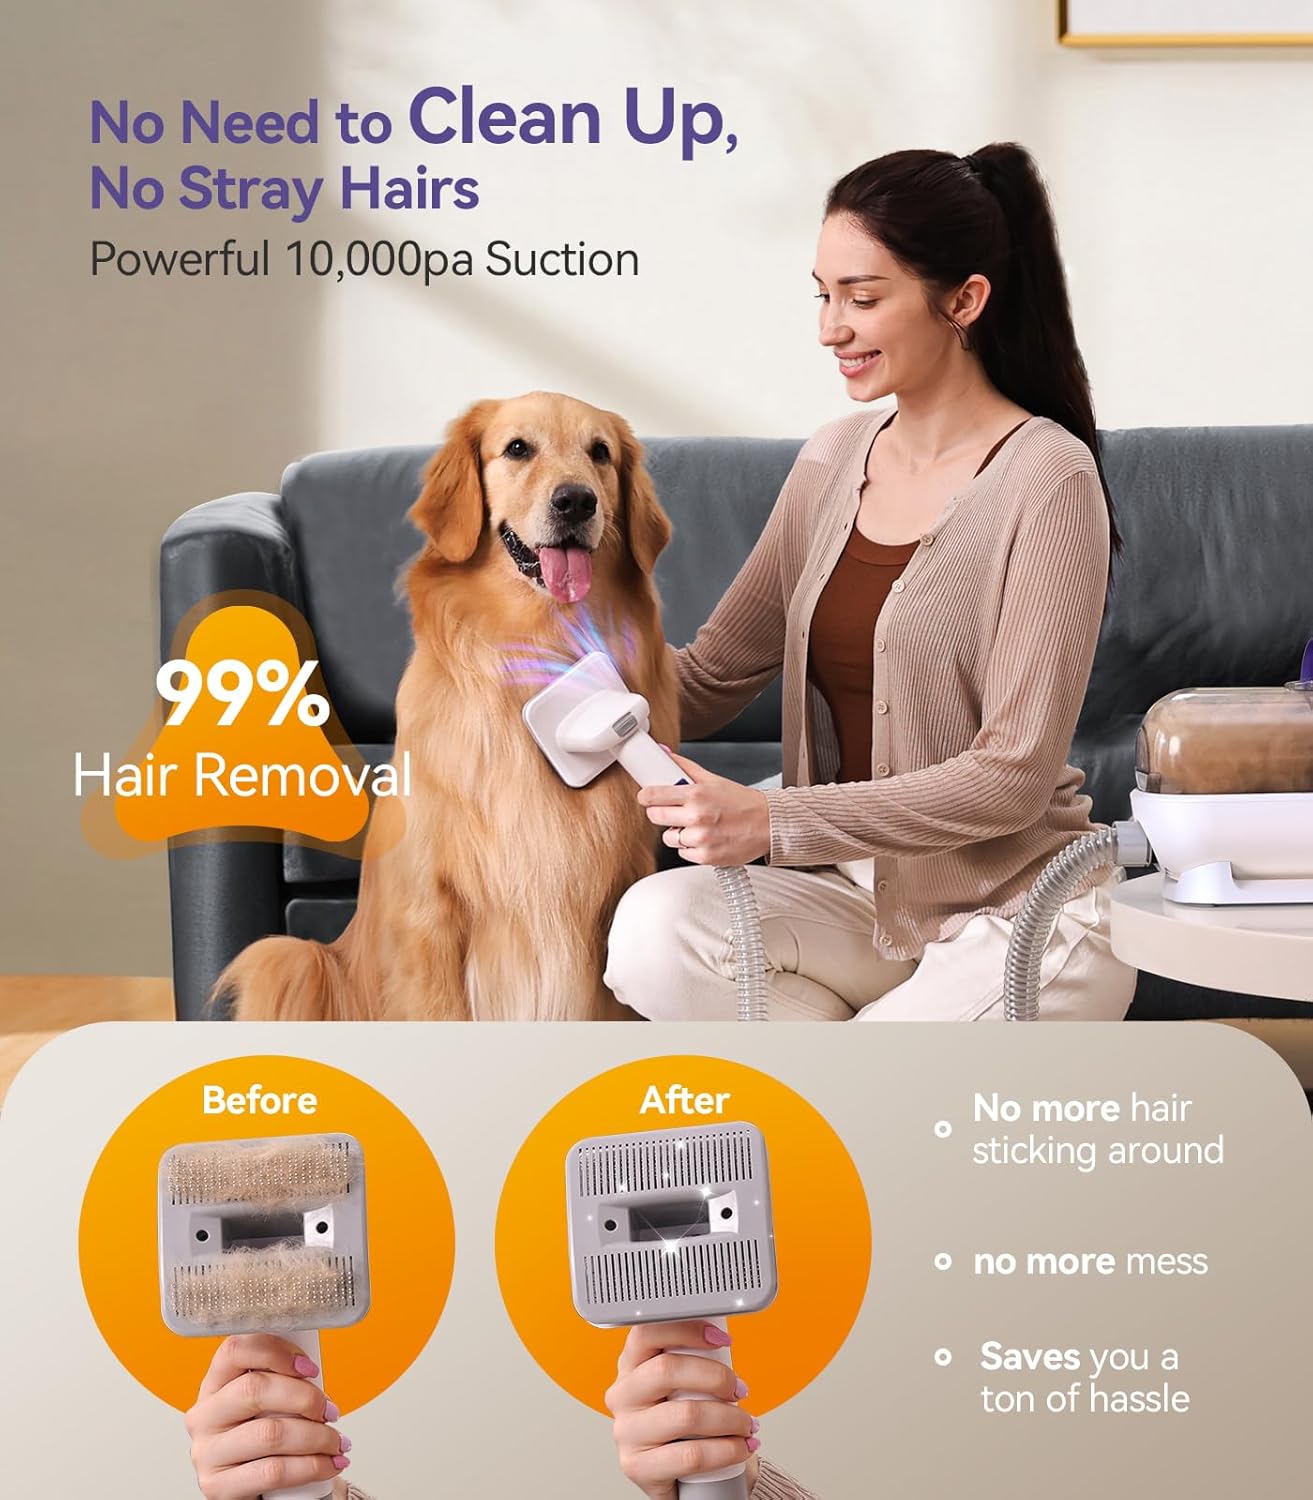
Figure 4.1: Demonstrating effective hair removal during grooming, capturing 99% of loose pet hair.
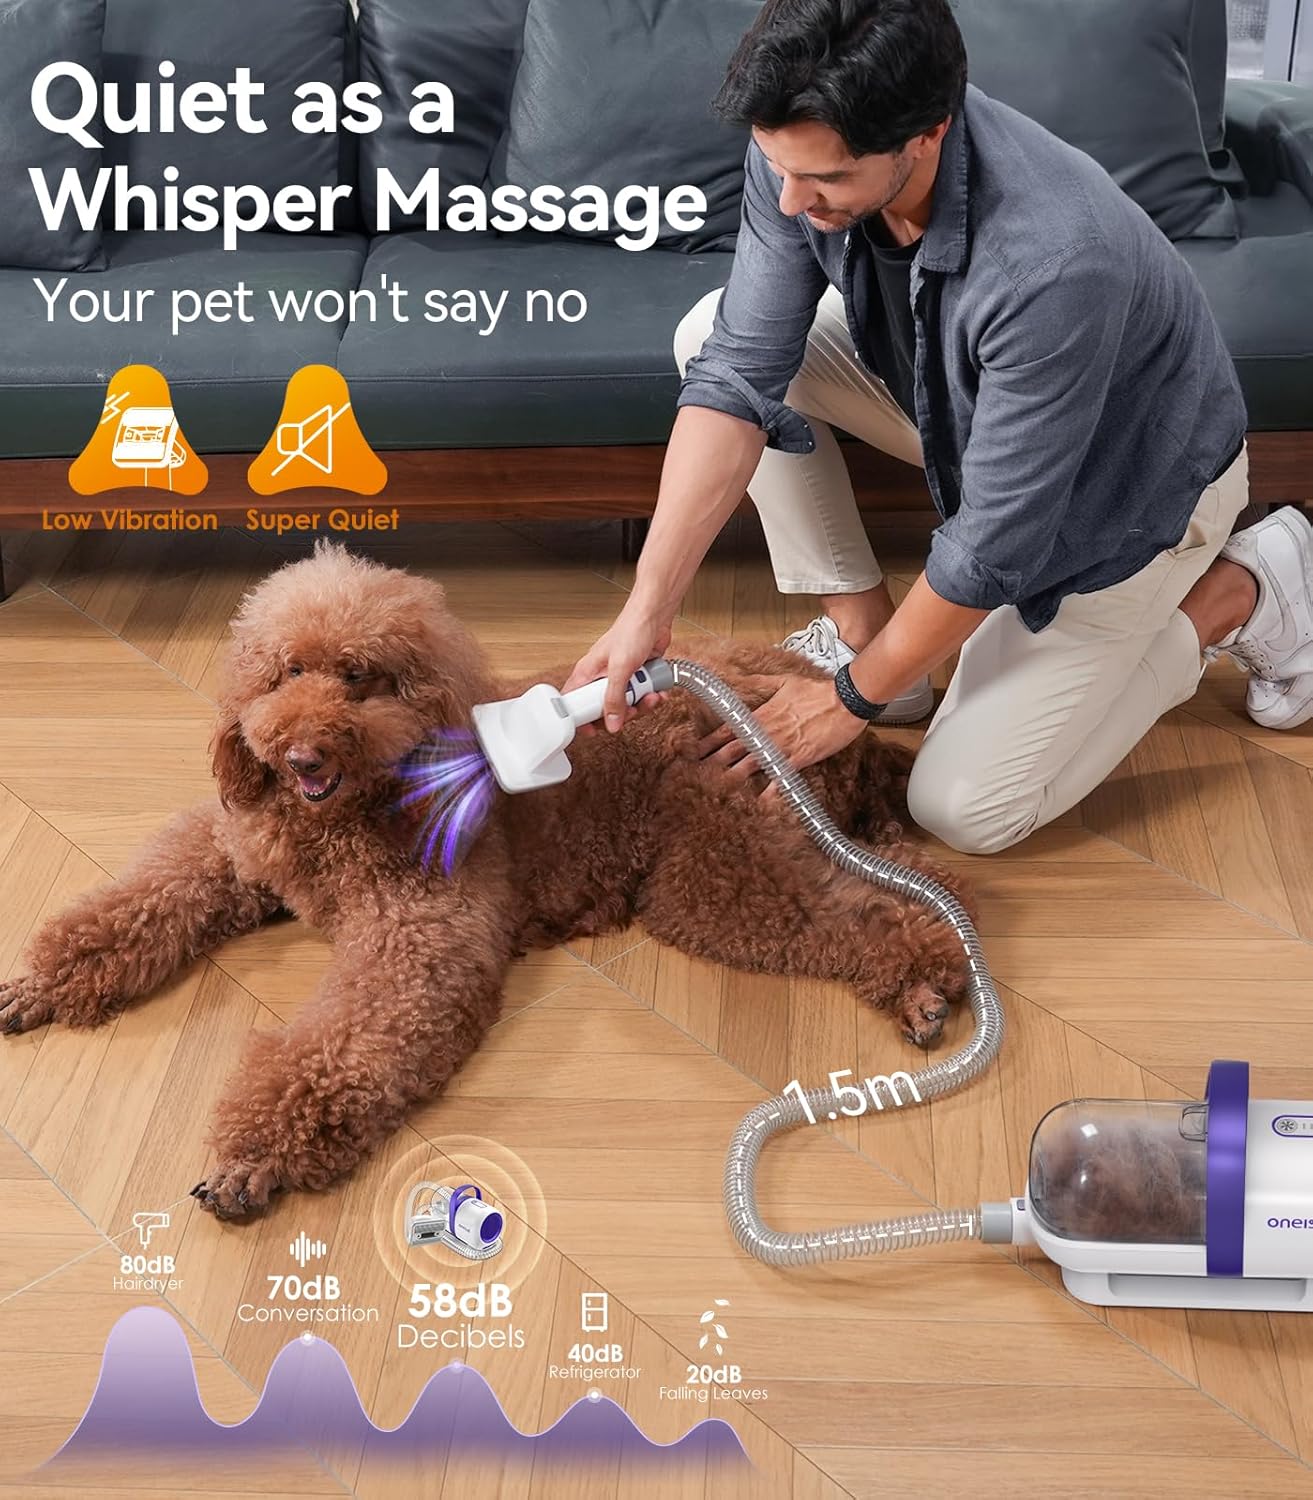
Figure 4.2: The pet grooming vacuum operating quietly, designed to minimize stress for pets.
4.2 Using Specific Tools
- Slicker Brush: Use for daily brushing to remove loose surface hair and detangle the coat. Press the button on the brush head to retract bristles for easy hair removal.
- Deshedding Brush: Ideal for pets with undercoats. Use gentle, long strokes in the direction of hair growth to remove excess undercoat.
- Crevice Tool: Attach this tool to clean pet hair from upholstery, car seats, and hard-to-reach areas.
- Cleaning Brush: Use this tool to remove pet hair from carpets, rugs, and clothing.

Figure 4.3: Illustrating the effectiveness of the various grooming and cleaning tools included with the vacuum.
5. Maintenance
5.1 Emptying the Dust Cup
The 1.5L dust cup should be emptied regularly, especially after each grooming session, to maintain optimal suction performance.
- Disconnect Power: Ensure the vacuum is turned off and unplugged before emptying.
- Remove Dust Cup: Detach the dust cup from the main unit.
- Empty Contents: Open the dust cup and dispose of the collected pet hair and debris into a waste bin.
- Reattach Dust Cup: Securely reattach the empty dust cup to the main unit.
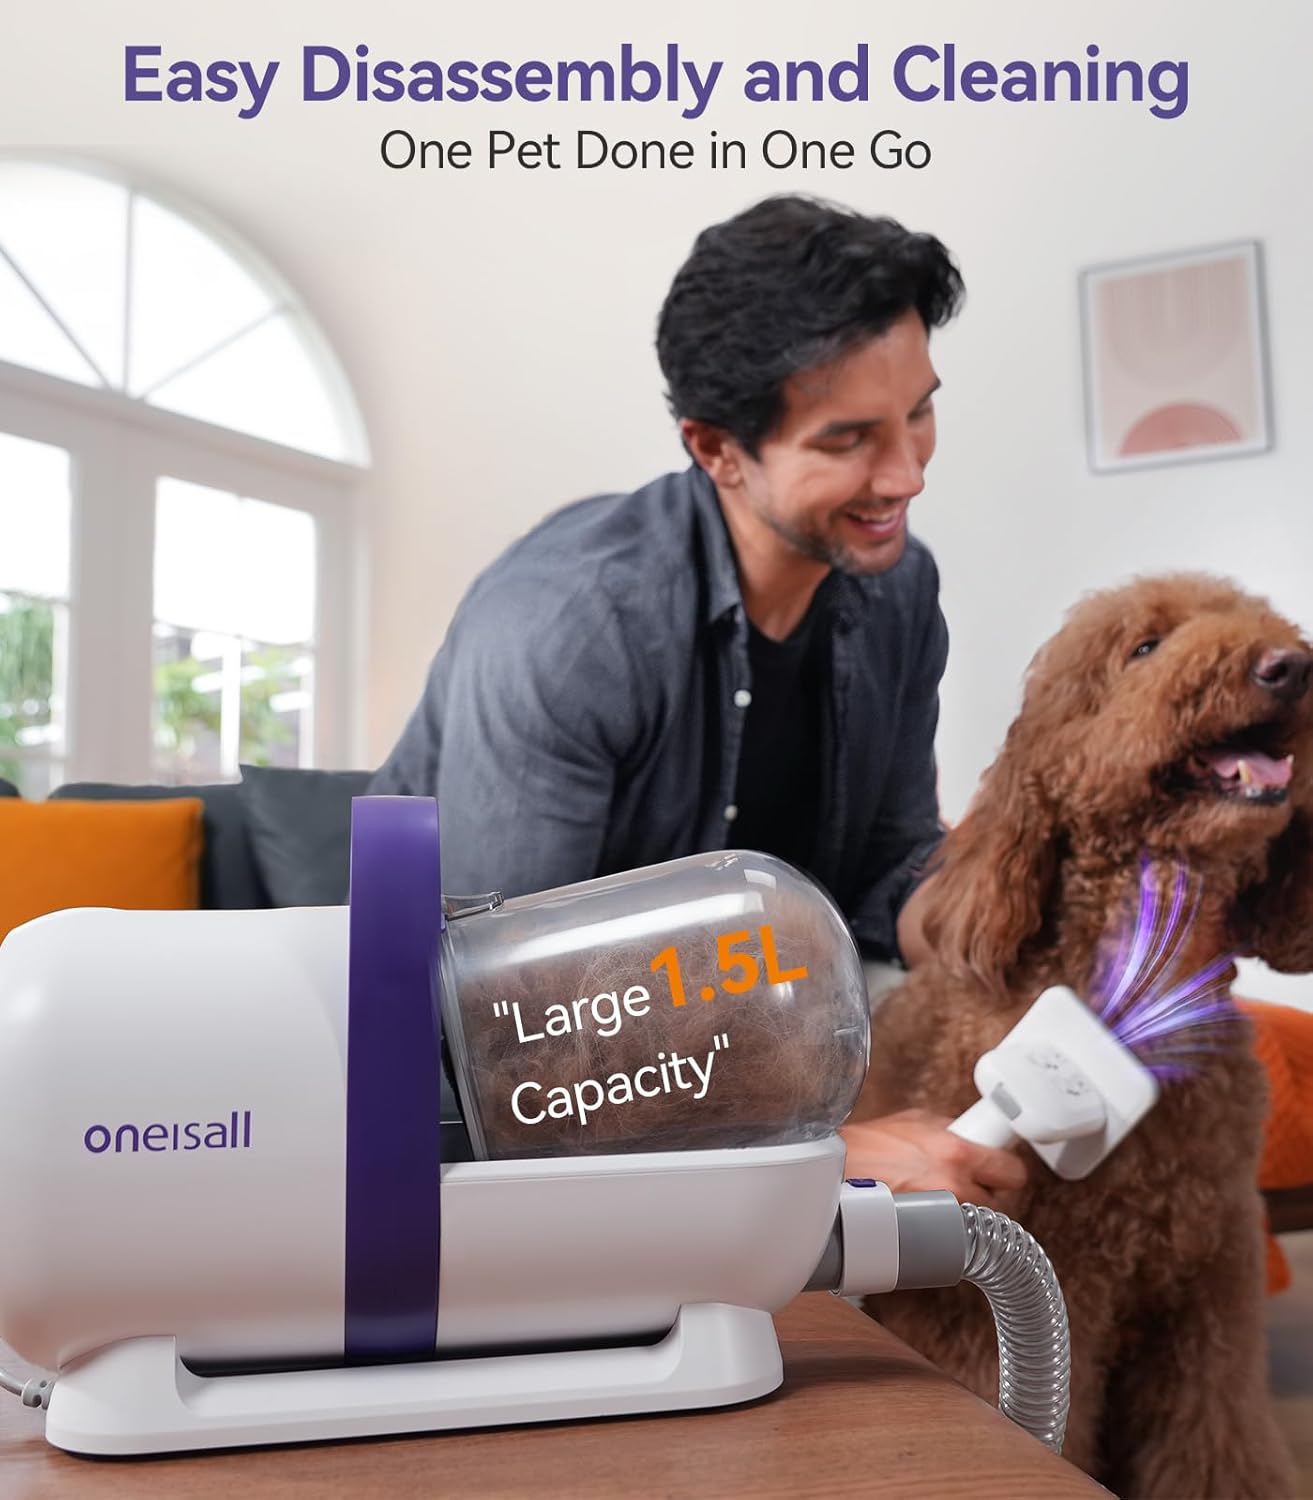
Figure 5.1: The large 1.5L dust cup is designed for easy removal and emptying.

Figure 5.2: Easy emptying of the collected pet hair from the dust cup.
5.2 Filter Cleaning
The vacuum includes filters that require periodic cleaning to maintain performance and prevent odors. It is recommended to wash the sponge filter after each use.
- Access Filters: After removing the dust cup, locate the filters inside the unit.
- Clean Filters: Gently remove the filters. Tap them to dislodge loose debris. For thorough cleaning, wash the sponge filter with mild soap and water. Rinse thoroughly.
- Dry Filters: Allow all filters to air dry completely before reinserting them into the vacuum. Do not use the vacuum with wet filters.
- Reassemble: Place the dry filters back into their positions and reattach the dust cup.
6. Troubleshooting
| Problem | Possible Cause | Solution |
|---|---|---|
| Low Suction Power |
|
|
| Vacuum Not Turning On |
|
|
| Excessive Noise |
|
|
7. Specifications

Figure 7.1: Key specifications of the oneisall CW16018 Pet Grooming Vacuum.
| Feature | Detail |
|---|---|
| Model Number | CW16018 |
| Brand | oneisall |
| Suction Power | 12000 Pa |
| Dust Cup Capacity | 1.5 Liters |
| Noise Level | Less than 60 dB |
| Hose Length | 1.5 meters (5.2 ft) |
| Product Weight | 3.6 Kilograms (9.11 pounds) |
| Package Dimensions | 41.3 x 29.5 x 19.2 cm |
| Material | Alloy Steel, Plastic (handle), Stainless Steel (bristles) |
8. Warranty and Support
The oneisall CW16018 Pet Grooming Vacuum comes with a 2-year warranty. For technical support, warranty claims, or any questions regarding your product, please contact oneisall customer service. Refer to the product packaging or the official oneisall website for contact information.
Note: Please retain your proof of purchase for warranty purposes.


