Introduction
Thank you for choosing the VIGO Greenwich VG02029MGS Kitchen Faucet. This manual provides detailed instructions for the proper installation, operation, and maintenance of your new faucet. Please read all instructions carefully before installation and retain this manual for future reference.
Safety Information
- Always turn off the main water supply before beginning any installation or repair work.
- Wear appropriate personal protective equipment, such as safety glasses and gloves, during installation.
- Ensure all local plumbing and building codes are met.
- If you are unsure about any part of the installation process, consult a qualified plumber.
- This product requires 2 AA batteries for the touchless sensor functionality (batteries not included).
Package Contents
Verify that all components are present before beginning installation:
- VIGO Greenwich Kitchen Faucet Assembly
- All Mounting Hardware
- Hot and Cold Water Supply Lines (PEX)
- Sprayer Head
- Weight for Pull-Down Hose
- Instruction Manual
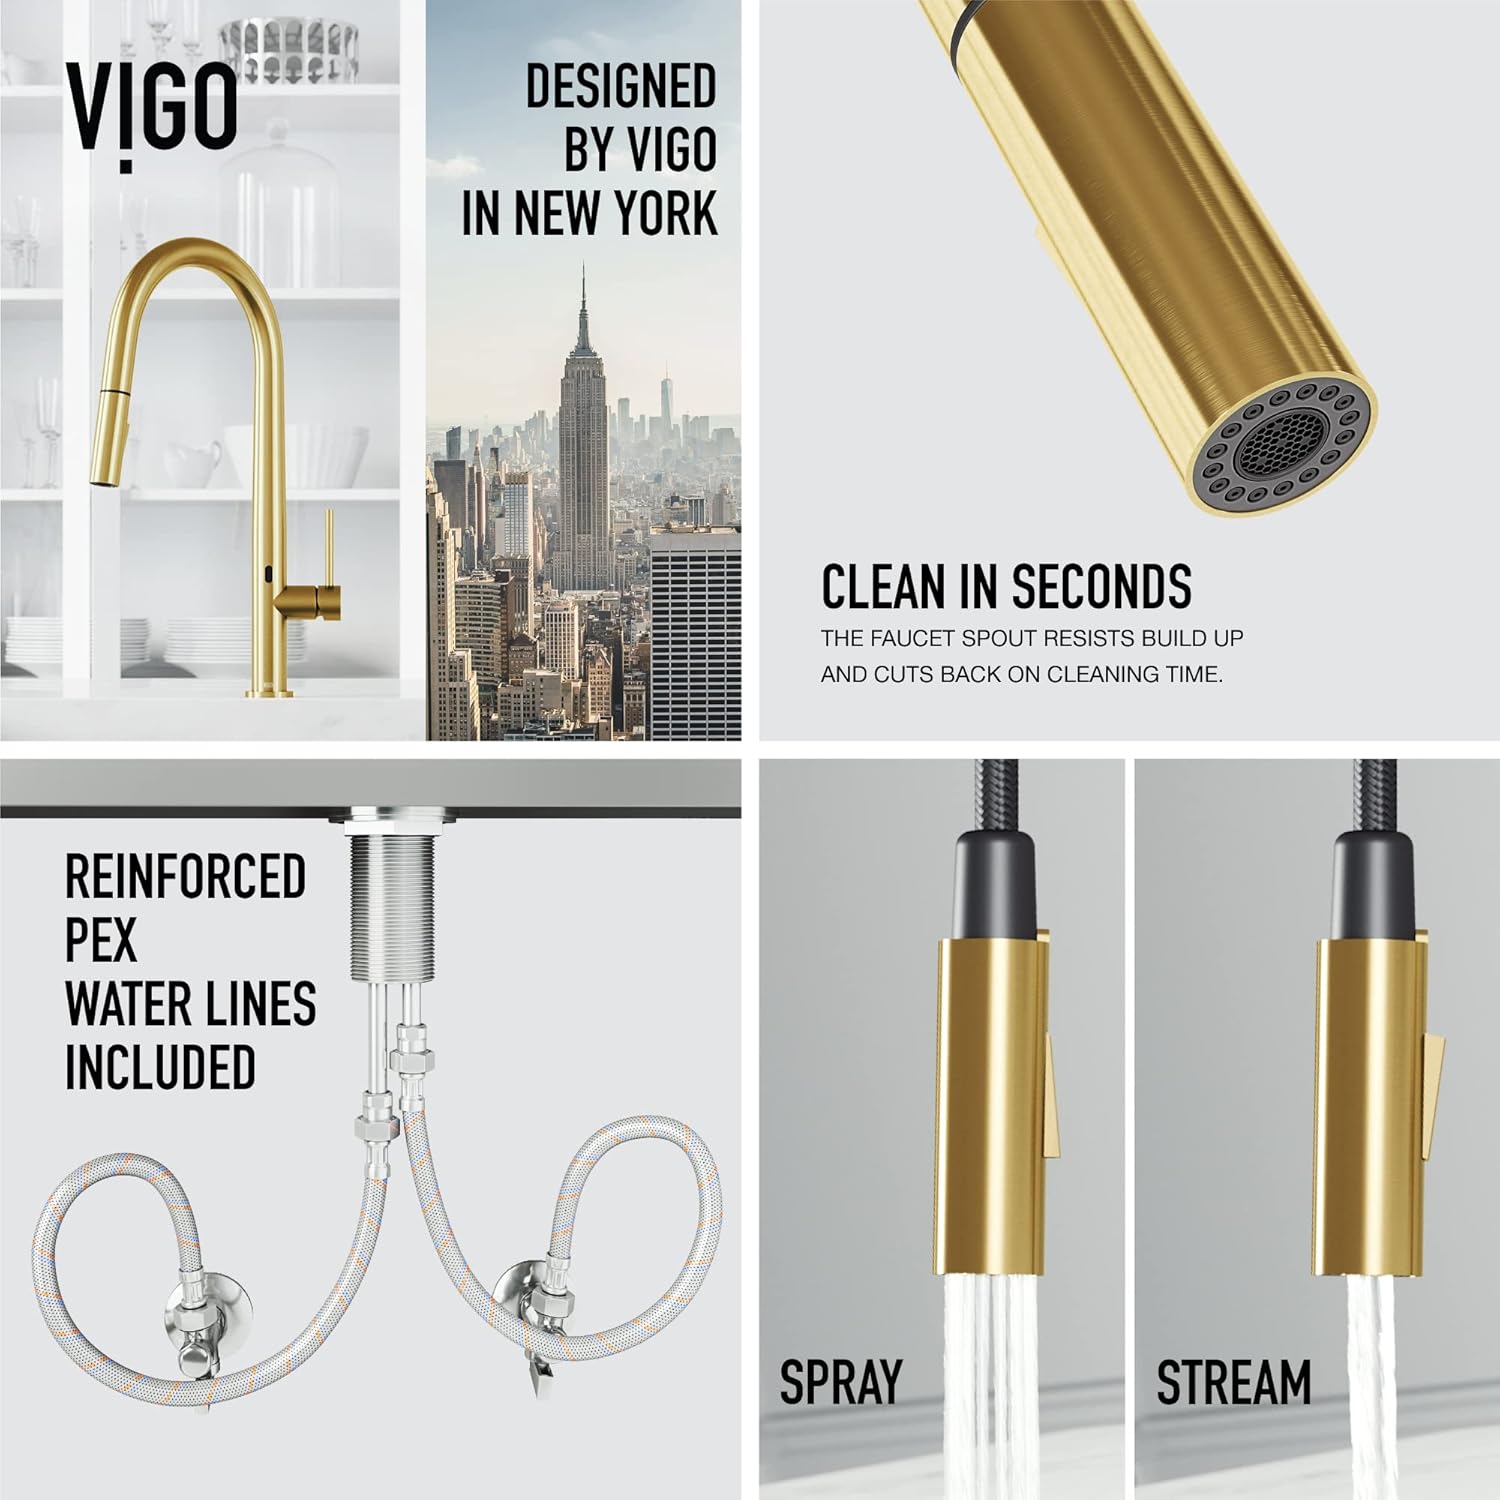
Image: Reinforced PEX water lines and other faucet components included in the package. The image also shows the spray and stream functions of the sprayer head.
Specifications
| Feature | Specification |
|---|---|
| Model Number | VG02029MGS |
| Faucet Height | 18 inches (deck to top of faucet) |
| Spout Height | 8 inches (deck to spout outlet) |
| Spout Reach | 9 inches (center of faucet body to center of spout outlet) |
| Hose Length | 30 inches (retractable) |
| Flow Rate | 1.8 gallons per minute (GPM) |
| Mounting Type | Deck Mount, Single Hole |
| Faucet Hole Size | 1-3/8 inches |
| Max Deck Thickness | 2-1/4 inches |
| Material | Brass |
| Finish | Matte Brushed Gold |
| Number of Handles | 1 |
| Special Features | Touchless Sensor, Pull-Down Sprayer, 360-Degree Spout Swivel, Automatic Shut-off, Spot Resistant |
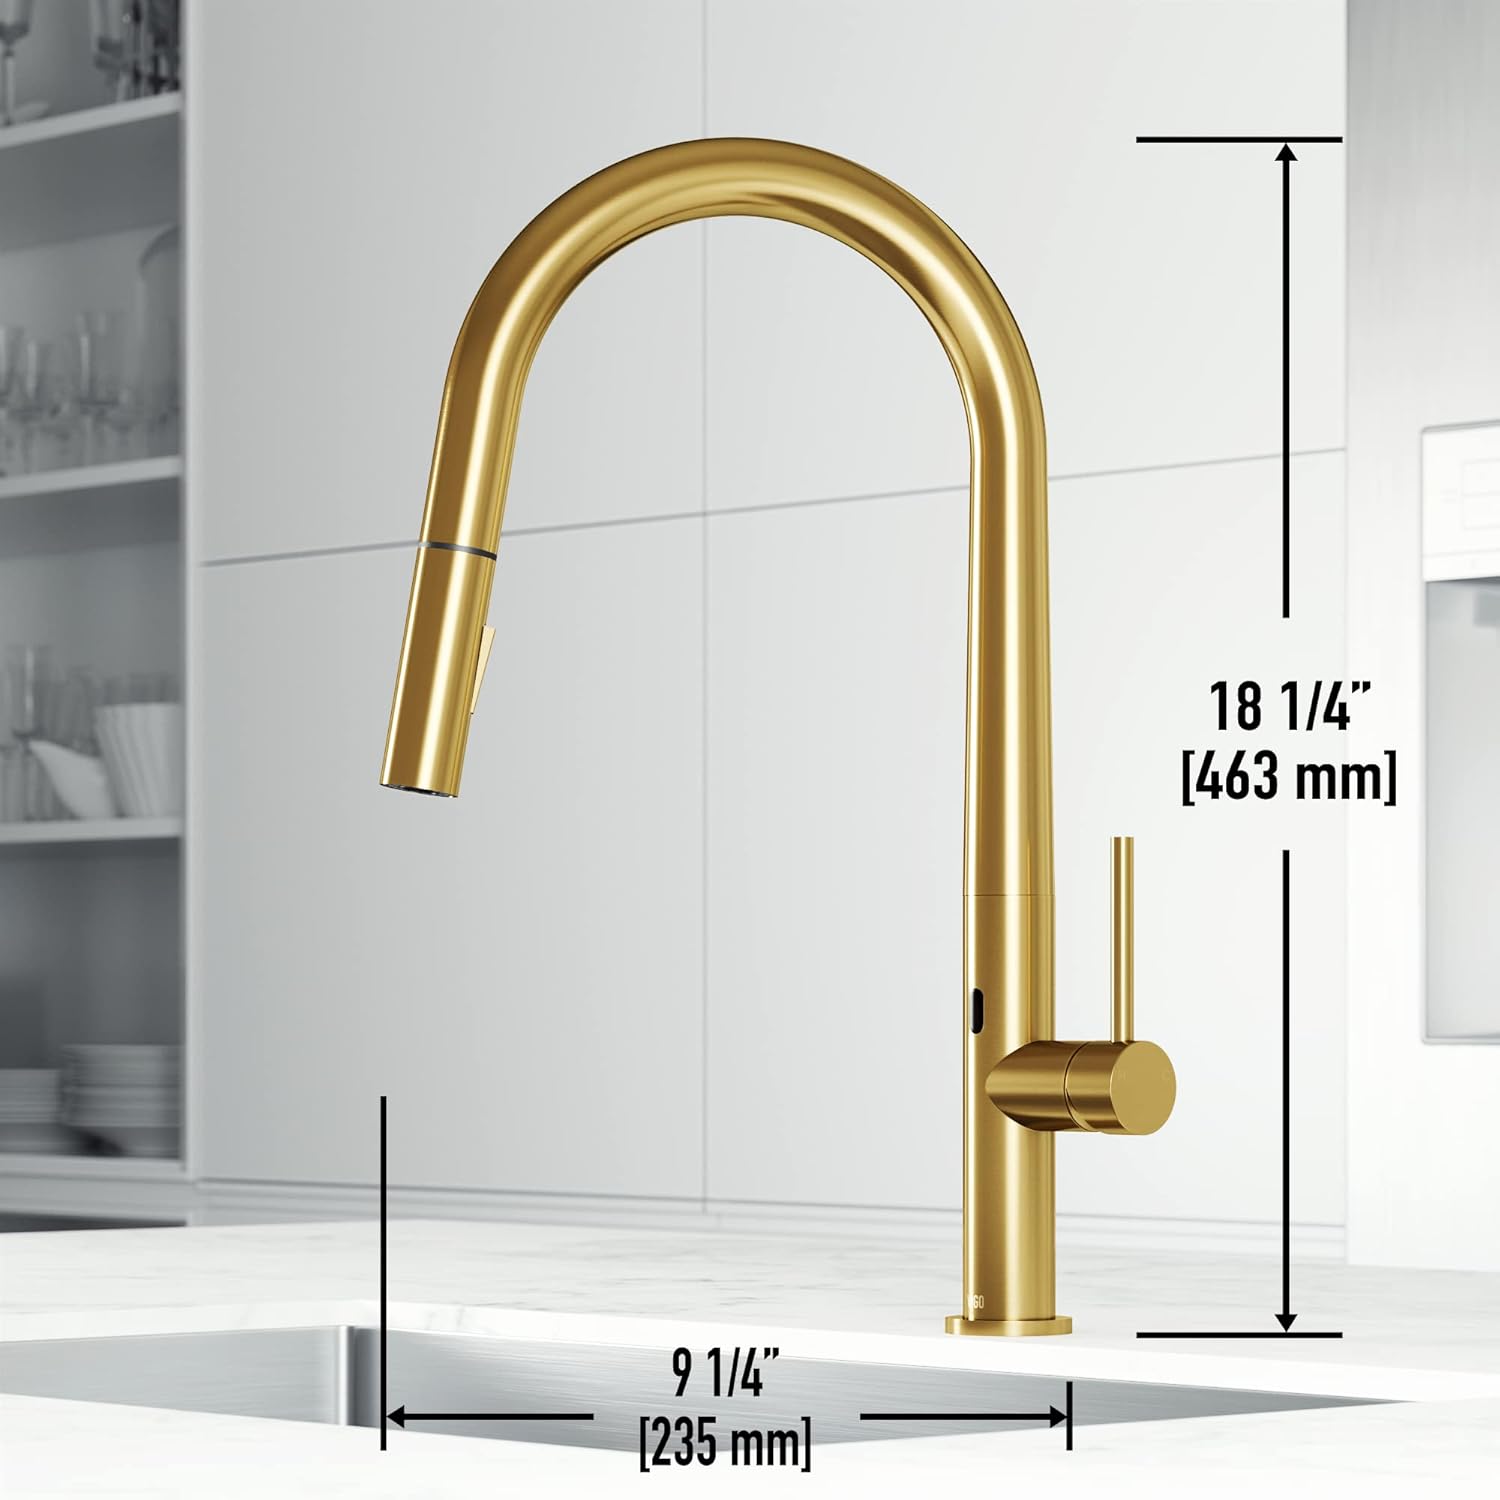
Image: Detailed dimensions of the VIGO Greenwich faucet, showing an 18 1/4 inch height and 9 1/4 inch spout reach.
Installation
This faucet is designed for single-hole deck mount installation. Ensure your sink or countertop has a 1-3/8 inch hole opening and a maximum deck thickness of 2-1/4 inches.
Step-by-Step Guide:
- Prepare the Mounting Surface: Ensure the mounting hole is clean and clear of debris.
- Install the Faucet: Insert the faucet body into the mounting hole. From underneath the sink, secure the faucet using the provided mounting hardware. Tighten securely but do not overtighten.
- Connect Water Supply Lines: Attach the hot and cold water supply lines (PEX lines are included) to your angle stops. Ensure connections are tight to prevent leaks.
- Install Sprayer Hose and Weight: Connect the pull-down sprayer hose to the main faucet body. Attach the hose weight to the pull-down hose at the specified location (typically 6-8 inches from the bottom of the loop) to ensure proper retraction.
- Install Batteries for Sensor: Open the battery compartment (usually located on the control box under the sink) and insert 2 AA batteries (not included). Ensure correct polarity.
- Test for Leaks: Turn on the main water supply and check all connections for leaks. Operate the faucet to ensure proper function of both manual and sensor modes.

Image: Illustrates the easy installation process and the 90-degree movement of the smart handle, designed for tight spaces.
Operation
Manual Operation:
- Water Flow and Temperature: Use the single lever handle to control both water volume and temperature. Move the handle up to increase flow and down to decrease. Move left for hot water and right for cold water. The handle moves 90 degrees forward to accommodate tight spaces and kitchen backsplashes.
- Sprayer Function: The pull-down sprayer offers a dual-action stream. Press the button on the sprayer head to switch between an aerated stream and a powerful spray. The 30-inch retractable hose provides extended reach for various tasks.
- Spout Swivel: The high-arc spout can swivel 360 degrees, providing flexibility and ample vertical space for filling tall pots.

Image: Demonstrates the pull-down sprayer with its 30-inch retractable hose and the 360-degree swivel capability of the faucet spout.
Touchless Sensor Operation:
The integrated touchless flow sensor allows for hands-free operation, promoting a more hygienic kitchen environment. To use the sensor, ensure the manual handle is in the 'on' (outright) position.
- Activate Water Flow: Wave your hand in front of the sensor located on the faucet body to start the water flow.
- Stop Water Flow: Wave your hand in front of the sensor again to stop the water flow.
- Automatic Shut-off: The faucet features a built-in timer that automatically stops water flow after three minutes of continuous use to prevent leakage or wastage.

Image: A hand activating the touchless sensor on the faucet, illustrating the hands-free operation.

Image: A side-by-side comparison showing how to activate water flow manually with the handle versus using a hand wave gesture for the touchless sensor.

Image: A close-up view highlighting the touchless flow sensor and explaining the automatic shut-off feature that activates after three minutes.
Maintenance
Cleaning:
To maintain the finish of your VIGO Greenwich faucet, clean regularly with a soft cloth and mild soap. Avoid abrasive cleaners, harsh chemicals, or scouring pads, as these can damage the matte brushed gold finish. The unique 7-layer coating process helps the surface resist fingerprints and water spots, simplifying cleaning.
Ceramic Disc Cartridge:
The faucet is equipped with VIGO's patented ceramic disc cartridge, designed to prevent water leaks and dripping for long-lasting, reliable operation. No routine maintenance is typically required for the cartridge itself.

Image: A detailed diagram illustrating the internal components of the 'Eternal Seal' ceramic disc cartridge, which prevents leaks and drips.
Troubleshooting
| Problem | Possible Cause | Solution |
|---|---|---|
| No water flow or low flow | Water supply turned off; Clogged aerator; Kinked supply line. | Check main water supply; Unscrew and clean aerator; Inspect supply lines for kinks. |
| Faucet leaks from handle or spout | Loose connections; Damaged O-rings or cartridge. | Tighten connections; Replace O-rings or ceramic disc cartridge if damaged. |
| Touchless sensor not responding | Dead batteries; Manual handle not in 'on' position; Sensor obstruction. | Replace AA batteries; Ensure manual handle is open; Clear any obstructions from the sensor area. |
| Water does not shut off automatically | Sensor malfunction; Batteries low. | Replace batteries; Contact customer support if issue persists. |
Warranty
VIGO products are covered by a limited warranty. For specific details regarding your product's warranty coverage, please refer to the warranty card included with your purchase or visit the official VIGO website.
Support
For further assistance, technical support, or to order replacement parts, please contact VIGO customer service. Contact information can typically be found on the VIGO website or on your product packaging.
Online Resources: Visit the VIGO Store on Amazon


