1. Introduction
Thank you for choosing the MXBAOHENG Mini Belt and Disc Sander. This versatile tool is designed for precision grinding and sharpening of various materials, including wood, metal, and blades. Featuring a dual-motor design and variable speed control, it offers stable and efficient performance for both professional and DIY applications. Please read this manual thoroughly before operation to ensure safe and optimal use of your new sander.
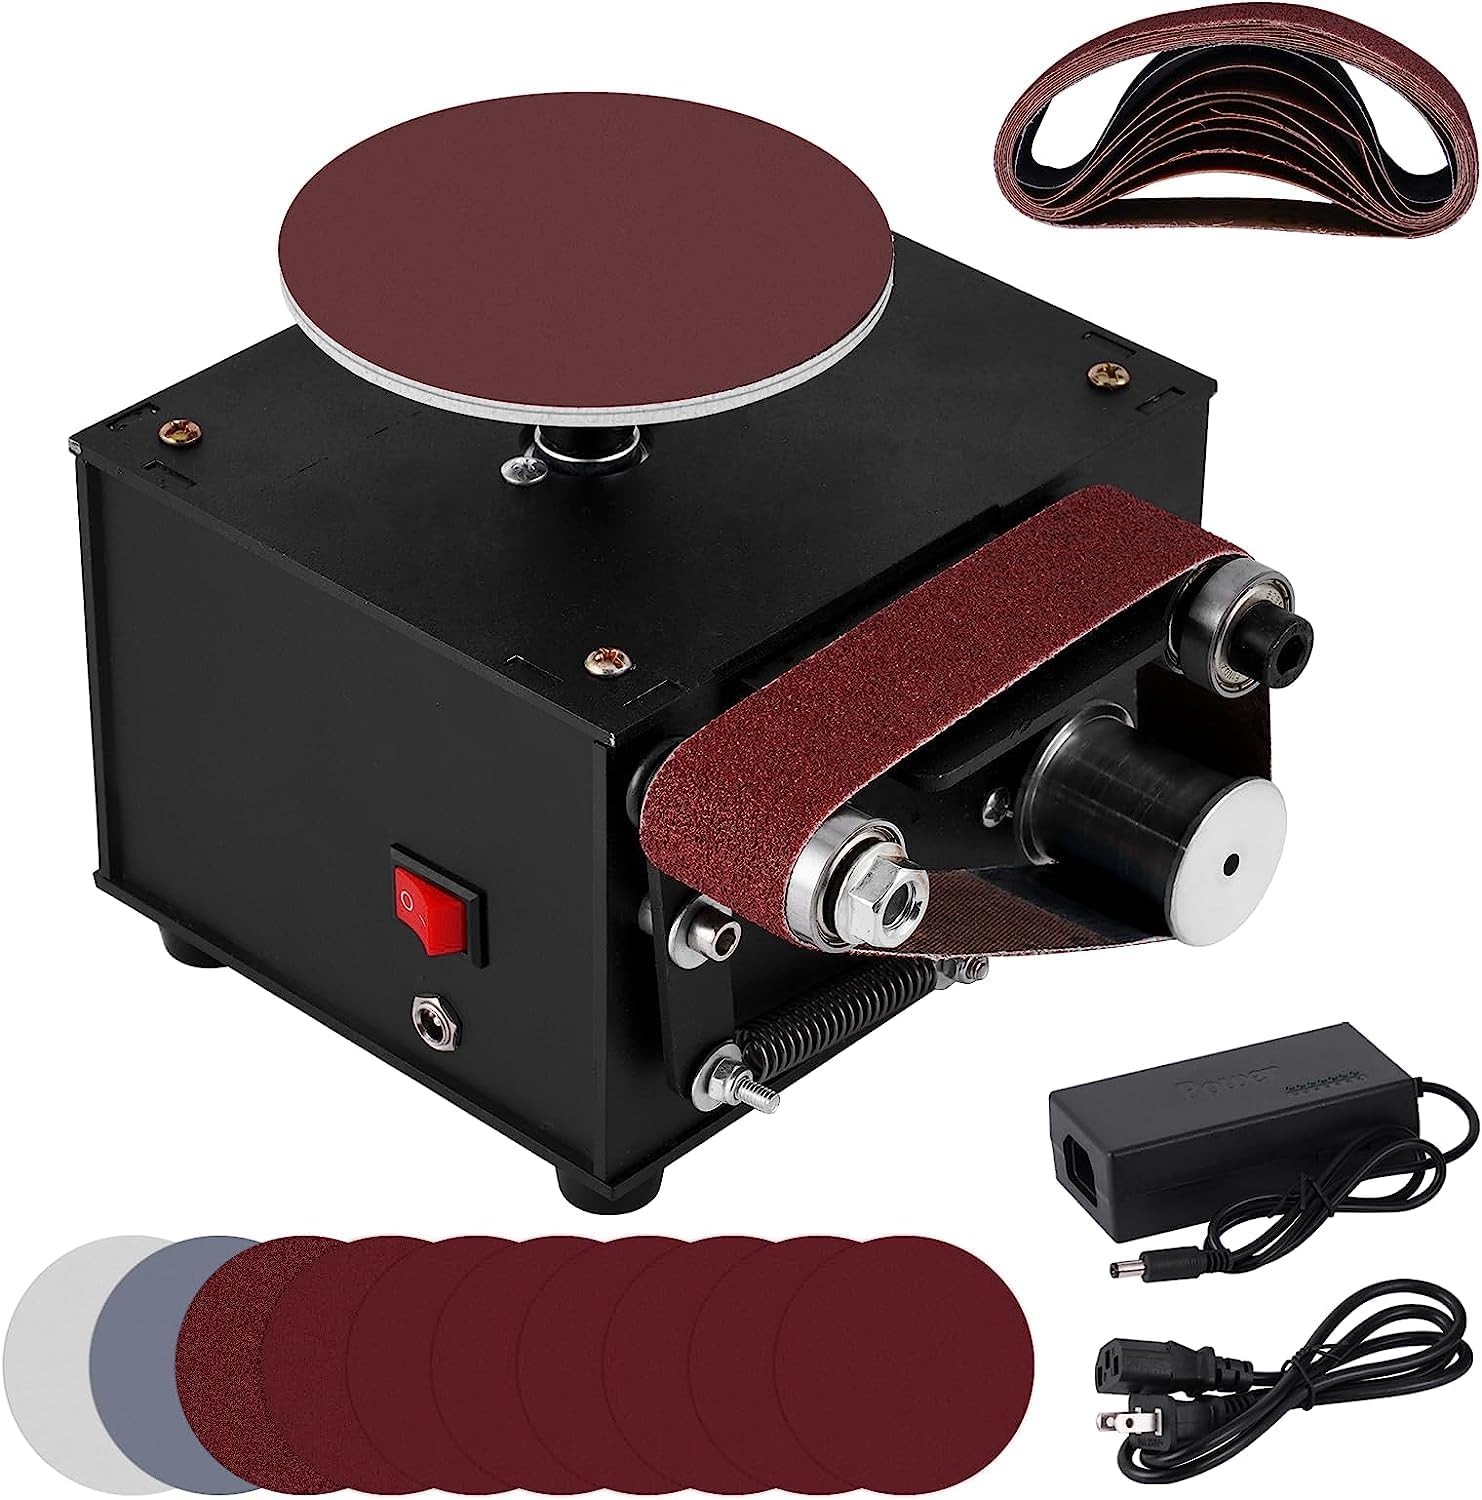
Figure 1: MXBAOHENG Mini Belt and Disc Sander with included accessories.
2. Safety Instructions
Always follow basic safety precautions when using electrical tools to reduce the risk of fire, electric shock, and personal injury.
- Read the Manual: Familiarize yourself with all instructions and warnings before operating the sander.
- Wear Safety Gear: Always wear safety glasses, gloves, and a dust mask when operating the sander.
- Secure Workpiece: Ensure the workpiece is firmly secured before grinding to prevent movement and kickback.
- Maintain Clear Workspace: Keep your work area clean, well-lit, and free of clutter to prevent accidents.
- Avoid Overloading: Do not apply excessive pressure to the sander, as this can damage the motor and reduce efficiency.
- Unplug When Not in Use: Always unplug the sander from the power source before changing accessories, performing maintenance, or when not in use.
- Keep Away from Children: Store the sander out of reach of children and untrained individuals.
- Proper Ventilation: Operate the sander in a well-ventilated area to disperse dust and fumes.
3. Package Contents
Verify that all items listed below are included in your package. If any items are missing or damaged, please contact customer support.
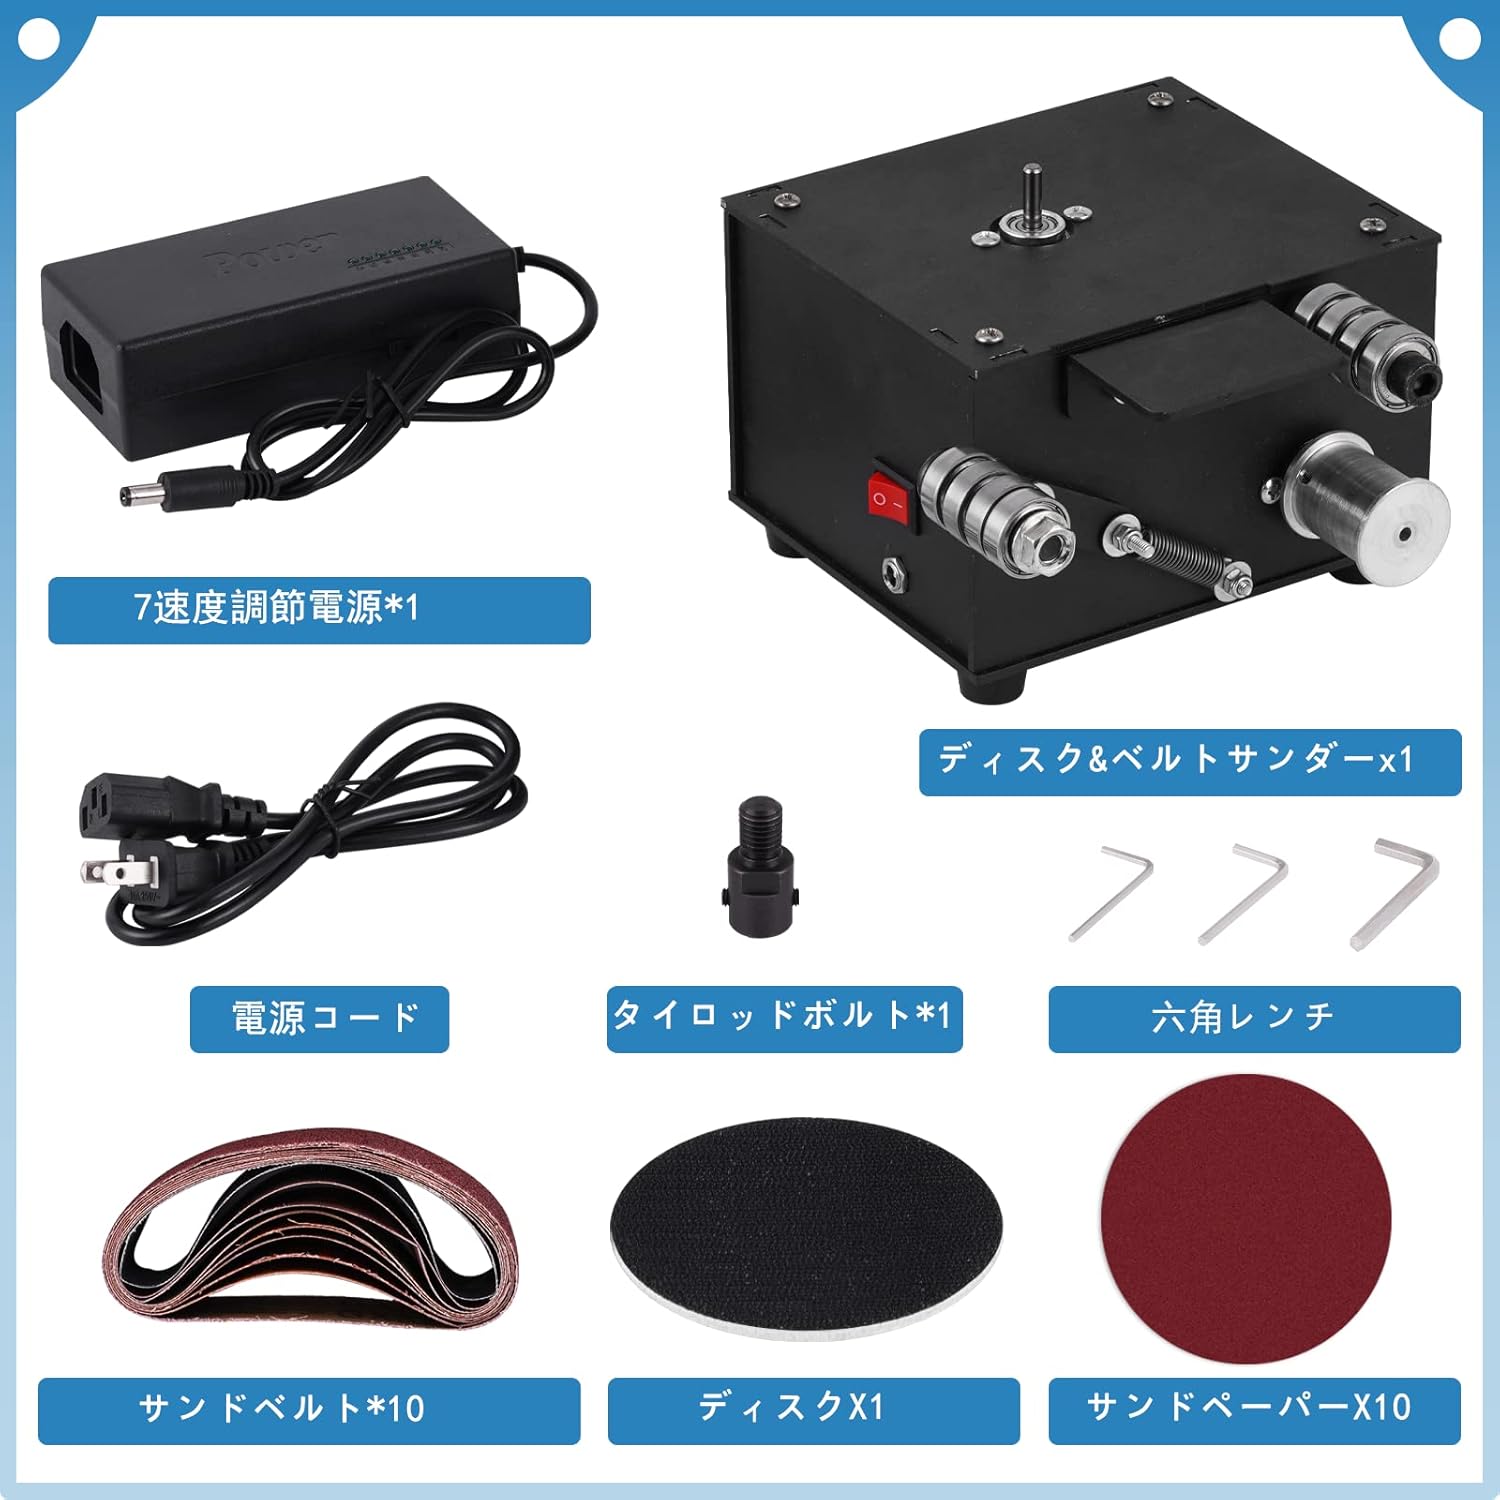
Figure 2: Contents of the MXBAOHENG Mini Belt and Disc Sander package.
- Mini Belt and Disc Sander Unit (x1)
- Power Adapter (x1)
- Power Cord (x1)
- Sanding Belts (10 pieces: 60/80/120/180/240/320/400/600/800/1000 grit)
- Round Sandpaper Sheets (10 pieces: 60/120/240/400/800/1000/1500/2000/3000/5000 grit)
- Disc (x1)
- Tie Rod Bolt (x1)
- Hex Wrench (x1)
- User Manual (x1)
4. Specifications

Figure 3: Product Specifications.
| Feature | Detail |
|---|---|
| Brand | MXBAOHENG |
| Product Dimensions | 15 x 12.5 x 15 cm (5.9 x 4.9 x 5.9 inches) |
| Color | Black |
| Model Name | DIY Small Belt Disc Sander |
| Material | Steel (Case), Aluminum (Disc) |
| Power Source | Corded Electric |
| Voltage | 110V (AC) |
| Max Rotation Speed | 8000 RPM |
| Grit Range (Included) | Belt: 60-1000, Disc: 60-5000 |
| Item Weight | 3 kg (6.6 lbs) |
| Motor Type | Dual Copper Wire Motor |
| Speed Adjustment | 7-level adjustable power adapter |
5. Setup
Before operating the sander, ensure it is placed on a stable, level surface. Follow these steps for initial setup:
5.1. Installing the Disc Sandpaper

Figure 4: Disc Sandpaper Installation Steps.
- Attach the Tie Rod Bolt: Insert the tie rod bolt into the central shaft on the top of the sander unit. Secure it by tightening the two black screws with the provided hex wrench.
- Mount the Adhesive Disc: Place the adhesive disc onto the tie rod bolt. Rotate it clockwise to tighten and secure it firmly.
- Apply Sandpaper: Peel the backing from the desired round sandpaper sheet and carefully align it onto the adhesive disc. Press firmly to ensure it adheres completely.
5.2. Connecting Power
- Connect the power adapter to the appropriate power jack on the sander unit. Note that there are separate power jacks for the belt sander and disc sander functions.
- Plug the power cord into the power adapter, then plug the power cord into a standard 110V AC outlet.
6. Operation
The MXBAOHENG Mini Belt and Disc Sander features independent operation for its belt and disc functions. You cannot operate both simultaneously.
6.1. Dual Motor Control
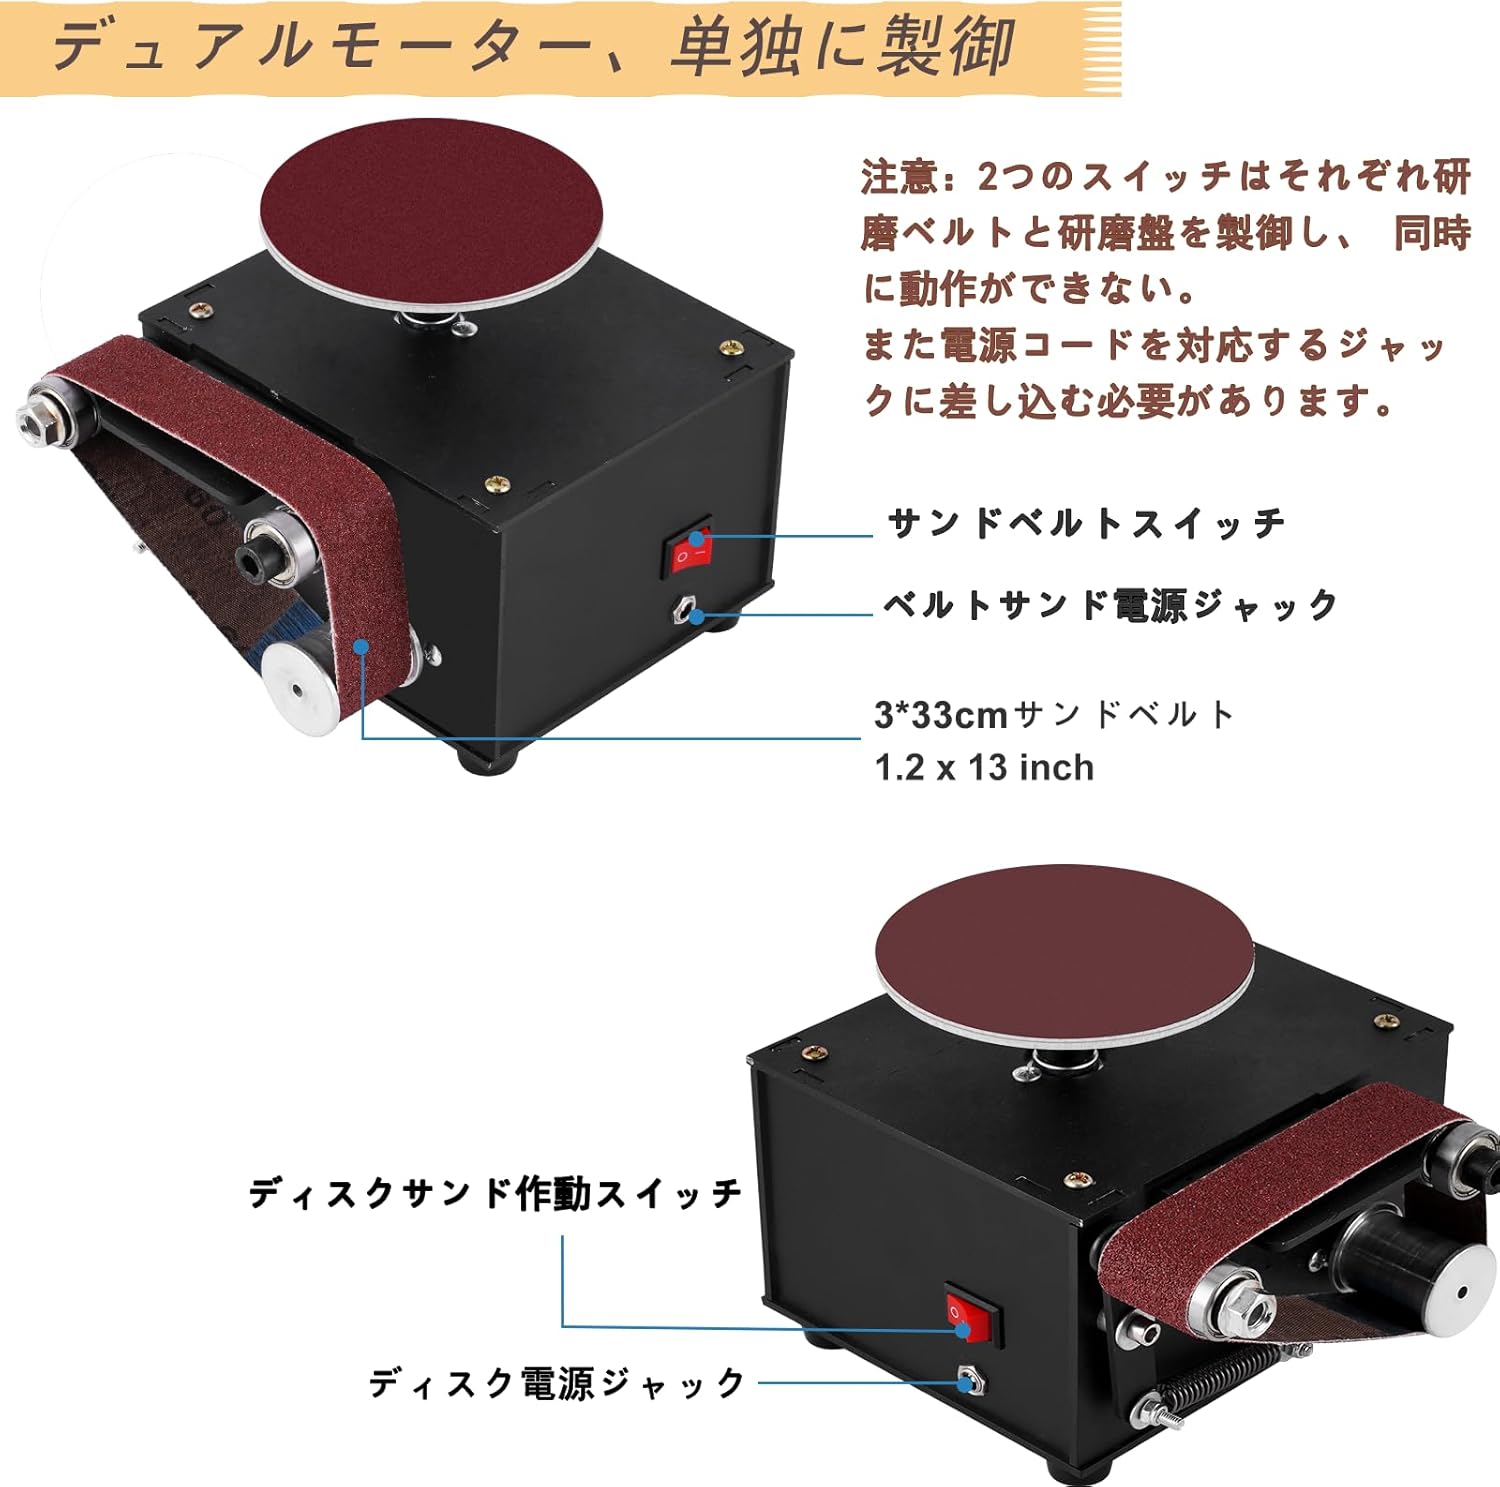
Figure 5: Separate controls for belt and disc functions.
The unit is equipped with two separate motors, one for the belt sander and one for the disc sander. Each function has its own power jack and ON/OFF switch. To use a specific function, ensure its power adapter is connected to the corresponding jack and its switch is turned ON. Do not attempt to operate both functions at the same time.
6.2. Disc Sander Operation
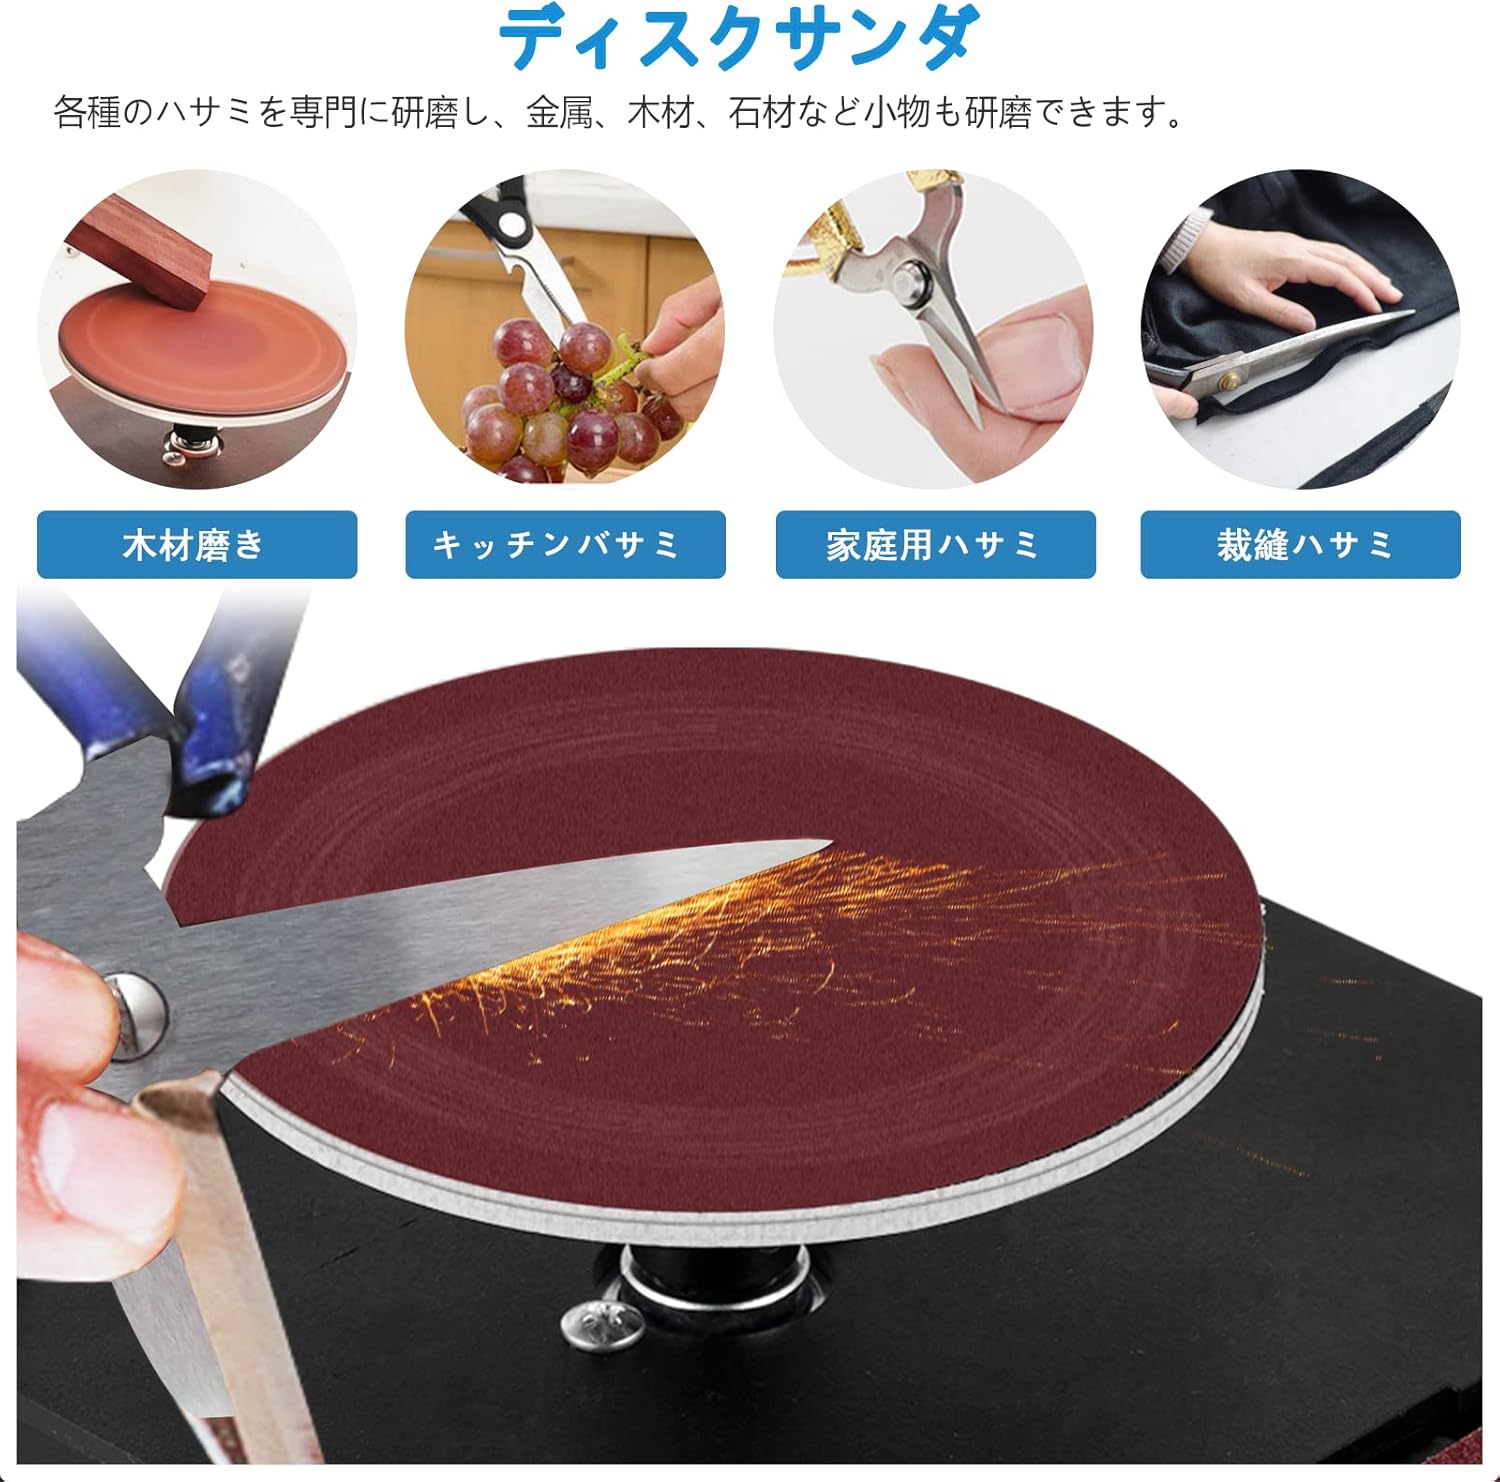
Figure 6: Disc Sander Applications.
- Ensure the disc sandpaper is correctly installed.
- Connect the power adapter to the disc power jack and turn on the disc sander switch.
- Gently bring the workpiece into contact with the rotating disc. Apply light, even pressure.
- Move the workpiece across the disc surface to achieve desired grinding or sharpening. The disc sander is ideal for general finishing, grinding, precision grinding, small item processing, and sharpening various blades like scissors.
6.3. Belt Sander Operation
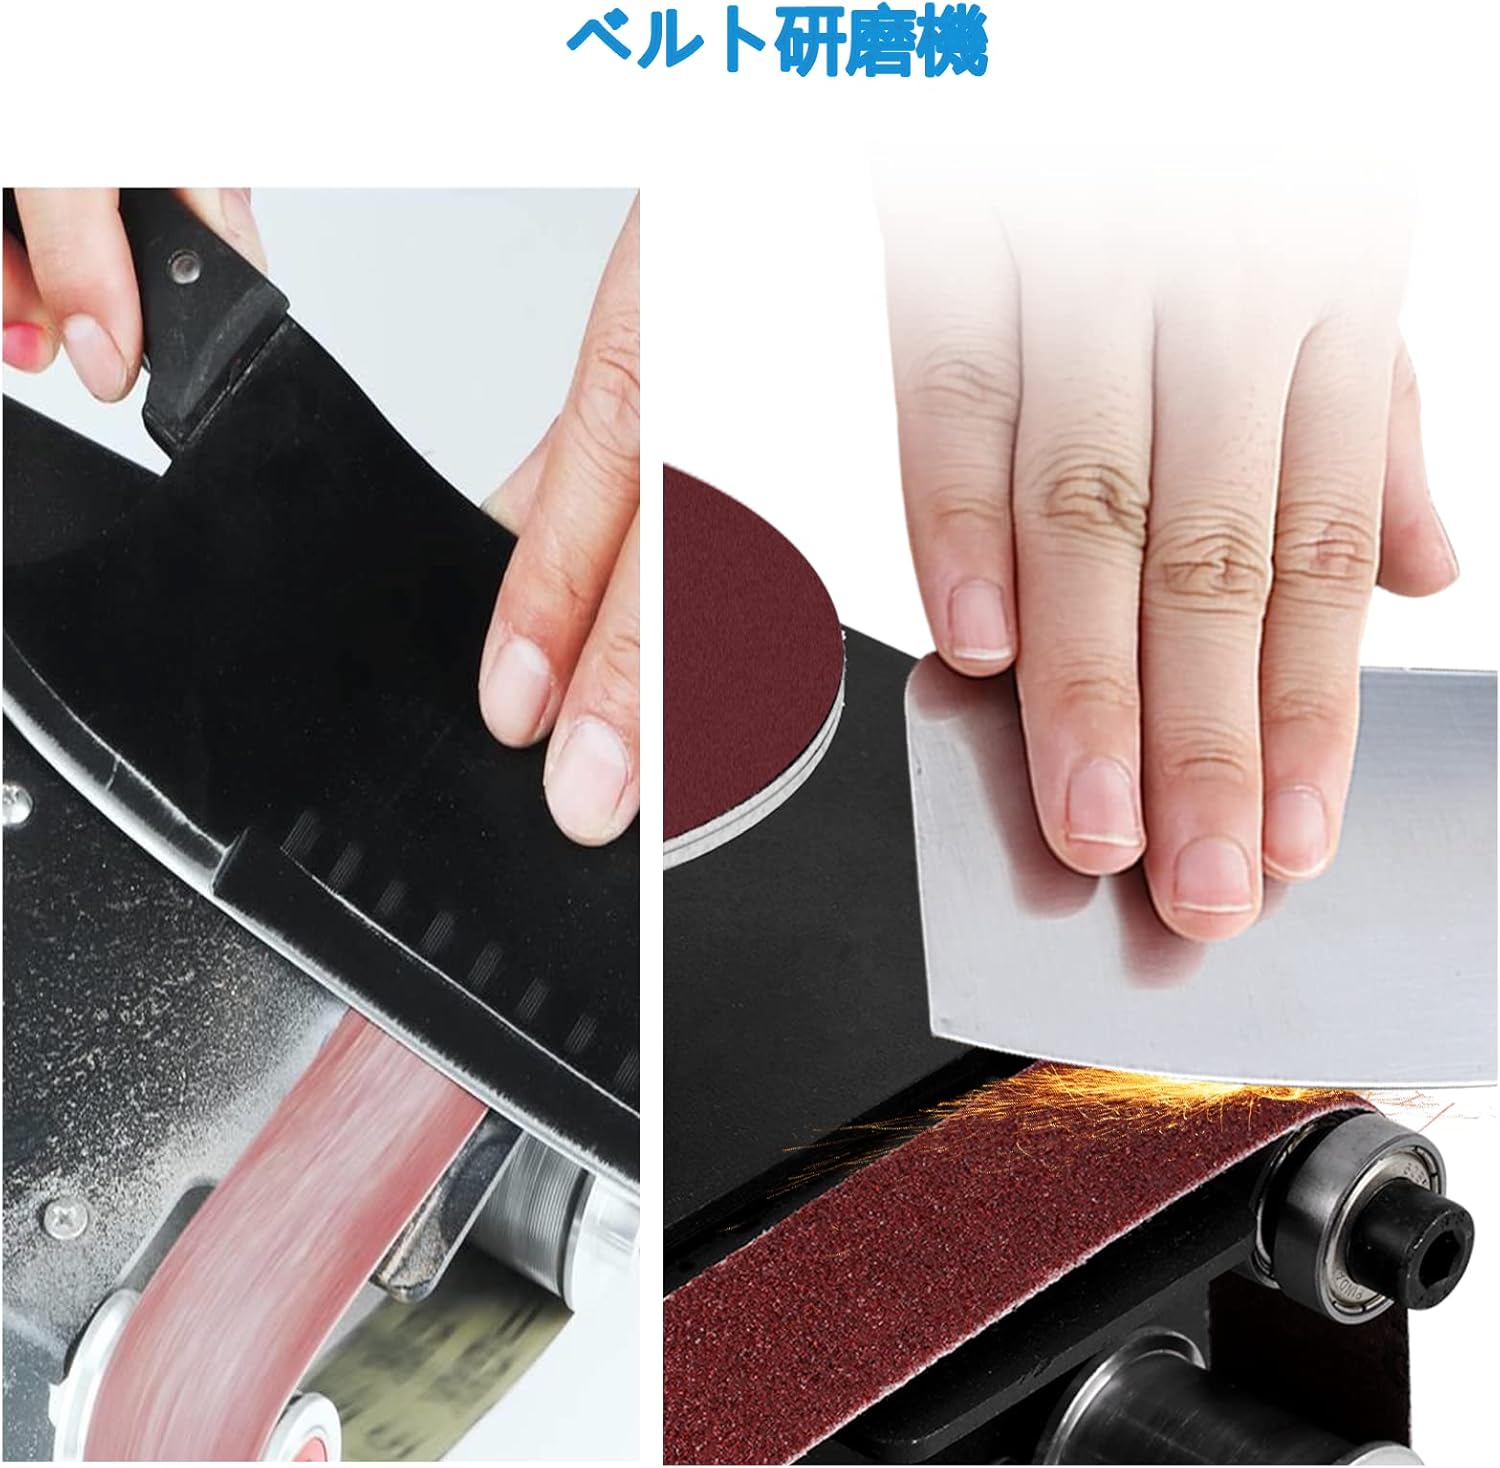
Figure 7: Belt Sander Applications.
- Ensure the sanding belt is properly installed and tensioned.
- Connect the power adapter to the belt power jack and turn on the belt sander switch.
- Carefully bring the workpiece into contact with the moving belt. Use consistent, light pressure.
- The belt sander is suitable for sharpening blades, grinding wood, metal, and plastic.
6.4. Speed Adjustment

Figure 8: 7-Level Speed Control on Power Adapter.
The included power adapter features a 7-level speed adjustment function. This allows you to vary the rotation speed of the sander (4000-8000 RPM) to match the specific requirements of your workpiece and grinding task. Adjust the speed using the switch on the power adapter before starting operation.
7. Maintenance
Regular maintenance ensures the longevity and optimal performance of your sander. Always unplug the unit before performing any maintenance.
7.1. Cleaning
- After each use, wipe down the exterior of the sander with a clean, dry cloth to remove dust and debris.
- Use a soft brush or compressed air to clear dust from the motor vents and grinding areas.
- Do not use water or harsh chemicals for cleaning.
7.2. Replacing Sanding Belts
- Unplug the sander.
- Lift the tensioner arm to release tension on the belt.
- Carefully slide the old belt off the rollers.
- Slide a new belt onto the rollers, ensuring it is centered.
- Release the tensioner arm to secure the new belt.
7.3. Replacing Disc Sandpaper
- Unplug the sander.
- Carefully peel off the worn sandpaper from the adhesive disc.
- Clean any residue from the adhesive disc.
- Apply a new round sandpaper sheet as described in Section 5.1.
8. Troubleshooting
If you encounter issues with your sander, refer to the following table for common problems and solutions.
| Problem | Possible Cause | Solution |
|---|---|---|
| Sander does not turn on. | No power supply; switch is OFF; incorrect power jack used. | Ensure power cord is securely plugged into outlet and adapter. Check that the correct power adapter is connected to the specific function's jack (belt or disc). Turn the corresponding switch ON. |
| Sander runs slowly or lacks power. | Low speed setting; worn sandpaper/belt; excessive pressure. | Adjust the speed setting on the power adapter to a higher level. Replace worn sandpaper or belt. Reduce pressure on the workpiece. |
| Belt slips or comes off. | Improper belt installation; tensioner not engaged. | Ensure the belt is correctly installed and centered on the rollers. Verify the tensioner arm is fully engaged. |
| Excessive vibration or noise. | Loose components; damaged belt/disc; unstable surface. | Check all screws and bolts for tightness. Inspect belt and disc for damage and replace if necessary. Ensure the sander is on a stable, level surface. |
9. Warranty and Support
This MXBAOHENG product comes with a 6-month warranty from the date of purchase. During this period, if the power adapter experiences any issues, a new replacement power adapter can be provided free of charge.
For technical support, warranty claims, or any questions regarding your product, please contact MXBAOHENG customer service through the retailer where you purchased the item. Please have your purchase receipt and product model information ready when contacting support.


