1. Introduction
This manual provides essential information for the safe and effective use of your HMF Small Furniture Safe. Please read these instructions carefully before setup and operation to ensure proper functionality and security.

Figure 1: HMF Small Furniture Safe (Model 49216-02) with the door open and key inserted.
2. Safety Information
Always adhere to the following safety guidelines:
- Keep keys in a secure location away from the safe. Do not store keys inside the safe.
- Ensure the safe is securely mounted to a wall or floor to prevent unauthorized removal.
- Do not attempt to force the lock or door.
- Keep the safe away from extreme temperatures and moisture.
- This safe is designed for storing valuables and documents; it is not fireproof or waterproof unless explicitly stated.
3. Package Contents
Verify that all components are present in the package:
- 1 x HMF Small Furniture Safe
- 2 x Double Point Keys
- 2 x Metal Dowels
- 2 x Fixing Screws
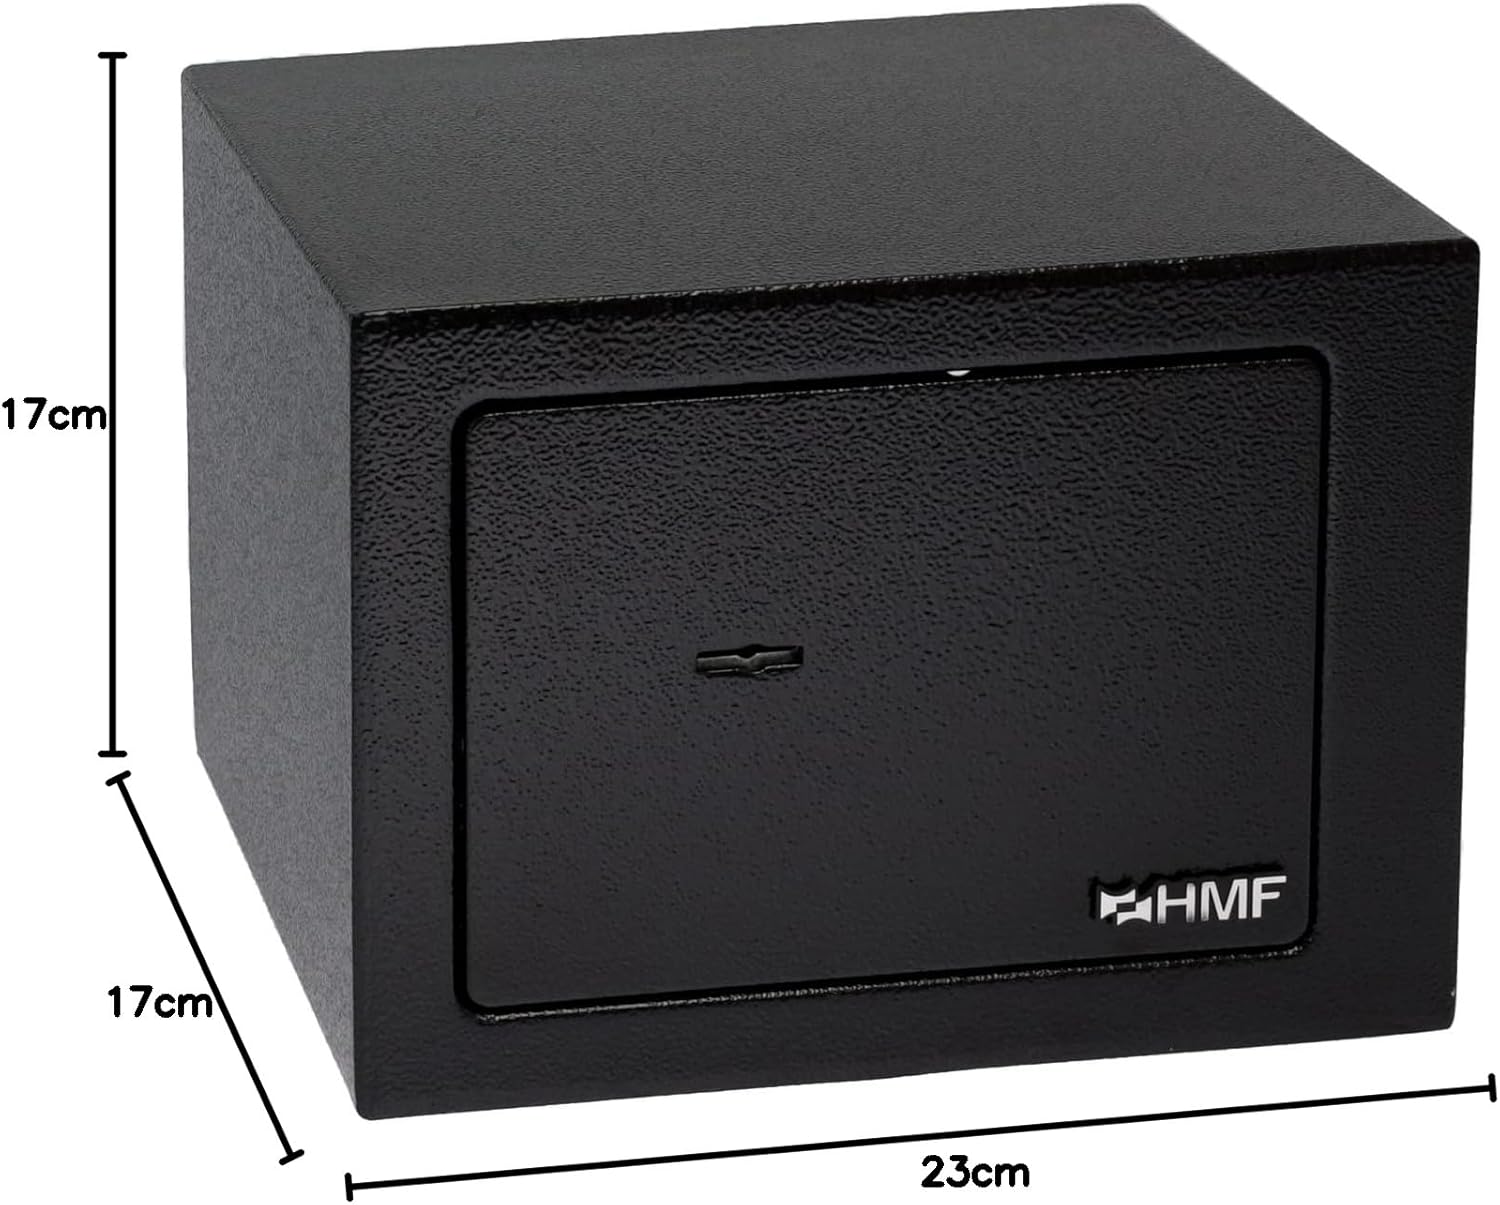
Figure 2: Included accessories: two double point keys and two metal dowels for secure mounting.
4. Specifications
| Feature | Detail |
|---|---|
| Model Number | 49216-02 |
| Brand | HMF |
| External Dimensions (W x H x D) | 23 x 17 x 17 cm |
| Internal Dimensions (W x H x D) | 22.5 x 16.5 x 16.5 cm (suitable for DIN A5 documents) |
| Weight | 2.35 kg |
| Material | Alloy Steel |
| Wall Thickness | 1 mm (body), 3 mm (door) |
| Lock Type | Mechanical double-bit lock with three-bolt lock |
| Mounting | Prepared holes for wall or floor mounting |
Figure 3: External dimensions of the HMF safe.
5. Setup and Installation
5.1 Unpacking
Carefully remove the safe and all accessories from the packaging. Inspect for any damage. Retain packaging for future transport or storage if needed.
5.2 Opening the Safe for the First Time
- Locate one of the two double-bit keys provided.
- Insert the key into the keyhole on the safe door.
- Turn the key clockwise to unlock the safe.
- Pull the door open.

Figure 4: Safe door open, revealing the three-bolt locking mechanism.
5.3 Mounting the Safe
The safe is equipped with pre-drilled holes for secure mounting to a wall or floor. This significantly enhances security.
- Choose a suitable location for the safe, considering both accessibility and concealment.
- Mark the drilling points on the wall or floor using the safe's pre-drilled holes as a template. The safe has two holes on the back and two on the bottom.
- Drill holes at the marked points using an appropriate drill bit for your wall/floor material.
- Insert the provided metal dowels into the drilled holes.
- Align the safe with the dowels and secure it using the provided fixing screws. Ensure the safe is firmly attached and does not wobble.

Figure 5: Rear view of the safe, highlighting the pre-drilled mounting holes.
6. Operating the Safe
6.1 Locking the Safe
- Ensure the safe door is fully closed.
- Insert the double-bit key into the keyhole.
- Turn the key counter-clockwise until it stops. The three bolts will extend, securing the door.
- Remove the key and store it in a secure, separate location.

Figure 6: The safe in a closed and locked position.
6.2 Unlocking the Safe
- Insert the double-bit key into the keyhole.
- Turn the key clockwise until it stops. The three bolts will retract.
- Pull the door open.
- You can now access the contents of your safe.

Figure 7: Interior view of the safe, suitable for storing various small valuables.
7. Maintenance
- Cleaning: Wipe the exterior of the safe with a soft, damp cloth. Avoid abrasive cleaners or solvents that could damage the finish.
- Lock Mechanism: The mechanical lock requires minimal maintenance. If the key turns stiffly, a small amount of graphite lubricant (not oil) can be applied to the key and inserted into the lock.
- Inspection: Periodically check the mounting screws to ensure they remain tight.
8. Troubleshooting
| Problem | Possible Cause | Solution |
|---|---|---|
| Key does not turn or turns stiffly. | Obstruction in keyhole, worn key, or dry lock mechanism. | Ensure no debris is in the keyhole. Try the second key. Apply a small amount of graphite lubricant to the key and insert into the lock. |
| Safe door does not open after unlocking. | Bolts not fully retracted, door stuck. | Ensure the key is turned fully clockwise. Gently pull the door. Do not force. |
| Safe feels loose after mounting. | Mounting screws are loose or not properly installed. | Tighten all mounting screws. If necessary, re-install the safe ensuring proper dowel and screw placement. |
9. Warranty Information
HMF products are manufactured to high-quality standards. For specific warranty terms and conditions, please refer to the documentation provided at the time of purchase or visit the official HMF website. Keep your proof of purchase for warranty claims.
10. Customer Support
If you encounter any issues not covered in this manual or require further assistance, please contact HMF customer support:
- Website: www.hmf.de (Please note: This is a general placeholder. Refer to your product packaging or purchase details for specific regional support contacts.)
- Email: support@hmf.de


