1. Introduction
This manual provides instructions for the safe and efficient operation, maintenance, and care of your Buffalo 37 Quart Clad Quick Pot Stainless Steel Commercial Pressure Cooker Canner. This appliance is designed for pressurized cooking and canning, offering fast heat transfer for various dishes. It has a capacity of 35 liters (approximately 37 quarts).
The Buffalo Quick Pot is constructed from BUFFALO Clad material, known for its thermal conductivity. It is suitable for use on gas, electric, ceramic, and halogen cooktops. This unit does not include a pressure gauge.
2. Important Safety Information
Read all instructions carefully before using the pressure cooker.
- Always ensure the lid is properly sealed before increasing pressure.
- Do not force the lid open while the cooker is pressurized. Wait until all internal pressure has been released.
- Exercise extreme caution when moving a pressure cooker containing hot liquids.
- Do not place the pressure cooker on an induction stove; it is only compatible with gas, electric, ceramic, and halogen cooktops.
- This unit does not come with a pressure gauge. Monitor cooking times and pressure release carefully.
- Ensure the pressure indication valve is clear and free from obstructions before each use.
- Keep hands and face away from the steam vent when releasing pressure.
- Do not fill the pressure cooker beyond two-thirds full for general cooking, and no more than half full for foods that expand, such as rice or dried vegetables.
- Never use the pressure cooker for deep frying with oil.
- Keep out of reach of children.
3. Product Overview and Components
The Buffalo Quick Pot is designed for durability and ease of use. Below are the main components and their descriptions.
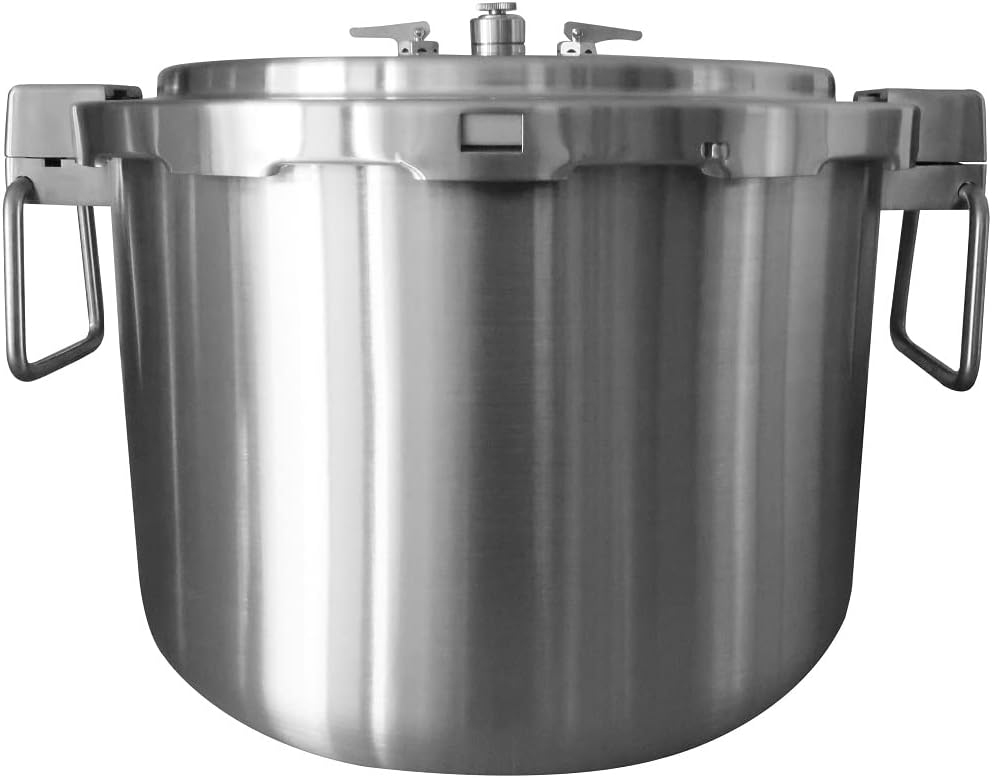
Image 1: Front view of the Buffalo 37 Quart Commercial Pressure Cooker. It features a brushed stainless steel finish with sturdy side handles and a secure lid locking mechanism.
- Main Pot: Constructed from BUFFALO Clad stainless steel with unibody construction for easy cleaning.
- Lid: Features a secure locking mechanism and a pressure indication valve.
- Regulator Weight: Used to maintain and release pressure.
- Filter: Part of the pressure release system.
- Sealing Ring (Gasket): A removable rubber ring for creating an airtight seal, easy to clean.
- Needle Probe: An accessory for specific functions (e.g., cleaning the vent).
- Handles: Sturdy side handles for transport.
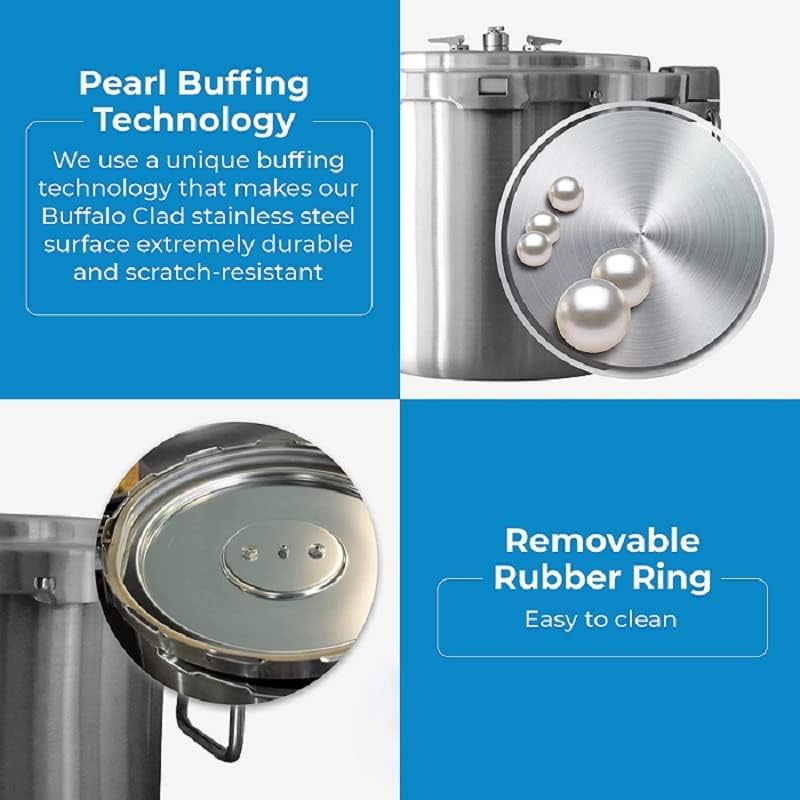
Image 2: Detailed view highlighting the interior surface with Pearl Buffing Technology for durability and scratch resistance, and the removable rubber sealing ring for easy cleaning.

Image 3: Detailed view illustrating the Buffalo Clad™ Stainless Steel construction, made from high-grade surgical stainless steel and metal alloys, and the unibody construction which eliminates hard-to-clean corners.
4. Setup and Initial Use
- Unpacking: Carefully remove all packaging materials and inspect the pressure cooker for any damage.
- Initial Cleaning: Before first use, wash the pot, lid, and all accessories (regulator weight, filter, sealing ring) with warm soapy water. Rinse thoroughly and dry completely.
- Sealing Ring Installation: Ensure the removable rubber sealing ring is correctly seated in the lid groove.
- Vent Check: Verify that the pressure indication valve and steam vent are clear and free from any debris. Use the needle probe if necessary to clear any blockages.
- Placement: Place the pressure cooker on a stable, level cooktop surface. Ensure it is compatible with your cooktop type (gas, electric, ceramic, halogen). Do not use on induction cooktops.
5. Operating Instructions
Follow these steps for safe and effective pressure cooking.

Image 4: The Buffalo pressure cooker positioned on a cooktop, illustrating its use in a kitchen setting. The image highlights its fast heating capability and large capacity.
- Add Ingredients: Place food and the required amount of liquid into the pressure cooker. Do not exceed the maximum fill lines (two-thirds full for most foods, half full for expanding foods).
- Secure the Lid: Place the lid on the pot, aligning the arrows or indicators. Rotate the lid clockwise until it locks securely into place. Ensure the sealing ring is properly seated.
- Position Regulator Weight: Place the regulator weight onto the pressure indication valve stem on the lid.
- Heat Application: Place the pressure cooker on your compatible cooktop over high heat.
- Pressure Buildup: As steam builds, it will escape from the pressure indication valve, causing the regulator weight to jiggle. This indicates that full pressure has been reached.
- Cooking Time: Once full pressure is reached, reduce the heat to the lowest setting that maintains a steady, gentle jiggling of the regulator weight. Begin timing your recipe.
- Pressure Release (Natural Release): For most foods, especially those with high liquid content or that foam, remove the pressure cooker from heat and allow the pressure to drop naturally. This can take 10-20 minutes or more. Do not attempt to open the lid until the pressure indication valve has dropped completely and no steam is escaping.
- Pressure Release (Quick Release - Use with Caution): For some foods, you may carefully move the pressure cooker to a sink and run cold water over the lid (avoiding the valve) to cool it rapidly and release pressure. Alternatively, you can carefully lift the regulator weight to release steam. Always keep hands and face away from escaping steam. Only use quick release if specified by your recipe and if you are experienced with pressure cookers.
- Open the Lid: Once all pressure is released, unlock and remove the lid. Always open the lid away from your face to avoid residual steam.
6. Maintenance and Cleaning
Proper maintenance ensures the longevity and safe operation of your pressure cooker.
- After Each Use: Wash the pot and lid with warm, soapy water. Rinse thoroughly and dry immediately to prevent water spots and corrosion.
- Sealing Ring: Remove the rubber sealing ring from the lid after each use for thorough cleaning. Wash it separately with warm soapy water, rinse, and dry. Ensure it is flexible and free from cracks or damage before re-installing. Replace if damaged or stiff.
- Pressure Indication Valve and Vent: Regularly check the pressure indication valve and steam vent for food particles or blockages. Use the needle probe to clear any obstructions.
- Exterior: For the brushed stainless steel exterior, use a non-abrasive cleaner and a soft cloth.
- Dishwasher Safety: This unit is NOT dishwasher safe. Hand wash only.
- Storage: Store the pressure cooker with the lid inverted or slightly ajar to allow air circulation and prevent odors.
7. Troubleshooting
| Problem | Possible Cause | Solution |
|---|---|---|
| Pressure not building up. | Lid not properly sealed; insufficient liquid; sealing ring damaged or improperly seated; vent blocked. | Ensure lid is locked; add more liquid; check and reseat/replace sealing ring; clear vent with needle probe. |
| Steam leaking from lid edges. | Sealing ring improperly seated, damaged, or worn; lid not properly closed. | Reposition sealing ring; replace sealing ring if damaged; ensure lid is securely locked. |
| Lid cannot be opened after cooking. | Residual pressure inside the cooker. | Do not force open. Allow more time for natural pressure release or use quick release method carefully. Ensure pressure indication valve has dropped. |
| Food is undercooked. | Insufficient cooking time; pressure not maintained. | Increase cooking time; ensure heat is sufficient to maintain steady pressure (gentle jiggling of regulator weight). |
8. Specifications
| Feature | Detail |
|---|---|
| Brand | Buffalo (Generic listed by retailer) |
| Model Number | de57cfba-60e4-4965-9af0-ad2cabc9a832 |
| Capacity | 35 Liters (approx. 37 Quarts) |
| Product Dimensions | 16"D x 16"W x 13"H |
| Material | BUFFALO Clad Stainless Steel (Surgical Grade) |
| Finish Type | Brushed |
| Compatible Cooktops | Gas, Electric, Ceramic, Halogen |
| Induction Compatible | No |
| Control Method | Manual |
| Operation Mode | Manual |
| Dishwasher Safe | No |
| Accessories Included | Regulator weight, filter, sealing ring, needle probe |
| Special Features | Pearl Buffing Technology, Removable Rubber Ring, Unibody Construction, Pressure indication valve |
| Pressure Gauge | Not included |
9. Warranty and Support
For information regarding product warranty, please refer to the documentation provided at the time of purchase or contact the retailer. Extended protection plans may be available for purchase separately.
- 3-Year Protection Plan: Available for purchase.
- 4-Year Protection Plan: Available for purchase.
- Complete Protect: A monthly plan covering eligible purchases.
For technical support or inquiries about replacement parts, please contact the manufacturer or your point of purchase.


